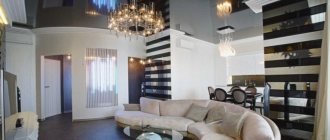
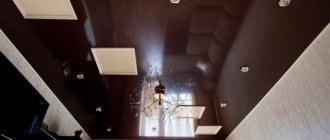
Stretch ceilings are modern structures designed for finishing premises. A panel of film or fabric is attached around the perimeter of the room to a mounting rail - a baguette. A perfectly smooth surface, matte or glossy, is created.
The tension covering material is not strong enough to withstand the load from ceiling lights, cornices and curtains. Therefore, before stretching the film or canvas, embeds are placed on the base ceiling, to which, after finishing, all the necessary equipment is attached.
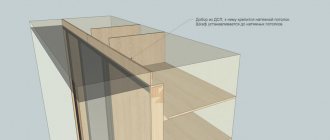
Built-in wardrobes are located along the wall. The role of the mortgage in this case is performed by the supporting beam, to which the upper tracks of the furniture and the ceiling molding are attached.
Special platforms are used to install suspended hoods in kitchens and ventilation communications in bathrooms. With their help, the exhaust duct is securely fixed under the stretch ceiling film.
A beautiful aesthetic coating of a stretch ceiling will hide communications and fasteners that are unnecessary to the eye. And all the equipment necessary for coziness and comfort can be securely fastened to supporting structures using mortgages.
Installation of embeds
Before installing mortgages for a suspended ceiling, you need to think in advance and mark their installation locations. If we are talking about platforms for lighting fixtures, then electrical cables need to be laid to this place.
It is also important to choose the appropriate method of fixing the product to the base to ensure the strength and reliability of the connection. Self-tapping screws and dowels or anchors are suitable for concrete and wooden surfaces
If the base ceiling is lined with plasterboard, then attaching screws to loose plaster is useless. They will break out under the weight of the heavy product. In this case, fastening is carried out only in the place where the supporting metal profiles pass behind the gypsum board
It is important to screw the screws for fastening the part through the gypsum sheet directly into the profile
Mortgages for suspended ceilings
In this case, we are talking about bars, ceiling rails and metal profiles on which corner and connecting baguettes are attached, as well as ceiling cornices at windows.
Installation of these products is carried out before installing the tension covering in the following order:
- Markings are made on the base ceiling surface. The auxiliary part is adjusted to the required size.
- Then, holes for fasteners are drilled in the prepared piece of metal profile or timber.
- The product is applied to the ceiling to transfer the hole markings to the base.
- Next, use a hammer drill to drill holes in the ceiling and install dowels in them.
- We attach the element to the base and screw it with self-tapping screws.
If the tension fabric is installed at a considerable distance from the base surface, then it is better to attach the prepared part to a pre-constructed frame made of timber or a metal profile. Perforated hangers are not suitable in this case, because they do not provide the necessary rigidity when attaching the cornice.
Mortgages for spotlights
Ready-made mountings for spotlights made of heat-resistant plastic can be bought in the store. Moreover, there are universal products that fit devices of different diameters, and elements that are selected strictly according to the dimensions of the lamp.
To fix the product to the base, we use perforated hangers and self-tapping screws with dowels.
We carry out the work in this order:
After marking the installation locations for lighting fixtures, we attach perforated hangers to the base ceiling surface. To do this, we drill holes in the ceiling, drive dowels into them and screw each suspension with two self-tapping screws.
Bend the perforated ears down. Next, using a level, we find the installation mark for the stretch ceiling plane (it is important that the baguettes have already been installed). At this point we attach plastic platforms to the suspension
We use screws for fixation. We check again how accurately the base coincides with the installation level of the stretch ceiling. If necessary, adjust its position. After installing the fabric or film covering of the base, we probe and glue thermal rings in this place. The material inside the ring is cut through, the lighting fixture is installed and secured to the platform.
Mortgage for a chandelier
Installation of a suspended ceiling embed for a chandelier is carried out in different ways depending on the part used.
The following options for fixing the chandelier to the base are most often used:
The lighting fixture is hung on a hook fixed in the concrete ceiling. To do this, after tensioning the film, a hole is cut in it through which the hook is screwed into the base. The chandelier is hung on a hook
It is important that the diameter of the hole in the coating is smaller than this value on the decorative bowl of the light source. If the distance between the base and the tension surface is small, then you can hang the chandelier on a pre-fixed beam. It can be a beam or a metal profile
After installing the covering, the beam is probed and a hole is made in this place in the film through which the chandelier is attached. If the weight of the device is small, then a base made of plywood or OSB can be used as a platform, which is attached to the main ceiling on hangers. In this case, installation is carried out similarly to the installation of spotlights. It is worth making a hole in the base in advance through which to release the wire to connect the lamp.
There are also ready-made mortgages for chandeliers on sale. These products can withstand 5-8 kg and have special holes for fasteners. Dowels and hangers are used for fixation to the base.
Marking the ceiling for mortgages
It is necessary to mark all the points where the parts will be located:
- spotlights and pendant lamps, household appliances;
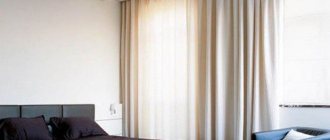
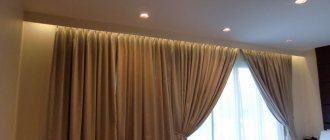
- hidden cornices and curtains;
- wardrobes;
- hoods and more.
It is necessary to foresee everything in advance, because... After installing the ceiling covering, it will be impossible to add or correct anything.
Marking of mortgages
Markings should be made with a bright marker or soft pencil. If you plan to install many lamps, it is more convenient to mark on the floor. The points are marked on the adhesive tape; if necessary, their position can be adjusted. They are transferred to the rough and then finishing ceiling using a laser level.
Marking of mortgages: done on the floor, and then, using a level, redrawn on the ceiling
Smooth and rounded lines can be marked with a painting cord and a tape measure or pattern. Sometimes a plastic baguette is used to draw an arc; it bends well.
A chandelier is usually placed in the middle of the room; spotlights can be placed in a straight or arcuate line. Lighting fixtures should not be closer than 40 cm from the wall.
Before installing the mortgages, all electrical wiring is installed in corrugated channels and boxes or on clamps.
The mezzanine is in the way
Installing a ceiling panel on a mezzanine is not as difficult as it seems at first glance. If the height of the mezzanine doors touches the main ceiling, then the mezzanine needs to be redone so that a top panel appears. To do this, you will have to saw off 8-10 centimeters from the top of the mezzanine doors. Chipboard or “plywood” must be attached to the top of the doors.
Electrical work is performed at the stage of installation of the mortgage. This also applies to marking the location of lamps on the future ceiling and their installation in the closet. For lamps in the wardrobe, choose LED or halogen lamp models.
Useful tips
If a suspended ceiling is already installed in the room, be careful when assembling the furniture. Ceilings are easily damaged by sharp edges and objects.
If there is a small gap between the wardrobe lid and the suspended ceiling, you can use a ceiling plinth. You will get a feeling of the integrity of the structure.
Don’t be lazy to calculate all the dimensions at the planning stage, before purchasing furniture. A few centimeters can become critical when installing a wardrobe or ceiling.
If you are making the ceiling first, be sure to inform the craftsmen of your intention to install a wardrobe. Perhaps they will give you useful installation advice and take your wishes into account when installing the ceiling. You should also express your wishes when installing a wardrobe.
We calculate the number and location of lamps on a suspended ceiling
Models for suspended ceilings are selected not only by functionality or design. Taken together, all lighting fixtures must provide sufficient illumination, as well as create decorative effects when necessary. Accordingly, if spotlights play the role of complementing a chandelier, a certain arrangement is used. If lighting is provided only by these devices, their arrangement should be different.
To calculate the optimal location of lamps on a suspended ceiling, you need to know:
- type of lighting fixtures – fluorescent, LED incandescent lamps generate luminous flux with different intensities;
- room size - 1 spot can provide lighting of no more than 2 square meters. m. area;
- presence, number and area of windows;
- living room design - style also dictates certain requirements for the layout;
- the need for zoning - spotlights successfully solve the problem of dividing into zones.
Power calculation
There are certain lighting standards for all types of rooms:
- for the living room, at least 3 W per 1 square meter is required. m;
- in the bedroom there is no need for such bright lighting - 2 W per 1 square meter is enough. m;
- but in the nursery the lighting should be maximum - 8 W per 1 sq. m.
Based on the norm, you can easily calculate the required total power. For example, with a living room area of 20 sq. m requires lighting with a power of 20 * 3 = 60 W. If there is no central lighting device, with a power of LED lamps of 5–7 W, you will need from 10 to 14 devices. Preference is given to an even number, but this condition is proportionate to the design.
Calculation of the number of required lamps
The existing recommended lighting standards for each type of premises will allow you to correctly calculate the number of lamps and their required technical characteristics. Currently, apartment owners are increasingly switching to LED lamps, so the calculation of the lighting norm for each room in the apartment will be shown using their example.
The illumination rate is expressed in W per square meter and is:
- for toilets and bathrooms – 2 W/m2;
- for halls – 3 W/m2;
- for corridors and hallways – 1 W/m2;
- for the bedroom – 2 W/m2;
- for children’s – 7 W/m2.
Based on the above standards, you can easily calculate the required number of devices and decide how to place the lamps on the suspended ceiling. To do this you will need:
- Multiply the area of the room by the illumination standard, for example: 12 m2 x 7 W/m2 (for a children's room) = 84 W.
- Divide the found value by the power of one lighting fixture, for example: 84 W/6 W=14 pcs.
It turns out that to create the necessary illumination in the children's room you will need 14 LED lamps with a power of 6 W.
If you need to recalculate the number of lamps with other lamps, you can multiply the norm for LED lamps by a correction factor:
- for incandescent lamps – 4;
- for fluorescent lamps – 2.5.
For this example, it turns out that the total lighting power for a children's room using incandescent lamps will be: 84 W x 4 = 336 W, and for fluorescent lamps: 84 W x 2.5 = 210 W. If the calculation results in a non-integer number, it is rounded to the nearest whole number.
Selecting a layout
Depends equally on the required level of lighting and on the style. In addition, you need to keep in mind additional requirements determined by the purpose of the room.
The living room is a room with a high level of lighting. It’s unlikely that you can get by with spots alone.
But if you use them together with a chandelier, you can greatly diversify the design of the room:
- lamps are used for zoning: in areas where bright lighting is required, devices are placed in a close group or high-power products are selected. In the recreation area, on the contrary, they are used to organize subdued soft lighting;
- it is preferable to place light bulbs on a suspended ceiling in a room in front of a wall with an interesting decor or furniture composition;
- 2 rows of point light sources along a shorter wall will allow you to visually correct the proportions of the room.
Bedroom – here they often do without a chandelier. Areas are marked with spotlights:
- A couple of pieces are enough above the bed to create very soft lighting;
- The wardrobe is highlighted with more powerful lighting fixtures. The person changing clothes must see himself in the mirror;
- the dressing table also needs good lighting.
Kitchen. The spots here provide sufficient illumination and serve as a universal tool for zoning. They allow you to visually change the proportions of the room.
Children's
In the hall or corridor
HOW TO REPAIR UNDER THE CABINET CORRECTLY?
Have you bought an apartment or started renovation? How to plan a room correctly at the initial stage of renovation work. What is meant by these words? Let's say that you have a small area, one room is 10 sq.m., the second is 20 sq.m. There is little space, but a lot of things, and the best solution is built-in furniture. But in order to correctly install the furniture, you need to prepare in advance while the rough work is underway. It is necessary to take into account the possibility of moving doors, building up walls, and placing lighting, if planned. Doing this after the work is completed will be problematic.
Specifics of fixing suspended ceilings on a plasterboard base
The popularity of such finishing of individual dwellings is explained by the following points:
- The ability to relatively quickly obtain a perfectly flat surface for further finishing. This makes it possible to eliminate unevenness and construction defects without labor-intensive plaster, which takes a lot of time to dry.
- Almost any type of finish can be applied over plasterboard on a wall or ceiling. This gives wide scope for personal creativity in implementing original design solutions.
- The ease of implementation allows any novice master to cope with this task. The main thing is to strictly follow the recommendations for installing drywall instructions.
As practice shows, fastening a stretch ceiling to plasterboard is used in two situations:
- When a residential apartment or room in a new house does not have any interior decoration. This usually results in very clumsy walls and ceilings. To make repairs as quickly as possible, it is easier to install plasterboard sheathing over nearby surfaces. After this, you can immediately begin finishing the room, including attaching the stretch ceiling to the plasterboard wall.
- Some room design projects feature multi-level ceiling systems with decorative lighting. This involves installing a metal profile frame around the perimeter of the room, which is subsequently covered with plasterboard boards. In this case, tension fabrics are often used as the upper base base, for fixation of which a clamping profile is used. It is mounted on top of a special plasterboard box installed along all the walls.
Which comes first: cabinet or ceiling
According to the classic scheme of home renovations, they start at the top and gradually work their way down. That is, first they make the ceiling, then the walls and floor. Furniture is placed last. But with tension structures the situation changes.
The sliding wardrobe is assembled in two types:
- Built-in with door guides attached to the ceiling.
- Frame with a top cover that does not touch the ceiling (the height is slightly lower than that of the room).
Since nothing can be attached to the tension fabric, mortgages are pre-installed to the floor slab. And when assembling tall furniture, be careful not to damage the film with a tool or sharp edge.
If you want to install a wardrobe and a suspended ceiling, you can start by installing the canvas or install the furniture first. But each case has its own subtleties and nuances.
It is better to start with installing the cabinet, this eliminates the risk of damaging the canvas during furniture assembly, and the doors will reach the very top without the slightest gap.
If you first stretch the ceiling, you will need to provide mortgages. Otherwise, you will have to get very creative to secure the guides for sliding doors. A cabinet that does not reach the ceiling looks less aesthetically pleasing and requires great care during assembly, since it is easy to damage the fabric.
Features of installation in a suspended ceiling
For suspended ceilings, spotlights are often chosen. But they do not allow you to create beautiful visual effects and bring comfort. Therefore, for many, installing a chandelier becomes mandatory. A centralized source creates diffused soft light in the room. The rays reflected from the glossy surface of the film give the room a special charm.
PVC is resistant to high temperatures. Already at +60 degrees Celsius it begins to deform. And with more significant heating, a hole is formed in it. Therefore, not all lighting devices are suitable for such structures. Fabric sheets can withstand heating up to +80 degrees.
A chandelier for a suspended ceiling must meet the following requirements:
- The rays come from the lamps downwards or to the sides, but not upwards.
- Preference is given to models with a suspension and base made of polymer materials. The metal can heat up under the influence of electric current, which will damage the blade.
- The shade completely covers the lamp. This will provide additional protection against overheating.
- The distance from the lampshade to the ceiling is at least 20 cm. This is what is considered safe.
Among other things, the lamp should not look too bulky. The tension structure already reduces the height of the room. Massive appliances will visually make the room even smaller.
It is important not only to choose the lamp correctly, but also the lamps used in it. Four types are popular.
| Image | Name | Description |
| Incandescent lamps | The oldest type of lamp. It is cheap. But such lamps consume significantly more electricity compared to analogues, get very hot and do not last long. They are not suitable for film suspended ceilings. The minimum distance between an incandescent lamp and a fabric ceiling is 40 cm. And this is provided that the lamp power does not exceed 60 W. | |
| Halogen | These lamps are more economical and have a long service life. They heat up slightly during operation, but when they are located close to the canvas, this heat is sufficient to deform the film. Such models can only be used in lamps on pendants with a length of at least 40 cm. | |
| Luminescent | They are usually called energy-saving. They consume minimal energy and have a long service life. The heating of such lamps is minimal, and therefore it is recommended to install them in lamps for suspended ceilings. The power of such a lamp should not exceed 45 W. | |
| LED bulbs | They are considered the most preferred choice for film sheets. LED lamps last a long time, do not overheat during operation and consume a minimum of electricity. |
There are no restrictions on the shape of the lamps or the weight of the chandelier. The remaining characteristics of the lamps are selected based on the personal preferences of the owners.
Types of lamps
What kind of lamps are suitable for lamp stacks?
Despite the fact that energy-saving lamps are gaining more and more popularity every year, incandescent lamps still occupy a leading place and this is due, first of all, to the low price that buyers focus on.
In addition, incandescent lamps are extremely unpretentious in operation: unlike an energy-saving lamp, which can only work for a few hours in a room such as a sauna, the service life of a conventional incandescent lamp is several times longer and it can only fail under sharp conditions. cooling the flask with water.
However, incandescent lamps are used extremely rarely in spots. This is primarily due to the fact that in cases where the light should be as close to natural as possible, incandescent lamps are not entirely suitable. For example, for artists, designers, or people who work specifically with colors and light, incandescent lamps are not suitable.
Moreover, the extremely low energy efficiency results in the light being converted to only 2.6% of the energy spent, while the rest of the light is scattered throughout the room. To obtain more targeted lighting, spots have to be equipped with displays, since strong heating can damage the plastic housings of the lamp, and sometimes even the wiring.
It is worth paying attention to the fact that it is precisely because of the strong heating that incandescent lamps with a power of more than 60 watts are not mounted near suspended ceilings. An ideal option would be halogen lamps, which have a number of advantages.
The temperature inside the coil rises to approximately 3000K, which means that the light from the lamp will be almost identical to sunlight, and objects will look almost the same as in natural light
An ideal option would be halogen lamps, which have a number of advantages. The temperature inside the coil rises to approximately 3000K, which means that the light from the lamp will be almost identical to sunlight, and objects will look almost the same as in natural light.
Such lamps are extremely economical, since at such a high temperature most of the energy will be presented in the form of a spectrum rather than infrared radiation. Thus, by gradually increasing the supply voltage, it is possible to ensure that halogen lamps will last up to 12 thousand hours.
However, it is worth paying attention to the fact that at such a high temperature the bulb itself will also heat up: this is why it should not be handled by hand when replacing the lamp. Fat left on the flask from the fingers, when burned, will cause darkening and uneven heating, which means that such a lamp will quickly fail
LED ceiling spots are divided according to several main criteria: for example, LED ceiling spots can have either one powerful LED or several LEDs at the same time, but with much lower power; have one power converter for all or have an independent converter for each lamp separately.
If we summarize all the numerous advantages that LED ceiling spots have, it is worth noting their maximum efficiency, while the period of operation of such a lamp does not at all depend on the number of on and off cycles. It is important that a reflector is not necessary for such lamps due to the fact that the LED emits all the light into one hemisphere.
It is important to note that the light beam is close to natural only in expensive lamps from only a few manufacturers. To adjust the brightness, it is better to use special dimmers for LEDs, since with the normal range the brightness will be insignificant
Profile types
Contents of the material
A baguette for a stretch ceiling is a long profile of complex cross-section, obtained by pulling heated and plastic material through a hole of the appropriate shape using special equipment. This process is called extrusion.
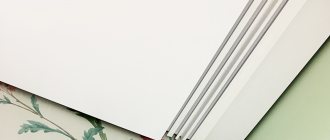
Conventionally, the profile is divided into two parts - a lock, which serves to fix and tension the ceiling sheet (made of polyvinyl chloride or polyester fabric) and a plane for fastening. The task performed by the last part is clear from the name - in this plane, when installing baguettes, holes are drilled, after which fasteners are inserted (for example, screws with dowels) and the profile is fixed under the ceiling.
Based on the fastening surface, it is divided into the following types.
- Wall - the baguette is attached to the wall under the main ceiling or on any other vertical surface.
- Ceiling - the lock and the mounting surface are designed in such a way that the profile must be installed on a concrete or wooden ceiling or any other horizontal surface.
- Universal - suitable for installation on both the wall and the ceiling.
Types of profiles for stretch ceilings
Profile mechanism design
In addition, there are special types of baguettes.
- Separate - used in large rooms where it is impractical to make one canvas, since it will sag under its own weight. Therefore, for rooms with an area of more than 60 m2, it is necessary to use several canvases; at the joints with each other, they are fixed using a separate baguette, which has two locks in its design.
- Corner - consists of two parts, the first is attached to the wall, the second - to the ceiling. Their locks are located in such a way that the canvas is stretched vertically to the first part, and horizontally to the second. Corner molding is used to create multi-level suspended ceilings or bypass protruding elements such as beams.
- The flexible baguette has cuts made at regular intervals. Thanks to them, the profile can be bent and given a curved or wave-like shape. Used to create complex types of suspended ceilings.
Flexible aluminum profile
Prices for aluminum profiles
aluminum profile
Stretch ceiling of complex shape
A split profile is also used in cases where it is necessary to install two or more panels of different colors and shapes
There are also visible and invisible profiles for stretch ceilings. Everything is simple here - the first one can be seen even with the canvas stretched, while the second one is completely hidden behind it. It should be understood that the visibility of the baguette does not mean that your guests will be forced to see the structural elements of the stretch ceiling - the profile can be covered without any problems with a special decorative overlay. And some visible profiles are already equipped with an attractive lower part.
Types of profiles: a - visible, b - hidden
Baguette with decorative insert
If the ceiling should be located around the cabinet
Stages to be completed:
- mark and adjust the timber blanks, after which you need to make holes in it and the ceiling slab with a drill;
- attach the harpoon baguette to the inside of the blanks with self-tapping screws, not forgetting to adjust the joints in the corners;
- screw the beam to the ceiling (accordingly, baguettes will be attached to it, along the level of which harpoon baguettes designed specifically for walls are attached to the wall);
- stretch the fabric and hide the gaps behind masking tape.
Harpoon systems are not particularly easy to install, so it would be better if you order them taking into account all the parameters of the room. Another advantage of this option is the ability to dismantle the suspended ceiling many times if necessary.
Mounting methods
First, let's look at the options when the gypsum plasterboard structure has not yet been assembled. After this, we will consider methods of fastening to a finished plasterboard wall, where the installation of a stretch ceiling was not provided.
During the work you will need the following tools:
- ladder;
- pencil;
- level (laser is better, but water level is also suitable);
- impact drill or hammer drill;
- screwdriver with a screw attachment;
- screws and plastic dowels;
- heat gun for heating vinyl film;
- spatula for threading the fabric;
- construction knife;
- hacksaw for metal;
- square
Installation of embeds
Before starting work, it is necessary to determine at what height the suspended ceiling will be mounted.
Marks are placed at the required height. Next, the plasterboard sheathing frame is installed. At the level where the suspended ceiling will be, it is necessary to attach the mortgages. For this, two types of materials are used:
- Wooden beam (section not less than 6x6 cm).
- Metal profile (preferably wider, from 10 cm).
The second option is only suitable for small spaces. The mortgage will take on the main load from the canvas. It must be securely fastened:
- the profile is screwed to each rack;
- the beam is attached to the main wall with dowels and galvanized screws 4.5x60 mm (in at least two places).
After this, the frame is sheathed with plasterboard. Take sheets with a thickness of 12.5 mm and fasten them with self-tapping screws every 10-15 cm. A more frequent step than with conventional installation gives additional strength.
The gaps between the sheets are reinforced with sickle and putty. Then the walls are painted or wallpapered. Then, in the area of the mortgage, a baguette for suspended ceilings is attached to the plasterboard. The standard step is 10-15 cm. After this, the film web is stretched.
Installation of a combined two-level ceiling
The second option is to attach the stretch ceiling to a plasterboard box installed around the perimeter of the room. This design allows you to hide utility lines and integrate lighting. And the height of the room will decrease slightly.
Let's look at how to mount a rectangular box along walls with a suspended ceiling in the central part. More complex structures (including those in rooms with niches and projections) are assembled according to the same principle.
First, the frame for the plasterboard part is mounted:
- A profile is attached along the perimeter of the ceiling.
- The required depth is measured from the lowest point.
- Using a level, marks are made at the same level on all walls.
- At this height, the lower profiles for drywall are attached.
- The width of the future box is measured and markings are applied to the walls.
- The profiles are mounted parallel to the previous ones.
- Horizontal jumpers are placed between the lower parts of the frame (perpendicular to the walls). The distance between them should correspond to the width of the gypsum board.
- Then vertical jumpers are installed.
- The height at which the suspended ceiling will be located is measured.
- At this level, a continuous horizontal profile (which serves the same function as the mortgages) is attached to the vertical lintels.
The frame is sheathed with gypsum board. Then the suspended ceiling is attached to the plasterboard box:
- The baguettes are screwed on (the screws must fit into the frame).
- The PVC film heats up.
- The fabric is stretched and tucked into the profiles.
Mounting options
1. Installation method under a regular cabinet
With this installation method there are two options:
- the ceiling is installed, after which the cabinet is ordered;
- installing a ceiling when the cabinet is standing.
A) In the first option, a stretch ceiling is installed, then the height from floor to ceiling is measured, after which a cabinet is ordered. It is necessary to take the measurements correctly so that when installing the cabinet there is a gap of 5-7 cm to the ceiling. The negative aspect of this method is the eternal dust.
B) If the cabinet is already standing, the distance from the rough ceiling to its roof should remain at least 50 cm. This is necessary so that you can reach the wall with a hammer drill, screw the profile and tuck in the canvas. This installation option does not affect the price in any way.
2. Stretch ceiling and built-in wardrobe
There are situations when the wardrobe is fixed to the very top of the base ceiling. Then, before installing the stretch ceiling, a beam is mounted around the perimeter of the cabinet, then the profile and ceiling are attached to it. In this case, the installation cost increases, taking into account additional consumables and installation complexity.
3. Installation of the mortgage
Timber is also used here. It is mounted before installing the canvas to the base ceiling at the required distance from the wall, where the edge of the cabinet will extend. In the future, door guides will be attached to this beam through the material. Thus, the suspended ceiling appears between the “mortgage” and the guide track. It seems as if the track is attached to a suspended ceiling.
Installation of embedded elements
The order and method of performing the work depend on the type of mounting of the chandelier itself. Let's look at four main types of mounting such lamps.
Butterfly dowel
Let us immediately note that this method is usually applicable for hanging chandeliers from wooden floors and plasterboard suspended ceilings. However, the technology is also suitable for tension coverings.
Butterfly dowel for attaching a chandelier
The bottom line is that at the installation site a mortgage is created from thick plywood, which is attached to the base with flexible perforated tapes. Then electrical wiring is connected to this place. The chandelier itself is connected to the mortgage using a butterfly dowel.
Hook suspension
Here you will have to drill the interfloor ceiling. For this, an impact drill with a concrete drill is used. After this, a dowel is driven into the hole, into which the hook is actually screwed. The work is not difficult, and this method of fastening is chosen most often.
Lamp mounting hook
Using an anchor hook
This method resembles the previous option, only instead of a regular hook, an anchor analogue is used. It is also screwed into the concrete base, clamped with a hanging nut.
Through fastening method
This method is usually used in country houses. The bottom line is that the installation hole is drilled through the interfloor ceiling. A plate with a nut is placed on the front side, through which a hanging hook is passed. The second platinum is mounted on the other side of the ceiling, after which the structure is tightened with nuts. The advantages of through mounting include reliability, and such solutions can be safely used for heavy and massive chandeliers.
Through hook for chandelier
What is a mortgage, why and how is it installed?
The embedded material is chipboard, a wooden or aluminum beam of appropriate thickness, usually in the shape of the letter P. It is mounted to the ceiling slab using dowels in the place where the cabinet is planned to be installed.
This part takes on all the loads associated with fabric tension and is not afraid of mechanical stress. The canvas can be joined to it at any level; this depends on the choice of room design by the owner or hostess. The cabinet is mounted directly to the same beam. The peculiarity of such a system is that:
- compartment panels are not subject to additional loads;
- the canvas is secured securely and at any height within this beam;
- The embed can be made in the form of a decorative visor, if that is what you want.
- Also, the beam can be made in dimensions exceeding the dimensions of the compartment, and baguettes for hanging fabric in this case can be mounted both on the facade and below, and even on the reverse side facing the door guides. In this case, the hanging canvas can partially or completely cover not only the top panel of the compartment, but also the upper door guides.
And finally, the promised exception to the rules - there are two options when a mortgage is not needed:
- the material of the furniture panels is strong enough to safely withstand the tension of the ceiling;
- the canvas is stretched along the entire perimeter of the room, the furniture is mounted below.
In this article, we briefly described the purpose and options for using (and not using) the mortgage, as well as attaching the canvas to it. What to choose and how to implement it is up to you to decide.
Chandelier connection diagram
After installing the chandelier on the suspended ceiling, proceed to its connection. The work is carried out in several stages:
- Wires are pulled through the central hole in the canvas.
- The chandelier is hung on a hook or attached to a bar.
- The wires are connected in accordance with the instructions supplied with the equipment.
- All open contacts are isolated.
- A decorative cover of the lamp is installed in a permanent place, hiding the place where the wires are connected.
- Light bulbs are screwed in.
Only after this the power supply is turned on. If the chandelier in the suspended ceiling is installed correctly, the light will light up. The cause of the malfunction may be a broken switch, damage to the cable or the lighting fixture itself. These situations require the assistance of a qualified electrician.
Why is this necessary?
When installing membrane structures, special mounting strips are attached to the surfaces - baguettes, on which the stretched covering will be held. If the fastening is not very reliable, then the screws that hold everything together will simply be torn out by the force created by the tension of the film or textile, and everything will have to be done again. This is what most often happens in frame buildings with plasterboard partitions or when decorating rooms in which the walls were leveled using gypsum plasterboard.
Gypsum sheets are not able to withstand the tension of the sheet, even in cases where they are thick and mounted in two layers. This requires special reinforcement in the form of a mounting strip. It should be firmly fixed either on the surface that serves as the base, or inside the frame, placing the bar between the profiles. Naturally, the mortgages need to be installed approximately at the level where the plane of the tension covering will pass.
Device.
Embeds on the ceiling
Embeds look like strips or rings that secure lamps, cornices, ventilation grilles and other decorative elements to avoid damage to the coating.
The low price and wide range make it possible not to waste time creating parts with your own hands.
The appearance and size are selected depending on the element being installed. A strong frame is attached to the main ceiling to support lighting, grilles or trim. Reinforcement is needed to reduce the likelihood of breakthrough or spreading of films and fabrics, eliminate the influence of the weight of lighting and decoration on the canvas, and increase the service life of the structure.
Hook fastening
- To install the chandelier using a mounting hook you will need:
- hammer drill or hammer drill;
- set of concrete drills;
- mounting hook (or hook-shaped anchor) with a new settler (usually included with the lighting fixture);
- hammer.
First of all, using a puncher in the ceiling, at the installation site, it is necessary to make a hole, the diameter of which corresponds to the size of the new home. Next, use a hammer to drive the base for the hook into the hole made. Then screw the mounting hook into the new housing to the required depth. The most common anchor diameter is 6÷14 mm.
There are 4 of the easiest and most reliable fastening methods. Let's take a closer look at each.
- Method 1.
- You need to take an anchor bolt, the size will depend on the weight of the chandelier, on average 7-15 millimeters.
- Drill a hole in the ceiling and insert it.
- The nut on the anchor must be screwed in all the way until the sleeve loosens itself.
- Method 2. Applicable only to private houses.
- We make a through hole in the interfloor slab.
- We take 2 orthogonal plates with an area of 25x25 or 35x35 cm, up to 3 mm thick with ready-made holes in the center.
- We place the first one in the floor of the upper floor. If it is not there, then in the attic, and the second under the ceiling.
- Take the hook and tighten the nut. It will hold the plate.
- Next, we insert the hook into the ceiling hole and screw a second nut on top, which will tighten the 2 plates together.
- Method 3. Used if the floor slab is six-hollow.
- We make a 30–50 mm hole in the ceiling.
- We insert a piece of reinforcement with a diameter of 9-10 mm into it and place it in a hollow channel parallel to the ceiling slab. The length will depend on the thickness of the slab.
- We make a hook from wire rod (d 10 mm), at the other end of which there should be a ring.
- We put the ring on the reinforcement. All is ready.
- Method 4.
- We prepare materials: 2 nuts, a metal plate, a hook.
- We take the plate and drill a pair of holes with a diameter of 9.0 mm diagonally.
- Screw the nut onto the hook until it stops.
- We put the plate on and screw another nut on top, pressing it against the plate, tighten it.
- Cut off the protruding edge.
- We attach the structure to the ceiling with 7.0 mm studs.
Anchor hook
Perhaps the most common option, which many people also love because in many apartments such a hook is already installed, as they say, by default.
- If it is missing, but there is a need to hang a chandelier on a suspended ceiling in this way, follow the basic procedure that will help you quickly deal with the problem:
- using a drill, make a hole in the concrete base with a diameter of 6 to 14 mm;
- Insert the anchor hook into the hole and tighten the hanging nut.
Have you installed a stretch ceiling? Let it dry - maintain exactly the time period specified in the performance characteristics of the film.
Many beginners, who don’t really know how to hang a chandelier on a suspended ceiling, rush to complete all the operations faster - and then pay with a torn canvas, not only spoiling their mood, but also significantly undermining their budget: find the location of the hook; stick a plastic ring onto the suspended ceiling; when deciding on its size, take into account the size of the cap - it should completely cover the diameter of the ring; cut out with the inside; pull out the wires; All that remains is to connect the lamp.
Through mount
Distributed mainly in private homes. In this case, not only a hook with a thread on the rod is used, but also two plates 2x2 or 3x3 mm.
- make a through hole and place the first plank;
- screw a nut onto the hook to hold the second plate;
- insert the hook into the hole and screw another nut on top;
- As a result, the 2 plates should be pulled together - all that remains is to hang the chandelier.
The further steps are nothing fundamentally new: we also fix the rings on the stretch ceiling, cut out a part, pull out the wires and connect the chandelier. Again, when using plastic rings, keep in mind the diameter of the decorative cap of your lighting fixture - it should be a little smaller so that the final installation pleases the eye and does not make you wince from aesthetic defects on the stretch ceiling.
