A table in the classical sense is a rectangular piece of wood that stands on four legs. To prevent the table from swaying and to be stable, you need to attach the legs correctly. It is also necessary to take into account the material from which it is made and the location of the piece of furniture. The tabletop, no matter what it is made of, is subject to deformation under the influence of humidity and temperature changes, which is why the choice of fixation method is so important. There are several ways to attach legs to a tabletop.
Fixation with surface plates
The plates are fastened with self-tapping screws on four sides of the tabletop. The bolt is screwed into the legs with the head facing inward. The legs are then screwed into the attached plates. One of the suitable plates is the platform for attaching the tlb60 leg. As a rule, they are made of chrome. They are reliable and easy to find in furniture supply stores.
Fixing with T-nuts
This form of fastening is suitable for countertops that in the future will be covered with other types of wood or upholstered with material. In addition to the nuts themselves, it is necessary to purchase bolts with eyes and eyes. Four holes should be drilled into the tabletop at equal distances through the base. Then the T-nut is driven in with a hammer so that it is completely in the array. Screw bolts with lugs and eyes into the legs. For greater convenience, you can use pliers. All that remains is to connect all the elements of the table.
Screw mounting
If the table does not come with a side drawer, this method may not be suitable, or you should purchase this element separately. Fastening the drawer will provide additional stability and reliability to the table. The drawer is a fastening strip along the entire perimeter of the table, to which the legs are screwed. A special expansion in the form of a cone in the drawer helps ensure slight mobility of the screw with some deformation of the tabletop (this is typical due to changes in temperature and humidity).
How to determine the stability of a table?
When designing, the stability of dining tables can be approximately calculated using the formula: PC=(B/2)*Q, where P is a vertical load equal to 10 daN (kgf) for tables weighing up to 15 kg and 15 daN (kgf) for tables weighing over 15 kg; C—table top overhang, mm; B - length, width of the table base, mm; Q is the mass of the table, kg.
Interesting materials:
What does Windows 86 or 64 mean? What is disk defragmentation on Windows 7? What is the Windows 7 page file for? Why do you need disk defragmentation in Windows 7? What are certificates for in Windows? Where is the Control Panel in Windows 10? Where are the drivers in Windows 10? Where is the Windows 10 page file? Where are Windows 10 Recycle Bin files stored? Where are Windows 10 system recovery files stored?
Necessary materials
To attach the table legs, depending on the chosen method, the following materials are required:
- Platform for attaching the tlb60 leg, screws and bolts for the plates.
- Nuts, bolts with lugs and lugs - for T-nuts.
- Tsar and screws – for fastening with screws.
- Holders and screws – for Z-shaped holders.
- Clamps and wood screws of the appropriate length - for fastening using wooden clamps.
- Holders and screws (there are exactly twice as many screws as there are holders themselves) - for figure-eight holders.
- Tsarga, spacers and screws - for spacers.
Fastening the tabletop with screws
This is a simple and time-tested option for attaching the table top to the table frames without the use of additional fittings. The special conical extension selected in the frame ensures slight mobility of the screw when changing the size of the tabletop. The cover itself is securely attached to the body.
Having made the basic markings, an end hole is drilled in the drawer. After this, using a wide semicircular chisel, select a pocket for hidden installation of a screw.
Using a narrow chisel, make an angular expansion on the upper edge of the drawer. The extension of this groove is always done across the grain of the tabletop, since wood expands and contracts in this direction.
Advantages and disadvantages
There are no advantages without disadvantages, but kitchen legs have many more advantages than disadvantages.
The positive points include:
There are significantly fewer negative aspects. The main disadvantages can be considered:
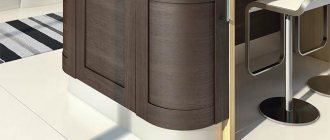
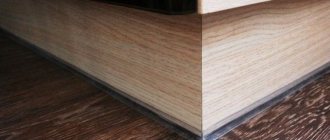
Most manufacturers of high-quality furniture make it with legs. Only budget models of headsets of not very high quality are produced on a non-removable base (a box made of MDF or chipboard). Such a support swells very quickly from moisture and loses its appearance. Even the silicone base covers (covers) that are sold to protect the box do not help.
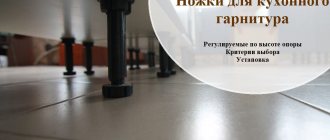
Adjustable and non-adjustable legs for kitchen units: rules for selection and installation
It would seem that insignificant details often determine whether the furniture will be comfortable and durable or not. Choosing and installing the right legs for a kitchen unit is not as easy as it seems at first glance. Delving deeper into this question, it turns out that they are very different from each other: high and low, adjustable and not, plastic and metal... So which are better, and are they needed at all?
What types of furniture supports (legs) are there?
In general, furniture supports are designed to perform a protective and aesthetic function.
Table legs perform a protective and aesthetic function.
Nevertheless, despite all the variety of designs, there are three main types of legs:
- Solid. The most common classic version. It can be made of wood, plastic or metal.
- Sliding. A more technologically advanced solution that allows adjustment in height or, less commonly, width.
- Decorative. A variety of materials can be used, since its function is rather decorative.
The table can also be installed on one leg.
Below are other entries on the topic “how to do it yourself - for a homeowner!”
♦ An old cabinet can be given a new look if the front surface, with the exception of the panels, is covered with fabric, wallpaper, or film. The facing material must match the wall covering in color and pattern. Such a wardrobe will look especially good in the bedroom.
♦ To prevent the legs of furniture - chairs, armchairs, tables - from scratching the floor, stick felt circles on them.
♦ To avoid damaging the floors when moving furniture, place plastic can lids under the legs - they will reduce friction.
♦ Place a thick woolen rug under the feet of the object being moved. With its help it is easier to overcome rapids. You need two people to work - one pulls the rug, the other pushes the cabinet.
♦ It’s not so easy to pull out a desk, chest of drawer or nightstand when the handle breaks off. A plunger will help you cope with this task. It is enough to press it against the drawer near the place where the handle was and pull it towards you. The drawer will slide out easily if it is not overloaded and does not “stick.”
♦ Polished furniture, mirrors, TV screens, lamp shades, window glass are easily electrified and attract dust. To get rid of this, wipe the surfaces with a mixture of 1 part shampoo, 1 part antistatic agent and 8 parts water.
♦ If a kitchen or desk drawer is difficult to open, wipe the edges of the drawer and the grooves into which it fits with dry soap or a candle.
♦ After wallpapering the apartment and washing the floors, the furniture can be placed in its place, but you should not push it tightly against the walls earlier than ten days. It is also not advisable to hang curtains, carpets, paintings and other objects before this date.
♦ Cleanliness and comfort in an apartment largely depend on the arrangement of furniture and carpets in it.
♦ Furniture is sensitive to changes in air temperature and humidity in the apartment, as well as to the action of sunlight. This is especially important for furniture coated with varnish. In damp rooms it becomes dull and spots appear on it. At elevated temperatures, the varnish layer becomes covered with a network of small wrinkles due to drying of the wood.
♦ Direct sunlight (especially those not passing through the window glass) causes irreversible changes in the varnish coating: it becomes dull, becomes stained and cracks. Varnish coatings also lose their appearance due to exposure to water, solvents, or contact with hot objects.
♦ Often, due to lack of space, a whole warehouse is set up on the closet: suitcases, boxes, packages are stored there. They don't decorate the room at all. The matter can be improved if: close everything with beautiful curtains. Stands are placed between the closet and the ceiling (against them or attached to the closet), horizontal tubes are inserted between them, and curtains move along the tubes.
♦ Heavy shelves can be hung with bolts. Holes with a margin are knocked out in the wall and bolts are cemented into them so that the thread protrudes to the required length. The shelves are secured with nuts.
Installation of tabletops using figure-eight holders
Steel figure-eight fasteners are another popular hardware option used to secure countertops. The bracket is installed in a small recess drilled with a Forstner drill or a square recess selected with a chisel so that it is flush with the upper edge of the drawer. The holder is fixed with two screws: one to the body, the second to the back side of the tabletop as shown in the photo. As the board swells or contracts, the bracket rotates slightly, preventing the wood cap from bending. The recommended distance between fasteners is 15-20 cm.
Figure-eight holders come in two types: with washers of the same and different sizes. In the latter case, a washer with a large diameter is attached to the drawer. When deciding to attach the tabletop to a kitchen or room set in this way, you need to make sure in advance that the thickness of the drawer matches the diameter of the washer.
Required Tools
Each fastening method requires a list of tools. Accordingly, in the order of listing the installation methods, you need to prepare the following tools:
- Screwdrivers or screwdriver - to facilitate the screwing process.
- Drill for drilling holes, hammer, pliers, screwdriver.
- A screwdriver (you can additionally use glue) for better fixation of the drawer. You will also need a semicircular chisel to make a pocket for a self-tapping screw.
- Screwdriver or screwdriver.
- Saw or machine for making wooden clamps. You also need a chisel and screwdrivers.
- Saw or thin chisel for cutting a cavity in the drawer, chisel, screwdrivers.
- Saw or thin chisel for drawer, screwdriver.
It is important not only to install it evenly, but also to properly secure the legs to the tabletop. There are various ways to attach the legs to the table, all that remains is to choose the most suitable option. There is nothing difficult about making a dining table with your own hands. This makes it possible to take into account all the design features of the kitchen unit and the dimensions of the room. Making a table with your own hands is a task that even novice craftsmen can do.
Did you manage to solve your problem using the recommendations from the article?
Yes!
46.84%
No. More answers required. I'll ask in the comments now.
37.31%
Partially. There are still questions. I'll write in the comments now.
15.85%
Voted: 713
