Interior decoration is the final stage of renovation or change of decor. Of course, exclusive decorations are valued above all else, but they are very expensive and do not always suit the decoration of the room. But many beautiful and modern things can be made with your own hands. For example, such a fashionable and unusual decoration as three-dimensional paintings. They can be made from a variety of materials: paper, cardboard, leather, wool, beads, putty. Undoubtedly, in every home there will be unnecessary leftovers from some kind of work, and the missing ones can easily be bought in craft stores.
Three-dimensional paintings “Ballerinas”
Volumetric paintings made of paper
Three-dimensional paintings
There is nothing complicated in making such a painting in the style of romanticism, as in the photo of three-dimensional paper crafts. To make the figures symmetrical, the sheet must be folded in half each time and 1/2 of the parts cut out. You can achieve an accurate fold when working with thick paper if you first work out its line with a sharp object (make a thin groove).
For greater effect, it is recommended to alternate open and closed hearts. It is appropriate to add a few elements of a different color and write a suitable romantic statement from a famous person.
Methods for creating images on walls
In the first case, spatial vision skills are required. The absence of clear lines and contours in the sketch creates unusual impromptu images. It is enough to have rough sketches and be very good at using paints.
The simplicity and accessibility of this technique makes it acceptable for most wall graphics lovers. Quite original colorful compositions with varied details are created. The number of stencils can vary from two to ten.
Simple equipment requires the use of expensive equipment plus skills to work with it - a compression apparatus, a hose, a paint sprayer. Regular cans will not work. Great pressure prevents the creation of those very transitions, the subtlety of which determines the volume and reality of drawings on a large vertical surface.
Application in the style of abstractionism
A diagram of how to make a three-dimensional paper craft in the style of abstract art includes:
- coating the plywood base with white acrylic paint;
- preparing pieces of tracing paper of different shades;
- Layer-by-layer application of prepared elements onto plywood with gluing of each layer.
If you lay out the tracing paper overlapping, you will get a beautiful effect of overlapping colors.
LiveInternetLiveInternet
Are you looking for a fresh and unusual idea for interior decoration? Familiar pictures are good, but the soul is looking for something new. On the Internet you can find more than one master class on creating three-dimensional paintings with your own hands from paper, fabric or leather. These are 3D canvases that are amazing in their liveliness, which are fun to create and pleasant to contemplate.
It is not necessary to have the ability to draw, you only need perseverance and accuracy.
A three-dimensional painting can be called a 3D sculpture in a frame, made from scrap materials. It can be anything in the full sense of the word: paper, dried flowers, polymer clay, leather, fabrics and other creative materials. For example, they make magnificent three-dimensional drawings from plaster directly on the kitchen wall.
Plaster modeling is, of course, beautiful, but this article will talk about simpler techniques.
Are you looking for a fresh and unusual idea for interior decoration? Familiar pictures are good, but the soul is looking for something new. On the Internet you can find more than one master class on creating three-dimensional paintings with your own hands from paper, fabric or leather. These are 3D canvases that are amazing in their liveliness, which are fun to create and pleasant to contemplate.
Anyone can make an original masterpiece of art with their own hands. Why don't you try your hand at it? The master class will help you learn the basic principles to get started with an idea and start creating.
Master class “3d paper painting”
For the first test of the pen, take the simplest version of a three-dimensional painting - a paper appliqué.
Set of materials for work:
- frame with deep sides;
- stationery knife;
- pencil;
- colored cardboard with a bright print;
- white watercolor paper or thin cardboard;
- ruler, scissors;
- PVA glue.
Instead of a frame, you can take a candy box.
Step-by-step description of a three-dimensional paper painting:
- cut out a rectangle from a white sheet of paper to fit the selected frame;
- draw by hand or print a heart of such a size that it fits freely in the frame 9 times in three rows. The approximate size of the heart is 4x5 cm;
- the heart needs to be cut out and circled with a simple pencil, placing it on white paper prepared earlier. You should get 3 rows of three hearts or more (less) as you wish;
- Now the important step has come - carefully, using a stationery knife, we cut out the “wings” of the hearts. To do this, you need to make cuts along the contour of the hearts, without touching the lower and upper parts;
- bend the cut parts of the hearts up and towards the center, making them voluminous;
- The blank with hearts must be glued onto colored cardboard. It is desirable that it be special scrap paper with a small pattern. It will be visible through the bent wings of the hearts;
- The final step is to place the picture in a frame and fix it on the back side with a stapler or glue.
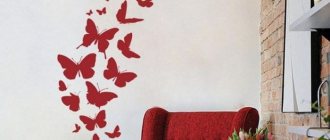
The presented master class is simple, but based on it you can make your own 3D plot - fluttering butterflies, tiles, people and other interesting templates.
Master class “multilayer 3d paper painting”
Making an interesting paper painting using the multi-layer technique is very simple - you just need to find a design and print many copies. The finished product, hung on the wall, looks interesting from different angles - a real 3D painting.
Set of materials for work:
- sufficiently deep frame;
- cardboard;
- laminate backing;
- thick album sheets and printer;
- craft glue;
- acrylic paint;
- acrylic lacquer;
- scissors;
Step-by-step description of a multilayer paper painting:
- choose a beautiful and bright picture with a clear image. It is desirable that there are many parts on it that will be convenient to cut out. We format or select the picture to fit the frame size. We print 10-12 copies on thick paper;
- Depending on what kind of printer you have, we determine whether the pictures need varnishing. Thus, images printed on an inkjet printer must be sprayed and varnished, otherwise the colors will run. Laser images can be left as is;
- We simply glue the first image onto cardboard cut to the size of the frame plus gaps for mounting;
- We cut out all other images, but in a special way. For example, if you are creating a flower, then let several whole flowers be cut out with a stem and leaves, a couple more layers of leaves, and even more of the inflorescence itself. It sounds complicated, but as you go along it will become clear;
- Now we are preparing the basis for the parts from a thin backing for the laminate, which looks like a thin layer of polyethylene foam. The cut-out backing should be slightly smaller than the parts so that it is not visible in the finished product on the wall;
- we glue the parts onto the substrate, but not all of them, but selectively - only those layers that should protrude forward. In some small parts, a substrate may not be needed;
- We place the prepared parts on the base in a frame with glue. First, we place large pictures with many details, and then individual details that should be more voluminous;
- the side parts should not remain white, otherwise they will reveal the presence of a substrate - they need to be painted over to match the image;
- We cover the picture with acrylic varnish in several layers. Each layer is applied after the previous one has dried;
Now you will have a three-dimensional painting with your own hands - now you can place it on the wall in this form or add glass. Such canvases can be made from fabric, then you will get a picture with a beautiful terry surface.
Master class “3d painting made of leather”
For more experienced craftsmen, we recommend making a three-dimensional painting from leather. This material is incredibly flexible to change shapes and create luxurious bouquets. This masterpiece is perfect to give as a gift.
Set of materials for work:
- frame;
- the base of the picture is made of leather, suede or fabric;
- pieces of leather of any color;
- acrylic paints;
- rectangular sheet of chipboard or plywood;
- furniture stapler;
- craft glue or superglue;
- scissors;
- knife;
- paper (for sketches);
- soap or chalk (for contours on the skin).
The first question that arises about creating such a work is where to get the leather? Firstly, it must be natural, and therefore it is not cheap. But you probably have a jacket, bag, gloves and other used genuine leather products. Feel free to chop them up - you will have a lot of fun and can make a gorgeous picture.
Step-by-step description of creating a painting “bouquet of leather”:
- Make sketches of leaves and petals on paper and cut them out - these will be templates for work;
- transfer the contours to the skin and cut out how many flowers with petals you want to have in the finished painting;
- If the materials at hand do not contain colored leather of a suitable shade for the colors, then use acrylic paints. Paint the petals with burgundy or pink colors, and the leaves with green. You can choose paints of any colors you like;
- to make the petals round and voluminous, you need to hold the skin over a candle flame - it will begin to take on an interesting natural shape;
- we collect buds from the petals; you can place a ball of leather or fabric in the center as the center of the flower;
- we stretch a base made of any fabric, suede, leather or other material onto a sheet of plywood and fasten it with staples from the wrong side. The fabric can be pulled tightly or draped. We insert the resulting base into the frame;
- Arrange the finished flowers and leaves on the base - evaluate their location by stepping aside;
- complement the composition with leather curls, natural materials - shells, dried flowers, etc.;
- Now you can glue all the elements to the intended places using a glue gun or a tube of superglue.
We clean the finished picture from traces of handicraft and hang it on the wall - that’s the whole master class. Similar creations can be made from fabric - decorating the drawn silhouettes of girls with dresses made of fabric and lace.
To repeat the master class and create three-dimensional paintings with your own hands, you do not need to have the ability to draw. But what you really need is perseverance and accuracy.
For beginners, we can recommend techniques made from paper, and for more experienced craftsmen, magnificent 3D paintings made from leather, polymer clay or plaster. Interesting paintings for the kitchen are framed vegetables and fruits sculpted from clay or made from plaster.
source
Painting from waste paper
To create this accessory, you can use old wallpaper, unnecessary geographical maps, newspapers yellowed by time, etc. Paper covers from vinyl records will also work.
In general, all the pulp and paper products that you were sorry to throw away can acquire a new life, being framed in an original frame.
Finished goods
The simplest solution for decorating your home with a three-dimensional painting. If you choose wallpaper with this effect, you need to remember that the realism of the image directly depends on how even and smooth the base is. Therefore, the walls will have to be carefully leveled and prepared for gluing the coating.
For three-dimensional patterns that appear under the influence of ultraviolet light, you will need to purchase a special lamp and connect it. In addition, the light source will need to be positioned so that it illuminates the surface completely. You will have to look for a place to install the lamp and decide how it will be mounted - permanently or temporarily.
Wicker panel
By combining two drawings, you can also get a three-dimensional paper craft with your own hands. You need to select two pictures of the same size, but with a contrasting image. These can be photographs, greeting cards, printouts from a computer.
The selected material must be cut into equal strips and intertwined, periodically fixing with glue. The finished panel should be inserted into a baguette.
Wicker on the wall
The imitation of various intertwined lines looks very advantageous on any wall and perfectly hides some irregularities. So with such drawings you can easily disguise the flaws of the builders.
For the braid you will need to make a rectangle out of cardboard. In order not to get your hands dirty, build a simple handle from a piece of cardboard and tape. You can arrange the parts in a horizontal and vertical plane, but it will be much more effective if you make the braid at an angle. The secret of the success of this pattern is in a certain sequence of applying the elements. One mistake and the braided effect disappears. But if you do everything correctly, the result is very interesting. The more contrast the paint relative to the main background, the brighter and more voluminous such a picture will appear.
Fan
A beautiful three-dimensional paper craft is a fan. Necessary materials:
- colored paper;
- glue;
- knife;
- ribbons and beads
Procedure:
- Fold the paper into an accordion shape.
- Fix one end of the fan.
- Decorate the product according to your own wishes.
Photos of such crafts can be easily found on websites dedicated to paper crafts. Don’t forget that you need to adapt the finished work to suit yourself, and not try to repeat it completely. For decoration, you can use not only prepared decorations, but also painting with markers.
Necessary tool
When you have decided on the material, you need to select the tool for the job. Let's look at the basic minimum set of a bas-relief master.
▶ Spatula and trowel. This is the main tool for applying plaster mortar to large volumes and leveling the surface. A narrow spatula is convenient for mixing the material in small buckets and applying it to a trowel.
Where to buy: any hardware store.
Venetian trowel and dovetail spatula.
The choice of a Venetian trowel for decorative plaster is described in detail in this article.
▶ Palette knife is the main assistant in forming the contours and details of three-dimensional paintings. Using a palette knife, apply small portions of the plastic solution to the wall, trim the edges, trim off the excess. Initially, this tool was used in painting for mixing and applying oil paints, but it also came in handy in bas-relief when they began to be made from plaster rather than carved from solid stone.
Where to buy: shops for artists, in convenience stores in the hobby department, online stores (Aliexpress, for example)
Small spatulas - palette knives for decorative modeling and artistic wall decoration.
▶ Stacks for cutting. They are used to remove excess completely or partially hardened mortar, to make a recess with neat edges and other various recesses. Such stacks are also used in pottery, when modeling from plasticine.
Double-sided stacks for modeling.
▶ Additional tool. You may also find a wood chisel useful. Their working edge can be straight, beveled, or semicircular. Choose according to the situation what and where you need to trim. Using a chisel you can easily remove plaster and form relief surfaces.
I always have sandpaper on hand. For rough sanding I use sandpaper with grit P 80-100; To achieve perfect smoothness, I use abrasive size P 180 or 240.
Paper modeling for children
There are many benefits to children making paper crafts. Such creativity develops imagination, fine motor skills, thinking, perseverance and attentiveness. Three-year-olds can make something out of paper. You should start with applications.
Stripes
The essence of another type of volumetric modeling is gluing together multi-colored paper strips. This technology is used to create applications, panels, and to decorate works made by other methods. Here are the instructions:
- Form loops from the strips by gluing the ends of the blanks.
- Use them to designate flower petals, peacock or swan feathers.
If you glue strips in the form of a three-dimensional hemisphere to cardboard, you can create a turtle, a balloon, an apple, or an entire underwater world.
By gluing many strips crosswise in the middle and lifting the free ends with a thread inserted into the holes made in them, you can get a pear.
Note!
DIY paper crafts: TOP-200 photos of exclusive ideas and craft options
DIY paper origami craft step by step: ready-made diagrams for creating beautiful origami at home (90 photo ideas)
Crafts from paper and glue for children: step-by-step instructions for creating interesting crafts with your own hands (90 photo ideas)
Christmas balls woven from paper ribbons look attractive.
Cones and cylinders
Compact three-dimensional figurines of animals and people based on a cone and cylinder can play the role of toys for a puppet show. Such products are easy to create.
For a cone, it is better to use a template the size of a third of the whole circle. A muzzle or face is depicted on a piece of colored paper. Wings, tails, ears, legs or arms are attached to the finished cone. Dolls are created from cylinders in the same way.
Quilling
The beauty of voluminous paper products created using the quilling technique is undeniable. This craft is a composition of twisted ribbons of colored paper. The strips are prepared in advance, rolled into peculiar curls and given the shape of petals, droplets, and hearts.
Typically, this papercrafting method is used to embody scenes on a natural theme. For example, you can make flowers and, using them on a cardboard base, create a flower meadow, complementing the picture with the sun and clouds.
Technique, examples
Textile painting varies greatly in design and style. It can look like a mosaic painted on Chinese silk, a panel, a three-dimensional pattern. The technique of creating paintings originated in the Japanese Empire, and then in Great Britain and the United States and the Russian Federation.
All possible types of execution of smooth and convex reproductions from the manufactory:
- kinusaiga;
- osie;
- patchwork quilt;
- quilling;
- string art;
- from openwork weaving;
- from felt;
- damp cloth;
- from jeans;
- 3D version.
Always make a sketch on paper with a pencil, then select the type of execution that is especially interesting to you.
Costume elements
Children's matinees and role-playing games, which are fashionable today, contribute to the development of the art of creating paper crafts. Various types of paper and cardboard are used. Using a headdress, you can make a real fairy-tale hero out of your child. For you need:
- Make a base from wide Whatman paper.
- Wrap the blank around the baby's head. Please note that the accessory should not cause discomfort to the child.
- Sew the ends together with thread or glue them together.
- Decorate the “hat” to your liking. You can use artificial hair yarn to make a figured crown, animal ears, a snowflake or a mustache.
Plane-breaking rhombuses
This drawing requires a diamond-shaped template. The diamonds are arranged in a checkerboard pattern and painted along the contour. The result is ambiguous and definitely breaks the even plane of the wall.
These are just 7 of the simplest examples of three-dimensional patterns on the walls. Agree, making them is not at all difficult, and you can definitely do it. Just remember to wear gloves: spray paint is very caustic and it’s difficult to wash your hands afterwards. And it is advisable to wear a mask during such work so as not to inhale the fine mixture.
It is possible that once you try to draw on the walls, you will no longer be able to stop and will train your artistic talent. Perhaps one day you will be able to create masterpieces like the ones in this video:
Watch this video on YouTube
PHOTO: YouTube channel Kotresh Koti
Previous STORIES We simplify the work of the master: a nail puller attachment for a screwdriver with our own hands Next STORIES It's time to forget about calluses on your hands: an automatic gun for sealant
Accordions
Volumetric paper crafts for children with accordion-type details look quite interesting. At the same time, they are incredibly easy to make.
Creating three-dimensional paper products is very exciting and accessible to people of all ages. In addition, such activities have a beneficial effect on a person’s psychological and emotional state. If you are short on imagination, then ideas and templates for three-dimensional paper crafts can be easily found on the Internet.
What is interior painting?
First, let's figure out what interior painting actually is, and then find out what you need to learn how to create interior paintings yourself.
First of all, I would like to note that any painting in the interior is designed to create a certain mood and evoke some feelings and emotions in you, as well as place some accents in the room, at home or in the office.
Based on the name, we can conclude that interior painting is specially painted paintings for a living or working space, that is, for their interior. The main differences between such painting and classical painting are as follows:
- such paintings, as a rule, are painted on medium and large-sized canvases;
You can purchase high-quality canvases at competitive prices in my store if you want to get a quality product and not waste time searching! I leave a link to the canvas catalog - https://nyshop.pro/product-category/canvases/
- Just like the canvas, the details of the painting are most often large and prominent. Many paintings also have abundant decoration and may include not only paint, but also gold leaf, texture paste and other materials;
- The paint colors of such paintings are usually calm, not aggressive - pastel and not very bright;
- The subjects are also not complicated: large and beautiful flowers, with large ones depicted, exotic birds, flowers.
Thus, you must understand that interior paintings are works that should ideally suit your apartment in color, image, and size.
