How to make a 3D painting with your own hands. Technology. Ready-made 3D paintings
Content
What are 3D paintings?
Greetings, dear, in touch. And in this article I want to tell you about how to make a 3D painting with your own hands. At first glance it may seem very difficult. But I assure you, if you know what needs to be done and how, then you will not have any difficulties. Believe me, I have already drawn about 1000 3D paintings of varying complexity and purpose, so I have something to surprise you with. You will also learn what to make such pictures from and how to install them. So the article promises to be extremely useful and informative, so read it to the end and very carefully.
3D paintings are a special three-dimensional image that takes on the correct three-dimensional appearance when viewed from a certain point.
Such paintings look as voluminous as possible in photographs, precisely for this reason, they have found their maximum distribution precisely where there is photo or video shooting ( 3D exhibitions , holiday decorations, 3D advertising, TV advertising, etc.).
As I said, the basis of such paintings is precisely a special image. That is, it’s all about the three-dimensional image, and not about the special material, as many people mistakenly believe.
If you have a three-dimensional image, you can print it on anything (banner, film, paper, fabric, plastic, etc.). If we take 3D paintings for an exhibition , then such paintings are printed on a regular banner. This is the optimal price-quality ratio.
The banner is quite durable, wear-resistant, the images are bright and saturated, and is inexpensive. So, where can you get a special three-dimensional image? There are two options here, let's start with the first - how to make a 3D painting with your own hands.
How to make a 3D painting with your own hands.
First, let's define the types of 3D paintings. There are two types of three-dimensional paintings. These are vertical ones, those that are mounted on the wall. And horizontal ones are those that are attached to the floor. Now let's move on to the question of how to make a 3D painting with your own hands. It’s very simple, I have two specialized courses on this topic.
The first is a mini-course called “3D drawings for the lazy or how to draw 50 3D drawings in 2 hours . In general, everything in this course is simple, here we do not delve into any technical details, but I simply provide you with a special universal form for converting to 3D and show you how to work with it. The duration of the course is only 60 minutes.
As a result, the entire process of creating a full-fledged floor 3D painting (or rather a three-dimensional image for it) comes down to just 3 stages. At the first stage, we select and decide on the image that we want to convert into 3D format.
At the second stage, we insert this image into a special universal form for translation into 3D .
At the third stage, using this form, literally in 1-2 minutes we convert the picture into 3D format and get a three-dimensional image.
Everything is so simple that using this form you can produce three-dimensional images for floor 3D paintings simply on an industrial scale.
And then these paintings can be used for various purposes, be it 3D exhibitions, 3D advertising or 3D paintings for holiday decoration
.
Professional course on 3D exhibitions and 3D paintings for them.
I also have a professional course on 3D exhibitions and paintings for them. The duration of the course is about 6-7 hours. In this course, I dedicate you to all the subtleties and nuances of creating both horizontal and vertical 3D paintings for exhibitions. There are also many useful points on the proper organization and operation of the exhibition itself. In a word, an indispensable course for those who want to open their own exhibition. Everyone who purchased this course was satisfied. Here are reviews about this course.
A set of ready-made 3D paintings.
Another simple option for making a 3D painting with your own hands is to take ready-made three-dimensional images and print them on a banner. I have a whole set of floor 3D paintings of different sizes and themes, completely ready for printing (about 50 pieces in total).
How to make a 3D painting with your own hands. Education. Ready-made 3D paintings
You can view all 3D paintings of the kit by clicking on the link below.
DOWNLOAD A SET OF READY 3D PICTURES.
And this is where my article comes to an end. I hope it was useful to you, and now you know how to make a 3D painting with your own hands. For any questions regarding purchasing a kit or training courses, please contact us by email, or leave your questions in the comments. And good luck to you all in your endeavors, bye.
If you liked the article, please do the following:
- Leave a comment. Just write whether you liked the article or not. Write what topic you would like to discuss in the following articles.
- Share this article with your friends.
- Subscribe to blog updates and my YouTube channel.
Best regards, Rustam Zakirov.
rz3d.ru
Modules
Small squares of paper are used to make parts for modular origami. They are no less convenient than their classic rectangular counterparts, but are used only for tangram puzzles - flat figures assembled like puzzles. There are two types of modules: main and additional. The second option is needed for narrow long parts:
The main module folds as follows:
- We bend the square base diagonally.
- Raise the outer corners up to the center line.
- Turn the workpiece over.
- Bend the top.
- This is what should happen.
- We lower the forked part over the previously bent one.
- Fold the resulting triangle in half into a “valley”.
- The final module is presented in steps 8 – 10.
3D paintings | Country of Masters
To work, choose ANY photo you like, except a portrait (although... It’s difficult, but you can do it) or any of your own (or someone else’s) drawing. Make several IDENTICAL photocopies.
We use one photocopy for the working drawing. Here we mark where and what layers will be. In one drawing you can get 3 layers or 33, it all depends on you. Take this work very seriously: if you make a mistake here, then you will have to redo all the work.
Looking at the working drawing, we cut out all the layers from the photocopies (one layer from one photocopy).
We glue corrugated cardboard or pieces of double-sided adhesive tape to the back of the layers.
All that remains is to paste the layers onto the photocopy background, frame it, hang it on the wall and admire your work.
In the same way, you can make your own house or cottage in volume.
Notes:
1. To avoid wrinkles, it is better to stick thin photocopies onto album sheets and then cut them out. For such purposes, I print photocopies on sheets from the “drawing folder”: there is no need to glue them.
2. I use corrugated cardboard to save on adhesive double-sided tape.
3. In the countries of the European Union, 3D paintings and 3D postcards are very popular. Many people make them. There is a whole industry there: you can buy a sheet of layer-by-layer prints at the Hobby Center. All that remains is to cut and paste. But in our Country of Masters I have not noticed such works and therefore I hasten to correct this shortcoming.
4. If any of you are in a hurry, you can send 3D New Year cards to your friends. And whoever is too lazy to invent something can do it
photocopies of a regular New Year's card and make a 3D version of it.
5. Good luck to you in your new business!
stranamasterov.ru
fish scales
From cardboard you need to cut out such a simple figure with a semicircle in the center
Attach the template to the wall and, at a distance of 7-10 centimeters, cover the edge of the semicircle with spray paint
After the first row, repeat this technique on the second row, moving the pattern exactly halfway from the previous pattern.
The finished image closely resembles fish scales. You can use silver or gold paint for a more dramatic effect.
This is interesting: Long pile carpets - more comfort and more warmth! (23 photos)
DIY 3D painting. Papertol or 3D decoupage – Fair of Masters
Do you want to feel like a little wizard? Then this is the place for you! Now I’ll tell you how to do this.
It all started with a gift brought from Europe by my friends. They know how to surprise and delight! When I opened the package, I was speechless for a moment. I have definitely never seen such mysterious beauty before! There was a microcosm in an unusual frame. It was a landscape with a perspective leading into beautiful distances. The alley and openwork trees were so realistic that it seemed that a gnome or an elf was about to peek out from behind the tree trunk. Looking at the picture, your fantasy plays out, and you can contemplate for a long time, being in this small world, forgetting about business and worries. Curiosity haunted me, how does it all work? The illusion of objects hovering in the air is created. After much thought, I had to dismantle all this beauty... The terrible secret was solved. Everything ingenious is simple! Now I devote all my free time to creating such three-dimensional paintings. I recommend you try it too. The result is striking in its liveliness and novelty of impressions. The picture seems to come to life before your eyes!
So, let's begin. We choose any picture or picture we like (to begin with, it’s not difficult to cut out) taking into account perspective and versatility. This is a very important aspect of the matter. Let's roughly estimate how many layers we need depending on the plan: 1st, 2nd, 3rd, etc. There can be 5, 6 or more if necessary. We print identical pictures based on the number of layers. In this case we have 6 of them.
To get started you will only need a few simple tools:
- Paper scissors.
- Nail scissors.
- Dummy knife.
- Double-sided tape (white or black)
- Corrugated cardboard (for interlayer between adhesive tape).
- Thick cardboard for the base of the picture.
We begin to cut out the first picture along the contour, only the sky. The second picture is cut along the outline of the house, etc. Each picture is a layer of the picture. The closer the layer is to us, the finer the details become, and on the topmost layer only the smallest details that are closest can be cut out. For example, a step or pots of flowers on the window.
It is advisable to tint the ends of all parts with a dark felt-tip pen, because... the white edges don't look neat.
We glue strips of tape on both sides of the corrugated cardboard (you can also use foam) to create more height between the layers. We cut the tape into squares and stick them on the back of each part.
All that remains is to glue the layers together. We glue the first whole picture onto cardboard, and mount all the other layers on it.
This is how the multi-layer “pie” turned out.
Now we insert it into a wooden box (I think we can’t do this without male help).
And we glue this entire structure to the frame with glass.
Your masterpiece is ready!
I am sure that you will look at your creation from different angles for a long time and watch with a smile as your friends try to look inside the picture and understand how it was made! But every master has his own secrets...
www.livemaster.ru
Where can I buy a high-quality printed painting and how much will it cost?
Are you planning to purchase an interior painting? We advise you to take a look at the Print4you online gallery. For little money here you can create the canvas of your dreams. If you have still decided what your painting on canvas should look like, go to the website Print4you.com.ua, where you will find a huge selection of images for every taste. Masterpieces of artists from different eras and genres, a huge assortment of modern posters and simply beautiful images. The work is completed in the shortest possible time and with maximum quality! Choose your perfect canvas and see you there!
Similar materials:
3D paper paintings | Crafts Master
At first glance, these kinds of crafts seem to be products of incredible complexity, and I will not dissuade you from this. After all, you still have to work hard on them! And before you start work, the main thing is to understand the main principle of creating this kind of painting. How to make a 3D painting is the topic of today’s article.
How to make a picture out of paper
The name 3D itself suggests that the picture has not one layer, but two, three or more. The easiest way is to make a two-layer painting. For example, this birch tree: two layers of branches arranged differently create the effect of one whole, and this is achieved in the following way.
Each layer has a frame, which is made from the same sheet as the drawing itself. Thus, one frame is nested inside another, that is, it closes like a box of chocolates.
Birch on the wall
The figure shows that each picture has a corresponding pair. Simply print out the images, carefully cut out the design with a utility knife, then fold the frame along the fold lines and secure it with glue.
Then you insert both frames into each other.
3D paper paintings
But a painting depicting bamboo was made using the same principle!
3D bamboo
Bamboo on the wall
Recently, there has been a fairly fashionable tendency to create several paintings that continue each other’s plot.
Thus, completely separate paintings, hanging horizontally or vertically at a certain distance from each other, at the same time are one whole, although each lives a separate life. At the same time, most often you should follow a certain order in the arrangement of the pictures, so as not to lose the main plot and not get in return just a set of awkward pictures.
Experiment! Make your home beautiful!
Source
comments powered by HyperComments
masterpodelok.ru
Kinds
Before you start folding origami, you need to familiarize yourself with the types of this art. There are not many of them, and each of them has its own characteristics.
- Classic origami is the traditional folding of paper squares.
- Modules - creating figures and connecting them by nesting.
- Kirigami is the same as origami, only using scissors and glue.
- Wet origami - made from wet paper.
The art of paper origami for beginners has a positive effect on motor skills and helps them learn to use their imagination.
Do-it-yourself three-dimensional paintings: 3D technology in the house (52 photos)
We are looking for authors for our site who are VERY well versed in interior design. Contact by mail
05.12.2017
Interior decoration is the final stage of renovation or change of decor. Of course, exclusive decorations are valued above all else, but they are very expensive and do not always suit the decoration of the room. But many beautiful and modern things can be made with your own hands. For example, such a fashionable and unusual decoration as three-dimensional paintings. They can be made from a variety of materials: paper, cardboard, leather, wool, beads, putty. Undoubtedly, in every home there will be unnecessary leftovers from some kind of work, and the missing ones can easily be bought in craft stores.
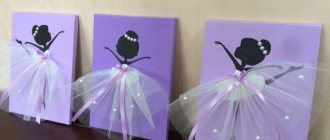
Three-dimensional paintings “Ballerinas”
Volumetric paintings made of paper
Do-it-yourself volumetric paper paintings
The easiest way to start is with a paper picture - paper is cheap, it’s easy to buy, and the range in stores is huge. To create a three-dimensional picture we will need:
- paper;
- stationery knife;
- scissors, paints;
- colored cardboard;
- PVA glue;
- frame with low sides;
- suitable plot.
Take the glass out of the frame and cover the backing with plain paper. It will serve as a background. Creating three-dimensional parts involves bending a piece cut out of paper or cardboard and partially gluing it to the background. Individual parts must be painted and allowed to dry before gluing.
Paper 3D painting
Three-dimensional painting made of wood
Butterflies, flowers, animal figures, and bouquets glued in this way look beautiful. The applique will be successfully complemented by individual elements made using the quilling technique. This is the name given to long strips of paper arranged in a composition, twisted into spirals. We will put the finished three-dimensional painting back into the frame and place it in a permanent place.
Three-dimensional painting in the nursery
Three-dimensional painting made of plaster
Volumetric paintings made of leather
To create such a picture it is not at all necessary to buy expensive new leather. Whole pieces from worn-out items will be used: bags, boots, raincoats and even gloves. Leather can be painted with acrylic paints if a suitable color is not found. In general, the technology for creating a three-dimensional painting from leather is no different from the same one from paper.
Three-dimensional painting in the living room
Three-dimensional painting in high-tech style
Volumetric paintings made of fabric
Each needlewoman has stocks of fabrics and many scraps left over from sewing. A good housewife will always find a use for them. Patchwork, a patchwork technique, has been known for a long time and combines the beauty of well-chosen patches and practicality. A skilled seamstress will be able to create from them a real work of art that you will want to look at for a long time.
Three-dimensional painting made of coffee
Volumetric fresco painting
roomplan.ru
Basic auxiliary materials
In order to make a handmade decorative painting, you need to prepare a frame, stretcher and material, paints, glue with which the image will be created.
There are many ways to create an artistic and unusual work from simple objects. Several proven creative techniques are offered, but the world of human imagination may turn out to be much wider than these examples.
DIY 3d painting
This decoration of the wall of your living room or bedroom will delight any guest who finds himself in your home. The 3D poppies are impressive and evoke true respect for the one who created this miracle. A minimal set of classic colors gives the painting a sense of style and modernity. How to make a 3D Maki painting - read on and follow the instructions in the photos.
Wall decoration
First, you will need to print out templates for all the components of the painting.
The secret to creating a painting with a 3D effect is multi-layering. You will have to use at least three layers. Cut each one out and overlap each other. To glue the layers, use thin strips of bulk tape (it should not be noticeable) or special glue drops, similar to those used by the author of the master class.
Here are templates of all the required layers and details for the real painting.
Print and cut out all the details of the picture from colored paper.
Collect in this order:
Three-dimensional picture
Paper painting
To create volume, gather the top petals of poppies a little, giving them a slight corrugated effect.
After all, the petals of a real poppy are so thin and delicate, almost transparent.
How to make a picture
Having glued all the petals, complete the decoration with the poppy core, which you should also work on.
This beautiful decor can be a wonderful gift for a sophisticated and refined nature.
Source
And:
lookathis.ru
Ideas for origami
When learning the art of origami, it is important to know what figures can be made from paper. The most classic option is the crane, which is considered a symbol of happiness and success.
In Japan, there is a belief that if you make a thousand cranes, any cherished wish will come true.
You need to make a crane according to a pattern; this is not the simplest type of origami, but it is very exciting and useful. In addition to the crane, you can make many other equally interesting figures.
- Various animals and birds - owls, foxes, hares, crabs and so on;
- Flowers and plants;
- Geometric figures;
- Unusual figures in the form of a cup, heart, star and much more;
This or that type of origami is made according to a certain pattern. There are easy paper origami, as well as more complex options for more experienced craftsmen.
Origami step by step
Paper paintings: master class, volumetric paper omnitrix
Cutting out large multi-layered pictures from plain paper is an interesting hobby . If you decide to try your skills in this part of the art, start with simple paper paintings, the production of which will allow you to become familiar with the details of this type of craft.
We offer an easy and detailed master class, which will help you make a large picture cut out of paper with your own hands. This requires very little time, and the materials needed for the work can always be found at home.
Contents of the material
How to make a regular paper picture with your own hands
For work, we will need:
- Wooden frame.
- Paper blue, white, gold.
- Glitter in liquid form.
- Styrofoam.
- Wire.
- Stationery knife.
- Large tape.
- Glue, three different ones.
Process description
Before creating the picture, we will treat the wooden frame with white paint. It is easier to use aerosol paints. Remember that the front part of our product will be the back side of the frame . While the paint dries, you can move on to creating the background. To do this, cut out a rectangle from blue material. It must completely fit the internal dimensions of the frame.
On a white leaf, we will depict several trees with different intersecting branches. To make cutting easier, let's shade a couple of intersections with our pencil. Place a second leaf under the first leaf . Let's move on to cutting out the marked areas. After this, separate the leaves and trim the cuts with a knife.
Slowly fold the edges of both sheets to increase their volume. We will also tuck the tree trunks, creating small cuts and fixing them with our glue. This work is easier to do with an awl. Glue a couple of pieces of foam onto the bottom sheet, and then attach the second sheet to it. Space begins to appear between the paper snowdrifts, which gives the effect of layering and volume.
Now, using our stationery perforation knife, we make a couple of dozen round “snowflakes”. In the same way, cut out a couple of circles (circles) of different sizes from multi-colored paper. If we don’t have it, let’s start working with liquid glitter and make circles.
Let's cut out the moon in the form of a circle and animal figures , and make stars from the yellow material.
On the third leaf of our white material, we depict a tall tree with thin and long branches, and slowly cut it out. When all the details are done, you can move on to assembling the “cut-outs,” as paper paintings are also called. To do this, you need to glue the layers of paper on top of each other one by one.
We also recommend reading:
Our three-dimensional fake is done, it’s time to frame it. Measure the center at the top of the frame and screw the wire into the loop. Then we will pass a wire or rope through the loop so that the product can be hung on the wall. Glue a couple of strips of large tape inside the frame and place the picture evenly.
Craft completed! Now you can safely decorate your home with a paper painting you created yourself.
As you can see, with a little effort and patience, you can create unique paintings.
Gallery: paper paintings (25 photos)
3D paper painting, master class and diagram
To make a 3D picture we will need the following materials and certain simple tools:
- A large frame or a nice box of chocolates.
- A special knife or knife for decoupage.
- A simple pencil.
- Sharp scissors.
- Leaf with print.
- A sheet of white specialty paper or small cardboard.
- Ruler.
- PVA glue.
- First stage. We start by making a blank from white special paper or thin cardboard, in accordance with the dimensions of the selected frame.
- Second phase. Separately, on a piece of strong paper, draw by hand or print using a printer a small heart, measuring four cm in height and five in width. We calmly cut out the sketch we have made along the contour and get the template needed for making a 3D painting from paper.
- Third stage. Next, we apply the created template to our paper blank and trace it in a row a couple of times horizontally and vertically. In the end we will have an image with nine identical hearts. You may get more or fewer hearts, it all depends on the size of the picture frame and the base, according to which we cut everything out.
- Fourth stage. Then, taking a stationery knife or a decoupage knife , we create cuts on both sides of each heart made, leaving only the top and bottom middle of each image untouched.
- Fifth stage. After this, slowly bend both halves of each cut out heart to one side, so that it looks voluminous in appearance.
- Sixth stage. We will paste the created blank with large hearts onto scrap paper with a small print, so that it is visible through the holes made.
- Seventh stage. We insert the finished 3D paper painting into a frame and complete the work on its creation. In approximately the same way, you can make a picture from an accordion, the main thing in this work is that a person knows how to correctly assemble and cut out parts from paper.
Conclusion. Don’t be afraid to start making paper crafts; after simple products, you can start making paintings of flowers, and then you can also sell them.
You will also need:
- double-sided adhesive pads for joining layers;
- scissors with sharp edges for cutting out small parts;
- scalpel or paper knife, tweezers and mat for safe cutting;
- liquid glass to add shine, realism and durability;
- deep frame or aquarium frame for a pronounced volumetric effect;
- thin multi-colored felt-tip pens for processing sections on each element.
Papertol "Venetian classics". Click to go to this product page.
Is it possible to create a sketchbook yourself?
On the Internet you can easily find a variety of photo sketchbooks for every taste and design.
But you can create it with your own hands, the main thing is to stock up on the necessary materials, patience, time, and use your imagination as much as possible.
There are a lot of advantages to a sketchbook created by yourself:
- To create, you can use paper according to your requirements and taste. For example, not plain white, but tinted watercolor paper.
- You can create from as many sheets as you need.
- A homemade notebook will cost less than a store-bought one.
- It will be individual, in a single copy, according to your own taste and style.
Abstract option
The second version of the 3D drawing gives you complete freedom of imagination. The outline can be the most intricate, imitating a lace ornament or simply a wavy line.
The author chose this simple option with sharp peaks and a wavy edge
The technique is still the same: apply the template to the wall and cover the edge from a spray can with a contrasting shade
You can place the template randomly or at specific intervals, creating triangular or square motifs
The option is quite unusual, but this is the secret of successful abstraction
Some lyrics
A person cannot learn to draw without practice. Every person who deserves the title of “artist” started with the same thing everyone else started with - ordinary sticks and circles. But as one gains practical experience, the skill in drawing grows, and a person wants to draw something more complex than geometric shapes.
The main thing in this matter is a special goal, a desire to create and share your creativity with others. Desire will help you overcome any difficulties, and your talent for drawing will not be so necessary.
After deciding to start drawing, you need to pay attention to practice, and you should start with this master class, which will tell you where to start drawing, how to draw every detail, and a master class on drawing techniques will speed up this process.
Studying does not take one day - many people study throughout their lives, improving their skills.
Studio “Discover Yourself” (CAO)
The drawing studio in Moscow “Discover Yourself” invites you to classes in painting and applied arts, which are held in the format of master classes in various areas:
- Oil, acrylic, gouache, watercolor - you will learn to work with different types of paints
- You will also master hard materials - pastel, charcoal, pencil;
- Ebru (water painting), batik (drawing on natural silk), stained glass, monotype, fluid art (liquid acrylic), works from foamiran (plastic suede) - these applied arts have many subtleties, and teachers will be happy to tell you about the specifics of these areas;
- You will learn how to create portraits, be able to calculate a personal mandala, and master drawing miniatures.
- Right-hemisphere drawing training in Moscow reveals your creative potential. After the training, you can draw easily and quickly.
Individual approach, 3 hours of drawing, all materials included in the price!
Drawing lessons for children
Drawing is one of the best ways to develop a child’s motor skills, color perception, spatial thinking and creative vision.⠀However, not everyone has the opportunity or time to go to art school. Moreover, parents want to spend more time productively with their child.⠀We have collected the best educational playlists and individual videos for different children's ages. You will be able to learn the techniques of professional children's artists and teachers to teach your child to draw quickly and beautifully.
01.
Finger painting, watercolor, gouache
https://youtube.com/watch?v=videoseries
Drawing houses
The “Draw at Home” channel is an online drawing school for aspiring artists. The founder, Nina Zhurova, is a teacher with 12 years of experience in the field of fine arts.⠀The channel has a lot of playlists dedicated exclusively to children. Here you will find lessons in drawing the alphabet, finger painting, and watercolors. There are also separate videos for the development of preschoolers (4-6 years old) and more complex master classes for 6-8 and 9-11 years old.⠀There are playlists with pictures for different seasons, fairy-tale and cartoon characters.
02.
Simple gouache paintings
https://youtube.com/watch?v=videoseries
Oil painting
The art school "Oil Painting" has a full-time branch in St. Petersburg, as well as its own YouTube channel with many lessons, including classes for children.⠀Studio teachers Ulyana Glazova and Leonid Kuvalev recorded several detailed lessons on how to create interesting children's gouache paintings from scratch.
03.
Life hacks and master classes with watercolors
https://youtube.com/watch?v=videoseries
Alinafineart
The author of the “Alinafineart” channel, Alina Nikitaeva, has been creating for 20 years. Her videos are completely non-commercial and created exclusively for home use.⠀All videos in this playlist show the process from start to finish. The videos are great for independent children's lessons. In addition to explanations on how to create different images, the playlist also contains life hacks like how to draw an even circle without a compass.
04.
Drawing animals in watercolor
https://youtube.com/watch?v=videoseries
Kalacheva School - School of Drawing by V. Kalacheva
Kalacheva School is the largest art drawing school in Russia created by Veronica Kalacheva. All lessons are taught by teachers with quite a lot of teaching experience and art education. The school has its own channel on YouTube.⠀This playlist is dedicated to drawing various animals using watercolors. In the description of the video you will find text instructions from the video and a list of materials used.
Drawing complex shapes
After gaining practice in drawing simple shapes, you need to move on to more complex drawings.
The main rules remain the same as before - constantly practice and study information about drawing certain objects, compare and note improvements in the previous attempt and in the first.
For example, an egg is a more complex shape than a circle. Afterwards, you can make the egg even more complicated and draw a strawberry. You can draw every grain, and a rather complex work will be ready.
The next step is to try to draw everything that is around, using simple shapes, skills in perspective and shading.
Mesh - four-leafed
To make a template, you will again need thick cardboard and a flat plate. The cardboard needs to be cut into a square with a side of approximately 25 centimeters.
Using a plate, make 4 semicircles on each side
To make it easier to work with this template, you will need a pen again.
We apply the template to the surface and paint all 4 semicircles with a spray can. Make sure that the sharp ends of the pattern match exactly, then you will get an even mesh
Someone might argue that this is a stack and call the drawing quatrefoils, well, it depends on perception
Bubble Mood
This drawing is an excellent option to hide any flaws in the design of the wall before renovation. The motif will look good in a child's room.
The template in this case is a circle cut out in a sheet of cardboard
To make a three-dimensional bubble you will need two contrasting paints. The dark one should be applied to the top of the template
Light paint is applied to the bottom of the template and another stroke is applied to the top of the dark circle.
The author added the drop-bubble with two strokes from below, but even without them it looks very interesting
If you regularly arrange such droplets, you will get a cheerful parade of capitoshkas
How to draw in 2 planes
3D pictures executed in two planes are very impressive. The illusion of volume is manifested by distorting the image at an angle to the fold line of the sheet and changing the proportions.
3d staircase
You will need fairly stiff paper or thin cardboard.
3D drawings on paper for beginners should be done strictly following all parameters and calculations.
- Before starting work, it is necessary to indicate where the fold will be.
- On both sides of this line, draw a ladder with rungs at a mirror angle.
- Connect the ends of the ladder with straight lines, repeat the crossbars between them - this will be a shadow.
- The staircase should be brighter than the shadow!
- Bend the sheet and find a viewing angle at which the stairs will appear level. In this case, the shadow will remain on the “wall” and “floor”.
Volumetric house
- Fold the sheet and mark the fold with a dotted line.
- Draw two perpendicular lines through the fold towards you. The horizontal line is slightly longer - this is the edge of the wall on which there will be a window, the vertical line is divided into two parts when bending the sheet, while the lower part will become the foundation, the threshold will be located on it, and the upper will turn into the edge of the wall with the door.
- From the resulting right angle, draw a line upward, at an angle of 35-45 degrees, not reaching the fold by about a third of the height. Construct a parallel segment from the right extreme point of the horizontal line. The two corners of the house are marked.
- Next, draw the wall with the window, taking into account the changed proportions.
- When the paper bends, part of the image will disappear from view. Therefore, the door at the end of the house should be drawn with a break. Most of it is located below the fold, the left part is almost half as long as the right.
- From the fold line, continue the doorway with a deviation to the left almost at a right angle.
- Finish the roof. The angle between the roof and the nearest edge of the house is about 160-170 degrees, the roof almost continues the wall. Above the fold, also mark the end of the roof. Connect to the bottom. At this stage, it has the shape of a trapezoid, the lower corner of which is where the sheet is folded.
- Add a window, its contours correspond to the boundaries of the wall.
- Darken the right third of the opening. On the left, draw a slightly open door, taking into account distortions.
- Fold the page, find the viewing angle at which the roof looks triangular. Apply chiaroscuro and indicate details.
- Add a shadow from the house.
toothy mouth
- The biting mouth is drawn on one (vertical) half of the sheet. The pattern is stretched along the fold line and from bottom to top.
- The teeth hold a straight object, such as a pencil.
- On the horizontally located part you should draw a shadow cast by the object holding the mouth.
A drawn man does not allow you to fold a piece of paper
- Mark the fold line.
- Draw a line to the fold at an angle of approximately 30 degrees. Repeat in mirror image on the second half of the sheet.
- This is the length of the future human figure and a guide for the drawing. The segments are unequal, the person's fold will not be divided proportionally. The lower part is from the legs almost to the armpits, the top is the head, shoulders and arms, “resting” on the sheet.
- Sketch a figure of a man, stretching the lower part more than the top - when viewed at an angle, part of the drawing is lost from the horizontal surface.
- Fold the piece of paper and check if the parts match.
- Work out the details, darken the drawing in the right places. Draw a shadow from arms to legs.
Crawling snake
- Divide the sheet in the middle with a dotted line; it will be folded along it later.
- Draw a line from the middle of the future vertical surface to the fold line at an angle of 30 degrees. Extend mirror image almost to the edge of the second half of the sheet.
- Draw a snake along the line. Around the smaller part, draw torn edges of the sheet, as if it had broken out of it.
- Fold the paper along the fold line, check if the parts match.
- Draw details, apply shadow.
Pencil drawing lessons
Creating images with a pencil is one of the most popular drawing methods. This is the most budget-friendly way of drawing.⠀In addition to the financial benefits, a pencil also has advantages in the absence of drying out of the drawn material, as well as in the detailing of images. In the next section, we have provided key information for those who want to start drawing with a pencil.
01.
How to sharpen pencils and do shading correctly
Art Shima
“Art Shima” is a training channel for everyone who wants to learn how to draw and write in different techniques and styles. The author of the videos is Anastasia Shimshilashvili or simply Shima, a famous artist and drawing teacher with more than 10 years of experience.⠀In her video, Anastasia explains the rules for sharpening a pencil using a simple stationery (layout) knife. The video also contains an example of creating hatching with adjusting the thickness and size of the strokes.
02.
Development of motor skills using tracing paper. Creating image textures.
Art Shima
This lesson is about training motor skills by translating pictures onto tracing paper.⠀Tracing paper - translucent paper - is a great way to learn to feel the volume, as well as soft and hard structures of the image.⠀The video contains detailed instructions on how to create straight, continuous lines with a pencil. In addition to practicing motor skills, during the process of redrawing, you will also do the so-called “collection of materials.”
03.
Studying light and shade and reflexes
Art Shima
This time, the author of the channel “Art Shima” clearly shows the elaboration of light and shade in the image. The video also contains the basics of drawing a reflex.⠀Charo and reflexes are the main ways to bring a picture to life. In this lesson, Shima shows the principles of distributing tone in a drawing according to shape. Reflex is a reflection of the image's surroundings.
04.
Basics of perspective in drawing
Art Shima
Perspective is one of the most important points in creating a drawing - this is the position of your drawing object in the plane and its distortion when transferred from a three-dimensional to a two-dimensional field. Proportions will depend on it. To train the correct vision of perspective, start with simple volumetric figures. This video lesson contains a detailed explanation of how to correctly build ellipses, cubes, prisms, cones and others.
05.
Basic mistakes in pencil shading and how to correct them
Art Shima
This video is the second part of the lesson on shading.⠀The author of the video, Shima, gives several examples of creating and applying strokes. The artist also shows how to correct mistakes in any shading.
06.
How to create image volume
Art Shima
This lesson is about creating volume in a painting. The author of the video, Shima, will clearly demonstrate volumetric shading on a round shape and plane.⠀However, before starting to study and complete the tasks of this video, the teacher recommends that you be sure to refresh your memory of previous lessons on chiaroscuro and shading.
07.
Creating shading, shading, shading
ABC of Drawing
The ABC of Drawing channel is dedicated to the creation of both “live” paintings and exclusively graphic computer drawings. The author of the project, Andrey Markov, points out that in his videos he relies more on his personal experience than on academic knowledge.⠀This is a video tutorial on shading, shading and shading. The video is divided into theoretical and practical parts. Using the example of a sketch of a plaster column, Andrey shows how to apply the received theory in practice, and also points out possible typical mistakes of novice artists.
Painting with paints
The easiest way to create an original painting for your interior with your own hands is to paint it. The subject is limited only by the imagination of the creator. Even if you have no artistic skills, you can create a masterpiece: use abstract techniques, study master classes and photos of finished works.
To create an original painting, minimal painting skills are required.
Original composition in a rustic interior
The spectacular combination of colors in the painting will attract the attention of household members and guests.
Simple but very attractive composition
A bright abstraction is perfect for a snow-white interior.
Oil, watercolor, and acrylic paints will become faithful assistants in creating paintings for the interior. As a base, you can use either professional canvas or regular thick paper or a primed board.
You can order a frame for your work at a framing workshop, where it is easy to find a suitable edging option.
Technique for creating an abstract painting using paints
Working with paints using improvised means
Design options for finished work:
Framed on the wall
Papertol "The sea in the picture"
As a decorative element
Papertol “Girl with Roses”
Christmas tree decoration
Papertol “Girl with a Basket”
We also draw your attention to the various design options for the finished work. Combined with such a powerful style variety, you will decorate your apartment (house, office) with taste, turning it into a real private gallery, in which you yourself will be the creator of all the masterpieces!
Papertol in our catalog
