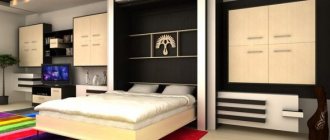
Making furniture is an exciting activity, you just have to try it once, get a positive result, and in the future you will no longer be able to do without such work. Furniture, depending on its purpose and design features, has varying structural complexity.
It is recommended to start with the simplest things. Only after gaining practical experience can you gradually move to the next level of complexity. This means an increase not only in theoretical knowledge, although this is also very necessary, but in practical experience.
A bed, according to the classification of furniture makers, is a simple product, and from it you can start making objects with your own hands. We will consider the simplest option, for the manufacture of which you will need a minimum set of tools - an electric jigsaw, an angle grinder and a drill.
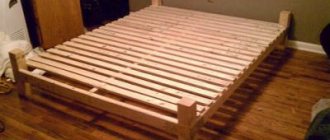
How to make a bed out of wood with your own hands: making a double bed
Procurement of materials and hardware
Calculation of materials must be done depending on the size of the mattress. For double beds, mattresses are sold with a width of 140–200 cm and a length of 190–210 cm. We will give an approximate list of materials for a bed 140×200 cm, this is the most common size.
Table. Materials for making a bed
| Name | Description and quantity |
Lumber | Boards 200×20×3 cm – 2 pcs. for making bed sides. The same boards, only 140 cm long, are needed for the headboard and footboard, 3 of them are required. In addition, you will need 2.7 m of 50x50 mm timber and six meters of 50x30 mm slats. Boards 50×10 mm 15 pcs are placed under the mattress. 138 cm long. It is recommended to increase this amount by approximately 5% due to the fact that the boards may have critical damage that must be cut out during cutting. If possible, it is better to purchase lumber passed through a four-sided surface planer with polished surfaces. They will cost a little more, but they will save you from many problems. You won’t have to create dust and noise in the house, or be afraid of defects and inaccuracies. In addition, for high-quality wood preparation you need to have complex and expensive woodworking machines; they cost much more than a wooden bed. Buying such equipment is beneficial only for professional carpenters. |
Fasteners | If previously all the wooden parts of the bed were assembled on tongues or in a tongue/groove connection, now modern technology is used. It greatly simplifies and speeds up the bed assembly process, and the quality is in no way inferior to traditional technologies. To make a bed, corners 70×60 mm – 4 pcs., 35×30 mm – 8 pcs. are required. and 20×15 mm – 15 pcs. The large ones are used to secure the side boards to the headboard and footboard, the medium ones hold the bars for the cross boards under the mattress, and the small ones are needed to secure the legs to the sidewalls. All fasteners are installed in invisible places and do not spoil the appearance of the bed. In large corners, two holes must be drilled along the bend line; self-tapping screws are screwed into them to secure the legs. |
Hardware | The bed parts are fixed with black wood screws 3×30 mm (110 pcs.), yellow 4.5×40 (10 pcs.) and dowels Ø8 mm, 10 mm long. |
paints and varnishes | The bed needs to be varnished at least twice, buy the appropriate amount of materials. If desired, the surfaces can be impregnated with stain before varnishing - it emphasizes the beautiful structure of the wood. The varnish must be furniture varnish for interior work. |
This is not a final set of components for all cases; the same bed model can be assembled in different ways; accordingly, a different list of additional elements will be required. We specifically chose a manufacturing option that does not require a workshop or a long list of special equipment and tools.
Advantages
The main advantages of making a bed on your own include:
saving money;- the opportunity to make a product to your taste, according to your own sketches and from any materials;
- confidence in the environmental friendliness, safety and reliability of the product;
- the opportunity to express your imagination and realize it.
Having made the bed frame yourself, you can be sure that such a product will be in a single copy. Consequently, you will become the happy owner of an exclusive piece of furniture, with which you can not only sleep comfortably, but also read a book or watch TV.
Step-by-step manufacturing instructions
The bed is made from cheap lumber; the surfaces of the boards are prepared independently.
Step 1. According to the specification drawn up earlier, buy lumber. Determine the specific list and quantity yourself, take into account professional advice and your own capabilities. It is more profitable to buy ordinary boards; they are much cheaper than planed ones.
Purchase the required amount of lumber
Step 2: Sand the surfaces of the lumber. We will tell you the easiest way - using a grinder and a rubber disc with Velcro. A grinder is found in every home today, and a rubber disc and grinding discs for it cost pennies. How to prepare boards with these tools?
- Place a rubber disc and sanding paper on the grinder. For initial rough processing, it is necessary to use an abrasive no higher than P 80; finishing processing is recommended to be done with sandpaper P 350–400.
- Check the functionality of the grinder; it should turn on/off easily and there should be no extraneous uncharacteristic sounds. It is imperative to work outdoors and with personal respiratory and vision protection equipment. Remember that cylindrical grinders (grinders) belong to the class of very dangerous mechanisms; strictly follow the safety requirements.
After securing the grinding wheel, you need to check the tool
- Place the board on stands, freeing the work area from foreign objects. Achieve a stable position, this is very important for safety.
- Turn on the grinder, hold the board with one hand, and carefully and gradually sand away any burrs on the surface. If you have an assistant, great. Let him hold the board, and you use the grinder with both hands, it’s much easier and faster.
Sanding must be done very carefully
Practical advice. Be sure to collect some dust in a bag; you will need it to mix the PVA putty.
When making a bed using our method, noticeable gaps may appear at the joints of some joints. They not only worsen the appearance of the product, but also reduce the strength of the connection. In the assembly, the parts do not adjoin each other with a complete surface, but only in separate lines, due to this the ability to withstand lateral loads is significantly reduced, and the assembly gradually becomes looser. The consequences are very unpleasant - the bed constantly creaks during sleep. How to solve the problem is a little lower.
After preparing the surface of the boards, a natural pattern clearly appears on them, and small irregularities will give the bed even more naturalness. In addition, the current trend is not perfectly straight products, but asymmetrical ones, reminiscent of those made using ancient technologies. In those distant times, there were no four-sided milling and belt sanding machines; boards could not be processed to a perfectly smooth and mirror-polished state.
The characteristic pattern is clearly visible on the sanded board
Step 3. Screw the slats on which the mattress rests to the boards of the sides of the bed. To do this, use 20x40 mm bars and secure them with self-tapping screws. Choose the length of the hardware correctly; their ends should not be closer to the edge of the board than 5 mm, otherwise the screwing points may be noticeable. To increase the strength of fixation of the elements, it is recommended to lubricate the surface with PVA glue before screwing it in; it has excellent adhesion to wooden surfaces. Excess glue that appears is carefully removed with a clean cloth.
Longitudinal slats are fixed to the sidewalls
Step 4. Accurately measure the length of the boards and cut off any excess pieces. It is better to do this with a hand-held circular saw, but you can use an electric jigsaw. This tool cannot even theoretically make a perfectly straight cut, but there is no need to worry. To attach individual elements into a single structure, a very reliable method will be chosen, and large gaps will be sealed with self-prepared putty. We have already collected wood dust for it.
Trim off excess with a jigsaw
Use sandpaper to remove any burrs and slightly straighten the end of the board. If you want to saturate the parts with stain, then all the surfaces on which glue or putty will be applied must be left untreated. PVA has poor adhesion to paints; you should first assemble the elements and then finish the remaining surfaces.
The cuts need to be sanded to remove burrs and irregularities.
Step 5. The legs of the bed need to be assembled using dowels. To correctly make holes for them, it is convenient to use furniture metal pins for marking.
Furniture pins for dowels
You must be extremely careful; if the holes are skewed, then big problems arise. The work is carried out in several stages.
The holes must be drilled with maximum precision so that the bed legs do not become loose later.
Important. Don't forget that the depth of the holes under the dowels varies. If it fits into the end of the board, then there are no restrictions on the length. And if holes need to be drilled in the side, then the depth cannot exceed 2/3 of the thickness. This is an assembly axiom, the condition must be fulfilled without fail.
Wood species
You can make a wooden bed from different types of wood:
pine trees
This material is in demand due to its presentable appearance and high technical characteristics. This product will delight you not only with its beautiful texture, but also with its pleasant pine aroma. Products that have been well sanded and varnished are highly resistant to the formation of fungi and do not rot;- oak _ This wood is considered elite. It is distinguished by its luxurious appearance, environmental friendliness, and the ability to create patterns and ornaments on the product;
- beech _ Such beds are distinguished by their original cut patterns, durability and strength. Beech models look noble and fit classic motifs;
- birch trees This type of wood is easy to process, has a high level of strength and elasticity, and is attractive.
Attention : when choosing wood, you should base it on what kind of bed model you need.
To make a wooden product look aesthetically pleasing, but not cost too much, you should know some secrets :
- for decoration and frame it is worth taking expensive material (oak);
- for making legs, cheaper wood (pine) is suitable;
- and for the slats that will be located inside the product, you can choose the simplest option (birch).
Assembling the headboard and footboard
These parts are subject to great forces; the connection must be as strong as possible. Before starting work, lay out all the parts on a flat surface, observe the order of assembly and the specific location of each element.
Step 1. Pour a little PVA glue into the holes, insert dowels, smear their side surfaces and connect the parts. Before doing this, apply glue to the adjacent planes over the entire area. Don’t skimp on PVA, let it fill all the cracks, the excess will be squeezed out and removed.
Prepare the legs with dowels
Step 2. Place a wooden spacer on the legs and use a hammer to completely seat the joints.
Connect the legs to the crossbars of the headboard
Professional furniture makers perform this operation on a carpentry machine and, after assembly, tighten the structure with a vice or large clamps. If you do not have such conditions, you can tighten them with twisted ropes or strong rubber. Attach it to the opposite legs and pull it as tight as possible. The headboard and footboard should be left in this position until the glue has completely dried, which usually takes about 24 hours.
The structure is tightened with an elastic band and left for a day.
Step 3. Carefully check the quality of the joint at the cuts. These works were done with hand tools; the quality of such cuts does not always meet existing requirements. If large gaps are found, they must be covered with putty. You can buy materials in a store or make them yourself, which will be faster and cheaper. To do this, pour some previously prepared wood dust onto a clean and flat surface, pour in PVA glue and mix the mixture thoroughly with a rubber spatula. Glue should be added as needed; the consistency should resemble jam - not spread after application and be flexible enough to fill even small gaps.
Making putty from PVA and wood dust
Step 4. Carefully seal the joints of the headboard and footboard parts with putty. Push the mixture in with sufficient force; you can use a metal or rubber spatula. The better the connections are sealed, the more beautiful and durable they will be. Immediately wipe off any excess putty with a cloth.
Fill the cracks with putty
Step 5: Reinstall the side and center boards. They are also fixed on dowels with PVA glue.
Assembling the bed frame
Practical advice. If you have the slightest doubt about the strength of the connection between the parts of a double bed, then you can use metal perforated corners to strengthen them. They are sold in every hardware store, choose the appropriate sizes. Please keep in mind that the thickness of the metal element must be at least 1.5 mm.
The corners are fixed to the boards with self-tapping screws in special holes. But there is one nuance - there are a large number of holes on the elements; inexperienced craftsmen screw screws into each one. Such actions bring harm instead of benefit. The fact is that close proximity of fasteners often causes cracks to appear in the board, it completely loses its original load-bearing characteristics and requires replacement. You will have to disassemble the bed parts, make new ones and start all over again. As you might guess, it will take a lot of time and money.
It is recommended to reinforce the most loaded parts of the structure with corners
Step 6. Make slats for the mattress from plywood. Sheet thickness is at least 8 mm. If the width of the bed is 160 cm, then the length of each plank should be 80.3 mm. A slight increase in length is required to increase the strength of the structure. In total you need approximately 24 pieces. lamellas - this number minimizes the load on each element and eliminates the likelihood of unpleasant situations.
Lamels cut from plywood 8 mm thick
Important. After cutting, the edges must be sanded, otherwise they can damage the upholstery of an expensive mattress.
On one side of the planks, drill holes for self-tapping screws; this must be done, since screwing in hardware without preliminary preparation will cause the plywood to crack. On the other side, make small recesses; self-tapping screws with large washers will be screwed in here.
Holes and small cutouts are made in the lamellas for fasteners
Step 7. Attach the slats to the base of the bed. Ordinary hardware is screwed in along the edges, and self-tapping screws with press washers are screwed in the center - one head presses two lamellas. We specially fix all the elements, in this way the strength and durability of the bed significantly increases.
Screw each plank to the frame
Now all that remains is to sand the furniture surfaces again and cover them with several layers of varnish.
Finished bed
How to determine the size of a bed?
To understand how to make a double bed yourself, you first need to decide on its size. The standard length of the product is considered to be 200 cm. However, this parameter varies in the range of 190-220 cm. To determine the appropriate size of the bed, you need to add 30 cm to the person’s height.
The minimum width of a double bed is 160 cm. There is no upper limit, but there are standards. They are:
- 160 cm;
- 180 cm;
- 200 cm;
- 220 cm.
To determine a comfortable width, you need to lie down, put your hands on your chest and straighten your elbows. You need to measure the distance from one elbow to the other and add 10-20 cm.
Another important factor is height. If there is a need for additional storage space, you should pay attention to a bed with drawers. However, it is never low due to design features. Height can be:
- small, 20-30 cm;
- medium, 40-60 cm;
- large, 70-90 cm.
You should choose the one that is comfortable to sit on. You also need to take into account the presence of diseases of the musculoskeletal system and the person’s age.
When drawing up a diagram or drawing of a sleeping place, it is necessary to take into account all the individual characteristics of the owner.
Varieties
Wooden frame
Wood is, first of all, a natural material; a product made from it will not only be durable and beautiful, but also environmentally friendly. The wooden frame does not become loose over time, does not creak, and looks beautiful and neat when combined with other furniture. Wood is more pliable, easier to process, has a beautiful texture, and there are many ways to decorate it. The production of such a frame does not require special equipment, as with a metal base, so it is technologically simpler to manufacture it. In addition, the paint on the metal base peels off over time and, despite all the treatments, the iron is susceptible to rust. Almost every owner has experience working with wood; the difference will only be in scale.
Advice! When choosing, it is better to focus on natural wood. Fiberboard and chipboard use glue, which can have a strong, unpleasant odor and furniture made from them is not so environmentally friendly.
In addition, if you choose high-quality wood, it will be more durable than fiberboard and chipboard, not even to mention its higher aesthetic value.
Metal carcass
Despite all the beneficial properties of wood, metal frames have also become widespread, primarily due to greater mobility and lower weight. Metal beds are very durable, elegant and beautiful, but if it is an intricate design, then it is not suitable for every interior. In order for a metal bed to fit beautifully into the interior design, you must have the minimum skills of an interior designer or try to get advice from a designer. But if you solve this problem, the result is worth it! A successful design solution for a metal bed will improve and ennoble the sleeping area! Painting such a frame requires special attention, because if the technology is not followed or you are inattentive, it will begin to rust. The durability of the product also depends on the correct choice of metal and its high-quality finishing. The metal frame is lighter, but does not look as impressive as wood and does not have its beneficial properties.
Important! Metal does not retain heat. Such a bed will almost always be cold, especially in winter.
Tools for work
To make a metal bed with your own hands, you need to prepare the following tools:
- Bulgarian;
- welding machine;
- drill with a set of drills of different diameters;
- roulette;
- square;
- square file;
- metal brush;
- sandpaper;
- paint brushes;
- primer for metal surfaces;
- paintwork.
Having blacksmithing equipment will allow you to create an unusual pattern for the headboard.
To make a bed out of wood, you need to prepare the following tools:
- hacksaw;
- drill;
- drills of different diameters;
- screwdriver;
- self-tapping screws;
- wood glue or PVA;
- clamps;
- square;
- screwdriver;
- tape measure and pencil;
- iron corners;
- stain;
- sandpaper;
- varnish;
- brushes for painting.
If you plan to make a bed from solid wood, you can use special cutters to create a pattern on the headboard of the bed. A wooden frame can be coated with stain, which will reveal the texture of the material and make the frame more beautiful.
Requirements for a master
To make a bed, several conditions must be met, and all of them are equally important; the absence of at least one of them causes an unsatisfactory result. In this case, it is much better not to start work at all. What criteria must a home furniture maker meet?
- Have practical experience in carpentry work. Don’t flatter yourself with the thought that 2-3 articles read will make you a master; theory can never provide the knowledge and skills that can be acquired in practice. You must make independent decisions in difficult situations, feel the tool, not be afraid of woodworking machines, etc.
- Have tools and equipment. Do not think that the quality of handmade work is superior to the quality of mechanical processing. You will never be able to get the same smooth, clean, and smooth surfaces as with a four-sided router, circular saw, or sander. You must have a minimum list of woodworking equipment.
To make wooden furniture you need appropriate equipment
- Have a great desire and free time. Even experienced masters are sometimes disappointed, but you shouldn’t just tune in to a minor key. Prepare for problems, do not retreat when they arise, but analyze the reasons for their occurrence and make every effort to solve them.
- Have material resources. They are not so large, but for a good bed you need to purchase lumber of at least first grade, use only high-quality paints and varnishes.
High-quality lumber is not cheap
If you have positive answers to these questions, then you can start making the bed.
Design
Hanging bed - an unusual design solution in the bedroom interior
Any bed, regardless of shape and configuration, consists of the following components:
- Frame
- Base
- Side and support panels
- Optional design elements (legs, hanging backrests, headboard, storage drawers, lifting mechanism)
A home-made sleeping place usually consists of a frame on which a base is installed - a mattress support. The supporting structure is made from:
- wooden slats (slats)
- metal mesh
- spring mechanism
Furniture for sleeping and relaxation can:
- have legs (most often no more than 20 cm high)
- be floor-standing (the frame is located directly on the floor)
- be suspended (fixed to the ceiling)
Original headboard for bed
The headboard is a decorative element that:
- carved from wood
- sawn from chipboard
- forged from metal
- upholstered with foam rubber and fabric
- can be carved and solid, straight and curved
In addition to the main functionality - a place to rest, the bed also serves as:
- closet
- stand
- sofa
- podium
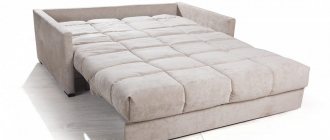
In these cases, the mattress is hidden in the shell of the body during the day, and at night it is unfolded using a “book” mechanism or a gas lift.
Now it's time to start decorating the product.
The easiest way is to level the surface of the wood with fine-grained sandpaper or a sanding machine, treat it with stain and varnish in 2-3 layers (the next layer is applied only after the previous one has dried, this will avoid cracking of the coating).
If pine boards are used to assemble the product, then there is no need to use stain. Due to the high resin content, pine may change its appearance - called tiger stripes will appear on it. It is enough to treat wood of this type with varnish.
If the master plans to upholster the bed with soft fabric, then for the work he will need the appropriate material, a furniture stapler, and staples. It is advisable to place thin foam rubber under the fabric and attach it with curly nails. You can cover not only the external, but also the internal elements of a wooden structure with fabric, this will reduce the likelihood of contamination of the mattress.
Design
Designing a bed frame consists of the following steps:
- Choosing a place where the bed will be located - this piece of furniture should be located in the room in such a way as not to interfere with the movement of people or the opening of entrance doors or cabinet doors. The bed should not be placed close to heating devices, radiators, or windows;
- Determining the dimensions of the future structure. To do this, take into account the dimensions of the mattress, convenience for people of non-standard height, and the availability of free space for installation. At this stage, the dimensions of the future structure are determined, the number and location of amplifiers and other supporting elements are provided;
- Frame drawings are made using simple computer programs or manually - linear dimensions are drawn up in the form of a visual drawing.
One of the simple graphic editors is the Graphite utility - an intuitively simple and understandable program that allows you to create easy-to-read, high-quality drawings. The last stage of design is especially important - drawing up a drawing. The result of the assembly depends on a correctly made and well-readable drawing. All sizes and locations of frame parts must be clearly visible, adjacent inscriptions and numbers must not merge.
DIY technology for making a wooden bed with a lifting mechanism
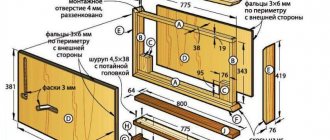
To create a bed with a lifting mechanism with your own hands, you should prepare a detailed drawing of the furniture assembly, and you can also find a similar diagram on specialized websites on the Internet. This will avoid many design errors that will subsequently negatively affect the functionality of the structure.
You can choose a gas or mechanical device as a lifting mechanism. The operation of the first option is based on the use of gas shock absorber springs. The mechanism is either equipped with a lock or does not have a lock. The main advantages are soft finishing, silent operation and ease of operation.
The mechanical element operates using metal springs. It is characterized by the ability to adjust the operation of the lifting system by removing, adding, tightening or loosening springs.
Beds with a lifting mechanism are practical, functional and easy to use
Using a do-it-yourself drawing of a wooden bed, drawer frames, sides, headboards and bottoms of drawers are made from chipboard or MDF. The base frame is made from wooden blocks. The bottom for the drawers is attached to it. Tsars and side elements are installed on the frame, on top of which the slatted flooring under the mattress is laid. A chipboard headboard is fixed to the base.
According to the instructions, the lifting mechanism is installed. The lower steel strip is attached to the timber frame of the base, and the upper one is attached to the side part. After the bed structure is assembled, it is covered. To do this, sheet foam rubber is laid on the base in several layers. On top it is covered with upholstery material made of fabric, dermantine or leather. The sheathing is attached to the frame using a furniture stapler. The sides of the bed are processed in the same way.
Important! In places where the finishing touches the lifting mechanism, small spacers are inserted under the main material.
The final stage is the installation of finishing accessories in the form of rollers, wheels or support legs.
