Finishing putty
Problem: the material is difficult to work with, the putty does not stretch well with a spatula, so creating an even coating requires considerable skill even from professionals, and the final coating turns out to be slightly grayish and grainy. When sanding it generates a lot of dust, the graininess does not disappear.
Solution: choose better quality finishing putties. They are easier to apply, even non-professionals can work with them, and the product consumption is less, since it is easier to “stretch” it along the wall. The coating turns out to be much more even, there are almost no visible defects, and when sanding, this putty produces almost no dust.
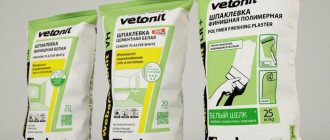
To show by example how to properly prepare a wall for painting or wallpapering, we selected products popular among professionals: moisture-resistant cement plaster weber.vetonit TT , finishing white putty weber.vetonit LR+ and ready-made super-finish putty weber.vetonit LR pasta . WEBER-VETONIT products were not chosen by chance; this brand enjoys well-deserved popularity among craftsmen and end consumers due to the quality of materials and ease of use.
Analogs
Sometimes the average buyer is interested in what can replace the company’s finishing putty so as not to lose in the quality characteristics of the material. Specialists in the field of construction and finishing offer several options for plaster material.
Among them, products from the following brands were especially highly rated:
- Sheetrock;
- Dano;
- Padecot;
- Unis;
- Knauf.
These materials have characteristics similar in quality and application. However, experts note that in an attempt to save money, you can lose quality, because the difference between the analogue and Vetonit will be small. If you choose a gypsum-based analogue, such plaster will not be moisture resistant. Some experts are confident that if you have the skills, you can work with any finishing plaster. Reviews from builders are contradictory, because each master has his own priorities.
Preparing the base
In our case, the surface that needs to be treated has a number of problems: from a large number of local defects on the surface to a significant deviation of the wall from the vertical plane.
Before starting work, it is imperative to prepare the surface: we remove substances such as dust, grease and dirt that impair adhesion; the base must be clean and dry. We protect all surfaces that cannot be treated (windows, doors, frames) with tape, polyethylene or newspapers.
Step-by-step instruction
Leveling a wall surface with Vetonite is much easier than it might seem at first glance.
- First comes the preparation of the wall. That is, it is necessary to get rid of the old wallpaper and the top layer of outdated plaster. You also need to use a spatula to get rid of any cracks with chips.
- Using reinforcing mesh, it is necessary to strengthen the wall surface.
- Next, you should measure the wall for curvature, eventually installing special notches and beacons on its surface.
- After this, you need to install the profiles at the beginning and end of the wall surface, not forgetting to monitor its position using a level. Then you need to stretch the thread between the two profiles. Based on it, the remaining profiles will be installed.
- The next step is to thin the plaster according to the instructions on its packaging. It must stand for a certain amount of time.
- Using a construction spatula, we apply the Vetonite composition to the wall surface with slaps from one beacon to another, and the movement goes from bottom to top.
- Leveling the work area using the rule. It may be necessary to use no layer of vetonite if the wall surface is very curved. Moreover, each previous layer must first be dried and sanded using an abrasive building material. This must be done walking from one lighthouse to another.
- Complete grinding of the working area is the final stage of work. After this, you can paint the wall or glue wallpaper on it.
By following all the necessary recommendations, even a beginner can cope with this work.
Perform basic surface leveling
Prepare the solution according to the instructions: the weber.vetonit TT from a 25 kg bag into a bucket with 5-6 liters of clean water, mix for 3-5 minutes using a drill with an attachment, let the solution sit for 10 minutes and mix again.
After this, we apply the plaster mixture to the surface manually using a steel spatula or mechanically. Each layer of weber.vetonit TT dries within 1-2 days, and the next layer of plaster can be applied only after the previous one has completely dried. In dry conditions, it is recommended to moisten the leveled surface with water from a spray bottle.
After completing the leveling process, treat the dried surface with sanding paper and remove dust.
Note that if we are talking about smooth walls or ceilings made of plasterboard slabs, then the stage of treating the walls with plaster can be skipped and you can immediately begin treating the surface with white finishing putty.
LKMFLOT
Finishing facade putty Weber Vetonit Fasade
Finishing façade putty Weber Vetonit Fasade wholesale!
We are a wholesale supplier of paints, varnishes, sealants, enamels, primers, impregnations and other paint and varnish products.
LKMFLOT is an official dealer of the world's leading brands; we cooperate with manufacturers Alpina, Beckers, Caparol, Dufa, Dulux, Hilti, Tikkurila and others.
We carry out wholesale deliveries of paint and varnish products from a warehouse in Moscow.
We offer special conditions for foremen, architects, painters and other regular customers who buy paintwork materials in batches.
- Huge assortment, more than 300 famous brands
- Delivery to your facility in Moscow and the Moscow region using the company’s own vehicles
- Professional advice from experienced experts
- Tinting using European equipment
- Finishing facade putty Weber Vetonit Fasade
- Lime-cement plaster Weber Vetonit 414
- Cement-based putty Weber Vetonit Reр 970
- Plaster Weber Vetonit TTT
- Plaster Weber Vetonit TT
- Cement plaster Weber Vetonit Cement
- Cement-based putty Weber Vetonit Reр 975
- Finishing putty Weber Vetonit VH
- Plaster Weber Vetonit TT40
—>
| (20 kg) white Winter | wholesale | specify |
| (20 kg) gray | wholesale | specify |
| (20 kg) gray Winter | wholesale | specify |
Code: 100976158
Category:
Putties and Plasters
Brand:
Weber-vetonit
Packing:
20
Packing:
1
Finishing facade putty Weber Vetonit Fasade (Weber Vetonit Facade)
DESCRIPTION: Cement facade putty. For final leveling of surfaces with a thickness of 1 to 5 mm. Color gray or white.
PROPERTIES: - layer thickness up to 5 mm - for interior and exterior use - high adhesion - water and frost resistant
PURPOSE: — final leveling of the surface before painting — cosmetic repairs of concrete and plastered surfaces — application to plastered surfaces
PREPARATION OF THE BASE: The base must be dry, sound and not subject to shrinkage or deformation. The base must be cleaned of dust, dirt, old paint, mortar and degreased. At ambient temperatures above 25°C, it is recommended to moisten the base before applying putty. The temperature of the base and the environment must not be lower than + 5°C. Porous substrates must be pre-treated with weber.prim multi or weber.prim A10 primer (previously diluted 1:4 with clean water).
PREPARATION OF THE MIXTURE: Pour 5.8-6.8 liters of water into a container and add 20 kg of putty (bag). The mixture must be mixed in clean water at a temperature of approximately 20°C. The amount of water depends on environmental conditions and surface porosity. The mixture must be mixed mechanically using a drill mixer at medium speed (400 - 600 rpm) to achieve a homogeneous mixture without lumps. Leave the mixture for 5 minutes to “ripen”, then stir again. After this, apply the putty to the wall using a spatula or trowel, the permissible thickness of one layer is up to 4 mm; greater thickness can be obtained by applying the putty in several layers with intermediate drying of each layer for at least 8 hours. After the putty begins to dry (after 2-3 hours), carefully sand it using an abrasive material. At 20°C and normal humidity, the prepared putty remains viable for at least 2 hours. As the temperature decreases, this time increases, and as the temperature rises, it shortens.
NOTE: While drying, the putty must be protected from high temperatures, direct sunlight and wind. When applying putty for the first time or when environmental conditions change, it is advisable to check and establish the optimal proportion of water and mixture in a small area, but then stick to it very precisely. If there are expansion joints on the base, then when applying the mixture it is also necessary to make expansion joints, repeating their geometry and filling them with polyurethane sealant.
APPLICATION: To apply the putty, you need a narrow spatula measuring 80 - 100 mm and a wider one - about 250 mm wide. To putty walls with large deviations from the main plane, metal rulers are used. The putty is applied to a ruler 2-2.5 m long, evenly “stretched” along it with a small spatula and applied to the wall. This method is effective where there is a need to apply a layer of putty several centimeters thick. Relatively smooth walls can be puttied with a regular spatula without any problems. If you apply a layer from left to right, the upper part of the spatula should be to the right relative to the bottom, if from right to left - to the left. When putting putty from bottom to top or top to bottom, the nature of the movements is similar. The inevitably resulting sagging is smoothed out with a spatula during the subsequent application of putty. The optimal angle of inclination of the spatula to the wall surface is 45-60°C. Changing it leads to a change in the thickness of the applied layer. The corners formed by the walls and ceiling are puttied with a specially designed corner spatula. After applying the putty, it should be allowed to dry, then sanded with abrasive paper or mesh if necessary.
We carry out the final coating
a solution of white finishing putty weber.vetonit LR+ according to the instructions: pour the dry mixture from a 25 kg bag into a bucket with 8-9 liters of clean water (not vice versa), mix with a drill for 3-5 minutes, let stand for 10 minutes, and mix again.
As a result, we obtain a superplastic mixture, which is very convenient to apply to the surface in a thin layer 1-5 mm thick, either using a steel spatula or mechanically. Depending on the temperature and humidity in the room, one layer of weber.vetonit LR+ putty dries completely in 1-2 days. Then minor defects can be removed very easily with sandpaper.
After the layer has completely dried, treat the surface with sanding paper and remove dust. If leveling is performed in several layers, each subsequent layer can be applied only after the previous one has dried.
Advantages of weber.vetonit LR+ putty
- Simple: the putty is so flexible and easy to use that leveling the walls will not be difficult even for beginners; just follow the instructions and recommendations of the manufacturer.
- Fast: the superplasticity of the mixture allows you to quickly level the surface and ideally bring the layers together.
- Smooth: a minimum number of layers makes it possible to obtain a smooth and even surface, ready for wallpapering.
In principle, many craftsmen recommend walls treated with a topcoat for traditional painting, but we will use another innovative product to create an impeccable, ideal, smooth coating for high-quality painting.
Work technique
For the work you will need an angled spatula, a wide and narrow spatula, a mesh jointer and an abrasive mesh, a plastic work bucket, and a rag.
The working order is like this.
The surface of the wall or ceiling is carefully cleaned. Remove the slightest particles of previous plaster, paint or wallpaper rolls, dirt or grease. Power tools for sanding walls after puttying?
If possible, wash and allow the room to dry thoroughly.
Using a large rule and a flashlight placed next to the wall, mark all the bumps and depressions. The bumps are immediately carefully knocked down, and the pits are outlined with a pencil.
The wall is being leveled. The tools are thoroughly washed and wiped dry with a clean, lint-free rag. The mixer for construction work must also be clean, without adhering remains of the previous mixture. Knead the paste-like mixture.
Important : you cannot add water or dry putty to the finished paste.
Apply a similar amount of paste to a long spatula, which can be used in one stroke.
Cracks, depressions and pits are covered with a long or medium-sized spatula using sweeping movements with equal pressure. Grouting is done until the putty is flush with the wall , without sagging.
It is important to choose a good spatula. Drying is performed with the interior doors open. Acrylic varnish for walls: how to apply video? In this case, balcony doors, entrance doors, to the bathroom or kitchen must be closed.
Additional equipment cannot be used.
It is enough to apply putty under the rolls of wallpaper for starting work to seal all the irregularities. The wall is leveled “to zero” so that there are not even the slightest depressions or humps.
For painting, after grouting the starter, use it as a finishing putty. It is applied in a thin layer and, after drying, rubbed down with an abrasive material with a number of 150 or more. Under mirror painting, they are additionally passed with a trowel with suede.
Slopes and corners are smoothed using an angle spatula.
The consumption of Vetonit final putty is approximately 20-25 kg per area of 45-50 square meters.
Here are the opinions of real clients
Vetonit putty is popular. It is easy to apply, lays down softly, and should not dry out in the bucket. The only thing is that the workers urge to be careful with the further primer mixture and the use of wallpaper glue. Putty is afraid of moisture.
Below are real customer opinions:
Excellent quality putty, we are doing renovations in the bedroom and decided on this option - the seller in the store recommended Weber Vetonit. I liked that it was much easier to work with; my husband diluted it in a bucket of water (keeping the proportions right!) and mixed it by hand. I was pleasantly surprised that the prepared solution stood in the bucket and did not dry out for several days (it was carefully wrapped in polymer ethylene), and throughout this time it remained flexible, which is extremely convenient for home repairs; there is no need to prepare it every day.
We provide super-finish coating for painting
If we are talking about the best repair, then the wall to be painted should be mirror-smooth without the slightest grain. To obtain such a surface, we will use an innovative high-quality product - super-finish ready-made putty weber.vetonit LR pasta Weber.vetonit LR Pasta is available in a plastic bucket, ready for application, so working with it is doubly convenient. The principle of operation is the same as with finishing putty, the difference is in the thickness of the layers - as a rule, they do not exceed 1.5 mm per application. After drying, the surface is treated with sanding paper and removed from dust.
White like marble
And now, attention, the first secret. Where does weber.vetonit LR+ putty come from so white? It turns out that it is made from finely ground marble - this is what gives it such a stunning color. Moreover, not just any marble is suitable for it. The necessary material for the Elerka was found only in a quarry in the town of Polevskaya, Sverdlovsk Region, where the Weber-Vetonit plant was built. Before this, the company studied all the marble quarries in Russia and the only one that met all the criteria was on the Polevaya River. What does marble whiteness give? Firstly, there is no need to repaint the putty color before painting and you can save on finishing materials. And, secondly, you can create very impressive decorative finishes using LR+ itself. Well, of course, “marble putty” will perfectly stick to any wallpaper and apply any paints.
Methods for applying putty
To achieve the desired result in the finishing process, you need to follow the established procedure.
To properly mix the solution, you need to do the following:
- The components of the putty solution are prepared at an approximate calculation of 1.2 kg/m2 with a layer thickness of 1 mm. A bag weighing 25 kg uses about 8 liters of water.
- The contents of the bag are placed in water, the solution is stirred for about 10 minutes using an electric drill with an attachment; manually the consistency will be worse. The mixture settles for an average of 20 minutes and then beats again. The average shelf life of the mixed solution is about a day.
- For application, narrow (30 cm) and wide (70 cm) spatulas are used.
- The putty mixture is applied in one or two layers. With a two-layer treatment, the second layer is applied only to the completely dry first one.
- For priming, it is best to use an acrylic solution.
Puttying walls
The procedure includes the following steps:
- Preparation. Before applying the putty, the working surface is cleaned of small debris and old finishes. If there are minor defects on the surface, they must be eliminated with starting putty or plaster and then sanded to approximately the same level. Next, the surface is degreased.
- Padding. In order for the solution to adhere more firmly to the wall, it must be treated with a primer.
Properties
Vetonit finishing putty has a white color with a gray tint and a weak characteristic aroma.
To prepare pasta from 25 kg of dry mixture you will need 9 liters of water. Moreover, the mixture is poured into water, but not vice versa. Using a mixer for construction work, the mixture is stirred for 3 minutes and allowed to brew for 10 minutes. Then they go through it again with a mixer and apply it to the wall surface.
The largest putty layer on a plane is no more than 5 mm. But this is already the limit, since such a layer dries for a very, very long time than that of gypsum-based putties. Also, the price of this particular mixture is slightly higher than others.
Subtleties of application
Surface. Before using any Vetonit finishing putty, the working surface must first be leveled. Any imperfections must be filled or sanded down; the finishing solution is not designed to remove them. All excess dirt, dust, old finishes, mold must be cleaned off. After this, you need to degrease and prime.
For each brand of putty, you need to carefully study the instructions, despite the external similarity, the thickness of the applied layer, hardening time, water temperature, setting time and other properties differ. Please note that diluted putty in a closed container is stored twice as long.
Vetonit putty is intended for manual application , although it can be applied by spray. After the applied layer has hardened (24 hours), pay attention to the places where the joints and seams were previously located. Irregularities often form in these areas. After completing the putty work, it is better to immediately rinse the tools with water; after the solution has hardened, this will be much more difficult to do.
When working, it is better to use protective equipment: goggles, a mask or a respirator. Although Vetonit putty mixtures produced in Russia are made from natural raw materials and do not have a toxic effect, the dust generated during the work process can mechanically harm health, for example, by getting into the eyes or lungs. For the “KR” and “LR” brands, it is better to use water at a temperature of approximately +10 C. If it is necessary to obtain a particularly durable surface, use a special mesh.
To get a perfectly flat surface, for example, when the finishing putty layer should become the front part of the wall, use beacons. This will allow the mixture to be drawn out more evenly and will reduce the amount of work required for further leveling.
This putty mixture has only positive reviews and is suitable even for difficult substrates. If you decide to carry out renovations or other construction, then feel free to choose this one.
In the following video, a professional shares secrets and tips for applying and choosing putty.
Vetonit is one of the types of construction powder mixtures used for finishing and construction work. Excellent quality has made this brand popular. The main purpose is to work at the final stages of leveling surfaces.
Vetonit putty can make walls perfectly smooth and hide cracks and cracks.
Example of packaging "Vetonit 25 kg"
How to Putty Walls (EASY and FAST)
Puttying walls or how to putty (putty) walls without experience. Support the author (for the development of the channel).
The type of mixture depends on the components - gypsum, cement, polymer. They are capable of covering walls and ceilings of various types - plasterboard, concrete, wood, etc.
Most solutions are universal, used for interior and exterior decoration.
Features of the Vetonit brand:
- Natural, environmentally friendly composition;
- Distributes easily, without visible differences;
- The powdery structure makes surfaces smooth and even;
- Sands without problems, leaving no dust;
- Provides additional sound insulation;
- Applied manually or mechanically;
- Economically used;
- Sold in reliable three-layer packaging of 5 and 25 kg.
On the building materials market, Vetonit putty is offered by the manufacturer in a large assortment:
- “B” (consists of cement) – for rooms with a high percentage of humidity;
- “VX” (base – cement) – waterproof type, used for processing ceilings and facades;
- “T”, “KR” - used in dry rooms;
- “LR Fine”, “LR+” - for work in conditions of normal humidity;
- “VH” (base – limestone, white cement) – for finishing puttying (concrete, brick, plastered walls and ceilings).
Types of putties and their descriptions
Vetonit putty is available in several types. Each product has its own unique composition and purpose. Thus, the following groups of materials can be distinguished:
- VH, V, TT - with these marks, mixtures that are made on the basis of cement are released for sale. Materials of this group are excellent for any type of premises; they can be used in the bathroom, kitchen and toilet (where there is high humidity).
- LR and KR - these markings indicate that the putty mixtures are intended for final leveling of walls and ceilings, resulting in a coating suitable for subsequent painting or wallpapering. Materials of this group cannot be used in rooms with high levels of humidity.
Vetonit VH
This type of product is best suited for use in conditions of high humidity. Vetonit vh putty, in addition to its main task of preparing the surface for subsequent painting, performs a protective function - it prevents the appearance of condensation on ceilings and load-bearing structures in rooms with high air humidity.
The product is presented in two versions: white and gray. The white model of Vetonit vh putty is simply irreplaceable if the surface is planned to be painted. The second option is used as a primary layer before laying tiles.
The main feature of this putty mixture is the ability to be used on surfaces made of a wide variety of materials. As the instructions say, the finishing putty can be used on plastered, concrete, stone (brick) walls and bases made of expanded clay, foam aerated concrete, and gas silicate blocks.
Vetonit LR and LR+
Vetonit finishing putty is in high demand on the building materials market; it has a unique composition, low cost and is easy to use. The Weber Vetonit lr putty model is designed for finishing dry rooms, therefore, compared to other brand products, it has a more viscous and dense structure. After applying the Vetonit finishing putty, they begin wallpapering the walls or painting work using specialized highly pigmented paints.
It is worth noting that this product is not suitable for leveling non-standard, volumetric planes, as well as large-sized objects. This is how most finishing compositions work, whose main task is to reduce the sharpness of the transitions between layers of plaster and paint and minimize surface unevenness. White base putty is best suited for plaster and chipboard surfaces.
The putty is available in different configurations, most often it can be found in a powder version in 25 kg bags. You can also see a ready-made putty mixture that does not need to be diluted with water.
There is also a product Vetonit LR+. This is a polymer putty from this collection. Due to its unique composition, it is ideal for finishing ceilings and walls in dry rooms. This is the starting and most popular model. Its distinctive characteristics are low consumption, quick drying, ease of use and a very affordable price. The diluted composition can be applied over smooth or rough surfaces (plasterboard and mineral materials).
On the Internet you can find many positive reviews about the use of this product, with most buyers appreciating the low consumption of material and its versatility. Plastering walls and ceilings with Vetonit allows you to prepare the surface for subsequent paint application.
Important! Vetonit lr plus putty is usually applied by spraying onto walls and ceilings made of plasterboard or particleboard. This starting mixture can also be used as an adhesive layer for installing gypsum boards.
KR and TT products
Marking KR means that the putty is finishing. Before using it, the VH starting solution is first used. Vetonit TT putty is a universal composition that can be used both as a starting and finishing coating. In addition, this material is also suitable for finishing facades.
Compound
Depending on the type of plaster, its composition differs . Thus, Vetonit EP contains cement and lime. The main component of the most common Vetonit TT mixture is cement. The basis of “Vetonit T” is adhesive organic binders. “Vetonit L” is a plaster with a polymer binder. Therefore, it is necessary to first study the composition of the mixture.
Colors
This product is intended primarily for subsequent painting, so neutral colors are provided: white, gray and light gray.
Layer thickness
Vetonite can be applied in a layer of 2 – 10 mm, the maximum thickness is 3 cm . Please note that it may differ depending on the type of mixture. More details can be found in the following tables.
Adhesion (stickiness)
The plaster has a high level of stickiness. On average, the adhesion strength is 0.5 MPa.
Frost resistance, moisture resistance
The dry powder is quite frost-resistant. It is capable of withstanding 75-100 cycles of complete freezing and defrosting . Therefore, this product is recommended in regions with cold climates.
Strength
The strength of different types of plasters differs slightly. Thus, a gypsum-based mixture is less durable than a cement-based mixture. On average, one month after plastering, the surface can withstand a load of 6-8 MPa.
Having examined the technical characteristics, we can come to the conclusion that Vetonit is indeed an ideal material for interior and facade plastering work.
More details about the most common types of mixtures can be found in the tables:
| Vetonit plasters. Specifications | |||
| Brand name | «Vetonit EP» | «Vetonit TT» | «Plaster» |
| Layer thickness (mm) | 2–50 (100) | 2–7 (30) | 5-50 |
| Fraction (mm) | 1 | 1 | |
| Operating temperature (degrees C) | 10 | 5 | 5 |
| Water consumption (l/kg) | 0,46–0,5 | 0,24 | 0,4 |
| Viability (h) | 6 | 4 | |
| Drying time (days) | 1–2 | 1 | 1–7 |
| Consumption (kg/sq.m/mm) | 0,5 | 1,2 | 1 |
| Cost (RUB/kg) | – | 10,53 | 9,41 |
| Basic plasters "Vetonit". Specifications | |||
| Brand name | «Vetonit V» | «Vetonit T» | «Vetonit L» |
| Astringent | Cement | Organic glue | Polymer glue |
| Layer thickness – full level. (mm) | 1–3 | 1–2 | 1–2 |
| Layer thickness – partial leveling. (mm) | 1–5 | 1–5 | 1–5 |
| Fraction (mm) | 0,6 | 0,6 | 0,6 |
| Operating temperature (degrees C) | 5 | 10 | 10 |
| Water consumption (l/25 kg) | 7–8 | 7 | 7 |
| Viability (h) | 4 | 12 | 24 |
| Drying time (days) | 1 | 1 | 1 |
After studying the technical specifications, you can begin plastering work.
Finishing putty Vetonit LR+ (25 kg)
The products are presented on the building materials market in packaging weighing 25 kg. It consists of rare white limestone and high-quality polymer materials.
The putty is intended for leveling surfaces in dry rooms. It turns yellow with prolonged exposure to moisture, and is applied to clean and treated surfaces of various types.
This is what the manufacturer's packaging looks like
To create the ideal effect, you will need a solid, clean (from dirt, grease) and dry workspace.
By mixing dry Vetonit LR+ with water, a thick, homogeneous white mixture is obtained. The finished composition is used within a day.
The putty is applied in a layer of 1-5 mm. For a large area, 1 mm is recommended, and for a smaller area, 3 mm.
Apply the putty with smooth movements from bottom to top. The room temperature should be maintained from +10 to +30, and ventilation of the room should be ensured.
Vetonit LR (25 kg)
Vetonit LR (25) is based on polymeric substances. It is used to cover plastered and concrete surfaces.
The task performed by finishing putty is the treatment of walls/ceilings of various types. It is distributed mechanically or manually. For independent work, choose a wide spatula and use it to adjust the thickness of the layer.
Vetonit LR easily levels surfaces, preparing them for further processing, and is applied in one layer.
Vetonit VH
The properties of this finishing putty are not affected by the humidity factor. Applying decorative plaster to a painted wall? Area of use: concrete, brick and facades.
This composition does not adhere to surfaces treated with water-soluble and lime-based products.
Vetonit VX
The wall/ceiling is pre-cleaned of dirt. Preparation of the solution: pour water into a clean container and add putty, beat it with a powerful electric drill for five minutes and let it sit for three hours.
Apply the composition with a standard size spatula using smooth movements. The remaining solution can be reused. If application is carried out in several layers, you should wait for each layer to dry.
It takes 2-3 days.
Facade putty is applied in two layers, each of which is no thicker than 3 mm. After drying, imperfections are rubbed off with abrasive materials.
What is this?
Finishing putty produced by weber - Vetonit is a non-moisture resistant material with a white color.
The basis for the production of the mixture is limestone and polymer binders. The white vetonit mixture is intended for manual application in dry rooms.
Advantages
First, let's get acquainted with the strengths that best characterize the Vetonit finishing putty. This is not clear proof that Vetonite is superior to all its competitors. There are many materials that can impose and even surpass Weber in some places. Simply studying the advantages will allow you to understand by what parameters this product may be preferable to analogues.
- Ease of use. The material fits perfectly on any surface, dries very quickly, and has excellent adhesion.
- Environmental friendliness and safety. Vetonit putty contains only high-quality environmentally friendly components that are safe for human health. Among them are limestone, polymer and organic adhesives, as well as mineral additives.
- Interaction with various surfaces. High-quality white putty produced by Vetonit is excellent for treating surfaces such as concrete, brick, plasterboard, expanded clay concrete, chipboard, etc. The only exception is surfaces that have been pre-treated with compounds with leveling and water-soluble properties. You cannot level or seal seams between plasterboard slabs with vetonit solutions.
Execution steps
To achieve the desired effect, the surfaces are treated with an acrylic primer.
Prepare the solution, taking into account the consumption - for a layer of 1 mm it is 1.2 kg/m². The contents of the bag (25 kg) are mixed with water (8 l), using a drill with an attachment, taking into account that the powder is poured into the water, and not vice versa. To obtain a homogeneous thick mass, beat for 10 minutes, then leave for 20 minutes and repeat stirring . You can use the prepared mixture at a temperature of +10 0 for 24 hours.
Execution example
For work, take two spatulas - one 70 cm wide and the second 30 cm wide. The putty is applied in one or two layers, provided that each one is completely dry.
If the room has normal humidity and temperature, there is ventilation, the layer dries in 2-3 days, after which they move on to decorative surface finishing - painting, wallpapering.
Puttying ceiling and wall structures
Vetonit putty has proven itself to be an excellent leveling agent. If the ceiling is rough, it should be cleaned and made perfectly smooth.
Puttying drywall seams
Sequence of actions when repairing the ceiling:
- First, apply a primer suitable for the given surface. Do this carefully, using a roller. Afterwards, all places where the composition came into contact are thoroughly cleaned.
- Fill the bucket with water and pour out the putty, mix with a drill. Using a narrow spatula, transfer the solution onto a wide one, then distribute it over the ceiling area. How to properly apply putty on a wall before painting video? The first layer is the starting putty, and the second is the finishing layer. The overall result of the repair depends on the quality of application.
- Ceiling sanding.
Stages of wall processing:
- The walls are cleaned of old finishes.
- Cover with primer and wait for it to dry. Cracks and irregularities are plastered. Afterwards, the surface is treated with sandpaper and re-rolled with a primer.
- The number of layers of putty depends on the type of decorative finish. The composition is distributed carefully, with smooth movements from left to right.
- When the putty has dried, it is sanded with sandpaper, then the dust is removed. The wall is primed again before the next layer of finishing putty. How to apply putty on a wall before painting video? After applying it, repeat the sanding and priming steps.
- Start wallpapering or painting.
Features of using putty
Vetonit finishing putty is applied using special equipment or a simple spatula of a convenient size. The procedure for working with this type of mixture is described below.
- The first step is to remove the old coating, if any, or simply clean the wall to remove grease stains, paint, and wallpaper residues. The surface is also washed and dried.
- Irregularities must be marked. You can use a pencil for this. This way, it will be easier to notice areas that need special attention while working.
- Then the wall is plastered with simple putty. All chips, cracks, gouges and other imperfections are smoothed out. The wall is drying.
- Vetonit finishing putty is applied in a very thin layer. Due to the high quality of the product, this is not difficult to do if you have practice.
- After the finishing layer has dried, they go over it with an abrasive, then everything is polished.
- To ensure that the corners are even, they are additionally treated with a spatula.
The average consumption of this putty is 5 kg of mixture per 5 square meters of area, but this figure may differ for different types.
Breeding recommendations
The number of types and brands of putties is huge. At different stages of leveling, different types are used - starting, finishing.
The rules for preparing the solution are indicated on the packaging; adhere to the manufacturer’s recommendations. Having calculated the consumption, take a bucket, pour the required amount of water into it, add the contents of the bag and knead for several minutes with a construction mixer. Now you can get to work, remembering that the mixture thickens during the day and its elasticity cannot be prolonged; you will have to mix a new one.
Structure
Tips for making a solution
In order to achieve optimal consistency and structure, dry putty must be diluted with water, adhering to the proportions noted in the instructions. The result should be a mass of homogeneous composition of medium viscosity.
Before mixing the components, remember that water must be added to the solution in small portions. Its temperature should be approximately 20 degrees.
Experts give some advice on this matter:
- Ten to fifteen minutes after preparing the mixture, it needs to be mixed with a construction mixer.
- Several hours (no more than 24) should pass before the composition is used after mixing. If you neglect this rule, the mixture will harden and lose its performance properties.
- The dry mixture should be stored in a dark, dry and cool place.
