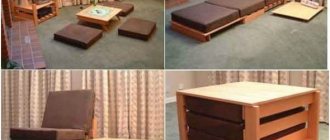
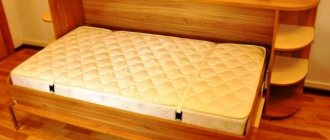
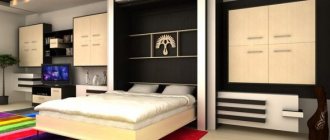
Decorating the interiors of residential premises is a complex and extremely responsible task. The furnishings should provide maximum comfort for household members and be functional. Particular attention is usually paid to the equipment of the sleeping area. The dimensions of the premises do not always allow the installation of comfortable and roomy beds. In this case, transforming structures come to the aid of the owners. One of the varieties of such structures is a bed built into a closet.
Folding bed built into the closet
Wardrobe, bed, transforming sofa 3 in 1
What is this product? A wardrobe and a sofa during the day, and a bed at night. Of course, such a complex structure will consist of: a cabinet, a lifting device, fasteners, and a frame structure.
If a home craftsman has at least a little experience working with carpentry tools and the materials that are used to make it, he can make it himself with his own hands.
- four board sides are the frame;
- the pins in the frame must be secured with glue;
- for reinforcement, it is necessary to attach a rail along the entire perimeter of the resulting rectangle;
- the base of the bed is plywood or boards;
- the closet also requires a frame, which is made identically to the previous version for the bed;
- classic legs - bars;
- choose the lifting device according to your wishes (the spring mechanism also works well on these beds).
To make transformable furniture with your own hands, you need a drawing with accurate measurements of the product being designed.
Transformer with lifting mechanism
A feature of the built-in transformer furniture is the presence of special mechanisms, with the help of which the closet, with a slight movement, turns into a spacious bed for comfortable rest and sleep.
When assembled, such furniture looks like an ordinary wardrobe. And when disassembled, it turns into a soft and warm bed. Before you start making this furniture, you should decide on its type of construction.
According to the type of location, the wardrobe-bed can be:
- vertical . This option is the most common. You can make a folding product from different materials, any sizes and designs. The furniture will fit harmoniously into the living room, bedroom, children's room;
- horizontal . This type of design is most often chosen for children and teenagers. As a rule, horizontal models are not particularly large in size.
The wardrobe bed can be made in any stylistic direction. This furniture fits harmoniously into classic and modern interiors. Its sizes range from a small single bed to a large bunk model.
To assemble transformer furniture you will need to prepare the main components :
- lifting mechanism;
- Heavy-duty magnetic clasp to prevent the bed from falling out;
- bed frame;
- closet.
The lifting mechanism is:
springy _ Consists of durable compressed steel springs installed in the bed frame. This system ensures smooth and easy unfolding and folding of furniture;- piston _ It is considered more durable, strong and reliable.
Important . When choosing a spring mechanism, it is necessary to take into account the weight of the product.
A step-by-step description of the process of making a do-it-yourself wardrobe-bed
Stages of making a wardrobe bed:
- Selecting a future design and drawing up a rough sketch.
- Calculation of the volume of necessary materials and their acquisition.
- Creation of the final drawing.
- Cutting the material, organizing places for attaching individual parts to each other.
- Assembling the wardrobe-bed and checking its functionality.
- Cosmetic work on decorating the resulting piece of furniture.
It is important to follow the sequence of steps. This will allow you to always have the necessary materials and fasteners on hand.
First of all, you need to make the frame of the wardrobe-bed.
The most important stage is cutting. Even experienced craftsmen prefer to carry it out in specialized factories. After all, no matter how simple and reliable a hand-held household tool may seem, not a single jigsaw is capable of providing consistently high quality cutting; once during the work, your hand trembles - and the entire sheet of material can be disposed of.
Before assembly, decide on the tools, drawings and components to assemble the product.
You need to have even greater dexterity when working on organizing the landing sites for fasteners. If they are performed poorly, you may completely lose the ability to assemble the entire structure.
Before assembling the transformer bed cabinet with your own hands, the drawings must be prepared in advance.
Built-in bed type
For installation in small apartments, as well as in modern interiors that require maximum openness of space, two types of structures are used:
- vertical;
- horizontal.
In the first case, the owners have the opportunity to organize a full-fledged sleeping place for two adults. Although, if desired, you can also build a single vertical structure into the closet.
Double bed
A horizontally positioned bed allows you to equip an additional storage system in the closet or place, for example, a TV panel above a low cabinet. Such systems are most often used in children's rooms or offices, as well as for organizing an extra bed in case of unexpected guests.
Horizontal bed
How to decide on the size
In order to build the best option for transforming a bed with the function of a wardrobe (or vice versa), it is important to determine the dimensions of the structure at the very initial stage. After all, it depends on them how comfortable the proportions of both furniture options will be.
Advantages of a prefabricated bed:
- the cost of a new bed is reduced several times, at least 2-3. The store-bought prefabricated version will still be more expensive;
- the design of the structure is universal, absolutely satisfies the needs of the owners;
- You can independently choose the highest quality materials and have no doubt about their reliability.
Step-by-step instruction
To make a bed, all the parts of the cabinet will be useful. The process of creating a bed is as follows:
- Disassemble old furniture into individual elements. Pull out the shelves, remove the doors and the back wall. The remaining frame should not be disassembled, since it will be the basis for the bed. The internal vertical partition will also come in handy, so there is no need to remove it.
- Take measurements of the space from one wall to the partition. This will be the length of one edge. The height can be selected depending on the height of the cabinet walls. It is better if this parameter is less than that of the base, then the mattress will not slide and move around the bed. The height of the internal partition should coincide with the ribs. If necessary, this element can be removed from the base, reduced and secured again.
- Calculate the number of edges after calculating their sizes. It is advisable to install them in the base every 20–30 cm. This will make the bed durable and will not allow the mattress to sink.
- Strengthen the base before working on the ribs. To do this, knock down the corners of the cabinet with nails and fix the central partition.
- Make ribs from shelves and doors. They should be cut according to the measurements that were taken earlier.
- Install the ribs, securing them vertically between the walls and the central partition. It is most convenient to use special metal corners as fastenings.
- Lay the bed bottom after securing the ribs. Its role can be played by the back wall of the cabinet or a sheet of suitable material.
- Make holes in the bottom of the future bed necessary for ventilation.
- If desired, paint the base or seal it with a special film. This will allow you to remove all the shortcomings of the old cabinet and those defects that appeared during the process of remaking the wooden base.
- Place the mattress on the frame. It is important that it is the size of the new bed. To avoid troubles with the wrong position of the soft part, it is worth purchasing it before remodeling the furniture. Slightly reducing or expanding a wooden cabinet is easier than reupholstering a spring mattress.
There is no need to spend a lot of money on buying a new bed if you can make it yourself from an ordinary unnecessary wardrobe in just a few hours.
Source
Necessary materials, tools, cutting and bed design
Materials:
- sheet of plywood or MDF 12 mm thick (1 pc.);
- boards 2.5×30×240 cm (3 pcs.);
- board 2.5×20×240 cm (1 pc.);
- board 2.5×10×240 cm (1 pc.);
- board 2.5×7.5×240 cm (1 pc.);
- boards 2.5×5×240 cm (3 pcs.);
- decorative strips 6 mm thick;
- 50 mm self-tapping screws;
- 50 mm nails;
- 30 mm nails;
- 15 mm parquet nails;
- glue;
- wood putty;
- sandpaper;
- hinges (strong door hinges or special hinges for folding beds);
- heavy-duty magnetic latch that can hold the bed in the raised position and prevent it from tipping over;
- hinges with a closer for slowly lowering the bed to a horizontal position.
Tools:
- roulette;
- square;
- pencil;
- hammer (can be replaced with a gun for hammering parquet nails with a hammer);
- protective glasses;
- Kreg Jig – a device for drilling holes for flush-mounted miter joints;
- drill;
- a circular saw;
- gun for hammering parquet nails;
- eccentric sander.
A few general notes:
Work on a clean, level surface
Take proper precautions and use personal protective equipment. Using a square, check after each step that the corners of the structure do not deviate from 90 degrees.
Use quality, non-warped lumber. Before screwing in the screws, drill pilot holes and countersink them. When starting to make your own folding bed, study the drawings presented here.
Cutting list
For "Box"
- 2.5×30×199.4 cm (2 pcs.) – side walls
- 2.5×30×107.3 cm (1 pc.) – bottom
- 2.5×10×107.3 cm (2 pcs.) – rear cross members
- 2.5×5×111.1 cm (1 pc.) – front cross member
- 2.5×5×195.6 cm (2 pcs.) – finishing of the front side of the drawer, vertical sides
- 2.5×5×31.1 cm (2 pcs.) – finishing of the side walls of the drawer, top part
- 2.5×5×114.9 (1 pc.) – finishing of the front side of the drawer, top part
- 2.5×7.5×120.0 cm (1 pc.) – back part of the “ceiling”
- 2.5×30×120.0 cm (1 pc.) – front part of the “ceiling”
For "Bed"
- plywood 6 mm thick ×102.9×191.1 cm (1 pc.) – bottom
- 2.5×20×102.9 cm (1 pc.) – back wall
- 2.5×20×139.7 cm (1 pc.) – side walls (cut the board diagonally, as shown in the plan, to get two parts)
- Finishing the front side using 6 mm thick slats according to your wishes
Types of folding bed designs
Today, consumers are offered several options for beds that differ in design. Most often, the bottom surface of the product is the front of the cabinet when folded. There are also models of cabinets that are equipped with folding, sliding or hinged doors.
The bed is built into a wardrobe with hinged doors
In this case, there are no design requirements for the design of the lower part of the bed.
Models are also produced whose height of the unfolded bed allows them to be installed above sofas, which are used for their intended purpose during the day.
Folding bed over the sofa
This design of beds fully helps to combine the use of the room as a bedroom and living room.
Wardrobe beds can be made from solid wood or materials containing wood (MDF and laminated chipboard). The first option has the highest performance characteristics, but at the same time it costs quite a lot. Laminated chipboard is inexpensive, but over time there is a high probability of loosening of the fastening points.
What is the difference between MDF and laminated chipboard?
Important! Manufacturers do not recommend using 1.6 cm thick chipboard panels to make folding beds.
Preparation of materials and cutting
Before starting the bed manufacturing process, you must have a drawing, following which you can make a wardrobe bed with or without additional shelves. A detailed diagram of the arrangement of parts will help you create a high-quality bed as quickly as possible that will function correctly.
Such schemes most often involve the production of beds with dimensions of 1800*2000, 2120*1715, 2040*2200, 1731*2020. This is how double beds are made. Single beds are most often intended for children's rooms, therefore they are smaller in size. Since they are installed independently, it is possible to create a drawing of the size of the bed depending on the availability of free space, the age of the child and the possible use of this bed by younger children after older children grow up. To create a transformable bed, the drawings must be as accurate and clear as possible.
To make a wardrobe bed with your own hands, you will need the following tools:
- Drill;
- Screwdriver;
- Jigsaw;
- Saw;
- File;
- Pliers;
- Roulette;
- Level;
- Screwdriver;
- Carpenter's pencil;
- Sandpaper with different abrasiveness numbers;
- Furniture screws;
- Self-tapping screws.
This is a minimum set of tools; others may be required during the work process.
Tools
You also need to have the following materials:
- Furniture boards or chipboards;
- Wooden beams;
- Wooden boards;
- Loops for fastening;
- Corners;
- Hinge mechanism;
- Decoration materials;
- Materials for making legs.
This is also a minimum set of materials. Cutting is carried out according to the drawing. This is done like this:
- Using a tape measure and a pencil, all the details of the future cabinet are made in the form of patterns according to the data from the drawing;
- For patterns, you can use joined sheets of whatman paper or wallpaper;
- Each element must be signed;
- Mark the connection points and fastening points of the transformation mechanism.
Materials
Ways to save space when placing beds
When living conditions are cramped due to the size of the living space, a variety of designs come to the rescue, making it possible to unload the space as much as possible.
Built-in bed
If there is a shortage of free space, two-tier systems can be a great help for a family with children. In some cases, it is appropriate to install beds that slide into podiums.
Podium bed
Folding structures are very functional.
The most common models of transforming beds:
- sofa beds;
- tables-beds;
- beds built into wardrobes.
Furniture manufacturers offer many interesting and functional solutions. In one-room apartments, it is often simply impossible to do without installing a sleeping place that can be stored in a closet.
Bed built into wardrobe
Making a lift bed
A bed that can be folded saves a huge amount of space in the apartment.
Taking into account the measured data, a bed assembly diagram is drawn up.
How to make this design:
project preparation (drawing the drawings yourself or selecting the desired diagrams on the Internet, purchasing materials and tools); be sure to pay attention that there is a sufficient number of plates (lamellas); the bed frame is placed on reliable wooden beams; side markings are made; installation of the monolithic bed structure begins; a front panel is attached on top of the structure (this is the bottom - it can be covered with a laminated chipboard sheet); the bed frame is fixed to the wall; a lifting mechanism connects the body and the bed itself; We make boxes for clothes according to the drawing.
The set of accessories depends on the selected product model. You need to think through everything in advance, make a list of the necessary elements for assembling the furniture.
Installation and decoration of the product
When all the components have been cut, the cutting areas have been sanded, and the mounting locations for the fasteners have been marked, it is time for assembly. You can assemble a wardrobe bed in just a few hours if all the previous steps are completed efficiently.
Installing the cabinet will not take you much time if you have made all the drawings and cut out the parts correctly.
First of all, we assemble and attach the cabinet frame to the wall and floor. Then we move on to assembling the bed. We fasten the elements of the bed frame together, then fasten the bottom. And only after making sure that these parts are securely fastened can you proceed to installing additional shelves or other selected elements.
After assembling the bed-wardrobe, you can begin decorating it.
The last step is installation and fastening to both parts of the transformation mechanism
It is important that when folding, the fasteners do not cling to the furniture frame. We check the lifting mechanism several times for correct operation and proceed to installing the façade elements
Choose a quality bed mattress that will serve you for a long time.
Once this stage has been completed, we again unfold our bed and install the mattress in its frame. You should remember the need to keep the mattress in place in a horizontal position - when the bed is folded. Most often, ordinary furniture belts are used for this, secured together with plastic locks.
The mattress must match the size of the bed.
Next we make the supports and headboard
The supports must be movable - this is an important condition for the successful transformation of the structure.
Metal parts are more convenient in this regard, as they are connected to each other by a bar. The final stage is to check the mobility of all four supports. They should be hidden in the assembled cabinet, but rotate 180 degrees and, when disassembled, create a stable base for the bed. The connecting bar should hold the mattress to the base.
The headboard can be made quite easily - attach the part to the frame or directly to the wall, because in the assembled position it will not be visible anyway. To make textile care easier, make the covering removable. This way you can wash it at any time. It is worth noting that not only the headboard should be soft, but also the side walls. When installing foam rubber or other softening materials, make sure that they do not interfere with the transformation of the structure.
Step-by-step description of the DIY manufacturing process
Once the cut is ready and all the parts are edged, you can begin the drilling and assembly process. From the front side, the holes are drilled with a 7 mm drill from a 5 mm end. To ensure that the holes match, first mark them with a pencil. The ends must be drilled exactly in the middle, and the drill must go perpendicularly.
It is quite possible to perform each action yourself, even if you lack the relevant experience.
Assembling the frame and box
Separately assemble the cabinet frame and mattress box
For proper operation of the mechanism, it is important that the cabinet has a diagonal. Checking for its presence is quite simple, first measure the distance from one upper corner to the opposite lower one, then repeat the procedure on the other side
The difference in diagonals should not be more than 3 mm; if you get more, press one by one on the corners of the frame to give it the shape of a regular rectangle.
For ease of use, you need to choose the right size mattress: 150 mm smaller in width and 400 mm in length than the base.
Installation of the transformation mechanism
The transformation mechanism is attached with bolts and nuts to the sides of the bed and the walls of the closet. Each mechanism is accompanied by instructions with the exact location of the fastening; this diagram must be followed with the greatest possible accuracy. When assembling it yourself, it is better to use the simplest mechanisms based on hinges.
When attaching transformation mechanisms, it is necessary that the box and frame are on the same level. After the fastening stage is completed, it is necessary to check the operation of the mechanism. It should open smoothly.
In order for the box built into the frame to be lowered and raised without problems, it is necessary to install a lifting mechanism.
Installation of legs and headboard
Legs for bed wardrobes can be purchased ready-made at a furniture fittings store; they are connected using a strip, the rotation of which makes them disappear inside the box. In addition, specially designed decorative handles located on the false panels can also be used as legs.
The headboard for the bed can be ordered from a studio, or you can sew it yourself using foam rubber for these purposes.
It is important that the cape on it is removable, which will allow you to remove it and easily wash it.
Metal products are the most convenient, especially if they are connected to each other by one strip.
Final finishing and decoration
After you have made sure that everything works, the last step is finishing the bottom of the bed to imitate the cabinet. There are many options here; first of all, it all depends on your tastes and imagination.
First of all, of course, you should take into account that the cabinet should be harmoniously combined with the interior. The decorative facade does not have to be solid. Someone breaks it into several parts, attaching a handle to each, thereby creating the appearance of a cabinet with several doors.
You can also use double-sided furniture tape to attach a mirror insert or glass with photo printing. In addition, a large facade does not have to be cut into several parts. You can create the appearance of several doors using decorative tape.
A wardrobe built into a furniture wall will be difficult to mistake for a bed if its bottom is designed in exact accordance with the front side of the other elements of the set.
Step-by-step diagram for assembling a transformer for a small apartment
Preparation
Having decided to make transformable furniture on your own, you need to think through everything carefully. You should start with:
- creating a detailed drawing;
- sizing;
- selection of materials;
- preparation of instruments;
- selection of colors and design.
Dimensions
The size of the bed is selected according to the free space of the room. If the room is spacious and bright, you can make fairly large furniture with a spacious double bed. For married couples, beds with sizes from 1600x2000 to 1800x2000 are suitable.
But for children, teenagers and single people, you can choose products with sizes from 1200x1900 to 1500x1900.
Advice . For small, cramped rooms, it is better to choose models with a horizontal bed position.
Drawing with dimensions
Creating a sketch is an important point in making furniture. You can do it yourself using a pencil, ruler and sheet, or you can order it from a special company, where they will make accurate calculations based on the model of the wardrobe-bed.
Advice . If you are good with a personal computer, you can download a special program for cutting furniture. She will create a competent and accurate drawing of all furniture elements.
If you use the services of professionals or a computer program, with the help of a well-drawn drawing it will be easier to assemble furniture on your own, since there will be no inaccuracies in the drawings. And if you do the calculations yourself, without having any skills in this area, you may encounter certain difficulties. For example, the dimensions of the parts and the like may not match.
Tools and materials
The preparatory stage of assembly includes the preparation of tools and materials. Most often, transformable furniture is made of natural wood or laminated chipboard. As for the array , it has the following qualities:
- naturalness;
- durability;
- resistance to mechanical damage.
LDSP is:
durable and reliable;- affordable;
- rich in interesting textures, textures and color schemes.
The tools you will need to prepare or purchase are:
- screwdriver;
- drill;
- electric jigsaw;
- roulette;
- furniture screws;
- self-tapping screws;
- grinding machine;
- hex keys;
- Screwdriver Set;
- folding mechanism and other accessories.
How to make it yourself at home?
After creating a drawing, purchasing consumables, and preparing tools, you can begin making furniture.
Some prefer to make parts with their own hands using an existing drawing and the necessary power tools. Others use the services of companies where they cut all the parts. The second option is more convenient.
After cutting and trimming the parts, all that is required of you is to drill holes in the right places and assemble the furniture in the correct order.
Assembling the wardrobe-bed is divided into certain stages :
- First, the cabinet body is assembled, in the middle of which the sleeping place will be hidden. Such a housing should consist of: a back wall, a plinth and a shelf for support. All parts must be fastened to each other with self-tapping screws at a distance of 25 cm from each other. The assembled cabinet body is installed in a previously prepared place.
- The next step is to install the assembled case in place and fix it to the wall.
- Now you can begin assembling the bed base. It consists of a frame with boards, and its height must clearly correspond to the size of the mattress.
- Now, after assembling all the other parts of the product, we firmly fix the base with the box using self-tapping screws.
- We attach the folding mechanism according to the instructions supplied by the manufacturer.
- The final stage of assembly is connecting the body with the remaining elements and installing the facade.
Important. Furniture must be installed on a perfectly flat surface. The base of the bed must strictly fit the dimensions of the assembled cabinet frame.
Installation of the facade is the final stage of decorating the wardrobe-bed. It is best to choose blank facades made of laminated chipboard.
To complete the assembly, the transformable wardrobe-bed can be equipped with shelves for books, racks and other elements.
That's the whole simple process of making a wardrobe bed with your own hands. Now you need to install a pre-purchased mattress and securely secure it with seat belts.
Important . Under no circumstances should mirrors be used on false doors. Since they are not designed for such loads and may crack over time.
