A kitchen set consists of many elements - wall and floor cabinets, cabinets, shelves, pencil cases and more. However, all the details of the furniture ensemble are standardized, and in fact, assembling a kitchen set is not so difficult. Many owners prefer to install furniture themselves.
Preparatory work
Before you learn how to assemble a kitchen set, you first need to choose it correctly. The preparatory stage for self-installation begins long before the details of the kitchen facades end up in the apartment.
- Measurements - it is extremely important to correctly determine the dimensions of the kitchen space, household appliances, and, in fact, the future set . The thickness of the side walls of the cabinets, the necessary gaps between furniture and equipment, etc. are also taken into account. If the latter are inaccurate, the furniture simply will not fit into the prepared area, and it is difficult to adjust its parameters after production.
- All repair, finishing and electrical work must be completed . After installing the headset, only certain activities are allowed: installing the skin, for example, installing a sink, attaching sockets.
- Your furniture set must be inspected to exclude defects or the absence of some elements. In addition, the set must include all the necessary fasteners for assembly, which is also worth checking.
- The room needs to be prepared - remove any existing furniture to make room for installation. Clean the floors thoroughly, since this is where most of the assembly takes place.
- Study the instructions - the instructions for assembling a kitchen set are the main assistant . Even if the apartment owner already has installation experience, you need to familiarize yourself with the document: different manufacturers may use different technologies for fastening certain parts.
Don't assemble the kitchen yourself, it's better to pay for the services of assemblers!
We do not recommend this out of greed - the price tag for assembly starts at 1,500 thousand rubles, you won’t earn much money on it. We recommend that you use the services of our assemblers because in this case we ourselves will be responsible for the quality of the services provided.
Neither you nor the hired worker you found through an advertisement - if you order an assembly service from the company where you bought the kitchen set, then it will be obliged to provide you with the expected and pre-agreed result. Do you want a perfect kitchen without a single defect? It is better to pay for the assembly immediately upon purchase.
In addition, many furniture manufacturers immediately warn in the contract that if you decide to assemble it yourself, and this results in defects, you will automatically lose the right to warranty service.
Assembly and installation of the kitchen by the manufacturer himself will guarantee that your kitchen set will look impeccable.
Required Tools
It is impossible to start assembling cabinets without the appropriate tools. It is taken into account that the equipment will be needed not only to fasten the parts of the kitchen furniture, but also to fix them on the walls.
- Screwdriver - even the most low-power model will be useful. In this case, only the speed of screwing in the screws is important, since there will be a lot of them.
- A hammer drill is needed if the wall cabinets need to be mounted on a concrete or brick wall. If the wall is wooden, then a screwdriver with a drill is enough.
- Sawing tools – jigsaw, wood saw. This is required if you need to cut a hole for a sink, for example, or saw off a piece of a countertop.
- Hammer, pliers, knife, screwdriver - necessary for fastening.
- Hexagonal furniture key - usually included with the furniture.
- Measuring tools - tape measure, level, corner.
Quality and guarantees
The managers of the Stolplit factory claim that they pay a lot of attention to product quality. They were even awarded a diploma in the “Quality” category several times at international exhibitions. They probably send the highest quality products to the exhibition. But marriage still occurs. Therefore, pay attention to the execution of all purchase documents. Receipts, invoices and, most importantly, packaging. Without it, your claims will not be accepted. Where to store it in a small apartment? The warranty period for cabinet furniture is 24 months from the date of purchase. At least that’s what they say on the Stolplit website. Therefore, it is not recommended to part with the packaging for two years.
The presence of all documents and packaging does not guarantee the replacement of a low-quality product. Many users complain that store employees are in no hurry to repair or replace damaged parts, citing the fact that the furniture was not used properly.
We can conclude that the “Regina” (“Stolplit”) kitchen may turn out to be of quite high quality, it will be quickly and correctly assembled, and it will serve faithfully for many years. But if it happens that the set turns out to be incomplete (and this often happens), then fixing the problem is very problematic. The process can drag on for a long time, taking a lot of your time and nerves.
Recommendations for assembly
When assembling the product, you should follow the following recommendations to reduce installation time and minimize the number of errors.
- Do-it-yourself kitchen installation starts from the corner . If the kitchen is L-shaped, then the corner cabinet is assembled first; if it is linear, then the cabinet that is placed next to the wall.
- You should not assemble all the cabinets at once and then install them . Firstly, the space is cluttered. Secondly, if it is necessary to adjust the next module, it will have to be completely disassembled and reassembled.
- The order of assembly of wall and floor cabinets is selected depending on convenience . On the one hand, assembled floor cabinets make it difficult to secure wall cabinets. On the other hand, they allow you to accurately determine the level of the upper tier. If the wall is tiled, then in any case the wall-mounted modules are attached first.
- It is not recommended to immediately hang the doors on floor and wall cabinets. It is much easier to install furniture without them.
- between the worktops and the wall - this is a prerequisite.
How to buy?
You can buy a decent inexpensive kitchen in regular chain stores. If you wish, you can order a kitchen design online. To do this, you need to choose a set and measure the dimensions of the room.
Then a design project is drawn up. You can do it yourself using the example provided. Or fill out a form in which you indicate all your wishes, checking the required boxes. Send your wishes to the employees and wait for the result. Some details will be discussed with you over the phone. This service is free.
You can also calculate the cost of the headset. This will allow you to evaluate your capabilities and, if necessary, make changes to the project. Customers liked the service.
Cabinet assembly
Installation of the headset is carried out exactly according to the instructions. If any part is out of place, this will reduce the strength of the fastening, and, therefore, the life of the furniture. In addition, if re-attachment is necessary, the material is damaged. For chipboard, for example, this can end disastrously.
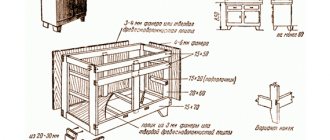
- First of all, cross-shaped fastenings for the facade are fixed on the side walls of the cabinet - both floor-mounted and wall-mounted. The holes for them are drilled in advance, and self-tapping screws are used as fasteners.
- Rails for drawers are immediately attached to the sides of the floor elements, since this is inconvenient to do later.
- Dowels or wooden choppers are inserted into blind holes. It is preferable to insert them with glue for reliability. Choppers provide stronger fastening of the main fasteners.
- When connecting any two parts, you should make sure that they are in the correct relative position, and only then secure them. The fastener is a hexagonal furniture screw that is used to tighten the elements. It is closed on top with a plastic cap that matches the color of the material.
- The fittings are attached to the side walls of wall cabinets - under the shelves.
- On floor cabinets, screw the legs into place. Instead, the kit may include thrust bearings - they are nailed from below.
- After the module is completely assembled, the back wall made of fiberboard is secured last. How to assemble a kitchen set with your own hands is demonstrated in the video.
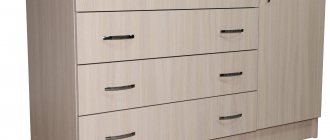
As a rule, floor cabinets are equipped with drawers.
They are assembled separately after installing the floor modules.
- The 3 walls of the box are connected and fastened with screws.
- The facade is installed - an eccentric tie is used for this. Its mechanism is somewhat unusual and involves fixation on both sides. First, a screw is screwed into the façade, then its end with the head is inserted into the side wall. The latter has a hole for the bushing socket. This part is screwed into the side hole until it grips the screw head.
- Roller guides are installed at the corners of the drawers: on the guide of the drawer itself, the roller should be at the back, and on the inside, at the front.
- The handle is fixed on the facade, the fasteners are selected depending on its type.
Kitchen set assembly diagram
The set is a complex close to a single whole. It is not enough to mount the cabinets; it is necessary to adjust their position relative to each other and ensure the stability of this position. To do this, tie the headset. The actual installation of furniture is carried out according to the following procedure.
- The corner module is attached first - both upper and lower . For pipes, since a sink is usually installed in the corner element, a hole is cut in the back wall of the product. In some cases, the module is mounted without a back wall at all.
- For the sink itself, the hole is also made in advance . Even at the assembly stage, the tabletop is marked, a large diameter hole is drilled, and then a hole of the desired size and shape is cut out with a jigsaw. The tabletop is fixed with special fasteners, which are included in the kit.
- The countertop is cut in the same way for the built-in stove
- The remaining floor cabinets are installed one by one , focusing on the location of the corner module as a standard. Then all the elements are pulled together using 30 mm self-tapping screws or a furniture tie. The last option is more reliable. Floor cabinets require 4 ties.
- Mark the level of placement of the upper part of the set, and in the same way, starting from the corner or wall, hang wall cabinets . Holes for fastenings are drilled in the wall with a hammer drill, and the plank is secured. Adjustable hangers are hung on the bar, and wall cabinets are fixed to them. Suspensions allow you to adjust the position of the modules. The kitchen cabinet should hang evenly, close to the wall.
- Mandatory tie – 2 fasteners per module are enough.
When installing each element, horizontality and verticality are checked using a square and slope. Otherwise, it is impossible to achieve the correct placement of the kitchen unit.
- Install the sink. Installation depends on the type of sink.
- Mark the tabletop according to the dimensions of the installed floor cabinets: the gap between the wall and the tabletop should be up to 0.5 cm - later it is covered with a plinth. The tabletop allowance in front is 3 cm. The element is secured with self-tapping screws. If all measurements were taken correctly, there is no need to cut the side of the tabletop. If, unfortunately, this becomes necessary, you need to pay attention to the integrity of the plastic or metal edge.
- The joints between the countertops are treated with silicone sealant and then covered with a metal strip. The ends near the stove are also sealed with a metal strip, since the plastic strip quickly collapses.
- The facades are hung last. To do this, hinges are installed on the doors and secured with self-tapping screws. Then the sashes are hung on cross-shaped plates and screwed. Using 2 bolts on the door hinge, the position of the door is adjusted: it should open and close easily and hang level.
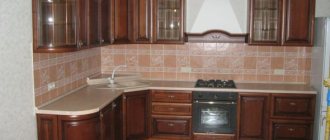
Kitchen "Stolplit" "Regina" (cherry)
There is a series of kitchens “Regina” in cherry color. One of them, "Barcelona", has an antique look with beautiful brass handles. It is possible to integrate household appliances, three types of pencil cases and corner modules into the furniture. The cabinets have different heights. For a rich look, use hanging display cases with stained glass.
Decorations can include various pilasters, balustrades, and handles with ceramics. An illuminated cornice will complement the overall look.
The mini-kitchen “Regina” is presented in the series, which, despite its small size, is quite functional.
Corner kitchens "Regina" (cherry patina) have different configurations (k2-k4). The latest economy class kit is created from the most necessary items. The body of the set is made of laminated chipboard, the facade is made of MDF.
How much does the Regina kitchen (Stolplit) cost? The price depends on the configuration. So, one shelf cabinet with one door costs 2-3 thousand rubles, with two – about 4 thousand rubles. The cost of a horizontal shelf is about 2.5 thousand rubles, a pencil case is 7-9 thousand rubles, an end shelf is a little more than 1 thousand. Thus, you can assemble furniture for the available amount.

