If you inherited an old chest from your great-grandmother, then you are truly lucky! This chest can take its rightful place in any room of your home and become its decoration. But don’t despair if you don’t own such a rare piece of furniture. You can easily make a chest out of a box with your own hands, without the help of professional craftsmen.
This material will be useful not only for those who want to make a new one, but also for those who do not know how to update an old chest. To do this, you can use various decorative and decoration techniques, as well as combine them. Find interesting ideas and master classes on decorating chests further in the material presented.
General repair and decoration steps
Everyone has a different approach to repairing and decorating antique chests. Some process only the front part, preserving the original ornament, while others completely change the style and design of the product. There are several general rules that will help you carry out work on decorating antique furniture:
- The vast majority of antique furniture is made of wood. Over a long period of use, the material begins to dry out. To extend the service life of the product, it is necessary to disassemble its components and place them in a bath of warm water. The moisture will saturate the wood, making it much stronger.
- Old paint must be removed with care. In the last century, chests were treated with special solutions that were absorbed into the top layer of wood. To work, you will need a plane, with which you can completely remove the top layer.
- Many chests are decorated with decorative elements made of iron. It is not recommended to remove them. During the removal process, you can damage the coils themselves or the wooden surface of the furniture.
IMPORTANT! Please note that each type of wood requires a certain amount of time to soak in moisture.
How to save an old painting
Many chests in the old days were decorated with patterns and ornaments for a brighter and more attractive appearance. If the painting is intact, the bright pattern can be renewed and left on the surface of the chest.
Materials:
- solvent for removing old coating;
- brushes for applying the composition;
- putty knife;
- protective impregnation;
- paints;
- brushes for applying a new pattern;
- varnish
Using a brush, apply the solvent to the surface of the chest. After application, the product must be left for some time for complete impregnation. In most cases, it takes several hours, depending on the composition. When the old varnish begins to bulge, remove it with a spatula. After removal, the surface should be thoroughly wiped with an unnecessary rag or a clean soft brush. Then we apply protective impregnation and draw in the peeling details of the painting. After drying, cover the chest with a new layer of protective varnish.
REFERENCE! The choice of cleaning agent depends on the number of layers of varnish. For one, a regular solvent will do. For several layers, you should use special powder products.
Children's
A well-restored version can be placed in a nursery. Then you should paint it in a bright color, and the baby will store toys in it. This disciplines the child and teaches him order, and the chest does not become deformed. Since it is stronger than the boxes, it will last much longer.
Homemade chest for toys in the nursery
Antique decoupage: master class
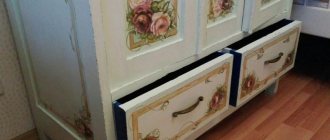
This decoration method is one of the most popular. Decorating in vintage style takes quite a long time, so you should be patient to work.
Work process:
- Using sandpaper, the surface of the chest is thoroughly cleaned until a smooth surface is formed. Cover with acrylic primer and leave until completely dry.
- We apply paint to the walls. The color scheme depends on personal preference. Corners and joints can be sealed with masking tape so that they are a different shade.
- After drying, a layer of craquelure varnish is applied to the paint. When it dries, it produces the necessary cracks, gaps and visual damage.
- Using stencils, we apply the selected designs to the walls of the chest. Here you can use acrylic paints.
After thorough drying, the chest is ready for use.
What material can be used?
There are several options for raw materials that can be used to make a wooden chest. They are described in more detail in the table below.
Table. Materials from which to make a chest.
| Name, photo | Short description |
| Plywood | It can be purchased at almost every hardware store. The material is inexpensive, and the thickness can be any. It is easy to work with plywood sheets; they themselves retain their shape well. However, a chest made of plywood alone will look boring and cheap. |
| Furniture panels | Made from solid wood of various types, they look attractive and expensive. They are highly durable and can be used to make a high-quality and durable chest. But to work with furniture panels, you need some knowledge of carpentry; They also weigh a lot and are not sold in all stores. |
| Furniture board | Compared to the previous option, this is a cheaper material. Working with a board is easier; even a beginner can handle it quite well - he can easily cut the material into parts of the required size. But finding furniture boards is still more difficult than finding plywood. |
| Plywood + furniture board | If you combine these materials in one chest, you can get a reliable and durable structure that looks noble and attractive. |
The simplest wooden souvenir chests
Having familiarized yourself with the important nuances of the issue, you can proceed directly to making the chest. Let's look at a few popular options.
English decoupage
Furniture decorated in the English decoupage style is distinguished by its special chic, elegance and attractiveness.
The process is similar to the method described above. The surface is carefully treated with sandpaper and then coated with a primer. The primer will help correct all the chips and cracks that exist on the surface. After drying, it is re-treated with sandpaper and primer. After thorough drying, you can apply the design to the surface. Acrylic paints are used for this. The top layer can be coated with a thin layer of varnish for reliable fixation.
REFERENCE! English style involves a large number of delicate tones and pastel colors. Roses predominate in the decoration.
What you need to make beautiful cardboard boxes
When creating any product with your own hands, the first step is to prepare a workplace and the required tools.
Since we are talking about using cardboard as a base, you will need all the equipment to work with it. The material itself is quite diverse; it can have different densities, hardness, structure and coating. Naturally, the denser it is, the more difficult it will be to work with, but the structure itself will ultimately be more durable.
Advice! It is not necessary to purchase cardboard; for crafts you can use boxes, notebook covers, paper folders and other products that are no longer suitable for their intended use.
At the stage of preparing all structural elements, the following tools will be required:
- simple pencil;
- ruler;
- scissors or stationery knife;
- folding board to smooth and bend the cardboard (optional).
To collect and decorate you should prepare:
- PVA glue (any stationery);
- brush for applying it;
- toothpicks or wooden skewers to strengthen the edges of the structure;
- decorative materials (paints, fabric, sparkles, bows, artificial flowers, ribbons, braid).
Drawings of cardboard boxes
Before starting work, you should decide on the type of future product. It can be a simple square or rectangular box, in the form of a chest, or a circle, polygonal in shape. In any case, you must initially select the appropriate drawing.
How to stylishly decorate a chest: photo
Modern interior designers actively use antique pieces of furniture, decorating them in a fashionable way. The most popular trends in interior style are minimalism and loft.
To decorate in a minimalist style, you need to sand and prime the surface of the chest. After complete drying, cover the corners, joints and handles with paint (for example, brown). When the paint has dried, the surface is sealed with masking tape. The chest itself is covered with a thick layer of paint of a different shade. After drying, remove the tapes from the closed surface. The minimalist style chest is ready. The product can be used as a coffee table or a table for storing souvenirs in the living room.
ATTENTION! Select shades in accordance with the color scheme of the room in which the piece of furniture will be placed.
Hallway
A large storage chest can be turned into an excellent shoe storage and placed in the hallway. In addition, you can sit on it when putting on your shoes or taking off your shoes, and if you place a mirror above it, you will get a kind of dressing table.
The chest can be used in the hallway as a cabinet under the mirror
Decoration using volumetric technique
Design using volumetric technique is one of the most creative and unusual methods. After painting and complete drying, you need to select stencils and shade for application. To work, you will need a special paste and a palette knife - a spatula for applying primer. Place the stencil on the wall surface. Using a palette knife, apply the paste in thick strokes. The larger the layer, the more voluminous the drawing will be. After application, remove the stencil. Drying time depends on the material used for painting. The chest, decorated using three-dimensional techniques, is ready.
Many owners needlessly throw away antique pieces of furniture. By following simple tips, you can transform an old chest with additional decor. This piece of furniture will decorate any home.
Subscribe to our Social networks
Decorative finishing
DIY wooden chest
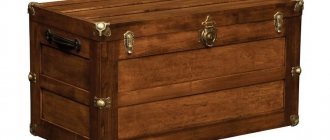
First of all, you should decorate the corners on the chest lid. To do this, you need to cut out several circles from the leather. After this, you need to try on the resulting products on the corners. If they look too big, you should remove the extra pieces. Here everyone decides for themselves what they like best. The leather overlay should be secured using furniture nails, the cover of which will be made in gold or silver color. The joints on all overlays must be coated with glue.
During restoration, all ribs should be decorated. To do this, it is necessary to cut strips from the same leather that will correspond in length to the size of the chest. Their width can be different, as you like. Using the same furniture nails, the leather strips are attached to the ribs. This must be done carefully and ensure that the distance between the nails is the same. Then the product will look beautiful and harmonious.
In this case, it would be relevant to use all kinds of metal linings from furniture handles. During restoration, they can be placed in both the lower and upper corners of the chest. They are attached to self-tapping screws using a screwdriver or a simple screwdriver. Handles should be made and secured. For them, you initially need to drill holes on the sides of the chest and only then screw them in using special screws sold with them. It’s good if they fit the overall style of the product. On the lid of the chest you can place a belt, which will be connected by the base. It must be attached using a construction stapler. In this case, when opening the lid will not fall back.
The chest is considered the ancestor of a number of modern furniture elements: wardrobes, wardrobes, chests of drawers, bedside tables and even caskets. Previously, in the absence of any other storage system, all the most valuable things were stored in it. Expensive fabrics, the best dresses given to a girl for her wedding, and jewelry were placed in the chests. During a major move, they were used instead of practical suitcases, which appeared much later. Nowadays, many mistakenly attribute a chest exclusively to vintage elements, which are suitable only for authentic interiors that imitate the decoration of premises of a certain era. In fact, if properly designed, this detail can become an adornment of many stylistic trends. You can decorate your “grandmother’s” chest and give it a chance for a new life with your own hands using scrap materials and a bit of imagination. In this article we’ll talk about what you can combine this colorful element with and how to update it yourself.

