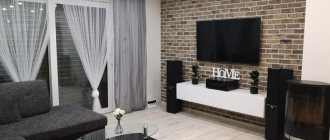
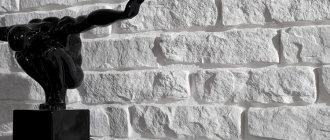
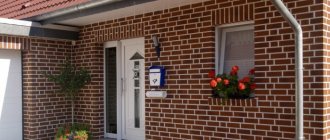
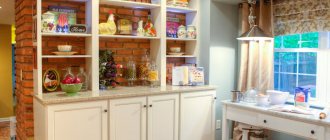
Brick in the interior is a trend and almost a bestseller in recent seasons. This is not surprising. It looks simply great and creates a truly unique atmosphere wherever it appears. When we can't afford a traditional solution, it's worth thinking about decorative gypsum tiles, which not only looks like real brick, but even surpasses it in many ways. This is a unique example of a situation in which a student defeats his teacher. What are the advantages of this modern finishing material, tips for choosing it and recommendations with photos for arranging stylish interiors.
Advantages and disadvantages
Gypsum tiles have their own characteristics, which provide them with well-deserved popularity.
The advantages of the material are:
- light weight - thanks to this it is excellent for finishing thin walls and plasterboard partitions;
- the ability to veneer any base;
- frost resistance - withstands at least 50 cycles with honor;
- heat resistance – not afraid of heating up to 70 °C;
- environmental friendliness and absence of toxins in the composition;
- ease of cutting and installation;
- accessibility for any budget;
- the ability to make tiles yourself.
The disadvantages include:
- relative fragility;
- insufficient moisture resistance.
Relevance
There are many materials from which volumetric surfaces are made. They all differ in their properties and have disadvantages. Materials from which the panels are made:
- Gypsum and additives.
- Polymers with additional components.
- Paint for coloring.
One wall in the room is given a plaster finish. If all the walls are covered with material, then the room will become smaller and will “crush” with its convex pattern. Basically, this is a blank wall in the living room, a partition with a TV, and the head of the bed.
Features and properties of gypsum tiles
Gypsum tiles are widely used for finishing walls and ceilings both in private apartments and houses, and in public spaces. In its original form it is suitable only for interior work. Such coatings cannot be used for the external facade. On sale are rectangular and square products that externally imitate stone, brick, fabric, leather, and metal.
The basis of the material is ordinary gypsum, absolutely harmless to human health. If you wish, you can make the tiles yourself. This will save a lot of money and allow you to get a unique material that will fit perfectly into your future interior.
Compound
Along with gypsum, the mixture for preparing tiles includes sand, water, surfactants and modifiers. Due to its cellular structure, the material is similar to aerated concrete. It may contain cement, lime, aluminum powder, quartz sand. Modifiers give the gypsum cladding additional hardness and resistance to mechanical damage. The tiles acquire particular strength after the glue dries.
Size
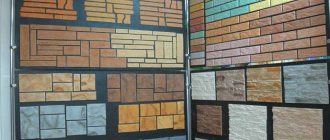
The dimensions of gypsum fragments differ depending on the material version and the features of its design. Basically, these are small individual rectangular bricks or blocks, with a composition of several decorative elements. Bricks can be narrow or wide. The tiles are available in the following sizes - 28 x 6, 29 x 6.5, 38 x 9.5, 19 x 5, 19 x 9.5 cm. Fragments imitating natural stone have parameters - 21 x 10, 27 x 10 cm. Blanks for corners have side edges at 7 and 12.5 cm.
Design, color and texture
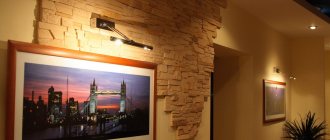
Gypsum tiles are available in a wide range of colors. Thanks to this circumstance, the possibilities of including such cladding in the home interior are significantly expanded. Accent decoration is in great demand when decorating a wide variety of rooms. Properly selected texture, shade and taking into account the features and purpose of the space will allow you to get a stylish interior. Most often, tiles are used to highlight areas in the hallway and living room, but they can just as often be found in the design of children's rooms, bedrooms, bathrooms, and balcony areas.
If the room cannot boast of impressive dimensions, white brickwork on one of the walls will be the ideal solution. It will visually expand the room, which is very important for the kitchen, bedroom or nursery.
An area highlighted with imitation natural stone will add dynamics to the space. It can act as an independent element, but it will also look very decent as a background. Against its background, plain furniture, photo frames, and paintings will look impressive and noble.
The most common are white samples. But you can easily find products for sale in milky, sand, beige, and gray shades.
Combinations of contrasting paint finishes look interesting. This is especially true for large spaces. Black tiles will look luxurious against a white or beige wall. Bright accents in such interiors are also very welcome.
Often manufacturers use several colors at once. They are most often related, which helps create smooth transitions and give the material more realism. This allows you to achieve the effect of versatility, volume and naturalness. Even at close range it is impossible to distinguish tiles from natural stone or brick. Brown, dark gray and even black inclusions are intended to set off light shades. Also, the surface of the slab can be smooth, decorated with ornaments. The pattern is formed depending on the form used. These can be geometric shapes, ornate patterned monograms, leaves.
Laying technology
Tool
- Spatulas: regular and serrated;
- Level;
- Hacksaw or grinder;
- Miter box;
- Drill mixer;
- Foam sponges;
- Grouting spatula;
- A construction gun or a milk carton;
- A pair of brushes;
- Sandpaper and whetstone;
Materials
Installation with gypsum glue.
- Glue. You can use any tile or gypsum material, for example “Knauf Perlfix” or “VOLMA MONTAGE”. Can also be laid on liquid nails. Some have glue included.
- Water based varnish.
- Dyes for grout and tiles;
- Primer.
- Grout for seams.
Step 1: Marking
The technology for laying gypsum tiles, including markings, is similar to the technology for laying ceramic tiles. It is important to find the starting points, horizontal and vertical, based on considerations of smooth, accurate cladding and geometric aesthetics. Typically, decorative tiles begin to be laid from the corners, so the markings are tied to them.
Decorative stone-look tiles are often of different formats, so take this point into account so that there are no duplicates one after another. Gypsum brick tiles are simpler in this regard; if necessary, you can immediately mark the location of any element.
Mark each row to avoid cutting at the top and bottom. At the bottom of the wall, a groove was made in the plaster so that the laminate would go there for a beautiful connection.
Use a water or laser level to mark. The latter is good because it is easy to use alone and at any time, adjusting the tile. But the hydraulic level is much cheaper - ideal for one-time self-cladding.
Step 2: Styling
To mix the glue, use a drill with a mixing attachment. The consistency of the composition should resemble thick sour cream. Apply the mixture with a spatula to a base that has been previously primed to enhance the surface and adhesion. To level the layer of glue, the residues are removed with a notched spatula - a comb. Next, lay the tiles, pressing them tightly to the base.
Applying glue with a spatula-comb.
When using brickwork, seams are required. To distance the elements, use any available material of the same thickness, equal to the width of the seams between the bricks. “Stone” cladding does not require mandatory seams; they are arranged at will, based on the general idea.
Step 3: Trimming
Since gypsum is a soft material, it can be cut with a hacksaw. For convenience, they use an angle grinder, but it creates too much noise and dust. It is important to join the outer corners correctly. To make them look beautiful, the tiles are cut at an angle of 45 degrees. This is where a miter box comes in handy. Some areas may require additional treatment. In this case, the tiles are ground with a block and brought to condition with sandpaper.
Arches and similar places require figure cutting. In the case of tiles with torn edges, it is easiest to cut along the textured line. If you use an angle grinder, you can ignore this.
The junction of tiles and switches, as well as the junction of walls and floors.
Step 4: Grouting
As a putty for joints, either a special grout mixture is used, which is used in a semi-dry form, or gypsum glue. Apply it into the gaps between the slabs using a special narrow spatula. It is also used to level the fugu. An alternative is a pistol or a milk carton. One side of it is cut in width, and a hole of 4–5 mm is made on the other. Fill the bag with a “sour cream” type mixture and squeeze it through the hole into the seams.
First, the mixture is applied from a gun or bag with a cut corner.
When it becomes elastic, it needs to be smoothed with jointing. Without the skills, it is important not to overdo the grout area.
Otherwise, the mixture will set before you have time to work the gaps. The remaining grout is removed using a foam sponge. Try not to let the putty get on the facing material - gypsum tiles have a porous structure, so it will not be easy to wash it off the fugue. If the color of the tile differs from the tone of the putty, and this is not included in the design plan, after grouting, after waiting for it to set, you need to paint the grouted spaces with dyes. A good manufacturer of slabs comes complete with facing material. Coloring is done using a narrow brush. Not only the seams are painted, but also possible chips that could have formed during the installation process or during production.
After completing the work, it is recommended to treat the tiles with water-based varnish to protect them from moisture that may enter accidentally or during wet cleaning. Since gypsum tiles are used for interior decoration, such treatment completely solves the “water-repellent” problem.
Kinds
The variety of gypsum cladding is determined not only by its shape, color and dimensions, but also by its texture features.
The most common tile variations are:
- imitation brick - its insignificant thickness allows it to fit perfectly into small spaces, decorate openings and individual areas of the hall or kitchen - bar, television. This type of decoration looks no less impressive in spacious rooms;
- imitation of natural stone - products are available in various shades and are practically indistinguishable from natural material. Particularly popular are aerated concrete tiles, which convey the texture of slate. Special coloring solutions help achieve shine. No less in demand are gypsum cement samples, which are used to decorate arches, fireplaces and niches.
Each of the presented options has its own advantages and is endowed with unique properties. The choice in favor of a certain type of tile is made depending on the style of the interior, the dimensions of the room and the personal taste of its owner.
Imitation ceramic brick
In general, historically, the first imitations of brick were made from ceramics, therefore, we can say that this is the most ancient material that replaces brick. Such bricks are completely identical in properties to ceramic tiles.
Distinctive features of ceramic bricks:
- Durability
- Moisture resistance
- Convenient to use
- Not subject to deformation under load
- Not subject to temperature changes.
This imitation brick can look completely different, it all depends on your tastes. The coating can be glossy, voluminous, etc.
On a note! Unlike gypsum, ceramics is a less pliable material, so making a three-dimensional relief layer will not be easy either.
Where it is used - design features
When decorating walls or ceilings with this material, moderation should be observed. A fragmentary finish will look most textured. It will be especially impressive against a smooth surface. If you cover the entire wall with tiles, it will lose its expressiveness and will look too heavy and uninteresting. Therefore, it is better to limit yourself to one or several accents that will set the mood of the entire interior.
The tiles are perfect for creating an accent area. It can be used to decorate the wall behind the TV, highlight a dining or sleeping area, or emphasize the convexity of an architectural element - a fireplace, column, arch.
Do not use tiles in different rooms or on two or more walls at once. It will be too much. The decoration is very active in itself, so it is better to limit yourself to one element in the apartment.
In the hallway, plaster bricks are used to cover the section of walls near the door and the corners. The material is applied partially, simulating exposed stone. Most often, the fragments are laid out in a ladder, or randomly, placing them in a horizontal position. To frame the entrance, the products are laid perpendicular to the doorway. When finishing the lower sections of adjacent walls, masonry is done according to the brick principle.
Gypsum vinyl panels
Gypsum vinyl wall panels have been created for finishing shaped surfaces and small elements. The base is made of plasterboard sheet and covered with vinyl film on both sides. The panels are characterized by increased flexibility and moisture resistance.
Gypsum vinyl panels are used for slopes of window and door openings, creating podiums, niches, and arches. They are widely used for cladding ceilings and finishing walls. The color is determined by the vinyl film on the front side. Most often this is imitation wood, reptile skin, matting. The decorative surface is smooth or with a pattern up to 0.5 mm deep.
Gypsum vinyl panels are installed mainly using the frame method. Frameless is used less often, but is quite acceptable. After installation of the coating and additional work is not required.
Advantages of gypsum vinyl wallboards in quick dry installation. The smooth surface is easy to clean and repels dirt. If damaged, the panel on the frame is easy to replace. Can be installed in damp rooms, places of sudden temperature changes.
The disadvantages of gypsum vinyl panels include the need to insulate all ends at once when cutting. The sealant is applied first, then the adhesive tape. Otherwise, moisture will enter and the panel will quickly collapse.
Masonry methods
The choice of method for laying gypsum decor depends on the designer’s idea. Most often, two main methods are used:
- brickwork - each subsequent row is shifted by half a fragment relative to the previous one;
- classic - the tiles are placed strictly one under the other and the edges form crosshairs.
When giving preference to one method or another, you should take into account the shape and size of the products. If they are made in the form of bricks, it is preferable to stick them with a shift, forming pronounced joints. When forming a stone wall covering, they try to make the seams invisible. All formed cracks are masked using a cement mixture tinted to match the finish. The “stone” wall should look monolithic and fundamental.
Compositions of different-sized fragments, which differ from each other in surface relief and different levels of edges, are assembled on the wall like a ceramic mosaic. Before installation, it is advisable to lay out the future “panel” on the floor and only after that attach it to the wall. This will help avoid the need for alterations, make it possible to minimize the number of joints, and save time and material. With this method, painstaking alignment of the side borders is not required.
To trim protrusions beyond the accent area, use a grinder. The large thickness of the material will not allow this work to be done using a tile cutter.
Imitation clinker brick
Clinker brick is a special brick made from certain types of clay. This brick actually resembles natural brick more than any other material. Clinker itself is quite dense, so it is impossible to create it at home. When making such bricks, a special technology is used: firing is carried out in kilns with a temperature of 1200 degrees.
On a note! When operating, be sure to use a special glue, ideally from the same company as the brick itself. And don’t forget to pay close attention to the shade of all the bricks. Quite often, one set can contain bricks of different colors.
Making your own gypsum tiles
Major renovations require significant investments. Therefore, the opportunity to save on material is always relevant. The fact is that tile cladding can be made independently. And it's not as difficult as it seems. If you choose the right grade of gypsum and observe the ratio of the components of the mixture, the artificial stone will have sufficient strength. Deviation from recommended standards inevitably leads to brittleness of the material, rapid formation of cracks and defects.
Tools and materials needed for production
First of all, to make tiles you will need a large space in which a certain humidity and temperature are maintained, as well as:
- ingredients for making gypsum mortar - gypsum, plasticizers;
- container for preparing the mixture;
- molds made of silicone or polyurethane;
- a flat horizontal base, leveled using a level;
- colors;
- acrylic-based matte varnish;
- brushes and spatula.
Making molds yourself will significantly reduce costs.
Production of molds
The work will take several days. To form the future container, you will need a sample of the tile. Pour liquid polyurethane with a hardener into the finished matrix and wait until it hardens completely. For brick production, a mold depth of 0.5-1 cm is sufficient, and for slate imitation - 1-2.5 cm.
You should decide in advance on the number, weight, size and shape of the fragments, and take into account the characteristic features of the room.
Prepare plaster, molds, a container for mixing the solution, a construction mixer, slaked lime and a color scheme of the required shade. If additional surface painting is planned, it can be done after the manufacturing process has been completed, which includes:
- preparation of gypsum mixture;
- filling out forms;
- drying.
Step-by-step instructions for making tiles with your own hands
- For 6 parts of gypsum powder, take 1 part of slaked lime and add 7 parts of water. Prepare the mixture using a mixer until a homogeneous mass is obtained. The finished solution should be similar in consistency to thick sour cream.
- We wet the molds with water and dissolved laundry soap. Thanks to this procedure, it will be easier to remove the artificial stone from the container.
- Fill the matrices with gypsum mass and shake several times to remove bubbles from the mixture. For this purpose, you can make a vibrating table. Place the molds on a horizontal, smooth surface.
- Let it dry for 24 hours, then carefully remove the finished tile from the mold and leave it for final drying, avoiding exposure to sunlight. The conditions created in a special drying chamber can significantly reduce the time and improve the quality of this process.
If desired, the tiles can be painted using water-soluble pigments or the mold can be coated with paint in advance to highlight the relief elements.
You can achieve a uniform tone using a spray bottle.
You can fix the paint with two layers of acrylic varnish.
How long do they last?
The service life of the panels is 50 years. However:
- if there are frequent temperature changes that lead to increased humidity;
- constant exposure to direct sunlight;
- frequent blows;
- constant vibrations and movement of the house.
In this case, the service life is sharply reduced to 10-15 years or less.
3D gypsum panels decorate the room and make the interior of the room unusual. They are easy to install with your own hands and painted in a color that matches the interior and design. If the panels are regularly looked after and monitored, then they will decorate the room for 50 years (until you get tired of it).
Tips for caring for tiles
Gypsum coating can be maintained using dry and wet cleaning. It is permissible to use a vacuum cleaner with a special attachment, soft-bristled brushes, and damp rags. Abrasive materials and aggressive detergents can cause irreparable damage to the surface. The varnish coating significantly reduces the risk of damage to the top layer. To ensure the finish is resistant to moisture, it is treated with a special impregnation. After applying this product, the cladding can be washed.
What it is?
Gypsum is calcined gypsum stone that is ground into a powder.
Important
The environmentally friendly natural material lies in a thick layer on the surface of the walls and hides existing visible defects well.
Gypsum plaster contains a large percentage of this material and various additives. They are necessary so that the mass does not harden on the surface too quickly and it would be possible to apply the finishing coat and make a drawing without rushing.
Gypsum decorative plaster, in addition to the main component, contains:
- Fine fillers. They lighten the weight of the building mixture. The most commonly added materials are expanded polystyrene, foam glass and perlite.
- Plasticizers that increase elasticity.
- Whitening particles. Lime or similar materials may be added.
- Retarders.
Thanks to fillers, thermal insulation properties are increased and adhesion is enhanced.
This gypsum plaster can easily be applied to any type of surface . This:
- brickwork;
- concrete walls;
- glossy surface;
- expanded clay concrete;
- aerated concrete;
- cellular foam concrete.
- horizontal or vertical - before finishing It can be used to form walls and ceilings, but in conditions of normal humidity. Recommended to be used for sealing:
- pits;
- cracks;
- cracks.
Suitable for residential/non-residential premises. But only interior finishing needs to be done.
Algorithm for applying the solution to the walls with your own hands
Wall finishing with gypsum plaster is carried out according to the following algorithm:
- Surface preparation. All dust and dirt are collected from the walls with a cloth or vacuum cleaner. All irregularities and defects are sealed with a base layer of plaster.
- Primer. One or more layers are applied to a clean surface. The faster the composition is absorbed into the base, the more it will need to be applied.
- Installation of beacons, installation of mesh. It is carried out to regulate the thickness of the plaster layer. The location is vertical, in increments of 20 cm smaller than the size of the rule. The minimum layer of gypsum plaster is about 8 cm.
- Preparation of the solution. Dry mixtures are diluted with water in a ratio of 2:1. Mix thoroughly with a mixer fitted with an attachment. The mixtures are mixed in small portions so that the solution does not dry out during application.
You can apply the solution with two spatulas or throw the plaster from a spatula onto a trowel, or you can use the machine method. The first option is convenient for small volumes of work; larger rooms are easier to handle with a spatula and trowel, as the work becomes much faster.
Important
It is necessary to level it according to the rule so that the layer lies evenly and tightly. This will prevent it from cracking.
All excess is removed, and the resulting recesses are filled again with plaster mixture. The process is repeated until a perfect surface is achieved. Evenness is checked with a laser or simple level.
Below is a video about applying gypsum decorative plaster:
Criterias of choice
The choice of a mixture suitable for these actions depends on where the plastering work will be carried out. You can purchase compositions for exterior work and for plastering the following surfaces:
- facades;
- base;
- walls with high indoor humidity.
Attention
Interior work can also be carried out with mixtures in conditions of low and medium humidity. You should not use finishing materials that are cheap or of dubious quality, since after their application there is a high probability of poor-quality finishing and redoing the work.
When choosing gypsum-based plaster, you need to look at the instructions for use , it will indicate for what types of work the composition was prepared.
In the building materials market you can find different manufacturers. We list the highest quality, time-tested brands that deserve the attention of a vigilant buyer:
- Perfecta - for finishing in heated rooms.
- Aegis - for leveling and thermal insulation of internal and external surfaces, during the construction of walls made of brick, expanded clay concrete, and concrete ceilings.
- Volma. The lightweight recipe makes it easy to work with the mixture in an economical manner. Suitable for work in rooms with high humidity.
- Knauf Rothband . She carries out external and internal work. Suitable for finishing facades.
- Bergauf. You can perform interior and exterior work manually or by machine.
