The house has been put into operation and the keys have been issued. Now you can fully engage in moving. However, things don't always happen so simply. Repairs begin, which include work such as installing screeds, plastering and painting walls, installing plasterboard partitions, and having to glue non-woven or paper wallpaper.
Moreover, each stage of repair work is characterized by its own manufacturing technology. It is imperative to adhere to the technology; it is important to know how long it takes for the primer on the walls, putty, and plaster to dry, so that repairs do not turn out to be an endless process.
It is worth considering that primers, plaster and putty mixtures must be applied to the walls in a certain sequence, and a specified time must be maintained between applying subsequent layers. Particular attention should be paid to the manufacturer's recommendations.
Detailed information about how long the walls should dry after applying wall finishing materials can be found in this review.
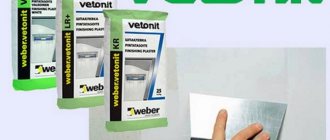
Types of putties
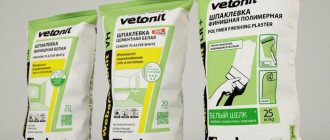
All of them are divided into types according to the binder: gypsum, cement, polymer, acrylic, epoxy. Another division is by area of application. For example, gypsum putties are usually recommended only for dry rooms. However, due to the additional additives included in them, the compositions can be used both in damp places and in places that are not subject to direct contact with water: universal putty compositions are suitable for any room.
Based on the grain size of the composition, roughing and finishing putties are distinguished, and the latter can be used for both types of work. Mixtures for rough leveling have a coarser grain than finishing ones. They are applied in a thick layer, filling all the unevenness. Finishing putties are placed on top of the rough ones in a thin layer, sanded thoroughly, after which the surface is ready for final finishing - painting, applying Venetian plaster or gluing wallpaper.
How long does putty take to dry? The answer to this question depends on many factors. Among them, the binder on the basis of which the mixture is prepared is of great importance.
Type of solution
The drying time of the surface depends on the type of solution and technical characteristics.
Mortar
Lime composition is created on the basis of lime. It can be unquenched or extinguished. Only slaked products are used for mixing the solution. We recommend a ready-made composition from the construction market, to which purified sand has been added. You should not extinguish the lime yourself. This is a poisonous substance that evaporates toxic substances into the air. It will take several weeks for complete extinguishing.
Lime
To mix lime mortar, you will need lime and sand in a ratio of 1 to 4. The amount of sand may vary depending on the fat content of the lime. Sand is added to the lime dough. Everything gets mixed up. A small amount of water is poured out. Bringing to a homogeneous consistency is achieved with a construction mixer. It is necessary to knead the lumps. Then water and sand are added again. The composition is brought to the consistency of sour cream.
Positive aspects of the composition:
- durability;
- high degree of strength;
- availability;
- simplicity and ease of working with the material;
- good ductility.
Plaster
The main rival of cement mortar in the matter of interior decoration. The main ingredient is gypsum powder, created from a mineral of natural origin. During production, a long period of heat treatment helps grind the mineral into powder form. The larger the fraction of gypsum powder, the worse the quality of the treated coating.
Plaster
Additionally, fillers of natural or synthetic origin and polymer additives are added to the solution. Fillers reduce mixture consumption and increase the strength of the treated surface. Polymers improve the adhesion of materials and elasticity.
Advantages of gypsum composition:
- high degree of adhesion. The building material fits well on any surface;
- leveling ability. After plastering, the coating is ready for decoration: painting, whitewashing, wallpapering;
- low consumption of building materials, subject to compliance with the technological process and construction regulations;
- the thickness of the plaster layer can reach 60 mm;
- simplicity and ease of the plastering process. The material easily lays on any surface, is leveled and distributed over the wall;
- obtaining additional heat and sound insulation of the wall surface;
- The drying speed of the plastered coating is 30 min-2 hours. The final strength gain occurs after 5 days.
Types of gypsum mortar:
- fine-grained. Contains well ground sand. Apply with a thickness of 50-80 mm. You can level the surface with two balls of plaster. Most often used for ceilings;
- medium grain. Popular. A competitor to the cement analogue of plaster. Recommended application layer – 50 mm;
- coarse-grained. Used to remove significant defects. Broken slopes are being repaired or damaged facades are being decorated.
Cement plaster
The volume of components for preparing the solution depends on the brand of dry cement powder. As the brand decreases, the volume of product in the solution increases. The standard ratio of cement and sand is 1: 2-3. Sand and cement powder are pre-mixed. Then water is poured in. The composition is brought to a homogeneous consistency. It is recommended to use the mixed solution within 1 hour. Then its technical and operational characteristics deteriorate.
Cement
Positive aspects of cement plaster:
- availability;
- different types of coating;
- ease of working with the composition;
- good density, durability of the finishing coating;
- versatility;
- moisture resistance.
The cement mortar dries in about two days. Then, you can apply the next layer of plaster. The final drying of the coating will occur after 14 days. This significantly reduces the pace of finishing work.
Clay-cement mixtures
The advantages of the clay-cement composition include:
- absolute harmlessness of the composition to the environment and humans;
- fire resistance;
- good adhesion to concrete and brick bases;
- plastic;
- availability;
- “breathable structure” that allows you to absorb and release moisture when the degree of environmental humidity changes;
- increasing the sound and heat insulation characteristics of the plastered coating.
Clay-cement
What affects drying time?
Each composition dries differently. This depends on various factors:
- thickness of the working layer,
- temperature in the room where work is carried out,
- air humidity level,
- presence/absence of additives affecting drying speed,
- base material and priming.
The greater the thickness of the working layer, the longer the putty dries. Finishing compounds on any binder dry quickly because they are applied with a thickness of no more than 2 mm.
The higher the ambient temperature, the faster the putty dries, the lower it is, the longer. It is not recommended to work at sub-zero temperatures. In the cold, the polymerization process of the putty is disrupted. Even if it hardens, it will still fall off quite quickly, and the work will have to be done again. The introduction of frost-resistant additives will help correct the situation.
The higher the humidity level, the worse the surface dries. This point must be taken into account if outdoor work is carried out.
All modern putties contain additional substances that ensure plasticity, viscosity, adhesion, and drying speed. To find out if the purchased mixture contains any of the above, study its composition indicated on the label.
The base material and priming have a direct bearing on the drying speed of the putty. If you tidy up regular and primed walls, the latter will dry less. The primer reduces the level of moisture absorption by the surface. Accordingly, the drying time of the putty is reduced.
How long does putty take to dry: construction forum - repair and finishing of apartments, houses, cottages.
How long does it take for primer, rotband, putty to dry? How long does it take for primer, rotband, putty to dry? Today, many people undertake to do repairs in their home on their own. At the same time, few people have special training, and therefore a lot of questions arise during the repair process. So, during any repair you will have to deal with such building materials as primer, rotband and putty. All these materials are used for finishing walls and floors. When working with them, it is very important to know the specifics of their use, in particular their drying time. Let's look at each of these materials. Primer is an important part of any finishing work. It is a liquid mixture of various polymer binder components designed to facilitate bonding of the material to the surface. The primer is designed to prepare the surface before plastering or puttying walls, wallpapering or pouring floor screed. This material can protect metal from corrosion, reveal the texture of wood, or hide defects in concrete, brick or plaster. The drying time of the primer is usually indicated on the packaging, as well as the approximate consumption of this building material. If the manufacturer does not indicate the drying time on the packaging, then professionals advise letting the primer dry for 3-4 hours. Naturally, you should also take into account such indicators as humidity and air temperature in the room. For example, at temperatures above 25 degrees the primer dries faster, and if the humidity exceeds 65%, the drying time of the primer increases by 2-3 times. Rotband is one of the types of primer produced by KNAUF. It is intended for preparing surfaces such as gas and foam concrete, ceramic and silicate surfaces, as well as brick and others before puttying. Before applying rotband, a simple primer is usually used to clean and remove dust from the surface. It is important while the rotband is drying to ensure that the temperature in the room is maintained from 5 to 25 degrees, and that construction dust does not fall on the treated surface. The drying time of the rotband is affected by both the thickness of the applied layer and the temperature in the room. In any case, when it comes to pouring floors, it is recommended to begin further work no earlier than 6 hours after priming. In other cases, the drying time of the rotband can last up to 7 days. Most often, the next step in the interior finishing process is to putty the walls. This building material is sold dry, and it must be diluted exactly in accordance with the instructions on the packaging. Putty helps to fill in all the unevenness and cracks on the walls and make the surface smooth. You cannot store the putty diluted for a long time. The choice of a specific type of putty is influenced by the type of surface to be treated. Thus, acrylic putty is used for both facade and interior work, and silicone mixtures are intended for rooms with high humidity. The drying time of the putty also depends on the thickness of the applied layer. The putty hardens quickly, but then time must pass for the excess moisture to evaporate. Depending on temperature and humidity, a very thick layer of putty can take anywhere from a few days to two weeks to dry.
Properties of compositions
Gypsum putty dries quickly, gives a perfectly smooth surface that is pleasant to the touch (can be used as a finish), and does not shrink. It is better to use in dry rooms, even if the manufacturer claims that its mixture is moisture resistant.
Cement putties are universal. They are suitable for both wet and dry rooms, but they shrink strongly and are often coarse-grained, so they are mainly used as starters.
Polymer compositions are sold ready for use (with the exception of epoxy, they are two-component), they give the same perfectly smooth surface as gypsum, while they are moisture resistant, do not crumble, do not crack, are white, plastic, and sand well.
Wild show off, or what to do when the putty doesn’t dry)))
Hello everyone, I finally decided to make my first logbook entry.
On a cold winter day the putty doesn't dry, but you're in the garage and you need to do something. You ask WHAT:
We will merge the key with the signaling key fob together)))
It's better to have two sets just in case.
we take what we will combine
cut off the rubber from the key
This will only happen to me (the key fits perfectly into the keychain and the hole fits evenly under the screw
and now everything is ready
Later the keychain will be painted in body color))))
Work technology
The operating rules include the following recommendations:
- Prepare the surface - remove old coating, remove dust, degrease, repair cracks.
- Wait for suitable conditions for puttying - the room temperature should not be lower than +5 and higher than + 25 ° C. Humidity should not be more than 55 - 60%. If it is higher, the drying process will be delayed.
- Prime the surface, this will reduce its moisture absorption and prevent cracking of cement compounds.
- Use starting putty to fill rough unevenness in walls (ceiling, floor). The thicker the composition is applied, the longer it will take to dry. Therefore, a good option would be to break the work into several stages - thin layers of plaster will dry faster.
- After complete drying, sand the surface and bring it to perfect evenness, then apply a thin layer of finishing putty.
- To sand the finishing putty, use very fine sandpaper and do not overdo it, otherwise you will have to putty again.
Many people are interested in the question of how long it takes for finishing putty to dry. It is applied in a very thin layer, so its drying time is no more than 1 hour under optimal operating conditions. Any quick-drying putty is finishing in 99% of cases.
How to prepare walls for wallpapering
When you decide to replace old wallpaper with new ones, you should not ignore the correct technology for this process. Even if the walls were perfectly prepared during the previous renovation, during operation and when removing the old coating they could lose some of their properties.
The primer is also included in this process, and it is applied twice. Let's describe it in detail.
Step 1.
Removing old wallpaper. To make it easier to remove them from the walls, you need to use special solutions. They evenly moisten the surface, allow the wallpaper to soak, and peel the whole canvases off the walls, preserving the integrity of the finish as much as possible.
Removing old wallpaper
Step 2.
Primer. The product is poured into a special container, a roller is moistened in it and rolled over the walls, leaving no gaps.
How to dilute primer for walls?
Primer in a tray
Applying primer to the wall
Step 3.
Plaster defects. After the primer has dried, all potholes, cracks and uneven walls are filled with plaster or starting putty solution. He is also allowed to dry.
Plaster defects
Step 4.
Continuous alignment. It is applied in a thin layer over the entire surface using finishing putty.
Methods for applying finishing putty
Prices for popular types of putty
Putties
Step 5.
Primer for wallpaper. The putty surface does not have sufficient strength - this can be confirmed by running your hand over the dry wall. You can strengthen it with wallpaper glue diluted with water. But not in the concentration required for wallpapering, but much thinner.
Primer for wallpaper
Step 6.
Drying. Before starting the final finishing, you need to wait 3-4 hours.
Video - Preparing walls before wallpapering
Inexperienced finishers often make another mistake when they prime the walls too much in advance.
It is important that no dust settles on the primed surface, otherwise the meaning of the primer as a binding agent is completely lost. In addition, the walls may be stained with oil, grease or other substances that paint and building mixtures do not adhere well to.
Therefore, they need to be primed immediately before the next stage of finishing, leaving time only for drying.
Is it worth artificially accelerating drying?
The vast majority of experts do not recommend doing this. When using various heating devices (hair dryers, heat guns, etc.), the surfaces of the walls dry unevenly; more precisely, only the surface layer dries out. Therefore, to speed up work, for example, with finishing putty, the method of accelerating drying is quite acceptable. When working with starting mixtures applied in a thick layer, forced drying can cause cracking, peeling of the top layer, crumbling or destruction of the entire restoration site.
Conditions that will help naturally speed up the drying process:
- optimal air temperature,
- high-quality ventilation in the room,
- normal humidity.
To speed up the repair at least a little, modern quick-drying putty is often used. There are options for such mixtures for surfaces made of concrete, metal, wood, as well as universal compositions, which, as a rule, are inferior in quality to both starting and finishing mixtures, while being significantly more expensive than both the former and the latter.
Excellent results in terms of drying time for latex putties. They are quite expensive, but the price/quality ratio is optimal. Such compositions are elastic, adhere well to the walls, one layer dries for about an hour at +20-25° C. Another advantage of this material is its readiness. Latex putty is produced immediately ready for use and does not harden for a long time.
Let's summarize
From all of the above, you can easily determine how much time is needed to finish the walls, but of course it will largely depend on the selected mixture and the initial state of the base. It is also possible to speed up the drying time if you artificially create the necessary conditions for this.
IMPORTANT! It is strictly forbidden to create drafts in the room and direct streams of heated air from the gun, especially onto freshly treated surfaces. Rush in such cases is inappropriate: as they say, it is better to spend a little more time, but get a decent result in the end.
Any non-compliance with the technology of all processes and the drying time of each subsequent layer will definitely negatively affect the result of the quality and durability of the final coating. Therefore, it is recommended to be patient and carry out all the work competently and correctly.
Drying time based on binder
To coordinate repair work, you need to know the hardening speed of putty compounds:
- Gypsum mixtures are the fastest drying. Starting compositions “Knauf” with a layer of up to 30 mm dry up to 7 days, quick-drying finishing compositions dry from 4 to 6 hours. A 3 mm layer is ready for further processing in 1 day.
- Cement. Starting dry mixtures set in 5 hours, and the drying time of the finishing layer up to 3 mm thick is 1 hour.
- Polymer. Here the drying time depends on the type of putty. For example, epoxy takes 8 hours to dry, latex takes at least 12 hours. The acrylic starting layer of 1 mm is ready for further processing in just 3 hours, and the finishing layer of 3 mm dries up to 24 hours.
- Knauf universal quick-drying compounds dry in just 30 minutes.
Knowing how long the putty takes to dry, you can properly plan the work, which is very important if it is carried out outdoors and depends on atmospheric conditions (heat, cold, precipitation).
Additional information
This is all work on applying the finishing coating. But there are some nuances that are useful for beginners. For example, the layer is applied with a small thickness (up to 2 mm). It is not leveling, but decorative, so it is no longer necessary
In addition, it is important for a beginner to know how much finishing putty is consumed per 1 m2. All these parameters are indicated on the packaging. All that remains is to calculate the area of the room and multiply by the mixture consumption
All that remains is to calculate the area of the room and multiply by the mixture consumption.
Now you know how to apply finishing putty. If you follow the instructions and prepare the necessary material in advance, the work will not seem difficult. The choice of finishing putty is also easy to make, since they usually start from two main ones: gypsum and polymer. For dry rooms, gypsum compositions are always chosen, and for wet rooms, polymer ones. When all the starting and finishing putty has been applied, you can begin the final decorative finishing. Painting, wallpaper or other finishing material will fit perfectly on the prepared base. Thanks to this, the service life of the finishing will increase significantly, and the room itself will be transformed.
Is it possible to speed up the process?
It is impossible to name the exact time it will take for fiberglass putty or other solution to dry - it is influenced by certain factors.
Developers are trying to figure out how to speed up this process. Let us note that experts do not advise resorting to such measures, because hardening has its own technological features. All the developer can do to help in this case is to organize the optimal conditions necessary for drying the putty material.
The only thing that can speed up drying is the use of quick-drying putty solutions.
It is prohibited to use aggressive heating with a hairdryer or heating systems, or to forcefully ventilate the room.

