Required materials and tools
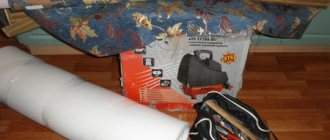
Tools and materials needed to repair upholstered furniture
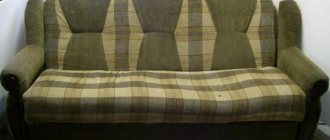
Restoring an old sofa will take time. This is a creative process that requires desire, tools and good material. Everything needed to repair a standard 180*90 sofa is indicated in the table. It is better to purchase filler and fabric for upholstery with a reserve.
| Name | Purpose | Quantity |
| tapestry, velor, or suede | upholstery fabric | 210*120 cm |
| Simple plain fabric | fastening case | 210*120 cm |
| special furniture foam | filler | 200*110 cm |
| Thick fabric, such as carpet | spring block protection on both sides | 370*190 cm |
Materials and components for DIY sofa repair
How to reupholster a sofa with your own hands
The first thing to do is to determine the scope of work that needs to be performed as part of the reupholstery.
As a rule, during the operation of the sofa the following becomes unusable:
- upholstery;
- foam rubber (latex);
- batting (sintepon);
A very common reason for restoration work is deformation and failure of springs and jamming of transformation mechanisms.
Replacing the fabric yourself. Blinds repair.
Blinds are very popular in modern interiors; they are used as a unique, but very worthy, alternative to conventional curtains. They come in different types and are made from various materials, including fabric, plastic, wood, etc. The light transmission capacity of blinds also differs - some only muffle bright sunlight, others can create complete darkness in the room. We talk more fully about all types of blinds on the Good to Know page.
But, no matter where blinds are used, sooner or later they gradually become unusable. There may be several reasons for changing the fabric slats that make up the blinds, including severe dirt, damage, or a simple desire to update the interior. In any of these cases, you can get by with “little loss” by simply replacing the canvas, and without purchasing the entire structure again, in addition to paying for its dismantling and installation. Saving at least a quarter of the cost of installing a new canvas along with the structure is also an important factor.
Types of sofa designs
Table 1. Seat and backrest manufacturing options.
| Option | Description |
| Without springs | On dense furniture foam rubber or latex foam. The second method is considered more practical and convenient, but has a high cost. |
| With springs | With standard springs assembled into a single unit, or with snake springs that support a soft base. These types of structures are the most common. |
The sofa may have a multi-layer structure, which must be studied before reupholstering.
It should be borne in mind that there are other additional layers. For example, modern designs are supplemented with layers of felt and synthetic padding, while older models were stuffed with horsehair, burlap and similar materials.
For the inner layer you need to purchase padding polyester in a roll.
How to choose replacement fabric?
Buy fabric specifically designed for roller blinds. It is impregnated with compounds that allow the curtains to resist dirt, repel dust and withstand direct sunlight. Ordinary dense fabric will not be competitive in this case. In addition, plain fabric will stretch and will not ensure uniform winding of the fabric onto the shaft.
When choosing fabrics with natural materials (linen, cotton...), keep in mind that the service life of such fabrics is much shorter.
By replacing the fabric, you can easily give the room a fresh, updated look, you can adjust the level of lighting in the room and hide various architectural errors.
Features of reupholstery or upholstery replacement
Even an experienced master will never be lazy and photograph all the elements from all sides. This will eliminate errors in your work. Images can also be used as templates.
Removing old
Old fabric must be removed carefully. When working, make sure that neither the material itself nor the furniture elements are damaged. Under no circumstances should the seams be torn. It is better to rip them out with a shoe knife. An anti-stapler is used to remove staples. As a last resort, carefully manipulate the screwdriver.
Old upholstery must be removed with extreme caution.
The fabric is removed in the following order:
- Laying the sofa on its back, release the lower base.
- Then the outer part of the back and armrests is processed.
- The same is done with the internal parts.
- They end up sitting.
Sewing new upholstery
The old upholstery is not thrown away, but used as a template. It is first ironed with an iron and then applied to new material.
When cutting upholstery, consider the following points:
- If the element consists of two pieces, then it is necessary to leave an additional 10-15 mm of fabric for subsequent stitching with threads.
- The edges that will be fastened with a stapler must be increased in size by 50 mm.
New upholstery is done according to certain rules.
The cut out elements are sewn together with strong threads and then secured to the frame using staples. Some craftsmen use decorative furniture nails in this case.
Wonderful transformation of an old sofa
Material:
- upholstery fabric (the estimated consumption is 1.5-2 times higher than the measurements of the sofa with a raised upholstery option; it is higher);
- sackcloth;
- lining fabric;
- construction foam rubber or other filler;
- batting;
- industrial double-sided tape or glue gun;
- decorative buttons, washers and other furniture fittings;
- strong thread and large needle.
At the first stage, we get rid of the old upholstery and analyze the condition of the spring unit, if any.
If necessary, we insert the springs into place or replace them. Carefully remove the upholstery so that it can be used as a basis for the pattern. At the same time, we get rid of the sagging filler.
If you plan to use decorative buttons to obtain a relief, then markings must be applied to the filler and slots made in the places where the fittings are attached.
We place the filler on the frame, fix it and lay a layer of batting on top and bottom. For fixation, you can use double-sided tape or a glue gun.
For convenience, we mark on the batting the places where the decorative buttons are attached. We do this from the front and back.
If necessary, we cover the buttons with upholstery material.
Let's move on to attaching the buttons. From the back side, not yet covered with upholstery material, we insert a needle with a strong thread, bring it to the face, piercing the batting with filler and upholstery material, attach the button and bring it back out. We tighten it to a predetermined distance and secure it to the washer. We perform this operation the required number of times in accordance with the markings, maintaining a certain length of thread and straightening the upholstery.
It is much more convenient to start working on adding volume from the center, gradually moving to the edges. Once the required volume is set, we stretch and secure the upholstery fabric around the perimeter of the frame with a stapler.
An exception may be the presence of a front “skirt”. This part is attached with tape, leveled, and then fastened on the wrong side with staples or stitched.
If the “skirt” is planned to be full, then assembly should be done in advance.
Let's move on to re-upholstering the sidewalls. If they are not removable, we cover the reupholstered part of the sofa so as not to accidentally damage or stain the upholstery. Depending on the design of the armrests, we determine the method of reupholstery. Sometimes you can even do without removing the old upholstery by placing a new one on top of the existing one.
For the upholstery of the inside we use durable lining fabric. Before attaching it, we stretch and secure the upholstery well and lay a layer of batting.
Place the lining fabric so that any excess upholstery ends up inside the sofa. For preliminary fixation we use double-sided tape. Don't forget to stretch the fabric.
Replacing parts
After removing the old cover, you can find a lot of damage, which, of course, must be corrected to ensure the cleanliness of the entire work. Here are some of them:
- Frame beams. If this part of the sofa is cracked, it needs to be replaced. An important detail is that the new tree must be dry, without cracks or bark, with an even structure. Material with defects will quickly burst, while raw material will dry out and warp. It is better to repeat the locking cut, which is usually used to secure old beams, by ordering from a carpenter or doing it yourself. Impregnate the joints of new beams with PVA before joining.
- Fiberboard parts. Usually these are jumpers of the seat/back frame, which can break during operation. To replace, cut out new parts of the same dimensions as the old ones, or order them from a furniture workshop. A life hack for trouble-free future replacement of such parts: it is better to make the jumpers separate. Fastening is carried out with a pneumatic stapler/nails.
- Springs. It happens that over time you can find burst springs in sofas. The result of such deformation is poor shock absorption characteristics of the furniture and the risk of cuts/injuries. Replacing one or more damaged springs is an option, but does not rule out a repeat failure. In this case, it is much more rational to completely replace the spring blocks.
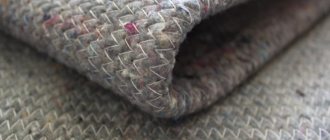
- Seat belts. Sometimes chairs use thick tapes as belts. Typically the backrests/seats use tightly woven straps with foam placed on top. And although they break infrequently, it is worth knowing that in the event of a defect, any strong belts with a dense weave at least 6-7 centimeters wide will do as a replacement.
- Foam rubber. A defect in foam rubber manifests itself in its compacted state. The fact that the filler in old sofas becomes obsolete is normal: any type of foam rubber can withstand a certain amount of compression, after which it is able to restore its shape. After this, the material becomes a viscous substance like sticky plasticine. In this case, the filler must be thrown away and replaced with a new one.
- Locks. A sign of deformation of the steel lock mechanism - the sitting/lying position does not work or works with difficulty. To correct the damage, you will have to change the screw or adapt a new latch spring. To completely replace the lock, you will need to purchase it in a store.
What types of springs are there?
The spring block is one of the main “components” of the sofa, therefore, when it fails, there is an urgent need to replace it. In order to understand how to do this, it is necessary to understand in more detail the types of springs.
Table 2. Types of springs used in the manufacture of upholstered furniture
| View, illustration | Description |
| Snake | This is the simplest version of the spring design, but at the same time it has good strength. This type of spring can be called budget, and its main disadvantage is that with frequent use the seat quickly sag. |
| Bonnell | This is also a budget version of springs, which is also comfortable. Of the minuses, it is worth noting that over time the sofa begins to creak unpleasantly, therefore, even if one spring has become unusable, the block is often replaced. |
| Independent springs | The most reliable, comfortable and durable type of spring block. If we consider the most expensive option, then in the event of a breakdown it is possible to replace any part of the unit and continue using the sofa. |
Problems with a sofa with a spring block
First of all, it is necessary to have information about the order in which the layers of materials are placed. If you have a sofa with a spring block, then the sequence of arrangement of materials is as follows:
- The first is the frame, which can consist of wooden blocks or plywood. Naturally, a plywood frame is stronger and more reliable, but it is more expensive, and there is more hassle with it. Therefore, frames made of wooden blocks are mainly found. Pine bars are joined by applying wood glue to the joints. For greater reliability, connections are duplicated using metal corners.
What layers should there be in a sofa seat? - Then there is a base that holds the spring block. The base can be made using different technologies and from different materials. The cheapest option is a base made of fiberboard, and the most expensive is based on lamellas that are attached to special stops. If the stops are plastic, they break quickly. It is possible to use low-quality lamellas or place them at slightly larger intervals to reduce the cost of the products. As a result, the lamellas are pressed through (break). Instead of wooden slats, some manufacturers use snake springs. Although this reduces the cost of the design as a whole, it does not eliminate problems.
This is what the slats look like from below - The spring block is structurally composed of dependent or independent springs. The presence of independent springs reduces the cost of upholstered furniture, and dependent springs create a certain level of comfort, which is why such designs are called orthopedic.
- Pad made of felt or thick fabric. Their role is to prevent the springs from pushing through the next layer of foam rubber.
- Polyurethane foam (foam rubber). As a rule, special high-density foam rubber is used. When choosing this material, you should pay attention to such an indicator as the durability factor. The higher the number, the better, although such material is more expensive. This indicator indicates how quickly after removing the load this material acquires its usual shape. This layer can be made thicker only if the furniture cannot be folded out.
- A padding polyester layer protects the foam from abrasion. It is better to fix the synthetic winterizer on the surface of the foam rubber using special glue, otherwise the material will gather in folds.
- Layer of upholstery fabric. The most preferred option is to use tapestry or chenille. In addition to being easy to work with, they do not fray. If you take flock and jacquard, you need to know that over time their seams come apart. In this case, the seams will have to be additionally fastened. The upholstery is sewn with special durable threads of the “Tytan” brand, and ordinary threads, although thick, will quickly tear.
It is not advisable to remove layers, but you can add them, within reasonable limits. For example, an additional layer of padding polyester would not hurt.
We disassemble the sofa and assess the scale of work
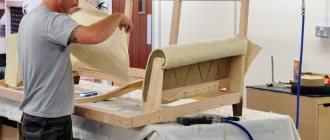
Reupholstering a sofa begins with disassembling it. During the process, you will be able to assess the extent of the damage and decide what exactly you need to do. For this part of the job you will need:
- a large screwdriver to unscrew visible bolts (if any);
- a small flat-head screwdriver, pliers or staple remover - to remove the staples that secure the upholstery.
The main thing is to remove the old upholstery.
Then everything will become clear. Actually, everything. First, remove the individual pillows, if any, and remove the side panels. It’s difficult to suggest here - there are many designs. Look carefully, you are sure to find something. If you have retractable parts, you can try starting with them.
Separating the upholstery
The next step is to separate the fabric from the frame. It is attached with staples to the wooden bars of the frame. We pry the staples with a flat screwdriver and pull them out. Some may fit very tightly; it is easier to pull them out by grabbing them by the raised back with pliers or pliers.
We disassemble the sofa: remove the staples
We remove the fabric carefully, trying not to damage it too much. We will then use it as a sample for new sofa upholstery. There are several layers underneath the upholstery fabric. Maybe felt, padding polyester, some kind of fabric. If the sofa repair was started only to replace the upholstery, look at the condition of these materials. If there are signs of wear, it is better to replace. After all, it will be a shame if in a few months the sofa needs to be reupholstered again, but this time because the layers of the lining have been removed.
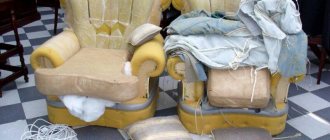
If the sofa is old, there may be a picture like this
Once the fabric is removed, it's time to evaluate which parts you'll need to replace. Everything is clear with the upholstery and lining underneath. It is advisable to keep the pie in the same composition. If old materials were used that are not currently on sale or are too expensive, replace them with modern analogues. The main thing for folding sofas is to reach the same height of the seat and back that were before, since folding mechanisms are designed for certain parameters of the “pillows”. In order not to be mistaken with the thickness of materials, find unworn (or least worn) areas and measure the thickness.
Assessing the damage
This stage is needed if the sofa seat is uneven, there are humps and depressions, protruding springs (and from below too). In seats that consist only of foam rubber, everything is simple: they are usually replaced. They can be made from high-density foam rubber by folding several layers; you can order ready-made foam rubber at a store that sells furniture spare parts. It is wise to order a latex mattress according to exact dimensions (measure after removing the fabric and all layers).
If the sofa has springs, remove all the covering layers to get to them. If there are no burst springs, the frame and its connections are strong, without play or cracks, the backing for the springs is in good condition, you can stop there. We change the covering layers, sew a new cover, stretch it and fasten it. This completes the reupholstery of the sofa.
One of the common defects in spring blocks is a broken spring.
There are also such sofas - with spring snakes that are attached to the frame and give elasticity to the foam mattress standing on top
This type of sofa breakdown is also common: the fiberboard on the frame is broken
Inspect the spring block for broken springs
If there is any damage listed above, the spring unit will have to be separated. It is attached to the frame frame using U-shaped brackets or nails. Now you have completely disassembled your sofa into its components. Next is the replacement and repair of damaged parts, and then reassembly.
V – make a pattern
Once a suitable fabric has been selected, you need to cut it into fragments. To simplify the process, use old upholstery, which must first be shaken out or vacuumed well.
- Spread the fabric on the floor and place all the pieces of the old upholstery you removed on it.
- Keep the layout as compact as possible, but do not forget to leave an allowance around the edges if you need to sew the covers together. Thus, between each part you should have gaps about 8-10 cm wide.
- Now you need to circle all the elements. Use a bar of soap or chalk for this if the fabric is dark, and a simple pencil if it is light.
- To avoid the parts moving, you can pin them using sewing pins.
- Now you need to sew covers for the sides and other elements, if this was the case initially. It’s good if you have a sewing machine at home and you’re comfortable with it. Otherwise, you need to contact the studio for help and be sure to ask that all edges be overlocked. This will protect the edges from fraying. It is very important to monitor the direction of the weft and warp threads. They must match on all parts. It is very easy to determine - the weft thread stretches, the warp thread does not.
How to replace slats on horizontal blinds
They are most often made from wood or aluminum. But, in any case, replacing the lamellas is also relevant here. If you need to change one or two pieces, then you can get out of the situation quite easily, since this type of blinds usually has a good length reserve that is not used. Therefore, reducing the entire height of the canvas by a couple of lamellas would be quite justified.
Even a non-specialist can change several elements in such blinds. First, it’s worth studying the mechanism itself and the principle of operation of blinds. It is a kind of “ladder” of two parallel threads with horizontal jumpers, in which strips of lamellas are located. This “ladder” supports each strip on both sides and rotates it while operating the mechanism. Each strip is threaded, allowing the entire blind package to lift upward.
To remove the plastic plug placed on the thread, you will need a screwdriver. The knot on the thread can be untied or simply cut off, and the thread itself can be removed along the desired lamella, inclusive of both sides of the fabric. The new strip is inserted in the reverse way, after which all the removed slats and the plug are put back on and a knot is tied. The plug is installed in the hole in the lower cornice. All manipulations are performed on the other side. They resort to the same method when they simply want to make a sheet of horizontal blinds that is too long shorter.
Selection of materials
Before you reupholster the sofa yourself, you need to decide what materials you will use. This applies primarily to upholstery and filling.
Filler
- Polyurethane foam is a synthetic foam structure that can vary in degree of rigidity, but generally adapt to the shape of the body during rest. Inexpensive types of filler lose their shape over time.
- Synthetic winterizer is usually combined with other materials, for example, polyurethane foam. This is all due to its insufficient rigidity - it is easily pressed, and therefore, over time, sleeping exclusively on padding polyester becomes uncomfortable. In its pure form it is more suitable for pillows than as a sofa filler.
- Struttofiber, which is also called “non-woven independent springs”. The material follows the anatomical features of the user, is resistant to moisture, breathable, and hypoallergenic.
- High-density felt is a natural felted version of the filler. It is not used in its pure form, but only in combination with other materials. It has good hypoallergenic and thermoregulatory properties. Requires careful care to prevent the appearance of mold and insects.
- Foam rubber is considered the most inexpensive and accessible filler, but over time it crumbles. Well suited for filling armrests or furniture completely, provided it is used infrequently.
Advice. To fill a sofa, it is best to combine several materials. A good option is struttofiber + felt + polyurethane foam.
Upholstery materials
- The velor has a velvety and slightly shiny appearance. It is easy to wash and vacuum clean. The material is well ventilated, quite durable and soft.
- Flock is chosen by those who have pets. All because of its resistance to claws, easy washing, hypoallergenicity. Well suited for upholstering furniture for children.
- Jacquard emphasizes the luxury of the product. Yes, upholstery is more expensive, but it allows you to get a magnificent appearance of the product. You should be careful when caring: do not use aggressive detergents or acids, protect the sofa from direct sunlight.
- Natural tapestry with a three-dimensional pattern on the surface is highly durable, easy to clean, and pleasant to the touch.
- Leather is not the most practical upholstery option and is more suitable for office sofas or furniture that is used infrequently and is more of an interior item than a full-fledged sleeping place.
- Scotchgard is considered a modern upholstery option. Any design can be applied to it - it is the originality of the material that is highly valued by users. Easy to wash, but as durable as bed linen (washing - no more than 40 degrees). The material is often used as a cape.
Advice. One of the most important conditions for the durability of a sofa is the quality of the upholstery. Therefore, when choosing, consider not only the price of the material, but also the conditions of use: frequency, presence of children and pets.
Nuances of work
When changing upholstery, you need to remember the following nuances.
- You need to carefully monitor the amount of fabric. If you buy less than you need, there may simply not be enough textiles. It is better to buy fabric with a small supply. And, of course, this can be done only after measurements of the piece of furniture being processed and preliminary calculations of the amount of materials required for the procedure.
- Sometimes slightly worn thick foam is difficult to wrap with cloth. To simplify the task, it is wrapped in a thin layer of padding polyester or other similar filler, and only after that textiles are applied.
- If it is sheathed with jacquard or any other patterned fabric, its consumption will be greater. The fact is that it is cut in places where there is no pattern, so that the patterns are in harmony with each other. This causes a high rejection rate. You will need about one and a half times more of this material than any other material.
- When working with leather, you need to take into account that it will be more difficult to give it the required degree of tension due to its high density. In addition, larger staples or even furniture nails will be needed to hold it in place. Also, leather patterns are quite difficult to sew together. This requires a thicker needle and a denser thread.
- An already upholstered sofa can be further decorated. The simplest option is to cover the pillows with fabric of a different color or create unusual covers for them. However, in terms of decor, everything is limited solely by the imagination and personal aesthetic preferences of the owner of the piece of furniture - here you can make beautiful braid, fringe, a beautiful gathered seam, and much, much more.
Chairs
The upholstery of the seat and back of the chair is supported on a plywood board - the base. They are attached to the frame either with screws through the upholstery from the rear, or inserted into sockets on it.
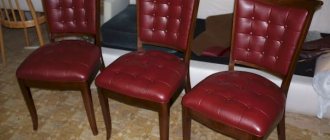
Photos before and after chair repair
Repairing chairs most often comes down to replacing worn upholstery, and this is a great opportunity to get the hang of upholstery. The sequence of work is as follows:
- We remove the old upholstery by prying the staples with a screwdriver.
- Remove batting and old foam; the canvas lining on the base is most likely still quite usable, unless it is saturated with sweat and fat secretions, then it can be removed and washed.
- We cut along the contour of the base with a release of 5-10% pieces of foam rubber grade 35-40 (harder) with a thickness of 40 mm and grade 20-25 (softer) with a thickness of 20 mm.
- We cover the base with canvas, securing it to the underside with a stapler; We fan out the folds in the corners in one direction.
- We lay hard foam on the canvas, and soft foam on it; Can be fixed with a few drops of PVA. Using the old upholstery, we cut out a new one with an allowance of 10-15%.
- We fasten the new upholstery on the sides to the underside with a stapler, 3-4 staples per side.
- On the sides, the upholstery is fixed crosswise with the hood; you need to make sure that the pattern does not float. If it suddenly becomes warped, we rip out the brackets with a screwdriver and retighten them.
- Using a stretch of fabric, we form the corners as shown in the pictures, secure with a stapler - ready!
The back is tightened in the same way, but foam rubber needs one layer of 20 mm and medium hardness, grade 25-30.
Restoration of upholstered furniture: changing the upholstery of a dining chair
When trying to update furniture upholstery, professionals recommend starting with small items: for example, a dining chair or pouf. Less time and materials are spent on them, and the fear of ruining something is not as great as when working with a sofa, couch, etc. The starting stage is dividing the chair into parts. The seat and backrest, if it needs re-upholstery, are unscrewed. Then, using pliers and a screwdriver, you should sequentially remove the paper clips that hold the old upholstery in place.
Then the creation of drawings and determination of the required cut dimensions begins. To do this, 3 parameters of the seat and back are measured: height, width and length. If the shape is not strictly rectangular, but has rounded corners, you need to count by the maximum points. The fabric has only 2 sizes: length and width. Therefore, to calculate them, the height multiplied by 3 is added to the same values obtained when measuring the part. if the length of the part is 33, and the width at the extreme points is 27, and the height is 7 cm, then a piece of fabric is purchased with dimensions of 54 by 48 cm.
The part is placed on a sheet of foam rubber with the wrong side up, outlined along the contour, and the desired shape is cut out of the foam rubber. Then it is put aside, the fabric purchased for upholstery is spread on a flat surface, placed inside out. A part that will be fitted is also placed on it. An outline is drawn with a pencil or chalk, but it should be cut so that you can subsequently bend and secure the edges. The indentation is usually equal to the height of the part with an increase of 7-9 cm, which will be placed on the wrong side.
Foam rubber is inserted into the part if it is a seat, and placed on glue if it is a backrest. A rough cloth is placed on top of it, which you can do without, but professionals still recommend using it in upholstering furniture. The easiest way to do this is to spread it out on a flat surface, place the back or seat on top, face down, and make sure that the fabric is smooth and has not formed a fold or crease anywhere.
Then its edges are folded inward, hugging the part, and fixed with fabric glue. You should work in the direction from the periphery to the center. In this case, be sure to ensure uniform tension of the material. In this way, you need to walk around the entire perimeter of the part.
The edges are folded and secured last. First, the top is folded into the center, then the corners formed on the sides are laid on it symmetrically, so that the place of their contact forms a diagonal. Be sure to fix this position with glue or thick threads.
The same algorithm for tightening should be repeated for the finishing fabric, but the fastening is done with staples from a large stapler. At the end they are knocked down with a hammer so that they do not fly out accidentally. Excess material, if any, must be cut off.
To facilitate the process of fixing the finishing fabric with staples, you can use a simpler algorithm: first stretch the material and secure it in the center on each opposite side, working crosswise - at the top and bottom, and then at the sides. After this, moving away from the center, add 1 staple on each side, constantly keeping the tension of the fabric under control.
This move allows you to fix the upholstery more evenly without causing distortions, which is possible when working with each side separately. At the end of the procedure, it is advisable to treat the product with a preparation that protects it from external influences and leave it to dry for 24-36 hours. After this, the parts are screwed back to the chair.
II – remove old upholstery
When the sofa appears in front of you in the form of separate parts, you need to carefully remove everything that is old and has lost its visual appeal and functionality. Be prepared for the fact that you will have to get rid of more than one hundred staples from a furniture stapler. This process can become very painstaking and annoying if you do not prepare all the necessary tools in advance:
- First of all, the bracket will need to be pryed off with something; a thin flat-head screwdriver will do for this;
- Now you need to remove it; pliers or round nose pliers will do for this;
- A utility knife may come in handy.
New comfortable bed
The bed is recognized as the most comfortable sleeping place, despite its size and occupied space. A full, healthy rest, according to experts, is only possible on a bed mattress. Before you begin remodeling your sofa, you should make sure that its soft parts are preserved. They will continue to play the role of a mattress. The wooden parts will serve as material for the frame, as well as the headboard. The remaining elements can be used as decoration. You may have to additionally purchase foam rubber, timber and, if necessary, decorative textiles. Using basic tools (screwdriver, drill, saw, furniture stapler, etc.) and wild imagination allows you to create an incredible masterpiece for the bedroom.
Step-by-step instructions for reupholstering a sofa at home
The process of replacing old upholstery with new one consists of the following steps:
- Laying the filler: when combining several materials, fasten the layers with Rapid-100 or Ecoline glue. These compositions set quickly, and the smell goes away after 5-15 minutes. Next, compact the material well/
- Place the new canvas over the filler
- Attach the first 3-4 staples to the back of the piece of furniture
- Tuck the edges, otherwise the fabric will look sloppy.
- Secure the upholstery with staples at intervals of 3-4 cm from each other around the entire perimeter, gently stretching the fabric. Do not allow the material to deform or roll to one side of the element.
Finally, visually evaluate all the details of the sofa.
Assembling roller blinds on a cornice
Installing such curtains with your own hands will not be particularly difficult. Step-by-step instructions for DIY roller blinds include the following steps:
A pocket is made on the bottom of the curtain for the weight strip. The canvas should be under tension, without sagging. You can take a metal rod or a wooden block. Such weights can be replaced at any time. Wood would be preferable since the metal may oxidize.- The top edge is wrapped around the bar and secured with several lines. If the block is wooden, then you can use a stapler or nails.
- Rings for the lifting mechanism belts are sewn under the bar.
- At the top and sides of the window opening, you need to screw in hook holders to assemble a simplified version of the lifting mechanism. If the frame is opening, then the screws are screwed into the glass unit.
- For such a design, one tape must have a size equal to three lengths of the curtain, and the width must be added to the second.
- One ribbon is attached to the top hook, wrapped from bottom to top and passed through the ring at the top. Do the same with the second one, only pull it through both rings.
- Both ribbons are tied together.
Padding
This relatively new concept includes not only the replacement of upholstery, but also: a complete repair of the frame, replacement of foam rubber, locks, spring blocks, everything that is required. In essence, reupholstery is a major overhaul of upholstered furniture, as a result of which you will receive a new interior element made to your taste.
Major repairs allow you to save even the most “dead” furniture
Required tools and materials
In order for the work of reupholstering upholstered furniture to proceed comfortably, smoothly and without unnecessary nerves, you need to prepare the necessary tools in advance.
Tools for disassembly and assembly work
- A large flat-head screwdriver and pliers are used to pick up and pull out old staples.
- A Phillips or flat-head screwdriver that matches the slot size of the screw heads securing the lock to the frame.
- Set of wrenches for nuts and bolts.
Almost all upholstered furniture frames are bolted, so you can’t do without a set of keys
- Tape measure - take the necessary measurements when replacing body parts.
- Stapler - construction or pneumatic. The second is preferable because, without effort on your part, it drives long, strong staples deep into the wood of the frame, even through several layers of fabric.
- Staples - from 6 mm to 10 mm depending on the thickness and density of the selected upholstery fabric.
- Garbage bags (larger and denser).
To sew new covers you will need:
- New upholstery fabric - the choice in stores is mind-boggling, choose according to taste and cost. In order not to be mistaken with the footage, sketch out approximate details before purchasing. Take into account the standard width of the roll - up to 145 cm (including the edging of the edges of the fabric) and the location of the patterns relative to the pile and shine of the material.
- Lining fabric for padding the back surfaces of the back and seat. This is not necessary, but a layer of lining will protect the furniture from dust getting inside, and the cost of lining material is low. Therefore, it is better not to neglect this simple operation.
- Sharp scissors, preferably special tailor's scissors for cutting.
When cutting new covers, tailor's scissors will be simply irreplaceable.
- Crayons or thin pieces of soap.
- Threads - no less than No. 10, and better - special reinforced ones for rigid fabrics.
- Meter ruler.
- Paper for patterns if you are going to modify the appearance of the product: change the shape of the legs, back and seats.
- Sewing machine.
How to make the simplest option with drawers at home?
To make a simple design of a soft sofa with drawers with your own hands, you will need to make a preliminary drawing of the product, prepare consumables and tools.
Drawing and diagram
To make a sofa, first of all, a detailed drawing with dimensions is created. It is created:
- with your own hands (pencil on a piece of paper);
- ordered from a specialized company for the manufacture of custom-made furniture;
- is on the Internet;
- drawn in a special program on a computer.
Each consumer chooses the option that suits him best.
Attention: when drawing a drawing, be sure to consider whether the armrests will be hard or soft, whether your design will include linen drawers and other additional elements.
When selecting the dimensions of a sofa, the following characteristics are taken into account:
- back and seat height;
- width of the sofa;
- filler volume.
Tools
The following materials are prepared from:
- boards;
- plywood;
- self-tapping screws;
- furniture corners;
- glue;
- foam;
- upholstery fabric;
- foam;
- padding polyester;
- threads
Tools you will need:
- drill;
- screwdriver;
- hacksaw;
- pencil and tape measure;
- clean rag;
- sandpaper;
- scissors;
- knife for cutting foam rubber;
- sewing machine for sewing covers.
Preparation for production
First, the components of upholstered furniture (sidewalls, armrests, frame, back, seat) are manufactured according to the prepared drawing. Markings are made on the boards and materials are cut according to the marks. The back, sides and base are created from boards. You can also use 8 mm plywood instead of boards.
The prepared elements of the product are polished. For these purposes, use a grinder or sandpaper of different grain sizes. Next, the lumber is treated with antiseptics, stain and covered with paints and varnishes.
Step-by-step assembly instructions
The sofa is assembled in the following sequence:
- First the base is assembled. For this, bars with a cross section of 40–50 cm are used. The frame is assembled with self-tapping screws and a screwdriver. When joining individual wooden parts, wood glue is used.
- Next, a rectangular frame is made from boards.
We glue the boards and reinforce them with slats along the entire length using self-tapping screws. The glued slats will later serve as support for the base of the sofa. Next, the product is set aside for several days until the adhesive composition has completely dried. - Now let's move on to making the back. It is covered with plywood.
- Next, we proceed to making the sidewalls from the same plywood.
- The back and sides are connected by metal corners.
- Boards are screwed to the base.
- After assembling the base, we proceed to the construction of drawers for things. For this, 4 boards and plywood are used, acting as the bottom.
- At this stage, all wooden surfaces are sanded again and their corners are rounded.
How to sheathe or upholster with leather?
The process of upholstering a sofa is as follows:
- The finished wooden frame is covered with foam rubber.
For these purposes, a material with a thickness of at least 3 cm is selected. First, the back is glued at the front and top, and then the sides. The glue is applied to the wooden surface with a brush or roller. Set aside the product until completely dry. - The next stage of cladding is pasting with padding polyester. The padding polyester located between the upholstery and the foam rubber will extend the life of the foam rubber itself and prevent wear and tear of the upholstery material. This will also give the furniture additional volume and make it softer and more comfortable to use.
- Now we move on to upholstering the sofa with leather. For this purpose, covers are sewn from fabric.
- After making the covers, they are put on the product and fixed with a furniture stapler.
That's the whole simple process of making a simple model of a soft sofa with spacious drawers. On average, its production will take from 3 to 5 days.
Tip: for comfortable seating, you can also make a rocking chair or a knitted ottoman. And at the dacha, you may need a chair made from pallets and a comfortable table for a gazebo.
Required tools and materials
To restore the covering and interior of the sofa you will need upholstery fabric, filling, padding polyester, non-woven fabric . It is not necessary to use the same “filling” as it was. You can purchase better and more modern material.
Before you restore an old sofa with your own hands, you need to prepare the following tools and consumables:
- spanner wrench or pliers;
- screwdriver;
- screwdriver set;
- furniture stapler, needle with a large eye, strong nylon thread;
- tape measure, pencil, chalk for cutting (or soap);
- universal adhesive (for fixing sheets of soft filler, repairing frame elements);
- screws, metal tongues.
To process repaired chipboard parts, you should prepare sandpaper. And for servicing the folding mechanism - a suitable lubricant.
Without experience in calculating the material for replacing upholstery and filling, you should not purchase it in advance. It would be more correct to go to the store after removing the old coating and measuring it.
