Today I want to show you how to sew pillows for newborns in the shape of a Butterfly, Bear and Owl. These are head pillows for babies from 1 month old, designed to properly support the baby's head while sleeping. Experts have different opinions about such pillows, so before sewing or buying such a pillow for your child, you should consult a doctor.
To make a pillow we will need: natural cotton fabric, synthetic padding (alpolux or sheet holofiber are also suitable), filler (holofiber or comforter), threads, needle, pins, measuring tape. If you want to sew different looking pillows, then below is a basic pattern for a pillow for newborns, with which you can create a pattern of any shape. To the pattern you need to add 1-1.5 cm to the seams on all sides.
Replacement options
Instead of pillows for babies, you should use:
- a diaper folded several times from a soft and environmentally friendly material;
- It is possible to slightly raise the mattress (up to 30 degrees) by placing a small cushion under it.
Such a device helps breathing and does not interfere with the baby’s salivation.
However, the first five months will fly by unnoticed, and you need to take care of a comfortable, useful pillow in advance.
Features of the product for children
When choosing pillows you should pay attention to a number of points:
- the product should not cause an allergic reaction;
- the material must be practical, because pillows will have to be washed frequently;
- the pillow should be as safe as possible so as not to injure the baby, so you should carefully examine the fasteners included in the product;
- take into account the height of the pillow; there should not be a significant difference between the child’s back and head when the pillow is placed under the neck.
Modern medicine advises using sleep products when the child reaches one and a half years of age. This is due to the fact that it is by this period that the spine takes on its final shape.
However, first of all, it is necessary to pay attention to the individual characteristics of the baby. Some will need a pillow earlier, others later.
Fabric preparation
Before cutting out a piece of fabric from a previously prepared pattern, you need to iron the fabric. A household ironing iron is sufficient. We iron on both sides using steam mode, which will give maximum shrinkage during further washing of the finished textile product. The future pillow will be less susceptible to changing shape and size, in other words, so that it does not shrink. For maximum effect, it is advisable to wash the fabric.
Ironing
Iron with steam on both sides.
Dimensions
Parents need to know about the features of choosing pillows for children. The correct selection of sleep products will help ensure proper development and a good night's rest.
The standard pillow sizes are 60x40 centimeters. When purchasing, consider the width of the mattress on which the baby is lying.
Children often like to sleep on their stomachs, so the pillow must be well-ventilated. A child’s nose needs access to fresh air, and this can be provided by filling a product made from buckwheat husks.
Note!
Duvet: TOP-170 photos + video reviews of duvets. Advantages and disadvantages of filler, choice of cover and quiltingBed linen for newborns: requirements for bedding for a newborn. Variety of sizes, materials and patterns of children's underwear (photo + video)
Double bed linen: TOP-170 photo reviews of new designs, choice of size, color and material
The size of a children's pillow for children from two to seven years old should be 50x40 centimeters and no more than ten centimeters high.
Children over seven years of age purchase “adult” products, but their height is selected individually.
Master class No. 2: Letter pillow
And now we propose to sew another simple but original letter pillow, which will help to personalize a nursery or bed if, for example, two or more children live in the room.
Materials:
- Textile;
- Synthetic fluff;
- Sewing supplies;
- Sewing machine.
By combining 3 types of fabric, you can use leftovers and make your pillow design more fun.
Step 1. Select a letter, draw it (or print it in A4 format) and cut it out along the contour.
Step 2. Now we need to cut out two parts of the pillow - the front and the back.
- To cut out the front part of the pillow you need to: place our template face up on the fabric lying face up, trace it and then cut out the blank.
- To cut out the back side of the letter you need to do everything the same way, but first turn the template “wrong side” up, that is, according to the principle of mirror reflection.
Step 3. Now you should prepare the side of the pillow.
- Its length should be equal to the perimeter of the letter + 2 cm for allowances. You determine the width of the sidewall yourself, for example, it can be 4 cm, then taking into account the 2 cm seam allowance, the width of the workpiece will be 6 cm.
But since you most likely won't be able to cut a single strip of fabric, you will need to cut several strips of the same width and stitch them together so that you end up with one strip of the desired length.
Step 4. Sew the side panel to the first letter. To do this, we fold them facing each other and begin to grind along the entire perimeter of the workpiece.
- For convenience, the side strip can be attached with pins.
We repeat the same procedure with the second half of the pillow, but leave a small section unfinished.
Step 5. We make several cuts in the places of roundings and corners.
Step 6. Hurray! Almost done. All that remains is to turn the pillow out thoroughly, stuff it with synthetic down and carefully sew up the hole.
With the help of this master class, you can “sew” an entire name or word with your own hands. For your inspiration, we suggest taking a look at another selection of photo ideas.
Pillow fillings
Modern pillows for children are made from a variety of materials. It often happens that pillows for cribs made from different materials have the same price. In this case, it is necessary to pay attention not only to the price tag, but also to the quality of the product.
Among the popular fillers, we note the following:
- fluff;
- wool;
- latex;
- buckwheat;
- eucalyptus;
- bamboo.
Bird down is considered the most undesirable filler for a child. In general, down is considered a high-quality material, perfect for adults.
Note!
Pillow for pregnant women - TOP 160 photos + video reviews of pillow designs for pregnant women. Properties and purpose of the pillow. Types of fillers and coversSofa decks: TOP-130 photos and videos of sofa deck design options for a sofa and armchair. Features of application, choice of color and material of manufacture
- Envelope blanket - TOP 150 photos + video reviews of baby envelope blanket designs. Types of safe fabric materials, colors and prints of blankets
However, for children, fluff has the following negative qualities:
- pillows should not be washed frequently;
- the soft structure of the filler negatively affects the child’s fragile spine;
- Dust mites, one of the “accomplices” of allergic reactions, settle in such products;
- down is an extremely hot material in the warm season.
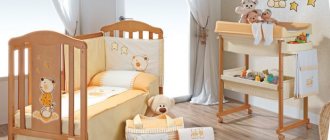
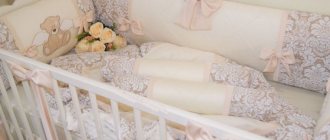
Soft sides made of four parts for a newborn crib
To sew such bumpers for a child’s crib, you need to prepare:
- cotton fabric of three colors - for the outer and inner sides of the product, for ties;
- filler – sheet synthetic winterizer;
- threads, sewing tools.
Description
We measure and write down the dimensions of the length and width of the crib, the required height of the side.
We cut out two large pieces from two colors of fabric. Dimensions – height of the side by the length of the crib. In addition, we cut out two short parts. Their dimensions are equal to the height of the side by the width of the crib. On all parts we provide allowances around the perimeter of 15 mm.
For the ties, cut out 10 stripes (= 3 pieces for each long piece + 2 pieces for each side piece).
We fold each strip in half, iron it, and unfold it.
We fold the sections of the long sides to the center of the strip along the wrong side. Then we fold the strip in half and iron it. We get a folded edge of the strip. Let's stitch it.
Pin the ties to the front side of the outer parts of the bamber at the corners and one tie in the center of the long side of the larger part.
Fold the outer and inner parts of the side right sides together, pin and sew. We sew together the details around the perimeter, leaving an open area. Through it we turn the part inside out.
From padding polyester we cut out the internal parts for the side. Their size should be equal to the blanks for the sides minus the allowances.
We insert the padding polyester inside the pillowcase. Sew up the holes by hand using blind stitches. You can sew it on a machine, it’s faster and easier.
Therapeutic pillows
In order to prevent various diseases, children's orthopedic pillows have recently become very popular.
The advantage of such a pillow is the ability to remember the anatomical features of the child’s body structure and prevent curvature of the back of the head, neck and the entire cervical region.
Therapeutic pillows also include pillows with an unusual headrest shape. The tilt of the pillow facilitates the process of feeding the baby, eliminates excessive swallowing of air and prevents the occurrence of colic.
How to sew bumper pillows: step-by-step instructions
The simplest version of crib bumpers consists of 4 elements. The longest of them are placed along the crib, the shorter ones - at the end, headboard. They look like large fabric rectangles and are attached to the bars at the corners of the bed.
The process of sewing bumpers for a crib can be described step by step as follows:
- Prepare patterns - to do this, transfer the required dimensions onto paper, draw the outline of the part on it and cut it out for transfer to the fabric.
- The resulting patterns are outlined on the material chosen for making the sides. Then the elements are cut out to create blanks.
- Preparing the base for filling with stuffing: rectangular parts are sewn on three sides. It turns out to be a bag. The selected filler is placed through the hole, then the part is sutured.
- Ties are sewn onto each corner to secure the bumpers to the rods. They are sewn on each side at equal intervals. You can make as many ties on the sides as the seamstress deems necessary.
If you are planning simple-shaped borders, but want to diversify their appearance, you can sew ruffles on the top of each or add decorative inserts to the product.
Bed bumpers are made not only as a luxury item, but also as a protective device. By independently developing their design, you can create attractive original compositions for the interior of a children's room.
With your own hands
Young mothers very often sew toy pillows for their beloved children. Such products are also called developmental, because needlewomen use figurines of funny animals, favorite cartoon characters, etc. in their products. These products help kids explore the world around them and attract them with their colorfulness, elegance and unusual design.
Note!
- Children's blanket: criteria for choosing a blanket for children. A variety of sizes, materials and patterns of children's blankets. Rules for caring for a child’s blanket (photo + video)
- Bedspread for a sofa: TOP-140 photos and videos of design options for a bedspread for a sofa. Features of the use of the bedspread, choice of color and material
Wool blanket: options for using wool blankets. Advantages and disadvantages of wool, varieties of sizes and shapes of blankets (photo + video)
Features, advantages and disadvantages
First, let's figure out what the main advantages of such sides are:
- Versatility. It doesn’t matter what shape the baby’s bed is – rectangular, round or oval. Since the sides are not solid, but consist of separate elements, they can be easily placed around the perimeter without concealing excess space inside. The only thing that needs to be taken into account is that the crib must have slats, because they are used to attach the bumpers.
- Style diversity . Whether the child has a separate room from birth or the crib is in the parents’ bedroom, such bumpers will not disrupt the style of the room, because depending on the fabric chosen, they can be both frivolously mischievous and strict.
- Functionality . When the baby grows up and there is no longer a need for protective bumpers, you can decorate the sofa with them, use them for sitting on the floor and even for sleeping.
- Safety . The sides cover the inner space of the crib from drafts, protect the baby’s arms and legs, preventing them from getting stuck between the slats, and soften impacts on the walls of the crib.
- Cognitive function . By studying drawings, the baby gets acquainted with objects and learns to distinguish colors.
What disadvantages are worth noting:
- The most important thing is that, like any textile product, the sides are dusty, so they need to be washed regularly so that the child does not breathe it in.
- The sides interfere with visibility and prevent you from getting to know the outside world. Is it important? No, at least in the first six months to a year of a child’s life. At this time, the baby cannot focus his vision on distant objects, so he does not need a review. Much more important is the feeling of comfort and security that the sides create, shielding the baby from the outside world.
- If you use thick, tightly stuffed pillows in a round crib, this can also become a disadvantage, because such cribs are not initially large in area. In this case, it is advisable to make loose packing or use cholcon as a filler.
- And lastly, a significant disadvantage for some will be the large number of ties, because each element is attached separately.
Important points
Before starting work, you need to carefully consider what material the product is made from and what kind of filling the pillow will have.
The best materials are considered:
- silk;
- atlas;
- calico;
- bike.
The most popular fillers are:
- silicone granules;
- foam;
- padding polyester
Detailed diagrams and step-by-step instructions on how to make a baby pillow with your own hands can be easily found on numerous handicraft websites.
Owl shaped pillow
Pattern of a pillow for newborns in the shape of an owl. To the pattern you need to add 1-1.5 cm to the seams on all sides.
We cut out the main part from the fabric in two copies; I made the parts for the eyes and beak from felt.
We first sew the eyes and beak to one of the sides, and then sew it in the same way as described above in the butterfly pillow.
The pillow for newborns in the shape of an owl is ready.
I got these head pillows for kids.
Wool fillers
Natural filler has the following positive characteristics:
- convenience in the hot season;
- breathability;
- elasticity.
True, there is one negative point - wool creates favorable conditions for ticks. And this can cause a severe allergic reaction in the baby.
Latex
Looking at photographs of children's pillows, buyers will definitely pay attention to products with latex filling. Natural rubber material:
- easily absorbs moisture;
- elastic;
- elastic;
- has hypoallergenic properties.
In addition, pillows with latex filling are very pleasant to the touch.
Side made of composite parts processed with edging
To make the sides you will need:
- cotton fabric of three colors - for the outer and inner sides of the product and for the ties;
- filler – sheet synthetic winterizer;
- cotton cord;
- threads, sewing tools.
Description
We measure and write down the dimensions of the length and width of the crib, the required height of the side. We cut out six identical parts from two colors of fabric. Dimensions – height of the side by the width of the crib. On all parts we provide allowances around the perimeter of 15 mm.
For the ties, cut out 24 stripes. We fold each strip in half, iron it, and unfold it.
We fold the sections of the long sides to the center of the strip along the wrong side. Then fold the strip in half and iron it. It turns out a folded edge of the strip, which we sew.
We mark along the bias thread the required (preferably with a small margin) number of bias tapes 4-5 cm wide.
We sew them into one long piece.
To make the edging, fold the strips in half, placing the cord inside.
We pin the fabric along the cord with pins. We sew the piping using a zipper foot for this operation. When stitching, the needle should hit the material as close to the cord as possible.
We pin the ties to the front side of the outer parts of the bamber at the corners.
We pin or baste an edging along the perimeter of the outer part. Please note that the edging should protrude beyond the boundaries of the part exactly along the seam line.
In the rounded areas, we cut the edging allowances.
We fold the outer and inner parts of the side with the right sides, chop and sweep away.
We sew together the details around the perimeter, leaving an open area. Through it we will turn the covers inside out. Trim off excess allowances at the corners.
We turn out the details.
From padding polyester we cut out the internal parts for the side. Their size should be equal to the blanks for the sides minus the allowances.
We insert the padding polyester inside the pillowcase.
Sew up the holes by hand using blind stitches.
The sides are ready!
Eucalyptus
Eucalyptus filling is used for children's pillows as an alternative to down.
The leaves of the plant do not absorb odors, do not cause allergic reactions, and create an “unbearable” atmosphere for mites and fungi.
Material requirements
Regardless of which model you choose, there are certain requirements for materials - as, indeed, for any children's things. The material must be:
- environmentally friendly;
- hygienic;
- easy to wash;
- do not be afraid of high temperatures;
- do not cause allergies.
Outer fabric
Suitable for napkin and pillowcase:
- chintz;
- satin;
- flannel;
- linen;
- teak;
- calico
Filler
As for the filler, young mothers now practically do not use down. This traditional “cushion” material has almost fallen out of use for several reasons:
- the cover requires very thick fabric so that the fluff does not get out;
- the pillow must be sewn with a special linen seam, otherwise the fluff will come out through the holes from the needle, and for a novice craftswoman this is quite difficult;
- despite the fact that fluff is a natural material, it causes allergies in many children;
- it clumps into clumps;
- This filler is quite difficult to care for - it is difficult to wash, it must be dried very carefully and periodically sorted out.
Important! If you really like down pillows, use synthetic down, which combines the properties of down and modern synthetic materials.
By the way, about synthetics. The following fillers are ideal for children's products:
- padding polyester;
- holofiber;
- latex;
- polyurethane.
Important! If you use padding polyester, then it is better to take not pieces or a sheet, but a fragment of clothing with this filler. For example, a pillow can be made from an old jacket, in which the filling is already quilted.
Fixing products
Special types include models that support correct body shapes, relieve stress from the spine and promote proper fixation of the baby’s head.
These special products for children born with various disabilities can be used after the first 28 days of the baby’s life.
Useful tips
Almost every expectant mother can sew borders made of cotton fabric and padding polyester into a baby crib thanks to the step-by-step instructions suggested above. Below are tips from experts on making your own crib bumpers:
- When choosing the fabric and design of the future product, it is worth using your imagination, because experiments with the color and shape of the sides have a positive effect on the development of the baby.
- Fastenings such as Velcro and ties often do not withstand the pressure of the baby, who pulls on the side, trying to get up in the crib. Therefore, it is advisable to sew overlays from a single piece of fabric. The edges that have not been finished can be folded. This way they will be in the middle. After this, one seam is sewn along at least part of the ties.
- You can use ordinary rectangles as patterns.
- Holofiber is one of the best fillers for sides, which does not lose its shape even with frequent washing.
