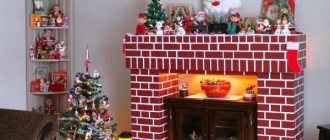
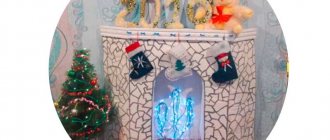
Warm and soulful winter evenings by the roaring fireplace. Who among us has not dreamed of this festive luxury, filled with the aromas of tangerines, the light of garlands and the sounds of Christmas music. If you live in a city apartment and you only dream of a stylishly decorated New Year's fireplace, we will tell you how to make it yourself. See a selection of cool ideas and make amazing decor for the New Year 2022 with Joy-pup .
DIY false fireplace made of cardboard - step-by-step master class
To make a fireplace, you will need thick cardboard as the main material. Make elements from it and connect them using masking tape and hot glue.
Cover the surface of the cardboard or paint it brown. Fix white stripes on the sides. On the sides of the opening for the fireplace, decorate the area “like a brick”, using wallpaper of the appropriate shade. Cover the inside of the fireplace with wallpaper or paint it black or dark brown. Decorate with large decorative candles, New Year's socks, garland and other elements.
Fireplace with high portal
Making a long fireplace with a high portal is perhaps the easiest way. You just need to twist two identical vertical columns of the required height from sheets of cardboard. For the back wall - one flat sheet. And several sheets of plywood or foam plastic for the base and top cover.
Photo: lachat.ru
DIY New Year's fireplace from a large cardboard box - master class with photos
The set of materials for making such a fireplace is minimal. All you need is a large cardboard box, a stationery knife, scissors, a tag, hot glue, and brown wrapping paper.
On a cardboard box, you must initially carefully seal the corners. On the larger side, mark and cut out a rectangle - a place for the fire in the fireplace. It is best to cut with a utility knife or large scissors. If the box is very large, then its back part needs to be cut off so that, leaning the fireplace against the wall, it will harmonize perfectly with the interior. If necessary, the fire hole can be enlarged.
Use tissue paper to carefully wrap the front of the fireplace. To make the fireplace more original and attractive, you can paint it. In this case, it is better to sketch sketches with a simple pencil.
All that remains is to install the fireplace in the right place and further decorate it. You can use a large candle as a fire, placed on a stool and decorated with various elements.
Where to begin?
Like any other home craft, building a fireplace starts with planning. This stage may seem unnecessary and boring when an idea is already growing in your head and you want to quickly bring it into reality. But it is mandatory. Without the right sketch, “building” a fireplace will take a lot of time and effort, and the result may be disappointing.
At the planning stage we do the following:
- we carefully select a place for the decorative element, since it is undesirable to move the finished structure;
- we determine the style and predominant colors in the interior: a decorative fireplace should fit harmoniously into the decor, and not stand out with its absurdity;
- we collect “construction” material (any cardboard boxes will do) and select the appropriate shape and size;
- We make a drawing of the desired design with a detailed indication of all dimensions;
- we select a method of decorative finishing and prepare a sketch of the fireplace in color (very often what we draw in our imagination turns out to be far from ideal, but on paper all the flaws will be immediately visible).
When choosing a decoration method, we recommend visiting a hardware store. If you haven’t done renovations for a long time, you will be surprised how many new materials and mixtures have appeared on the market. Perhaps such a walk will lead to an original idea for painting or covering with an imitation material.
Don’t rush to simplify everything as much as possible, because the manufacturing process itself is already quite simple. You need to pay enough attention to decorating the structure. Otherwise, you will get a craft at the level of a school labor lesson, which will not deceive or surprise anyone.
DIY decorative New Year's fireplace made from boxes
So, if one large box is not available, you can make a fireplace from several smaller boxes. For work you will need: cardboard boxes (preferably the same size), brown craft paper, sponge, acrylic paints, colored paper in yellow, black and red.
At the initial stage, secure the boxes in the desired position with tape. One door must be open. The boxes need to be turned sideways and laid so that the base of the structure is formed. The back seams and sides are well taped.
Use a sponge and red paint to imitate brickwork on craft paper. The drawing will be more realistic if the paint on the sponge is not very saturated. After the paint has dried a little, the paper can be attached to our fireplace. This can be done with double-sided tape or glue. Now all that remains is to cut out flames from colored paper and seal the back of the fireplace (behind the flames) with black paper.
Preparatory stage
Before you begin directly creating a false fireplace, you should carry out some preparatory measures:
- First of all, choose a place to install it. It is optimal for this to be an empty wall without bulky furniture; the latter will not always be combined with the structure. It's convenient to install a fireplace in an unsightly corner or a place that is in desperate need of decoration.
- The second stage is choosing sizes. They are calculated based on the availability of space and the wishes of the hostess. Approximate dimensions - about 1 m in height and 1-1.5 in width.
- At the next stage, you need to decide on a sketch of the future product. If the shape of the fireplace is complex, it is better to outline all the dimensions in advance so as not to be distracted during the manufacturing process. In the case of a simple design, you can focus on the size of the available box.
- Before starting, it is recommended to draw a completed drawing of the fireplace, including all decorative elements and the final coating. All this can be changed during the manufacturing process, but it is better to imagine exactly what will happen. This will help you determine the list of necessary tools and materials so you don’t forget to buy anything.
It is very important to pay attention to the decor so that the guests present do not suspect that ordinary cardboard was used to make it. It is better that all seams and materials are closed. The minimum is to paint the base with acrylic or water-based paint several times.
Christmas false fireplace made from A4 paper boxes
A fireplace can also be made from empty A4 paper boxes. For this option you will need 8 such boxes and 10 lids from such packages. You also need to stock up on packing tape, plenty of crepe paper, masking tape, paint, colored pencils and markers, a large box or sheet of thick cardboard from which to make the fire background.
Manufacturing Features
- Make three fireplace elements from the boxes - 2 side columns and one upper part. The boxes can be connected together with tape. So, for example, to create a side part, 4 boxes can be used to make one column.
- Each support should be wrapped in crepe paper. This material can be fixed using glue.
- Collect all the prepared columns and form a fireplace out of them. After all the elements have been placed, use packing tape to securely and efficiently connect all the elements.
- Using white masking tape, stick strips on the red surface of the fireplace so that it imitates a brick surface.
- The fire background can be painted on the white wall inside the fireplace or made from cardboard in red, orange and yellow.
Choosing a fireplace type
There are different types of home fireplaces: corner, island, wall-mounted and so on. The easiest way to make and fit into any interior is wall-mounted. The island one is more difficult, but you can move it in the process. A corner apartment would be a good fit for a small apartment.
You can use ready-made drawings and make changes to some parameters according to your dimensions.
Before starting production, remove everything unnecessary, clear the workspace and the wall where the fireplace is installed, prepare the tools and you can start.
DIY New Year's fireplace from a TV box - step-by-step master class with photos
Well, mommies, the warranty period has passed, but the huge box is still lying on the balcony? Now is her finest hour! The perfect New Year's fireplace will come from a TV box! For work you need: a TV box, polystyrene foam or any other material for the podium, ceiling plinth (for decoration), putty, white paint.
Cut the box and bend the sides to create an opening for the fire. For greater rigidity, fill the hollow holes with small boxes or make stiffening ribs. When the frame is ready, you need to make a podium (for example, from polystyrene foam) and start decorating. Here, of course, everything depends on your imagination. According to this MK, the ceiling plinth is first glued, then the surface of the artificial fireplace is puttied and painted with white paint. The craft looks gorgeous both in daylight and in the evening.
Christmas wreath
A wreath is a classic decoration for the wall above the fireplace for the New Year and Christmas. It helps fill the empty space above the mantel.
Most often it is made from the same spruce branches, but, as in the case of a garland, it can be any greenery. For example, bay and oak leaves:
Just Christmas toys:
And even sheets of glossy paper rolled into a tube:
Everything is limited only by your imagination and available materials. But in any case, it is better to make the wreath frame from flexible rods. Willow vines work well for this.
To make such a frame you just need to twist one or two dozen vines around something round. For example, buckets. Then tie them with a strong cord every 10 cm - and that’s it, the base is ready. Without a frame, a wreath can be made only from spruce branches, but this will cause difficulties even for a master.
DIY corner false fireplace made from boxes
To make such a false fireplace, you can use a large box. Shorten its side parts and the top part so as to form a triangle. Consider the shape depending on where the fireplace will be located. Cut a hole in the front for the fireplace. Using cardboard, fix the top part and make all the parts inside the fireplace.
After the structure is ready, cover it completely with a film with a “brick” effect. Place several layers of cardboard cut out in the form of segments on top and also decorate them. They will serve as the top of the fireplace.
How to decorate an artificial portal?
After the “fire” is ready, you need to decorate the finished fireplace on top. The photo shows some interesting ideas.
This false portal is perfect for a photo shoot!
Now, having invited friends to visit you for the New Year, you can unrealistically surprise them with the fact that you have a fireplace. Turn off the lights, turn on the “lights”, and for the first few seconds your guests won’t be able to distinguish it from the real thing! And the fact that the fireplace is made with your own hands and from cardboard boxes... let this be a little New Year's secret. 
Fireplace for the New Year made of penoplex - step-by-step MK with photos
For this fireplace you will need one large sheet of polystyrene foam (material thickness 5 cm), a hot glue gun, remnants of wallpaper or a strip of plinth, a stationery knife, a simple pencil, and thick cardboard. You will also need any glue used to glue wallpaper.
Initially, draw the shape of the fireplace on a piece of paper and indicate its exact parameters. Using the same pattern, lay out the base of the fireplace. If necessary, straighten the edges of the structure using a utility knife. Glue the baseboard to the top of the chimney. Cover the surface of the structure with white wallpaper; the inside of the fireplace is covered with brick-like wallpaper. Glue strips of plinth at the joints. As additional decoration for the lower part, you can use a lattice, artificial candles, or glowing garlands.
Assembly options
If there is a big box
A large cardboard box will make a fireplace with a rectangular portal. Determine the size yourself, but the optimal height is about 80-90 cm, the width is about the same, and the depth is 6-15 cm. But there are models that are wider, narrower, taller, and lower. Everything is to your taste. For example, here is a drawing of a cardboard false fireplace with dimensions.
Drawing of a fireplace from a cardboard box
We begin assembling the imitation fireplace from cardboard from the central part. We form the columns first. Cutting rectangles to size is no problem. The problem is to make even folds in the right places. Take a large ruler or a straight bar and a hard object with a rounded end. For example, a ballpoint pen will do, or you can take a spoon or fork and use the pen. The idea is as follows - along the line where the fold should be, apply a ruler/bar, draw the back of a ballpoint pen or the handle of a cutlery along the bar, pushing through the cardboard. But be careful not to tear it. The sheet bends easily along the drawn line.
Cardboard fireplace parts
We glue the central part or paint it right away. Then it will be too inconvenient. You can paint it black, as in the photo. Another option is to imitate brickwork. Looks good too.
It is convenient to glue the parts together with tape (the type of tape has already been discussed). We glue each connection on both sides. We don't regret scotch. This cardboard fireplace was painted, so the columns were covered with white thick paper. You can use a primer and apply paint over it.
Almost done
We make a shelf above the fireplace from several pieces of cardboard using the same technology. If you plan to install something, it is advisable to make stiffening ribs - several partitions. If the entire structure turns out to be strong and stable, you can make a shelf from a piece of plywood, for example.
If the cardboard is thin, you can use polystyrene/foam. It is sold in construction stores. You can take the slabs that are used to finish the ceiling. They have processed edges and a pattern is applied to the front surface. In general, it might turn out interesting.
Next comes the finishing touches. In this version, “bricks” were cut from paper of suitable colors. They decorated the portal opening. This is where you will need PVA glue. Do not forget to leave seams between the “bricks”. In the presented model they are painted with a base color, but you can make them, for example, black or white.
Portal design
The rest of the surface of the false fireplace is painted, and foam (polystyrene) moldings are glued on top.
This is what happened
Moldings can be glued before painting. You need to cut them with a sharp stationery knife. Then the cut will be smooth. Glued with PVA or special glue. Wipe off any remaining residue immediately, otherwise the paint will lie unevenly.
The same structure can be covered with brick or wild stone wallpaper. Self-adhesive film is also suitable. But you have to work with it carefully - you won’t be able to peel it off.
If the boxes are small
Small cardboard boxes are no more difficult to work with. They can be the same or different sizes, thickness and width. Based on the existing set, the structure is assembled.
This is the fireplace we made from existing cardboard boxes
There are two ways:
- Seal the opening part of the boxes with tape, then glue them together. You can use PVA glue. Press the boxes to be glued well together and leave for 8-12 hours for the glue to dry.
- Cut off the opening part and glue them together with pieces of tape.
Glue the boxes together with tape from the back side
The second option takes less time, but the design is unreliable. If the dimensions are large, it may sag and sag.
With the lids cut off, the structure becomes shaky
To give a fireplace made of cardboard boxes a presentable look, we paint it “like brick.” To do this, cover the surface with thick grayish-brown paper. This color will be the background.
To paint, you need reddish-brown paint and a large foam sponge. It can be cut to the size of the brick - 250*65 mm. Pour the paint into a flat dish, dip a sponge into it, apply it to the paper and lightly press it, draw the bricks.
Drawing bricks
When working, you need to make sure that the “seams” between the “bricks” are the same width. This is not an easy task - you get distracted a little, and the size is not the right one. You can do it simpler - cut the masking tape into narrow strips, stick it on, and draw “bricks”. After the paint has dried, remove the tape.
Here's a fireplace made of cardboard
The top part had to be reduced because our fireplace was too wobbly. It is better to use whole boxes.
Fireplace with round portal
Its assembly is more labor-intensive: you will have to glue the vault well. This fireplace required 4 large boxes (like TV boxes).
Drawing of a cardboard fireplace with dimensions
The base was glued separately. Stiffening ribs were glued to the inside of polystyrene. The weight turned out to be solid and the base sagged without reinforcement. The strips were installed approximately 5 cm apart. They were glued with masking tape, then the base was taped on all sides.
Then we cut out the front part and decorated the back wall. It’s better to decorate it right away, before it’s glued together. We transfer the arched cutout onto a sheet of cardboard. We cut out “bricks” from cardboard and glue them so that the edges do not extend beyond the “arch.” When the glue dries, we assemble the main part of the portal. We also install several stiffening ribs in the portal - at a high height, the cardboard can “play”, and this way everything turns out strong and rigid.
The process of making a fireplace from cardboard
The next stage is making the lid. It is multi-layered - cardboard, polystyrene foam, cardboard. Everything is coated with glue, the weight is installed. When the glue had dried (after 14 hours), the lid was secured to the structure with tape. NEXT - finishing work.
To smooth out any unevenness caused by the tape, we cover all surfaces with thick white paper. You can take A4 sheets, or larger ones.
Next you will need a roll of paper towels and PVA glue. We dilute it 1:1 with water and pour it into a spray bottle. We wet the napkin and lay it down, squeezing it a little. Wet thin paper itself gives a relief; we just correct it a little, achieving a better effect. We process all surfaces in a similar way, excluding “bricks”. We wait until it dries.
This is how the surface turns out
We take red-brown and ivory paint (in this case). We paint the “bricks” brown, and the rest of the surface light. The cardboard fireplace is almost ready. The finishing touches remain.
This is how the cardboard fireplace turned out
After drying, we go over everything with a brush slightly dipped in gold paint. We dip the brush, squeeze it out, and once again remove the remaining paint on the sheet of paper. Using a semi-dry brush, we go through the “seams” between the bricks, lightly touching the “bricks” themselves. Next, using the same technique, we emphasize the texture of the surface. It is important not to apply too much paint. That's it. The cardboard fireplace is ready.
DIY fireplace for the New Year made of polystyrene foam
In addition to the main material - polystyrene foam - you will need polyurethane foam, white water-based emulsion, gouache, a stationery knife, and scissors. According to the specified master class, the parameters of the fireplace are 110 by 130 cm. The parts are glued using polyurethane foam. Foam sheets with parameters of 50 by 100 are used; choose a material thickness of 3 cm and 5 cm (depending on whether they will be used for the base or wall).
Initially, you need to prepare the upper and lower parts of the fireplace, then mark the side part and cut out the material. You can attach it to the base using toothpicks or special glue. After all the elements have been assembled, they can be secured using polyurethane foam.
Make bricks from thin foam plastic and attach them to the fireplace using Titan glue. After the bricks are glued and the seams are processed, you can proceed to painting the surface of the fireplace. For this you can use, for example, a water-based emulsion. While the paint is drying, you can make a grate for the bottom of the fireplace. To do this, use thick cardboard and paint it black. You can also use Titan glue to attach it. The fireplace can be decorated with small firewood or decorative candles.
Mantel
The mantel is an important part of the design. Without it, the fireplace will not have the appropriate appearance. It is very important that it is not heavier than the main part of the decorative element, since the entire structure can fold. It can be made from plywood no more than 10 mm thick or from several sheets of cardboard.
It is optimal if it is possible to attach the shelf not only to the fireplace itself, but also to screw it to the wall using dowels and screws. In this case, you won’t have to worry that everything will fall, and you can use chipboard or wood for manufacturing.
If it is on the fireplace, then use polymer glue or liquid nails for gluing. This guarantees a more secure fit.
How to make a New Year's fireplace with your own hands from plastic wall panels
To make a fireplace from this material you will need about 8 wall panels. From them, build a fireplace design, which can be depicted in advance with a diagram, having carefully thought through all the parameters. It is advisable to make the top from a plastic panel. The bottom of the fireplace (place for the fire) can be decorated with a luminous garland or a set of decorative candles. The inside of the fireplace wall can be lined with disc segments, which will give a special effect to the design.
Fireplace for the New Year from an old bedside table - step-by-step master class
Such a fireplace turns out to be large, and its appearance is no worse than that of a real one. It looks rich; if desired, you can add elements of stucco, consoles and the effect of antiquity.
To make the product, you will need an old bedside table, which no longer fits into the new interior. In this case, the shape of the fireplace will mainly be dictated by the shape of the bedside table. You need to make a cardboard frame-sheathing under it and do not forget about the hole for the artificial fire. The cardboard frame must initially be covered with newspapers, and then a thin layer of putty must be applied. After this, the product must be left for at least a day so that it dries well. At this time, you can prepare bricks that will be used to decorate the product. They must have a rough surface. It is advisable to cut them into rectangles of two shapes or at your discretion. Alternatively, special thin foam plastic plates can be used as bricks.
You can glue such bricks directly onto a dried layer of putty. The seams must be carefully and thoroughly sealed and rubbed. After this, the surface can be painted beige or any other color. Decorate the lower part of the fireplace according to your wishes and personal imagination.
Finishing a false fireplace
The effectiveness of a fireplace depends not only on its shape, but also on the finishing and additional decor used. If it is not possible to purchase a real fireplace, then you can make an artificial one, and the cost of its production will be minimal. Everything can be made from available materials. As a finish (usually you need to give the surface a “brick” effect), you can use plywood, drywall, polystyrene foam, cardboard, wallpaper in a themed tone, wood.
Manufacturing materials and tools
The next thing you should decide on is the materials and tools used to make the fireplace and decorate it. The basis can be a large box for household appliances or a TV made of corrugated cardboard. They are rarely stored in homes, so you can turn to neighbors or friends who have recently purchased large household appliances. You can also buy it at a hardware store that sells materials for packing when moving.
Another option is to go to the store and negotiate with customers to pick up the box after they no longer need it.
If you can’t get a large one, you can get by with smaller ones.
In addition to cardboard, you will need:
- PVA or specialized adhesives designed for gluing polyurethane moldings (for example, “Dragon”). Will be needed when decorating with stucco foam.
- Masking tape. Purchased at any store, used for gluing parts of the fireplace together. As a replacement, you can use electrical tape or regular tape.
- Acrylic paint. Any color, optimally white. Used for priming and painting the base. You will also need paints of other colors or tints for tinting if you need to paint decorative elements. Can be purchased in a gold or silver tone.
- Glue gun, wallpaper knife. Convenient to work with cardboard.
- Liquid wallpaper. Sometimes used for exterior coating.
- Styrofoam. It is convenient to cut artificial bricks from it.
- Pencil, tape measure and ruler, paper for pasting, stucco molding (foam plastic), additional small boxes for making stiffeners. Sponges, brushes of various sizes for painting surfaces.
Depending on the specific project, additional materials may be needed. Almost everything can be purchased at a construction or stationery store; some can be purchased in specialized stores focused on the production of handmade decor.
Imitation of fire
So, the fireplace is ready, now all that remains is to simulate the fire. What is used to simulate fire in a false fireplace: candles (both wax and electric), garlands, colored paper, Quiet paper, flames can be painted on thick paper or cardboard or printed on a large sheet, felt, LED strips, night light, etc. Do not limit the flight of your imagination and be sure to share your creative ideas in the comments!
Help us improve: if you notice an error, select a fragment and press Ctrl+Enter.
Furnace design
The design of the firebox largely depends on the amount of money you are willing to spend. There are five ways to quickly and efficiently solve the problem.
- Buy a bio-fireplace or its electric equivalent. The result will be an imitation of fire that is as close to reality as possible.
- Embed a 3D frame with a flash drive on which a GIF image of a bright flame is recorded (this is possible if the size of the portal is relatively small).
- Mount a platform with several LED lamps that completely imitate a live flame.
- Cover the interior walls with mirrors and place massive candles.
- Another non-trivial solution is the inner surface of the fireplace, completely covered with LED strips of bright red and orange colors.
And the final touch is an elegant metal grille.

