DIY bunk bed photo
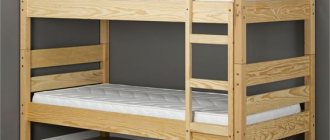
If you have limited space in your child's bedroom or share a small apartment with friends, you can still make good use of the space by making your own bunk bed . Here we've compiled some of the best step-by-step instructions we could find online. All presented models have a unique design, so you can choose the best option for a master class on how to make a bunk bed out of wood with your own hands . So if you want to get a new comfortable bed and save some space in your home, check out our list of projects. We've even found a few examples of how to make your own three bunk bed so you can further improve your use of space. If you have the tools and some basic woodworking skills, you can make any of these beds. In each example you will find a link to the source website with detailed instructions. Be sure to look at all the projects to choose the most suitable bunk bed option.
Tools
Making two-tier furniture for children will not be difficult if you prepare all the necessary tools and remember your existing construction skills. Of course, it’s good if the master has already made something from wood and knows how to work with it.
To work you will need:
- saw - hacksaw;
- screwdriver;
- plane or grinder;
- knives;
- jigsaw (preferably electric);
- sandpaper;
- drill.
We need instruments and devices for measuring and fixing. You can't do your work without a simple pencil.
The simplest wooden design for children on chains
To assemble the beds you will need: timber (glued) 90x90 mm, plywood (18...21 mm thick), boards 25x55 mm for making stairs and railings, protective impregnation and paint for wood, as well as fittings.
Table. Accessories for making a bed.
| Name | Photo |
| Metal corners | |
| Dowels | |
| Bolts (180 mm) for attaching the frame to the wall | |
| Ring head screws (with washers) | |
| Chain | |
| Carbines | |
| Eye nuts | |
| Anchors 12x150 mm | |
| Confirmations | |
| Self-tapping screws |
To produce a structure, you need a minimum of tools, which every owner usually has. The only thing is that there must be a place for the work, for example, a garage, since neighbors in an apartment building are unlikely to like work related to wood processing.
Important! Since the beds will be attached to the wall, the floors must be strong and able to withstand significant loads.
Step 1. Prepare two identical bases for the upper and lower beds. Timber and plywood are sawn to size.
Wood slicing
There are no special drawings for this two-tier structure, which is distinguished by its simplicity. You just need to assemble two frames from timber of the required size. In our case - 1800x800 mm.
Sample drawing
Longitudinal cuts are made in the timber to create a groove for laying plywood.
Longitudinal cuts are made
The result is a recess in which the base will be securely fastened.
Photo of the finished cut
Small defects can be eliminated with a chisel.
Important! Wooden blanks must be treated with a wood preservative. It is recommended to use slatted flooring rather than plywood as a base, which allows for better ventilation of the mattress. It is important to treat all prepared elements with a grinding machine or sandpaper to eliminate the risk of splinters. It is also recommended to process the edges with a router to protect children from bruises.
The frame elements are fastened with glued dowels and corners (2 dowels are required for each connection).
Each connection requires 2 dowels
The corners are fixed with four self-tapping screws on each side.
Fixing metal corners
After this, you can begin fixing the frames to the wall.
Step 2. To fasten the beds to the wall, bolts 180 mm long are used (4 for each frame). To recess the bolts in the timber, since protruding heads will interfere with the installation of mattresses, it is also necessary to make a shallow cut with a feather drill.
The result of working with a feather drill
Four such holes need to be made - on each beam adjacent to the wall. The outer sides of the bed will be fixed to the wall with a chain. To do this, you will need screws with a head bent into a ring (such hardware is called a ring screw or a hook screw).
Ring screw
Frames ready for installation must be painted. For this purpose, any decorative coating (for wood) intended for indoor use is used. The lower base must be installed at such a distance from the floor that it is possible to place drawers for storing things. For convenience, the base is installed on a temporary support.
It is best to start fastening by fixing the outer wall of the bed with a chain. This makes it easier to later align the horizontal. Holes are drilled for installing anchors. Both chain mounts are fixed.
Fixed mount
Eye nuts are mounted through the washer. The chain is suspended from a carabiner. The lower end of the chain is also fixed to a ring screw using a carabiner.
Hanging chain
Dowels for fastening the part of the frame adjacent to the wall are installed in holes made with a 16 mm drill. The anchors are screwed in.
Anchors are screwed in
The plywood base is fixed to the frame with self-tapping screws.
Fixing the plywood base
The upper bed is attached in the same way.
The upper bed is also mounted
Step 3. Installation of the stairs. In order for a child to climb up, a durable structure is necessary. It can be assembled from 25x55 mm boards. In our case, larch was used. The ladder is attached to the upper and lower beds. Ladder dimensions:
- length of steps - 36 mm;
- the distance between the crossbars is 31 cm.
- number of steps - 5 pcs.
To fasten the steps, confirmats measuring 7x70 mm are used. You will need 2 Euro screws on each side. The ladder is secured to the timber of the upper and lower bases using long self-tapping screws, the heads of which are slightly recessed into the wood.
Self-tapping screws must be of sufficient length
The design is reinforced with metal corners.
Reinforcement with metal corners
To protect the child from falling, it is necessary to make a fence. It is also made from boards. The height of the railing is 20 cm (above the mattress).
The result is a simple but attractive design that does not clutter up the room.
Finished bunk bed
Decorating the product
A bunk children's bed should not only be absolutely safe for small users, but also beautiful, because the aesthetic aspect is one of the important criteria for children. The color is selected to match the shade of the walls and the tone of the furniture, taking into account the overall style of the interior.
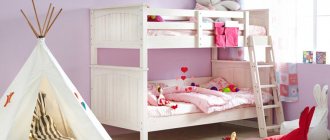
For girls, a children's corner is made in light brown, pink, and white colors. The walls and backs are painted with patterns or ornaments are cut out on them. On the bottom floor of the bed you can make a real house, for example, by hanging curtains and making a window in the side backrest.
The structure is decorated with forged parts, mosaics, or ornaments are applied to the surface using the decoupage technique. For girls, bunk bed models with drawers are suitable: they are convenient for storing clothes, linen, toys or books, while at the same time they act as a laconic, stylish decoration of the structure.
For boys, beds are made in the shape of a ship or car. All shades of blue, green, brown, gray are suitable. Yellow, orange, neon elements would be appropriate. From the second tier you can go down not only the stairs, but also the rope or the slide.
Teenagers are often keen on sports, so designs with a sports wall are suitable for high school students. Often vertical surfaces are decorated with posters and placards - this is the most practical and cheapest option, allowing you to change the decor every day without damaging the furniture.
The model for adults has a more strict design, and a crib for babies can be made in the spirit of your favorite animated film, painting the surface with images of fairy-tale characters.
Stages of work
How to make a bunk bed yourself? This question is asked by everyone who has decided to correct the problem with the lack of sleeping space in the children's room. Let's try to consider the stages of making a bunk bed at home. Step-by-step instructions will help you complete this work without outside help.
The manufacturing process looks like this:
- the first thing you need to do is choose a bed model;
- draw up a drawing and diagram;
- purchase materials and prepare tools;
- based on the drawing, prepare parts of the required sizes;
- assemble the main frame;
- make the back, side walls, stairs, legs;
- assemble the overall structure.
During design and development, drawings of the bed are prepared. Particular attention is paid to the safety of the entire structure as a whole: strong frame, reliable side walls (fences), easy stair climb.
Side walls
In construction terminology, the side walls are called the headboard and backrest. These are two elements similar to each other, with the only difference being that railings are inserted into the back, and the headboard remains solid. Sometimes both parts are ordered from workshops, then all you have to do is attach them to the frame. The side walls can be made solid for two floors.
For the headboard take:
- two sanded boards, one slightly wider than the other;
- 4 side slats.
Side wall mounting:
- the boards for the headboard are inserted into the slats on the sides. The second rail will be needed to fasten the walls with other parts;
- the back and headboard are connected;
- a lattice, lamella or mesh is made to support the mattress;
Laying slats on the top bottom
- the lath is nailed to the inside of the frame to strengthen the strength. It is recommended to make at least one partition for the mattress, which will add rigidity;
Bars for supporting the slatted bottom
Attaching the central strip to the frame
- a frame is prepared for the slats; it is located along the inner plane of the bed;
- a rail is placed on the frame, approximate step 5-7 cm.
All external ribs need to be chamfered (6x6 mm). This can be done using a hand plow.
For the back you will also need two boards and four slats. But the arrangement of the boards here needs to be changed: a wide board should be installed at the bottom, a narrow board at the top. The height of the wide backboard is the same size as the narrow headboard.
Assembling the frame base
Assembling the upper tier
Bunk bed made of metal corners and pipes: manufacturing features
Not long ago, metal couches and tiered beds were used in dormitories and barracks
Now designers are paying special attention to such designs, so why don’t we try to design comfortable furniture
Preparation of materials and tools
To prepare the frame of a two-story bed, you need to ensure that not only the material is strong, but also that all connections meet this requirement. For the product we will need:
- metal profile and corners 45×50 cm;
- a mesh that will act as a base for the mattress;
- pipes 25 mm in diameter;
- channels;
- bolts, nuts and keys for them;
- welding machine;
- electric screwdriver;
- hacksaw if necessary;
- grinder with a disc for metal.
The most difficult thing is to make shaped elements of metal bedroom furniture
Do not forget that it is better to select all materials with a reserve, however, you should also focus on fixed dimensions.
The slats of metal bunk beds can be made not only of mesh, but also of special plates
How the frame and racks are made
First of all, you need to work on the frame, from which you can later build upon when preparing additional components.
- We cut metal parts to size. You can immediately make holes for the screws.
- Next, we equip all the parts at the joints with channels, then fasten them by welding. This way we create two frames with internal crossbars.
- We prepare pipes of the required height and weld them to the prepared frame. Be sure to take into account the optimal distance from the bottom tier to the top.
- We take a tube bent into a semi-oval and attach it to the outer edge of the upper tier. It will play the role of a safety fence.
- All that remains is to weld the ladder. It is advisable to completely manufacture it in advance, so that it can then be installed in one piece on the finished frame.
At home you can make beds from old pipes or forgings
The process of sanding parts
No matter how hard you try to make the structure perfectly smooth, the seams will definitely have roughness. We need to get rid of this. You can use a metal brush or medium-grain sandpaper for this purpose. Next, all that remains is to thoroughly sweep away all debris, dust and metal particles from the surfaces.
After this, we prime the metal frame and paint it. It is better to choose a color that best suits the interior of the future or finished room.
The headboard and footboard can be made in an interesting pattern
All that remains is to put plastic or rubberized plugs on the ends of all protruding tubes. The lower ones will serve as footrests, and the upper ones will simply create an aesthetic effect and prevent injuries from impacts and contact with metal.
Drawings and diagrams
All work requires care and precision, so each stage is accompanied by a drawing. It is prepared not just for one, but for all parts. The exact dimensions of the parts, height, thickness will help you get the result that the master strives for.
What is indicated on the drawing:
- dimensions of the final structure;
- assembly diagram of individual parts;
- methods of connecting nodes;
- installation procedure for each part;
- dimensions of structural parts and fastening elements.
Assembly diagram
Model with drawers
With side ladder
With perpendicular floors
With built-in wardrobe
Bed for children
Loft bed
With wardrobe and steps
With work area
Materials
When making a bunk bed at home, you need to choose the right material. Experts recommend paying attention to the following types:
- solid wood - from which beautiful, strong and durable structures are obtained. But working with it requires construction skills and abilities;
- lumber - which must be selected from high-quality dried specimens. Raw wood will not retain its shape, it will begin to move away, and cracks may appear;
- MDF is a modern analogue of ordinary wood. The products look attractive and stylish. You can choose laminated MDF boards. There is an option for a regular untreated slab, then it is finished finished with stain and varnish. If parts of the bed are ordered from a furniture factory, then specialists will process the edges with a special finish. The furniture will be neat, no different from the factory one;
- Chipboard (chipboard) is a material that is not suitable for all parts of the bed. You can use it to make drawers under the base of the frame, back, or panel. It is important to consider covering the ends of the parts with film;
- furniture panel - consisting of pieces glued together into a single whole. Natural wood is not just beautiful, it allows you to make carvings, make other ornaments, and implement interesting design solutions. Only a craftsman with carpentry skills can work with furniture panels.
Rules for constructing a drawing
The drawings contain specific parameters and dimensions, the number of parts, and the order of their assembly
A schematic representation of the planned structure is the basis for successful completion of the assembly job. A drawing is considered to be of high quality if it contains:
- dimensions of the structure in centimeters with a margin
- dimensions of individual elements
- order of assembly of parts (frame, back, handles, stairs, headboard, footboard, side panels)
- method and order of connecting node elements
Drawings can be flat or three-dimensional, made manually on paper or in special computer design programs.
When calculating design parameters, take into account:
- Length and width. Measurements are made according to the size of the mattress or the height of children with a margin
- Location of the staircase (right, left, end) and its dimensions
- The height of the tiers and the distance between them. Most often, the height from the lower sleeping tier to the floor is such that it is comfortable for an adult to sit
- Distance from the floor to the sleeping area below (for placing drawers for things or linen, toys)
- Width of supporting beams
- Pull-out dimensions
Design drawing with a sleeping area at the top and a work area in the lower tier
The following sizes are considered optimal for school-age children (from 7 to 14 years old):
- Length of the lower berth – 180 cm, upper – 160 cm
- The width of the lower berth is 80 cm, the upper one is 70 cm
- The height of the entire structure is 170-185 cm
- Height of sides – 35-40 cm
- Staircase height – 150 cm, width – 40 cm
- The distance between the steps of the stairs is 20-25 cm
Characteristics of a reliable sleeping place
A bed with 2 tiers saves space and is suitable for a children's room
A bunk bed consists of 2 sleeping places, located one above the other and connected by a ladder.
High-quality furniture for children's sleep should be:
- safe (eliminate the risk of injury, fire, breakage)
- sustainable
- durable
- comfortable
- beautiful
- functional
- durable
Self-assembly of furniture for a non-professional is a responsible and time-consuming process, which, however, also has a number of positive aspects:
- exact measurements for a specific child
- unique author's design
- low price compared to finished products
- high quality
- maximum safety
- assembly reliability
Children's hospital
You will need the following materials:
- vertical posts (38 mm);
- frame boards (38 mm);
- boards for slats, planks, railings, steps (20–30 mm thick).
The instructions for assembling a children's bunk crib are quite simple:
- according to the drawing, prepare all the details;
- assemble the ends of the bed from posts and supports;
- attach the side supporting frames to the support;
- fix the cross slats for laying the mattress;
- Attach the protective guard to the headboards at the top;
- assemble a ladder for a bunk bed according to the drawing with your own hands;
- varnish the finished structure.
A crib located on the second floor must have a special fall protection system. The stairs are also subject to increased safety requirements.
