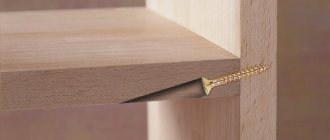
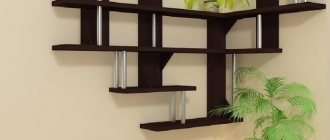
The main part of each cabinet is the shelves, thanks to which compact storage of various items is organized. A long and high-quality service life directly depends on the reliability and correct fastening of the shelves.
A long and high-quality service life directly depends on the reliability and correct fastening of the shelves.
Fixing the hanging shelves in the closet will not be difficult; you just need to make markings, observing the horizontal levels. Otherwise, the weight will be unevenly distributed over the surface of the shelf, and the load on one mount will be much greater than on the other. In the future, it will break and the shelf will fall, there is a possibility that the cabinet wall will ultimately be severely damaged.
The main part of each cabinet is the shelves, thanks to which compact storage of various items is organized.
Types of fastenings for different shelves
There are three main types of shelves used in modern furniture:
- Wood. Material - chipboard or MDF. The most common type.
- Cup. They are made of tempered glass using special thermochemical treatment. As a result, additional strength is provided, which allows them to be used in furniture production.
- Net or wire. They have the shape of a metal frame in the form of boxes or baskets.
Today, shelves are made from almost any material, including glass.
There are other modifications to the shelves, such as folding, sliding or height-adjustable. However, no specially designed fittings (except hidden ones) are used for their installation.
Shelves can have various modifications, including with retractable mechanisms.
Bracket material
- metal or alloy (steel, aluminum, bronze, cast iron);
- natural solid wood, chipboard, MDF;
- gypsum.
From an operational point of view, a metal shelf bracket is an ideal choice. When choosing it, you can find strict, laconic models in the spirit of minimalism or elaborate forged supports. The latter will fit perfectly into fusion, gothic or rococo style. Although forging is becoming less and less common in interiors due to its high cost, a shelf with ornate supports will become the highlight of a living room or hallway.
For classic room design, plaster holders are recommended. They can be standard white or gold plated. Ceramic figurines, porcelain sets and elegant vases look harmonious on such shelves. There is no need to worry about the load-bearing capacity of the stucco molding: it is all reinforced with metal fittings.
For connoisseurs of country, shabby chic or Provence style, wooden brackets are suitable. The winning option is intentionally aged wood with a rough natural texture or painted to match the interior.
Holder for glass shelf in cabinet
There are two most common types of glass shelf supports.
Special supports have been developed for glass.
Classic, support
In general, they are a pin design and are structurally divided into two parts: secret and support. The first part is usually mounted on the wall. Support: Designed to directly support the top of the shelf. It is made in the form of a platform: simple, lined, with an installed plastic gasket or suction cup. Allows you to remove shelves without using tools.
Various modifications of classic supports may have different appearances.
"Pelican": plug-in, with lock
This type of fastening can have a different design, but in principle it also consists of two parts - secret and receiving. The hidden part allows you to install the fastener on the cabinet wall, and the receiving part contains a groove into which the glass is inserted and fixed with a lock. Installation requires a screwdriver or a special wrench.
Pelican owners look like this.
Attaching mesh shelves
These shelves are often used in kitchen cabinets or closets. If they are used in the kitchen, as a rule, for storing (drying) dishes, then to secure the shelves in a wall cabinet, special reinforcement may be required (in addition to the standard one or included in the kit), since in this case, shelves in grids are often used for storing shoes.
These shelves are used in kitchens to store utensils. This imposes its own demands due to the high load and increased dimensions. Typically, the holder is a latch with a fixed part for fastening and a groove for accommodating the frame wire.
As a rule, they are attached to the supporting part.
How to attach removable shelves?
Removable shelves are often installed in a cabinet that is already in use. It may also be an initial decision pursuing its own specific goals. In principle, most of the above types of fastenings are suitable for their installation, but not all. The following are commonly used:
- Shelf supports.
- Corners.
- Screw or conical ties.
If you have the necessary tools, Rafix may also be a good solution, but only if the shelf does not need to be removed every other day.
Furniture corner
This type of fastening is used to connect two parts. This is a rather fragile connection method, so it is used for fastening parts that should not be subject to heavy loads. Usually these are decorative elements, for example, the base of a cabinet or mezzanine shelves.
Figure 21. The furniture corner is used for fastening decorative furniture elements (plinths) and installing shelves. Made of plastic. Has a cover to hide the clasps. Self-tapping screws 16 mm long are used as fasteners.
Instead of metal corners, plastic ones are often used. They are no less durable, but have a more attractive appearance and the possibility of hidden fasteners. The corner of the cabinet is attached to two mating parts with two self-tapping screws. The lid is then suspended, thereby hiding the fasteners.
Figure 22. The corner of the cabinet is used for fastening lightly loaded furniture elements, as well as for installing decorative elements such as plinths, inserts, etc.
The furniture fasteners discussed in the article are the most common and frequently used, as they are the most versatile and easy-to-use types of fasteners. In the vast majority of cases, the types of furniture fastenings described are sufficient for assembling any furniture.
Details and elements
How to make shelves in a closet or how to build a closet from scratch? Here are the answers to the questions:
Required tools:
- screwdriver;
- screwdriver;
- drill;
- hex wrench;
- roulette;
- pencil, square or ruler;
Parts for cabinet directly:
- laminated chipboard sheets with a width of 70 to 40 cm - for the frame and internal partitions (false sheets or panels 10 cm wide - for framing the contour along the top and side walls in the case of a built-in wardrobe when attaching elements to the wall);
- The same shelves for the wardrobe;
- doors with a sliding mechanism - usually 2 or 3 (you can order ready-made ones or assemble them yourself - all components are sold in stores);
To secure shelves in a finished closet or assemble a built-in closet, you will need the following parts:
- Pins. With their help, the frame elements are attached to each other;
- Furniture corners, eccentrics, shelf brackets or European screws. One of the options for attaching shelves to a frame or wall. With corners and Euroscrews - it doesn’t look very nice, it’s quirky - it’s more complicated, but the brackets for the shelves are practically invisible from both sides.
- Drawer guides;
- When choosing drawers, pay attention to the mechanism. The box should not completely unwind and fall.
- Drawer handles should not interfere with opening. To do this, handles are made in the wooden canvas or slots are left.
Dimensions
As mentioned above, the depth of a closet in a bedroom or living room is standard - 60 cm. The depth of a hallway closet is 40 cm. 8-10 are subtracted from this size (for the door mechanism) to get the actual depth.
For clothes on hangers
The width of the section with a compartment with rods should be larger than with conventional shelves. The section for rods located parallel to the rear wall is 90 cm. The same size accommodates 2 rods perpendicular to the rear wall. The height required is 80-100 cm for blouses and shirts, 150-160 cm for long dresses and coats.
You can easily calculate this size yourself. Try on your longest shirt or dress and add 20 cm to this value.
For horizontal shelves
The width of the sections for ordinary horizontal shelves is 60 cm.
The vertical distance between shelves should be 35-40 cm for clothes, 20-35 cm for books.
How do you install shelves in a closet?
The whole process can be divided into several stages:
- Performing markings. When performing this work, it is very important to monitor the horizontal levels. Therefore, this is necessary to prevent items on the shelves from moving around in the future. If the weight is distributed unevenly, it will increase the load on the fastener. This may cause the supports to break and the shelf to collapse.
- Choosing a mounting method. If you choose corner support as one of the easier options, use furniture corners. They make the connection stronger. The downside is that corners cannot be hidden.
- If aesthetics are of paramount importance to you, you should choose a non-standard method - the "helicopter" method. This method involves the use of Euroscrews (three in total are required).
- Screw the screw into the center of the first floor, secure it to the partition, but do not tighten it too much. Rotate the surface 180º around the longitudinal axis to find a point to secure the adjacent element.
- Secure the adjacent frame with the remaining two screws. Try to lift them well, then return the first plane to its normal position.
- Fully tighten the shelves from the outside of the frame.
If any point remains unclear, look at the photos on our website to understand the situation, do the job efficiently and equip the cabinet with side shelves. The result is a durable and reliable structure that will last a long time.
Furniture screed is a special type of fastening used exclusively in the furniture industry. Such fasteners not only make furniture assembly much easier, but also become “invisible” after installation. In this article, we will look at the different types of fasteners that are used to assemble wooden furniture.
Why is sagging dangerous?
In addition to the unpleasant external effect, sagging is also dangerous because at some critical moment the sagging shelf may simply break in half, and books and other objects placed on it will damage the lower elements if they fall. And in this case, the stability of the side walls of the furniture will be greatly shaken and, most likely, the cabinet will simply fall apart, crushing - at best - the furniture standing nearby, at worst - the owners or pets.
The bookcase must be securely attached to the wall with its entire structure in order to prevent it from falling and causing damage to property and health of people and animals.
To prevent this, deflections should be dealt with at the first manifestations.
Installing shelves in a closet: types of fasteners
Furniture fittings vary both in purpose and in the nature of the connection provided.
Shelf fasteners vary in purpose and type of connection. According to their intended purpose, fasteners are:
- Frame.
- Assembly.
- Power.
According to the nature of the connection:
- Collapsible.
- Doesn't add up.
Typically, fastening involves the use of tools such as a drill, Forstner cutters, countersinks, screwdrivers, hex keys, chisels, and wood glue. In addition, some types of fastenings require the use of very specific tools, which limits their ability to be used (Lamello Invis tie).
Tools are needed to attach the shelves.
Before choosing the type of fastening, you need to carefully consider the nature of the cabinet's use, so that in the future you can ensure trouble-free maintenance of individual elements or complete disassembly.
Euroscrews (Euroscrews, confirmats)
Used for joining elements of wooden furniture (chipboard, MDF). Such fasteners for a shelf in a closet require a wall thickness of at least 16 mm. Confirmations are made in a specific length range from 20 to 70 mm.
The wall for this mounting should not be thinner than 16 mm. Preparing the hole requires special drills with a countersink in the base and special keys to hold it in place. They are relatively easy to assemble, but may not fit all types of furniture since the screw head remains exposed. In addition, Eurovits do not allow organizing the longitudinal arrangement of shelves at the same height in the presence of vertical jumpers.
Such fastenings are quite reliable.
Fastenings for shelves in the closet: rastex (minifix)
This equipment belongs to the so-called eccentrics, which indirectly indicates their principle of operation. This type of fastening provides good joint strength, but is difficult to manufacture, as it requires high drilling accuracy. Structurally, it consists of a bushing for the pin (footer), the pin itself and a pressure bushing.
This is what Rastex frames look like. The footer is installed into the furniture wall in a pre-prepared location. A pin is screwed into it. For shrink wrap, the cutter selects a piece of wood to fit the shelf. A hole for the pin is made perpendicular to it at the end. After assembling the connection, the bushing lifts the pin and secures it thanks to the groove in the side wall (hence the ex src=»https://pro-dom-mebel.ru/images/wp-content/uploads/2020/07/sverlenie-dlya-rasteksa .jpg" class="aligncenter" width="1500″ height="1143″[/img] This fastening requires precision drilling skills. Such a connection has two significant drawbacks: it cannot be used in a finished frame, and when marking it, it should be taken into account that when fastening the shelf can be moved in the plane.
Conical coupler
In this case, installing shelves in a cabinet is similar to installing them using a minifix. In addition, their circuit diagram is also quite similar: both have a footer, a pressure sleeve and a pin. The only difference is the storage method.
This is what conical screws for fastening look like. If this is provided in the raster using a groove in the bushing body, then fastening here is carried out with a special conical screw, which, screwed into the cavity of the bushing, enters the corresponding hole at the end of the pin and tightens it, thereby creating the necessary tension.
Screw tie
Typically, such fastening is used to extend (join) shelves, especially in the presence of vertical walls. This solution provides both a fairly convenient installation method and high reliability. This can be considered a further strengthening of the frame.
The screw clamp is easy to install and reliable. The concept of this solution is extremely simple: using a utility knife, a piece of wood is cut out from the edge of the shelf, forming a recess. A similar one is formed on another shelf. A hole is drilled in the wall large enough to accept a grub screw or screw. Specially shaped staples with a side hole are inserted into the grooves. The pin is inserted into the clamps and then tightened with nuts on both sides.
Fastenings for shelves in the closet: Rafix
Another representative of the eccentric type, but unlike the minifix, it does not require drilling the end channel. The circuit diagram is approximately the same, only the pin is held in place by a special screw.
This is what Rafix furniture frames look like. The choice of sleeve is made at the edge of the shelf, so that after machining with a router, the end is provided with a sufficient hole for the passage of the pin, which is installed on the cabinet wall. Next, a shelf with inserted bushings is put on the pins. Fastening is carried out by tightening the bolts. The disadvantages of Rafix include the inconvenience of installation, especially with low shelf heights.
Shelf holder
The simplest option, and no less effective for attaching shelves. Structurally, it differs between mortise and hinged. The insert involves a pin piece with which it is installed inside the wall. Hinged - fixed with self-tapping screws or glue.
Shelf supports can be mortise or hinged. With this method, the shelf sits freely on supports (under its own weight), which makes it easy to disassemble if necessary. Structurally, a typical support for a shelf in a closet can be equipped with a built-in platform with spacers or a special protrusion to prevent the shelf from moving towards the door.
The convenience of such stands is that the shelf can be easily disassembled at any time.
Dowel
The same pin, only made of wood, is the oldest way to connect furniture. Structurally, it is a small (20-30 cm long) chop with waviness along the side surface. The connecting parts of the frame (or shelves) contain coaxial inlet and outlet holes so that a pin installed at the end of the shelf fits into a hole in the cabinet wall.
The wooden dowel has the shape of a small chop with grooves along the side surface. In principle, installing dowels is sufficient. However, for the reliability of the connection, as well as to strengthen the frame, adjacent ends are additionally glued (sometimes confirmations are screwed in). An obvious disadvantage of this type of fastening is the difficulty of disassembling. As a rule, such fasteners for shelves in a closet are used in non-demountable structures.
The disadvantage of such an attack is the difficulty of dismantling the shelves.
Corners
Also a simple and at the same time reliable type of fastening hardware. They differ in both design (in details) and material of manufacture. Of course, it is better to install metal corners, as they are stronger and more durable. However, they have one significant drawback - their appearance.
Corners are simple and reliable accessories for attaching shelves. Since the installation of corners both on the wall and on the shelf is done with self-tapping screws, this may not always be acceptable. In such cases, the installation of shelves in the closet is carried out using open or closed plastic corners. The closed type lid has a special cover that hides the less aesthetically pleasing interior.
However, recently metal corners have begun to be supplied with decorative covers.
Shelf holders for glass shelves
As noted above, metal shelf supports are not the best choice for glass shelves. That's why there are shelf supports designed specifically for glass. Most of them are also suitable for chipboard shelves. This is very convenient, since shelves made of both glass and chipboard are often used in the same design.
The cheapest option for a shelf holder for glass shelves is to put a transparent plastic tube (cambric) on the RK 5x16 shelf holder. But at the same time, all the other disadvantages of this shelf support remain, in particular, the very small contact area between the shelf and the shelf support, as a result of which the shelf does not hold firmly on the shelf support.
There is a similar model:
Shelf holder with belt for glass (MV 05)
The advantage of the shelf support is its superior design compared to PK 5×16.
- A small area on which the shelf rests;
- Lack of protection against the shelf holder falling out of the hole;
- The shelf is not fixed to the shelf holder.
Shelf support 3011 23 DREAM
A variation of the previous design is the shelf support 3011 23 DREAM. Its advantages include a stylish design and a large contact area with the shelf.
Plastic shelf holder (ME 09)
Convenient to use, because Suitable for both glass and chipboard. But plastic is a much less durable material than metal, so heavy things cannot be placed on shelves supported by such shelf holders. In addition, such shelf holders again have a cylindrical shape.
Metal-plastic shelf holder (ME 13 RT)
Some of the most versatile are shelf holders that combine metal and plastic. They are durable and suitable for both glass and chipboard. There are different types of such shelf holders. One of them is ME 13 RT, consisting of a metal rod and a plastic structure with a flat platform placed on it. As a result, the area of contact between the shelf holder and the shelf is much larger than that of shelf holders with a round shape.
Plastic shelf holder with suction cup (MV 02 + rod SP 03)
Plastic shelf holder with suction cup MV 02
One of the most successful models. It consists of a metal rod and a plastic structure with a suction cup on top. The suction cup increases the area of contact between the shelf holder and the shelf and, by suction, fixes the shelf. The plastic part comes in different colors, from clear to black.
Shelf support with suction cup (MV 01 (Art 138))
It is a variation of the previous model, in which the metal part is enlarged, and the plastic part consists of a suction cup, which is smaller in size than in MV 02. This shelf holder, of course, is more durable, it can withstand a significant load, but its contact area is not too large with shelf. These two models of shelf holders with a suction cup differ not so much in functionality as in design: some like the look of plastic, others like the shine of metal.
Shelf support with suction cup (MV 03 (Art 140))
The most functional model, which provides everything: protection against falling out of the hole; a stop in the side wall that protects the chipboard from destruction, and a suction cup of a sufficiently large diameter.
To choose the most suitable of these models, one usually focuses on the design and purpose (for example, if only glass shelves are provided, then the strength of the shelf holder is not of great importance, since glass shelves are rarely loaded with heavy things).
Through fasteners (with drilling) for confirmations
Confirmations are most common through closing shelves. To install, you will need to drill a hole in the end of the shelf with a diameter of 5 mm and on the front side of the side wall of the bedside table with a drill with a diameter of 8 mm. It is best to use a special confirmation exercise. Because it also requires a countersink under the confirming head to “sink” the screw itself flush with the surface of the side wall. In addition, the cap is hidden by a special self-adhesive cap, matched to the color of the chipboard.
Gradient - depending on the thickness of the side walls, the length of the confirmation is selected. For standard thickness of chipboard and MDF 16-18 mm, a 5x50 Euro screw is used, for thicker panel materials - a longer one, up to 70 mm.
- Among the advantages of attaching shelves to confirmations, it is worth highlighting the ease of assembly and the low cost of the fastener itself.
- The downside is that it requires drilling. Not everyone likes the “losing” aspects of furniture in an aesthetic sense. Self-adhesive dowels, although color-matched, are still visible. In addition, furniture assembled by confirmation no longer “values” assembly and disassembly.
Shelf supports-ties
The universal combination of shelf support and tie (SI 03 + rod VE08; 2574) not only holds the shelf, but also tightens the structure. The fashion for this model was introduced when it used such a shelf holder in the Modula furniture system (prefabricated structures, the design of which can easily be changed in accordance with the client’s wishes). This model consists of two parts: a metal rod and a plastic part. The metal rod is partially screwed into the side wall. The plastic part is driven into a pre-drilled hole in the shelf (20 or 15 mm depending on the shelf holder model). When assembling furniture, the shelf is snapped onto the head of the rod, and the entire structure is rigidly fixed.
Until now, some furniture production uses a cast metal corner - a screed, which often holds shelves. It securely fastens all furniture structures and does not require high-precision equipment. But it looks rather unattractive, so it is suitable exclusively for internal fastenings.
In sliding wardrobes, all structures are attached to corner ties, but not metal, but plastic. Plastic corners (UM) do not require pre-prepared holes; they are fastened with an ordinary screw and then closed with a lid. They look neat, and the wide range of colors (there are 12 colors in the MDM-Komplekt warehouse program) allows you to select a corner to match the chipboard. A plastic screed is unlikely to fit luxury furniture, but it is perfect for interior shelves and fixtures.
Hidden
Hidden support for shelves is a solution for interiors in high-tech, minimalism or modern style.
To install shelves on the wall use:
- Hidden loops. They are suitable for products of different thicknesses and from different materials (chipboard, solid wood, plywood). Using a building level and a marker, mark points on the wall surface and drill holes for fasteners. Then the dowels are inserted and the rings are fixed to the self-tapping screws. At the end of the shelf with which it will be connected to the wall, it is advisable to make a recess to the size of the ring so that there is no free space between the wall and the shelf due to protruding joints.
- Metal rods. This type of fastening applies to the console. Usually it is sold complete with the shelf itself, in which holes of the required diameter and depth are already drilled. The mounting method can be different: screwed to the wall with a dowel or mounted on flat hinges or strips. Reliable fastening is guaranteed only by fittings with a diameter of at least 10 mm.
- Wooden beam. Used for installing closed shelves. Using a level and a marker, draw a line on the wall along which the auxiliary fasteners will be placed (it should go under the shelf). Then the plank is fixed with dowels and screws. Hang the shelf and secure it with an additional strip.
What types of brackets are there?
Shelf brackets vary in shape, material, style and maximum load. Photos of shelf brackets, which can be found in hardware catalogs or on the Internet, allow us to distinguish 3 main forms:
Corner bracket. One of the easiest ways to attach a shelf. Structurally, it consists of two planks connected by a rib or jumper for greater rigidity. The vertical strip is used to attach the support to the wall, and the horizontal part is used to mount the shelf itself.
Rectangular brackets. The method of fixing to the wall is similar to the previous one. A distinctive feature is that the bracket allows you to install 2 shelves under each other at once.
Pelican type mount. The support got its name due to the similarity of the lower part with the beak of a bird. Most often used as a bracket for glass shelves. But it can also be found paired with a shelf made of chipboard or metal.
This type of shelf holder has a collapsible design, dividing the device into moving and fixed parts, a screw pair and a seal. The fixed part is attached to the wall; a pressing element with a rubber or silicone gasket is inserted on top. The shelf is clamped between the two parts using a screw.
Most models can withstand loads of up to 30 kg. At home, it is very rare that the weight of a shelf with its contents exceeds this figure. But for warehouses or retail outlets, it makes more sense to secure shelves using reinforced shelf brackets.
Increased thickness (from 3 mm or more), the addition of additional stops and ribs make the element durable. It can withstand significant loads without deforming.
Features of fastening shelves depending on the type of wall
When installing fasteners for shelves to the wall, it is necessary to take into account the characteristics of the material from which the base is made. The higher its strength, the more reliable the attachment of the hinged structure will be. Soft wood and fragile drywall surfaces do not provide adequate support. Methods for attaching shelves and the type of fittings used vary.
Concrete wall
To drill a hole in a solid concrete surface, you will need a hammer drill. The work must be carried out using a special drill for concrete, the diameter of which is selected based on the size of the dowel. The depth of the hole should correspond to the length of the fastener.
The drill is placed at a right angle; at the slightest inclination, the diameter of the hole at the entrance will increase, and therefore the dowel and self-tapping screw will not be firmly secured. This may cause the shelf to fall later.
General method of making shelves
Regardless of the design, size and area of application of the shelves, the manufacturing algorithm is the same:
- Calculate the number and dimensions of the shelf components.
- Cut out parts from the remnants of chipboard.
- Cover the ends with decorative edges.
- Mark the entry points of the fasteners on the parts.
- Drill holes of the required diameter.
- Assemble the shelf.
- Hang on a vertical plane: a wall, a side rack of a cabinet, a door leaf, a balcony trim.
Accessories for rotating shelves
Rotating shelf accessories include:
- upper and lower fixation of the rotation axis;
- the axis of rotation, which is a telescopic metal tube, that is, the height of the pole can be changed according to the dimensions of the cabinet;
- flange mounting bracket.
Installation of a rotating shelf
To install the rotating shelf correctly, you must:
- choose a place to attach the rotation axis so that the installed shelf can move freely inside the cabinet;
- secure the upper and lower connecting structures (simply screwed to the lower and upper parts of the cabinet, respectively);
- install the pin by inserting the pipe into the fixed flanges;
- screw the shelf support to the board;
- install the shelf itself.
The rotating shelf is installed correctly
Therefore, when choosing accessories for shelves, you should proceed from the material from which they are made and the method of fastening the product. In stores you can find many different options for overhead, mortise supports, sliding and rotating mechanisms, the independent installation of which does not cause any difficulties.
Fixing the shelf on the wall using hidden fasteners
Step 1. To attach the shelf to the wall using a secret fastening option, you will need to prepare a hammer drill with a drill of a certain section, 2-3 special titanium pins, a building level, a square, a drill and a drill, the shelf itself, and mark a pencil. The pin is a metal rod with a thread on one side and smooth on the other. Using the threaded part, it will be screwed to the wall and the shelf will have to be placed on the smooth part. Typically the diameter of the pin is 10-12 mm. The drill is selected with the same diameter as purchased titanium.
Special metal pin
Step 2: First, label the shelf itself. By the way, you can make it yourself from any other piece of furniture that has served its purpose, and not buy a new one. Using a ruler, you need to take the required distance from the end edge of the shelf. In this case, a distance of 12 cm was chosen.
Marking
Step 3. Having chosen the distance, use a square and a pencil to draw a line perpendicular to the plane of the shelf at the end where the hole for fasteners will be drilled.
At the end a perpendicular line is drawn
Step 4. Next, you need to find the center of the end of the board and make a corresponding mark for the drill. It is important to understand that if the shelf consists of two sheets of chipboard glued together, it is better to make the hole for fastening not in the center, but with a slight offset to one or another board (better down, it will be safer).
Marked for drill
Step 5. A similar mark must be applied to the opposite side of the shelf.
On the other hand, the same signs apply
Step 6. Next, at the end of the shelf where the marks are made, you need to attach a building level and directly on it make marks parallel to those previously applied to the panel, and also mark the edges of the shelf itself. The layer cannot be moved when the markup is transferred. The pencil marks can be easily erased from the flat surface later, but this method of transferring marks will make it easier to make marks for drilling holes in the wall.
The layer cannot be moved when moving elevations
Markings are made at the level
Step 7. Then you need to choose the approximate location of the shelf on the wall. After application to the surface, you must use a pencil to mark the boundaries of the product directly on the background.
The shelf is attached to the wall
Shelf limits are marked
Step 8. Now you need to take a building level with marks and, gluing it to the wall in a selected and marked place, align and transfer the marks from the level to the wall, also with a pencil. This makes it easy and quick to accurately mark pin holes without unnecessary movements.
Transferring marks from level to wall
Step 9. Next, at the end of the shelf in the designated places, you need to drill holes for the pins. They should be the same depth as the length of the part of the pole on which the board will slide.
Eventually a hole is drilled
The depth of the hole should correspond to the part of the pin on which the shelf will be placed
Step 10. Now you need to take a hammer drill with a drill of the same diameter as the pin and drill holes in the wall according to the previously marked marks. To prevent concrete dust from falling onto the floor, it can be removed immediately using the included vacuum cleaner, from which an assistant will hold the hose.
Holes are made in the wall
Step 11. Both titanium rods must be installed in place, that is, inserted into the holes in the wall. If they are difficult to insert, they can be carefully knocked out with a hammer or screwed to the wall with a wrench.
The pins are inserted into the holes
Step 12. All that remains is to place the shelf on the studs in the wall, aligning the holes with the metal fasteners. The shelf is installed. By the way, for better fixation, you can add a little glue to the holes of the shelf, then the connection will be even more reliable. This mounting option will allow you to achieve an effect where it seems that the shelf will be held against the wall.
The shelf is installed on studs in the wall
Finished shelf without visible fastenings
Video - How to install a shelf with invisible fasteners
Sources
- https://severdv.ru/mebel/polki-i-stellazhi/kak-krepit-polki-v-shkafu/
- https://csdesire.ru/mebel-interier/mebelnaya-styazhka-58.html
- https://AmiPlus.ru/zona-otdyha/bokovye-polki-k-shkafu.html
- https://englishpromo.ru/2019/12/kreplenie-polok-v-shkafu-bez-vidimogo-krepezha/
- https://kraska.guru/dom/xozyajstvo/polki-v-nevesomosti-paryashhaya-konstrukciya-bez-vidimogo-krepleniya-na-stene.html
- https://MebelRus64.ru/polki-i-shkafy/kak-sdelat-dopolnitelnuyu-polku-v-shkafu.html
- https://shkaf-info.ru/kreplenie-polok-v-shkafu-obzor-vozmozhnyh-variantov/
- https://KrepezhInfo.ru/ustanovka-polok-so-skrytym-krepleniem/
- https://infomebli.ru/gostinaya/shkafi/krepim-polki-svoimi-rukami.html
- https://papa-carlo.su/materialy/dsp/kak-krepit-polki-v-shkafu.html
- https://udobno77.ru/kak-prikrepit-polku-mezhdu-shkafami/
- https://dd-space.com/chastye-voprosy-professionalov/mebelnye-krepezhi/
- https://mebel-expert.info/kreplenie-polok-k-stene-bez-vidimogo-krepezha/
- https://MebSam.com/vidy-mebelnyh-krepezhej.html
Types of fastenings
Manufacturers of furniture fittings offer various types of fasteners for shelves. Each of them corresponds to a specific installation method inside the cabinet. We will not consider fittings for pull-out shelves and rotating structures, but will focus on classic stationary options.
The most famous and common elements of such fastenings are:
- Euroscrew (confirmed).
- Rastex (minifix).
- Rafix.
- Shelf support.
- Dowel.
- Corners.
Brackets are also reliable supports for shelves, but they are not used in furniture production due to their bulkiness and unaesthetic appearance.
Euroscrew
Euroscrew or confirmat is used to connect chipboard parts to each other. Its length is 50 mm, diameter 6.4 mm. Holes for confirmations are made with a special countersink drill. Its length and diameter are equal to the dimensions of the Euroscrew.
The drill is slightly narrower than a European screw. When screwed in with a hexagonal driver, the confirmation spiral firmly cuts into the chipboard, forming a rigid and reliable connection between the shelf and the cabinet wall. The countersink at the upper end of the drill has a reaming collar, which flares the entrance hole under the countersunk. Thanks to this, the confirmation cap does not protrude above the surface of the chipboard.
The disadvantages of fasteners include the following:
- the screw heads have to be covered with adhesive circles or plastic plugs, and this somewhat spoils the appearance of the cabinet;
- This type of fixation does not allow placing shelves with a partition on the same center line. Horizontal slabs can only be installed vertically.
Rastex
The eccentric coupler consists of an eccentric sleeve and a dowel-screw. Rastexes are otherwise called minifixes and allow you to secure a shelf without visible fasteners.
The figure shows the technology for installing rastex. The rotary sleeve clamps the head of the dowel-screw. To secure the shelves, bushings are inserted into the horizontal plane of the slab from below. The whole operation consists of several stages:
- The hole for the eccentric is drilled with a special cutter ø 15 mm at a distance of 34 mm from the edge of the part to the center of the bushing. The working depth is 13 mm.
- Insert the eccentric with the cutout inward.
- From the end side, a hole is drilled to the opening cut with a milling cutter.
- In the cabinet wall and partition, recesses are drilled for plastic bushings, which are hammered in with a rubber hammer.
- Then ø 5 mm dowels are screwed into them.
- The other end of the dowel is inserted into the channel, reaching the rotary sleeve.
- The screw head fits into the eccentric cutout. Using a screwdriver, turn the bushing clockwise until it is completely secured.
Conical coupler
The connection is similar to raster. In both cases, the rod is screwed into a plastic dowel installed in the cabinet wall, and a seat for the bushing is cut with a milling cutter. The difference between a conical coupler is that the rotary cylinder has a through hole, and a circular recess is made at the end of the rod.
The rod is inserted into the sleeve through the hole in the shelf. A conical screw is screwed in from above, which firmly fixes the rod. The result is a hidden and durable fastening of the shelf.
Screw tie
Such a fastening element is used for hidden extension of a shelf with an additional plane or for connecting shelves at the same level through a partition. The fastener consists of two semicircular brackets, through the holes of which a screw with a hex nut is passed.
The connection is installed as follows:
- a cutter is used to cut out recesses in two shelves;
- A channel is made between the holes using a hand router. You can do this with a drill, drilling several holes and connecting them with a chisel;
- The staples are placed in the recesses and the rod is threaded through them.
- tighten the nut at the end of the screw.
- The connection in the flange is strengthened by installing dowels at the ends of the elements.
There are other types of screw ties. They are designed to connect the vertical walls of furniture to each other (pedestals and hanging cabinets in kitchen units).
Rafix
The screed has a second name - VB. Rafix is a plastic or metal sleeve with a dowel-screw.
Instructions for installing rafixes:
- In a shelf 18 mm thick, using a cutter ø 20 mm and height 14 mm, a recess is cut at a distance of 9.5 mm from the edge of the panel to the center of the recess.
- The bushing is driven into the hole with a rubber hammer or mallet.
- A hole for a ø 5 mm dowel is drilled in the cabinet wall or partition. Then screw the dowel screw under the Rafix tie.
- The shelf is placed on 4 dowels, which are tightened with a screwdriver or a screwdriver with a cross-shaped bit.
- the ties must be duplicated by installing dowels;
- fasteners have to be tightened at an angle, which creates certain inconveniences when installing shelves;
- The rafixes remain open, and in some cases they have to be covered with adhesive tape.

