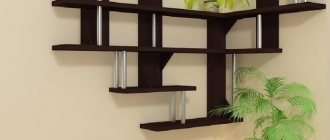
Not so long ago, shelves in rooms primarily served functional purposes and only to a small extent design purposes. The explanation for this phenomenon is simple - there was very little furniture, it was possible to buy an ordinary bedside table only through an acquaintance. There was nowhere to place household items, so wall shelves were used instead of shelves in closets.
There was a catastrophic lack of space for various trinkets; only the most experienced housewives managed to place a small number of beautiful objects on them. Another problem is the unsatisfactory appearance of the products; in those days, few manufacturers paid attention to such a trifle as appearance. It was necessary to fulfill the plan in terms of quantity, not quality.
Today the situation has changed dramatically; shelves are more decorative than functional. They are made from various materials and using the most modern technologies. Designers have developed a large selection of specific original solutions: shelves can be large or small, heavy or light, made of natural or artificial materials. Depending on the type, the issue of fasteners is also resolved.
DIY fasteners for shelves to the wall
Types of fastenings for different shelves
There are three main types of shelves used in modern furniture:
- Wood. Material - chipboard or MDF. The most common type.
- Cup. They are made of tempered glass using special thermochemical treatment. As a result, additional strength is provided, which allows them to be used in furniture production.
- Net or wire. They have the shape of a metal frame in the form of boxes or baskets.
Today, shelves are made from almost any material, including glass.
There are other modifications to the shelves, such as folding, sliding or height-adjustable. However, no specially designed fittings (except hidden ones) are used for their installation.
Shelves can have various modifications, including with retractable mechanisms.
Required Tools
The tools you will need are: a level, a drill, or better yet a hammer drill, a screwdriver, dowels, self-tapping screws, a jigsaw, wood glue, a fastening set, a set of drills, a pencil, a hammer, and a wrench for anchor bolts.
If you use metal rods, you need to remember that the diameter of the fastening element should be 10-12.
Upon completion of all stages of work, we attach the shelf.
Holder for glass shelf in cabinet
There are two most common types of glass shelf supports.
Special supports have been developed for glass.
Classic, support
In general, they are a pin design and are structurally divided into two parts: secret and support. The first part is usually mounted on the wall. Support: Designed to directly support the top of the shelf. It is made in the form of a platform: simple, lined, with an installed plastic gasket or suction cup. Allows you to remove shelves without using tools.
Various modifications of classic supports may have different appearances.
"Pelican": plug-in, with lock
This type of fastening can have a different design, but in principle it also consists of two parts - secret and receiving. The hidden part allows you to install the fastener on the cabinet wall, and the receiving part contains a groove into which the glass is inserted and fixed with a lock. Installation requires a screwdriver or a special wrench.
Pelican owners look like this.
Attaching mesh shelves
These shelves are often used in kitchen cabinets or closets. If they are used in the kitchen, as a rule, for storing (drying) dishes, then to secure the shelves in a wall cabinet, special reinforcement may be required (in addition to the standard one or included in the kit), since in this case, shelves in grids are often used for storing shoes.
These shelves are used in kitchens to store utensils. This imposes its own demands due to the high load and increased dimensions. Typically, the holder is a latch with a fixed part for fastening and a groove for accommodating the frame wire.
As a rule, they are attached to the supporting part.
Installation of wall-mounted TVs
Speaking about the comfortable arrangement of living quarters, it is impossible not to mention console-type brackets for flat-screen TVs. Often, variations with a rotating function are used to place TV on walls.
Design options for a modern TV console come down to the option of a stand or hanging mount. These can be classic designs or decorative ones, made of wood or metal, innovative models.
Wall brackets for TVs can be divided into single-support or multiple support, with a rotating mechanism or stationary, angular or horizontal.
Furniture corner
This type of fastening is used to connect two parts. This is a rather fragile connection method, so it is used for fastening parts that should not be subject to heavy loads. Usually these are decorative elements, for example, the base of a cabinet or mezzanine shelves.
Figure 21. The furniture corner is used for fastening decorative furniture elements (plinths) and installing shelves. Made of plastic. Has a cover to hide the clasps. Self-tapping screws 16 mm long are used as fasteners.
Instead of metal corners, plastic ones are often used. They are no less durable, but have a more attractive appearance and the possibility of hidden fasteners. The corner of the cabinet is attached to two mating parts with two self-tapping screws. The lid is then suspended, thereby hiding the fasteners.
Figure 22. The corner of the cabinet is used for fastening lightly loaded furniture elements, as well as for installing decorative elements such as plinths, inserts, etc.
The furniture fasteners discussed in the article are the most common and frequently used, as they are the most versatile and easy-to-use types of fasteners. In the vast majority of cases, the types of furniture fastenings described are sufficient for assembling any furniture.
Laying cable communications
The console mount for electrical wires allows you to aesthetically lay wiring in rooms using perforated and non-perforated cable channels. It looks like this.
Cantilever fasteners allow you to create any type of wall- or ceiling-mounted communication plexus; it is an element that ensures reliability of structures even under heavy heavy loads.
Details and elements
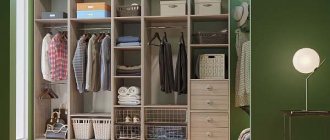
How to make shelves in a closet or how to build a closet from scratch? Here are the answers to the questions:
Required tools:
- screwdriver;
- screwdriver;
- drill;
- hex wrench;
- roulette;
- pencil, square or ruler;
Parts for cabinet directly:
- laminated chipboard sheets with a width of 70 to 40 cm - for the frame and internal partitions (false sheets or panels 10 cm wide - for framing the contour along the top and side walls in the case of a built-in wardrobe when attaching elements to the wall);
- The same shelves for the wardrobe;
- doors with a sliding mechanism - usually 2 or 3 (you can order ready-made ones or assemble them yourself - all components are sold in stores);
To secure shelves in a finished closet or assemble a built-in closet, you will need the following parts:
- Pins. With their help, the frame elements are attached to each other;
- Furniture corners, eccentrics, shelf brackets or European screws. One of the options for attaching shelves to a frame or wall. With corners and Euroscrews - it doesn’t look very nice, it’s quirky - it’s more complicated, but the brackets for the shelves are practically invisible from both sides.
- Drawer guides;
- When choosing drawers, pay attention to the mechanism. The box should not completely unwind and fall.
- Drawer handles should not interfere with opening. To do this, handles are made in the wooden canvas or slots are left.
Brackets are of the following types:
- Fixed. They are used in cases where TV will be watched from one point, for example, in a bedroom or public place. The TV is mounted strictly parallel to the wall. Most often, this type of fastening is used for large panels.
Fixed bracket
Inclined. They are movable and make it possible to adjust the tilt of the TV plane. In this case, regulation can only occur in the horizontal plane. It is used most often in private use.
Tilt bracket
Pan-tilt. Such mounts allow you to rotate the plane of the TV, which makes it possible to give it almost any angle. The limitation in this case will be only the distance from the plasma panel to the wall. Not applicable in public places.
Pan & Tilt Bracket
- Movable. With their help, you can move the LCD panel away from the wall. This type of mount is ideal for rooms with complex wall shapes and difficult squaring of rooms, as it gives complete freedom to choose the angle of the TV. This option is the most expensive.
Fortunately, the mounting system for LCD TVs is now completely standardized - any model of support uses the same interface. It's called Flat Display Mounting Interface (FPMI), so the panel manufacturer doesn't matter when selecting mounting hardware. However, you shouldn’t completely ignore the individual features of the LCD panel, because some TV models can be made for completely non-standard mountings. Also, the connectors may be located slightly differently, which eliminates the possibility of using conventional brackets. In this case, it is necessary to select a special variety.
How do you install shelves in a closet?
The whole process can be divided into several stages:
- Performing markings. When performing this work, it is very important to monitor the horizontal levels. Therefore, this is necessary to prevent items on the shelves from moving around in the future. If the weight is distributed unevenly, it will increase the load on the fastener. This may cause the supports to break and the shelf to collapse.
- Choosing a mounting method. If you choose corner support as one of the easier options, use furniture corners. They make the connection stronger. The downside is that corners cannot be hidden.
- If aesthetics are of paramount importance to you, you should choose a non-standard method - the "helicopter" method. This method involves the use of Euroscrews (three in total are required).
- Screw the screw into the center of the first floor, secure it to the partition, but do not tighten it too much. Rotate the surface 180º around the longitudinal axis to find a point to secure the adjacent element.
- Secure the adjacent frame with the remaining two screws. Try to lift them well, then return the first plane to its normal position.
- Fully tighten the shelves from the outside of the frame.
If any point remains unclear, look at the photos on our website to understand the situation, do the job efficiently and equip the cabinet with side shelves. The result is a durable and reliable structure that will last a long time.
Furniture screed is a special type of fastening used exclusively in the furniture industry. Such fasteners not only make furniture assembly much easier, but also become “invisible” after installation. In this article, we will look at the different types of fasteners that are used to assemble wooden furniture.
Safety rules for installation
Even before attaching the bracket to the wall, you must do the following:
- Find out where the electrical wiring is in the room. Obviously, you should not hit an electrical wire with a drill.
- If the structure is attached to an absolutely smooth surface, you can glue tape to the fastening points - then the drill will not slip.
- If you think that you cannot handle the installation yourself, contact an experienced technician.
To successfully install a complex structure, you need to follow the simple rules that we have given in this article. If you do everything correctly, your TV will sit securely and securely on the wall.
Installing shelves in a closet: types of fasteners
Furniture fittings vary both in purpose and in the nature of the connection provided.
Shelf fasteners vary in purpose and type of connection. According to their intended purpose, fasteners are:
- Frame.
- Assembly.
- Power.
According to the nature of the connection:
- Collapsible.
- Doesn't add up.
Typically, fastening involves the use of tools such as a drill, Forstner cutters, countersinks, screwdrivers, hex keys, chisels, and wood glue. In addition, some types of fastenings require the use of very specific tools, which limits their ability to be used (Lamello Invis tie).
Tools are needed to attach the shelves.
Before choosing the type of fastening, you need to carefully consider the nature of the cabinet's use, so that in the future you can ensure trouble-free maintenance of individual elements or complete disassembly.
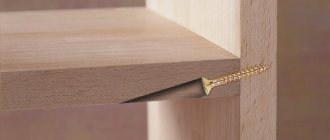
Euroscrews (Euroscrews, confirmats)
Used for joining elements of wooden furniture (chipboard, MDF). Such fasteners for a shelf in a closet require a wall thickness of at least 16 mm. Confirmations are made in a specific length range from 20 to 70 mm.
The wall for this mounting should not be thinner than 16 mm. Preparing the hole requires special drills with a countersink in the base and special keys to hold it in place. They are relatively easy to assemble, but may not fit all types of furniture since the screw head remains exposed. In addition, Eurovits do not allow organizing the longitudinal arrangement of shelves at the same height in the presence of vertical jumpers.
Such fastenings are quite reliable.
Fastenings for shelves in the closet: rastex (minifix)
This equipment belongs to the so-called eccentrics, which indirectly indicates their principle of operation. This type of fastening provides good joint strength, but is difficult to manufacture, as it requires high drilling accuracy. Structurally, it consists of a bushing for the pin (footer), the pin itself and a pressure bushing.
This is what Rastex frames look like. The footer is installed into the furniture wall in a pre-prepared location. A pin is screwed into it. For shrink wrap, the cutter selects a piece of wood to fit the shelf. A hole for the pin is made perpendicular to it at the end. After assembling the connection, the bushing lifts the pin and secures it thanks to the groove in the side wall (hence the ex src=»https://pro-dom-mebel.ru/images/wp-content/uploads/2020/07/sverlenie-dlya-rasteksa .jpg" class="aligncenter" width="1500″ height="1143″[/img] This fastening requires precision drilling skills. Such a connection has two significant drawbacks: it cannot be used in a finished frame, and when marking it, it should be taken into account that when fastening the shelf can be moved in the plane.
Conical coupler
In this case, installing shelves in a cabinet is similar to installing them using a minifix. In addition, their circuit diagram is also quite similar: both have a footer, a pressure sleeve and a pin. The only difference is the storage method.
This is what conical screws for fastening look like. If this is provided in the raster using a groove in the bushing body, then fastening here is carried out with a special conical screw, which, screwed into the cavity of the bushing, enters the corresponding hole at the end of the pin and tightens it, thereby creating the necessary tension.
Screw tie
Typically, such fastening is used to extend (join) shelves, especially in the presence of vertical walls. This solution provides both a fairly convenient installation method and high reliability. This can be considered a further strengthening of the frame.
The screw clamp is easy to install and reliable. The concept of this solution is extremely simple: using a utility knife, a piece of wood is cut out from the edge of the shelf, forming a recess. A similar one is formed on another shelf. A hole is drilled in the wall large enough to accept a grub screw or screw. Specially shaped staples with a side hole are inserted into the grooves. The pin is inserted into the clamps and then tightened with nuts on both sides.
Fastenings for shelves in the closet: Rafix
Another representative of the eccentric type, but unlike the minifix, it does not require drilling the end channel. The circuit diagram is approximately the same, only the pin is held in place by a special screw.
This is what Rafix furniture frames look like. The choice of sleeve is made at the edge of the shelf, so that after machining with a router, the end is provided with a sufficient hole for the passage of the pin, which is installed on the cabinet wall. Next, a shelf with inserted bushings is put on the pins. Fastening is carried out by tightening the bolts. The disadvantages of Rafix include the inconvenience of installation, especially with low shelf heights.
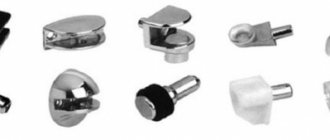
Shelf holder
The simplest option, and no less effective for attaching shelves. Structurally, it differs between mortise and hinged. The insert involves a pin piece with which it is installed inside the wall. Hinged - fixed with self-tapping screws or glue.
Shelf supports can be mortise or hinged. With this method, the shelf sits freely on supports (under its own weight), which makes it easy to disassemble if necessary. Structurally, a typical support for a shelf in a closet can be equipped with a built-in platform with spacers or a special protrusion to prevent the shelf from moving towards the door.
The convenience of such stands is that the shelf can be easily disassembled at any time.
Dowel
The same pin, only made of wood, is the oldest way to connect furniture. Structurally, it is a small (20-30 cm long) chop with waviness along the side surface. The connecting parts of the frame (or shelves) contain coaxial inlet and outlet holes so that a pin installed at the end of the shelf fits into a hole in the cabinet wall.
The wooden dowel has the shape of a small chop with grooves along the side surface. In principle, installing dowels is sufficient. However, for the reliability of the connection, as well as to strengthen the frame, adjacent ends are additionally glued (sometimes confirmations are screwed in). An obvious disadvantage of this type of fastening is the difficulty of disassembling. As a rule, such fasteners for shelves in a closet are used in non-demountable structures.
The disadvantage of such an attack is the difficulty of dismantling the shelves.
Corners
Also a simple and at the same time reliable type of fastening hardware. They differ in both design (in details) and material of manufacture. Of course, it is better to install metal corners, as they are stronger and more durable. However, they have one significant drawback - their appearance.
Corners are simple and reliable accessories for attaching shelves. Since the installation of corners both on the wall and on the shelf is done with self-tapping screws, this may not always be acceptable. In such cases, the installation of shelves in the closet is carried out using open or closed plastic corners. The closed type lid has a special cover that hides the less aesthetically pleasing interior.
However, recently metal corners have begun to be supplied with decorative covers.
Corner shelves for books
You can often see corner shelves used to store books. It is not only convenient, but also beautiful. Such shelves complement the interior of the apartment and make it more aristocratic. The design itself can be varied; imagination will help make them original and practical.
A shelf made of wood looks impressive, parts of which are attached either on one side of the corner or on the other. It looks like a ladder. Such shelves are ideal for books, which, thanks to their shape, will fit perfectly into the right place.
Taking into account all the tips, making corner shelves yourself will not be difficult. This kind of work will only take a few hours. And the finished shelf will serve you for many years, delighting you with its beauty and practicality.
You might be interested in the following materials:
Through fasteners (with drilling) for confirmations
Confirmations are most common through closing shelves. To install, you will need to drill a hole in the end of the shelf with a diameter of 5 mm and on the front side of the side wall of the bedside table with a drill with a diameter of 8 mm. It is best to use a special confirmation exercise. Because it also requires a countersink under the confirming head to “sink” the screw itself flush with the surface of the side wall. In addition, the cap is hidden by a special self-adhesive cap, matched to the color of the chipboard.
Gradient - depending on the thickness of the side walls, the length of the confirmation is selected. For standard thickness of chipboard and MDF 16-18 mm, a 5x50 Euro screw is used, for thicker panel materials - a longer one, up to 70 mm.
- Among the advantages of attaching shelves to confirmations, it is worth highlighting the ease of assembly and the low cost of the fastener itself.
- The downside is that it requires drilling. Not everyone likes the “losing” aspects of furniture in an aesthetic sense. Self-adhesive dowels, although color-matched, are still visible. In addition, furniture assembled by confirmation no longer “values” assembly and disassembly.
How to choose a fixation type?
This is not an easy task, since when choosing a method for attaching shelves, several factors must be taken into account. And they are the ones who will influence the final decision.
Brackets for mounting shelves in the wall
Relationship between shelf depth and load on each mensolo holder
Important! You can choose the right mount only if you know the answers to the questions: “What will stand on the shelf?” and “Which wall will the product be fixed on?”, only then can you make the right choice.
It is also important to estimate the number of fasteners in advance. So, if the shelf is shorter than 1-1.5 m, then a couple of fasteners are enough. If the length is greater than the specified parameters, then it is better to increase the number of fasteners in order to evenly distribute the load on the product and the wall. Moreover, again, the number of fasteners can vary greatly depending on the thickness of the shelf itself and its quality.
The free space above the sofa is organically filled with shelves to match the walls
Hidden
Hidden support for shelves is a solution for interiors in high-tech, minimalism or modern style.
To install shelves on the wall use:
- Hidden loops. They are suitable for products of different thicknesses and from different materials (chipboard, solid wood, plywood). Using a building level and a marker, mark points on the wall surface and drill holes for fasteners. Then the dowels are inserted and the rings are fixed to the self-tapping screws. At the end of the shelf with which it will be connected to the wall, it is advisable to make a recess to the size of the ring so that there is no free space between the wall and the shelf due to protruding joints.
- Metal rods. This type of fastening applies to the console. Usually it is sold complete with the shelf itself, in which holes of the required diameter and depth are already drilled. The mounting method can be different: screwed to the wall with a dowel or mounted on flat hinges or strips. Reliable fastening is guaranteed only by fittings with a diameter of at least 10 mm.
- Wooden beam. Used for installing closed shelves. Using a level and a marker, draw a line on the wall along which the auxiliary fasteners will be placed (it should go under the shelf). Then the plank is fixed with dowels and screws. Hang the shelf and secure it with an additional strip.
Materials
Shelves for cabinets are made of chipboard, MDF, wooden boards, plywood, furniture panels, plasterboard, and metal. Glass shelves are often installed in the bathroom because of their moisture resistance.
The main materials for making furniture are laminated chipboard or MDF. Let's talk about the technology of installing shelves with your own hands using 7 different types of fasteners.
You might want to learn how to make a closet shelf yourself.
Features of fastening shelves depending on the type of wall
When installing fasteners for shelves to the wall, it is necessary to take into account the characteristics of the material from which the base is made. The higher its strength, the more reliable the attachment of the hinged structure will be. Soft wood and fragile drywall surfaces do not provide adequate support. Methods for attaching shelves and the type of fittings used vary.
Concrete wall
To drill a hole in a solid concrete surface, you will need a hammer drill. The work must be carried out using a special drill for concrete, the diameter of which is selected based on the size of the dowel. The depth of the hole should correspond to the length of the fastener.
The drill is placed at a right angle; at the slightest inclination, the diameter of the hole at the entrance will increase, and therefore the dowel and self-tapping screw will not be firmly secured. This may cause the shelf to fall later.
Installation of sinks
An interesting design solution in arranging a bathroom is to install consoles under the sink. Sewage drains are hidden when installing plumbing fixtures. Cantilever bathroom sinks are designed for spacious rooms. There are pros and cons to such designs.
The advantages include a stylish appearance; the outer console can serve as an additional towel holder.
The disadvantages are the impossibility of installing interior furniture cabinets for personal belongings. This option is more suitable for use in public spaces.
Accessories for rotating shelves
Rotating shelf accessories include:
- upper and lower fixation of the rotation axis;
- the axis of rotation, which is a telescopic metal tube, that is, the height of the pole can be changed according to the dimensions of the cabinet;
- flange mounting bracket.
Installation of a rotating shelf
To install the rotating shelf correctly, you must:
- choose a place to attach the rotation axis so that the installed shelf can move freely inside the cabinet;
- secure the upper and lower connecting structures (simply screwed to the lower and upper parts of the cabinet, respectively);
- install the pin by inserting the pipe into the fixed flanges;
- screw the shelf support to the board;
- install the shelf itself.
The rotating shelf is installed correctly
Therefore, when choosing accessories for shelves, you should proceed from the material from which they are made and the method of fastening the product. In stores you can find many different options for overhead, mortise supports, sliding and rotating mechanisms, the independent installation of which does not cause any difficulties.
Useful tips
Even if you think that you don’t know how to hang a shelf correctly, you shouldn’t immediately call a professional. All you need to do is show a little effort and diligence, and you can easily get the job done. If, for example, you also need a shelving unit hung in the closet, then you can first practice on it, and then move on to working in rooms where there is finishing.
In addition, the greater the planned load on the fixed rack, the stronger the fasteners should be used. After all, over time, they may weaken, and the shelf will fall with all its contents. And this is extremely undesirable. Therefore, it is not recommended to skimp on bolts, as this can have negative consequences.
Fixing the shelf on the wall using hidden fasteners
Step 1. To attach the shelf to the wall using a secret fastening option, you will need to prepare a hammer drill with a drill of a certain section, 2-3 special titanium pins, a building level, a square, a drill and a drill, the shelf itself, and mark a pencil. The pin is a metal rod with a thread on one side and smooth on the other. Using the threaded part, it will be screwed to the wall and the shelf will have to be placed on the smooth part. Typically the diameter of the pin is 10-12 mm. The drill is selected with the same diameter as purchased titanium.
Special metal pin
Step 2: First, label the shelf itself. By the way, you can make it yourself from any other piece of furniture that has served its purpose, and not buy a new one. Using a ruler, you need to take the required distance from the end edge of the shelf. In this case, a distance of 12 cm was chosen.
Marking
Step 3. Having chosen the distance, use a square and a pencil to draw a line perpendicular to the plane of the shelf at the end where the hole for fasteners will be drilled.
At the end a perpendicular line is drawn
Step 4. Next, you need to find the center of the end of the board and make a corresponding mark for the drill. It is important to understand that if the shelf consists of two sheets of chipboard glued together, it is better to make the hole for fastening not in the center, but with a slight offset to one or another board (better down, it will be safer).
Marked for drill
Step 5. A similar mark must be applied to the opposite side of the shelf.
On the other hand, the same signs apply
Step 6. Next, at the end of the shelf where the marks are made, you need to attach a building level and directly on it make marks parallel to those previously applied to the panel, and also mark the edges of the shelf itself. The layer cannot be moved when the markup is transferred. The pencil marks can be easily erased from the flat surface later, but this method of transferring marks will make it easier to make marks for drilling holes in the wall.
The layer cannot be moved when moving elevations
Markings are made at the level
Step 7. Then you need to choose the approximate location of the shelf on the wall. After application to the surface, you must use a pencil to mark the boundaries of the product directly on the background.
The shelf is attached to the wall
Shelf limits are marked
Step 8. Now you need to take a building level with marks and, gluing it to the wall in a selected and marked place, align and transfer the marks from the level to the wall, also with a pencil. This makes it easy and quick to accurately mark pin holes without unnecessary movements.
Transferring marks from level to wall
Step 9. Next, at the end of the shelf in the designated places, you need to drill holes for the pins. They should be the same depth as the length of the part of the pole on which the board will slide.
Eventually a hole is drilled
The depth of the hole should correspond to the part of the pin on which the shelf will be placed
Step 10. Now you need to take a hammer drill with a drill of the same diameter as the pin and drill holes in the wall according to the previously marked marks. To prevent concrete dust from falling onto the floor, it can be removed immediately using the included vacuum cleaner, from which an assistant will hold the hose.
Holes are made in the wall
Step 11. Both titanium rods must be installed in place, that is, inserted into the holes in the wall. If they are difficult to insert, they can be carefully knocked out with a hammer or screwed to the wall with a wrench.
The pins are inserted into the holes
Step 12. All that remains is to place the shelf on the studs in the wall, aligning the holes with the metal fasteners. The shelf is installed. By the way, for better fixation, you can add a little glue to the holes of the shelf, then the connection will be even more reliable. This mounting option will allow you to achieve an effect where it seems that the shelf will be held against the wall.
The shelf is installed on studs in the wall
Finished shelf without visible fastenings
Video - How to install a shelf with invisible fasteners
Sources
- https://severdv.ru/mebel/polki-i-stellazhi/kak-krepit-polki-v-shkafu/
- https://csdesire.ru/mebel-interier/mebelnaya-styazhka-58.html
- https://AmiPlus.ru/zona-otdyha/bokovye-polki-k-shkafu.html
- https://englishpromo.ru/2019/12/kreplenie-polok-v-shkafu-bez-vidimogo-krepezha/
- https://kraska.guru/dom/xozyajstvo/polki-v-nevesomosti-paryashhaya-konstrukciya-bez-vidimogo-krepleniya-na-stene.html
- https://MebelRus64.ru/polki-i-shkafy/kak-sdelat-dopolnitelnuyu-polku-v-shkafu.html
- https://shkaf-info.ru/kreplenie-polok-v-shkafu-obzor-vozmozhnyh-variantov/
- https://KrepezhInfo.ru/ustanovka-polok-so-skrytym-krepleniem/
- https://infomebli.ru/gostinaya/shkafi/krepim-polki-svoimi-rukami.html
- https://papa-carlo.su/materialy/dsp/kak-krepit-polki-v-shkafu.html
- https://udobno77.ru/kak-prikrepit-polku-mezhdu-shkafami/
- https://dd-space.com/chastye-voprosy-professionalov/mebelnye-krepezhi/
- https://mebel-expert.info/kreplenie-polok-k-stene-bez-vidimogo-krepezha/
- https://MebSam.com/vidy-mebelnyh-krepezhej.html
Sequence of work
Before you attach the shelf to the wall, you need to know that the thicker the shelf, the thicker the support should be. A hole is drilled in the end part an average of 5 mm below the surface. All holes for shelves in the wall must match, otherwise attaching them will be quite problematic.
Attaching the shelf to the wall:
- A strip of the required length is considered a template. It is applied to the end of the shelf and a hole of the required diameter is made, after which it is applied to the wall.
- The next step will be drilling, which must be done with maximum precision.
To attach the shelf you will need:
- electric drill,
- threaded coupling,
- brackets,
- lath - template,
- carpentry glue,
- screws.
