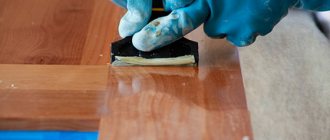
1.Apply the compound to the chips, covering the areas around them.
2.After a few minutes, you need to cut off the protruding areas and level the surfaces as much as possible.
3.Sand and polish the surface.
The main advantage of using wax for restoration is its wide range of colors; it can easily be matched to almost any furniture.
To quickly and easily melt wax, you can use a soldering iron.
How to restore and how to paint over scratches on furniture: 100% effective oil polish
If you are in doubt about how to remove scratches on a wooden door, you can use oil polish to mask them. It perfectly fills damaged areas, and also cleans them of dust. As a result, the surface is smooth and shiny.
How to quickly remove scratches from polished furniture using folk remedies
When scratches appeared on furniture, our ancestors did not have the opportunity to buy special products; they coped well with traditional methods that still work successfully today.
How to disguise a scratch using walnut kernels, nut butter and mayonnaise
Walnut is an excellent remedy for eliminating defects. You need to wipe the scratch with the core and wait a few minutes, repeating the steps if necessary. The damaged area will gradually fill with mass, as a result of which the scratch will not be noticeable.
Advice! Instead of the kernel, you can use nut butter. It needs to be applied to a napkin and wiped off all damage.
The effectiveness of mayonnaise is based on its deep penetration into the structure of the wood, due to which it swells and the scratch is filled on its own. After this, you need to paint over the damaged area with cream and polish thoroughly. The procedure is as follows:
- Periodically apply mayonnaise to the damaged area for three days.
- There should be 2 hours between treatments. During this time, the composition will be completely absorbed into the wood.
After processing, mayonnaise does not need to be wiped off, it must be absorbed
How to remove scratches from lacquered furniture: use tea leaves, machine oil and iodine
For simple cosmetic repairs, you can use an alcohol solution of iodine or tea leaves.
It is important! Iodine can only be used on lacquered furniture.
To make it more convenient to apply iodine, you need to use a cotton swab. Similar actions can be carried out with machine oil.
Brew a bag of black tea in ¼ cup of boiling water, let it brew and wipe the scratch with a cotton swab dipped in the liquid.
Removing scratches from light-colored furniture using vinegar with vegetable oil and stain
If you are faced with a dilemma about how to cover up scratches on light-colored furniture, use a recipe made from vinegar and olive oil. The operating procedure is as follows:
- In a small container, prepare a mixture of 20 g vinegar and 50 g oil.
- Wipe the damaged area with the mixture and leave for 24 hours to absorb.
- Polish the area with a rag.
A mixture of vinegar and oil perfectly masks minor damage.
Stain, unlike the previously mentioned products, must be applied to the entire surface at once. Its use in certain areas will be visually noticeable. As a result of such actions, you will receive completely restored furniture.
A unique composition of stain, prepared with your own hands, as a means of eliminating scratches
To restore furniture at home, you can make your own mastic from wax, alcohol and turpentine. The operating algorithm is as follows:
- Melt 40 g of wax in a water bath.
- Pour in 30 g of turpentine and 10 g of alcohol. Mix everything until smooth and turn off the stove.
- Treat the damaged areas with a warm mixture and rub with a rag to a glossy shine.
Advice! You can use homemade mastic to remove white spots on the surface of lacquered furniture.
Work order:
Closet.
At first I wanted to paint it like this without removing the door, then I realized that it would be inconvenient. So I took a risk. and took it off. It turned out not to be difficult. True, worries about how to put them back on were present until the last moment. In the end, I also screwed it myself; I didn’t have the patience to wait for my husband))).
I pulled out the built-in lights and wrapped them in a suspended state with masking tape. The same tape was used to protect the walls on the sides of the cabinet, the floor, and the mirrors on the doors. Prepared the workplace. I decided to paint it. on the bed)))! I covered it carefully with polyethylene. And I have never regretted this choice. The bed was large and high, everything fit, there was no need to bend over and crawl on all fours. I prepared approximately equal stacks of books and wrapped them in cling film. They are needed as substrates so that the doors can be lifted and painted as if suspended; the painted edges will not come into contact with a flat surface.
Stage 2.
I sanded all surfaces that needed to be painted. It is necessary to sand lightly, without fanaticism, with the finest sandpaper. Light circular movements. Purpose: to create roughness without removing the laminated layer. If there are dents and scratches, they should be filled with putty at this stage. After sanding, thoroughly wipe all surfaces with degreaser. It will remove dirt, grease marks, and everything that can disrupt the adhesion of the primer and paint.
Stage 3.
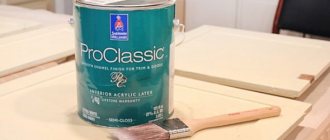
Primer. I went through hard-to-reach places with a brush, the rest with a roller. A thick layer is absolutely not necessary; it must be covered with primer without drips and in a thin layer. Uneven coloring is not a problem, but there should be no gaps. I didn’t prime the rattan inserts; the paint applied well to them anyway.
They are easy to paint - just roll them with a roller; with a brush it is more difficult not to go beyond the edges. Wipe off any blemishes immediately with a cloth. Each layer was dried, as recommended, acrylic dries in an hour and, in principle, you can carefully turn it over and paint the door on the other side.
Stage 5.
I assembled the closet. I screwed the doors and handles. I removed the masking tape and cleaned everything up. At first I planned to keep the doors open for two days, I was afraid that they would stick. Nothing like that - you can close it right away.
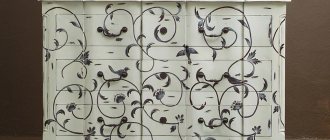
Dresser.
Mirror.
Important!
Acrylic paints dry quite quickly “touch-free”, but polymerize for at least a month; with a primer the process can take even longer. The painted product can be used almost immediately (or it’s better to wait 2 days) and even wiped with a damp cloth. But within a month, the coating remains very vulnerable; it must be handled carefully, not scratched or rubbed with force. If shelves or horizontal surfaces are painted, then it is better not to immediately place things on them that may “stick”, wait until the paint “sets”. Although I immediately put everything I needed on the chest of drawers, nothing stuck).
Here you go. The work is labor-intensive, but I was pleased with the result. The paint job ends up looking no worse than the factory paint, no brush marks are visible. It holds up well too. I haven’t tried scratching, I use the furniture as usual. But usually I don’t scratch it))). Although I will conduct an experiment in a month. The room has been pretty updated). Alas, the photos after compression leave much to be desired; in fact, the colors are brighter and cleaner, but this is not so important.
How to remove scratches from a glass table using GOI paste and nail polish
Even small scratches can ruin the appearance of a glass tabletop. You can try to eliminate them yourself; if unsuccessful, it is better to turn to professionals.
Method 1. GOI paste
The order of work is as follows:
- Melt the paste.
- Apply it to a rag and rub into the damaged areas in a circular motion.
- For larger damages, it is better to use a sander with a fur attachment.
- Polish the countertop with polish, which can be purchased at any auto store.
Method 2. Nail polish
To repair damage, you can use clear nail polish. After complete drying, polish the surface with a soft cloth soaked in sunflower oil or special polishing wipes.
Nail polish can help with minor scratches on glass countertops
Do-it-yourself furniture repair: step-by-step 60 photos of repair and designer restoration
Furniture surrounds us in any room; these are functional structures of various shapes and designs that are used in houses and apartments.
Made from various materials, cabinet and upholstered furniture wears out over time and loses its attractive appearance, but do not rush to look for new furniture.
Simple and uncomplicated procedures, presented in the photo of the stages of DIY furniture repair, will help restore the aesthetics of structures.
Even in the event of breakage or failure of individual elements, wear of the upholstery or paintwork, you can transform old furniture without much expense, giving it a new life.
Removing scratches from wooden furniture
Scratches on furniture are a rather unpleasant phenomenon, if only because visually it adds several extra years (or even dozens) to your interior items. Once stylish and impressive, scratched furniture takes on the appearance of used and outdated, making you want to cover it with a blanket or tablecloth, or maybe even replace it altogether. At the same time, many people forget that scratches on wooden furniture can be removed, at home and on their own. Let's look at the main ways to do this successfully.
Nut rub
This is perhaps the most widely known and simplest option. You will only need one or several walnuts (depending on the length and depth of the scratches), or several pecans, which, by the way, both in appearance and in taste, are quite reminiscent of a walnut.
In order to repair uneven surfaces of wooden furniture with their help, it is enough to rub the damaged area with them. As a result, the scratch cavities will gradually be filled with small particles of nuts, and they will be highly compacted, which guarantees the fairly high reliability and strength that such a seal will receive. After rubbing with nuts, wipe the treated surface with a dry cloth.
Wiping with machine oil
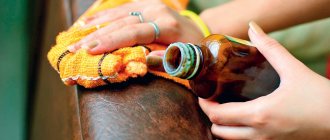
Machine oil is best for covering up scratches on dark-colored varnished wood. It will need to be applied to the damaged areas in a small amount (using a cotton pad or cotton swab) and left there for a few minutes. Then these same places will need to be thoroughly wiped with a dry cloth.
Let us once again draw your attention to the fact that very little machine oil is needed. Otherwise, you will simply stain the furniture, and you will have to wash everything off it, and then try to remove the scratches again, from scratch.
We wash off the old paint
The first task that furniture restorers face is to clean it of old paint and varnish. In the hands of FORUMHOUSE member Galushenka there was a Soviet bookcase - the glass in the doors was sealed with cheap film, the shelves were broken. Relatives kept jars in it, and were about to throw it in the trash, but the forum member decided that the furniture could still become a decoration for the living room.
To remove the old coating, Galushenka sanded the surface with a grinder and sandpaper. In this case, this treatment was sufficient - although with difficulty, the old paint came off evenly, exposing the wooden surface of the cabinet. The forum member then coated the furniture with two coats of dark furniture oil and varnish, cleaned the glass and installed new shelves.
It is more difficult to remove old paint and varnish from wooden furniture decorated with carved elements. In this case, as a rule, you cannot do without special tools - Nuwa uses a set of hand cycles for this purpose.
You can also remove old paint using AFT-1 remover. Nuwa advises treating the surface in small pieces - 10x10 cm, and not overexposing the chemical for longer than the time indicated in the instructions, so that the wood fibers do not have time to become saturated and there are no unsightly stains left.
After applying the remover, the surface must be covered with a film for 15-20 minutes (so that the remover does not dry out and the coating comes off evenly), and then remove the old paint or varnish with a metal spatula, a figured scraper without pressure, or a stiff non-metallic brush (from the places of the figured thread). If after the first time you need to use the remover again, then we do an intermediate treatment of the furniture with solvent 646, then wipe it several times with a damp soft cloth and dry it.
Applying a mixture of olive oil and vinegar
This method is especially recommended in cases where you need to eliminate not so much scratches as extensive abrasions (caused by frequent mechanical damage, constant exposure to moisture and high temperatures, and so on).
The mixture is prepared based on a three to one ratio, that is, three parts olive oil to one part vinegar. The specific amount of product will depend on how large an area you plan to treat. Dip a cloth into the resulting solution, then rub the worn furniture with pressure. After a couple of minutes, the same surfaces must be carefully wiped with a dry cloth. You will be surprised how much your interior items can be transformed after such simple manipulations.
Uses of iodine
Iodine can also be used very successfully to touch up damage to dark-colored polished or matte furniture. Some experts advise applying a small amount of iodine to a cotton swab and gently covering the scratch with it, others recommend diluting it with water to a solution with a low concentration and using a brush when applying it to the surface of the furniture. The second option will probably achieve a more accurate result.
Filling with mayonnaise
This method of getting rid of scratches on interior items may seem strange, but it can also be very effective. The reason is that mayonnaise contains some proteins and fats that cause wood to swell. It is suitable for removing small and shallow damage.
Just apply mayonnaise to the scratch, and try to do it so that adjacent areas of the wood are not covered with it, and wait a few days. If the scratch is really not too deep, then during this time the wood will swell and, on its own, will remove the groove that “showed off” on its surface.
Aspects of recovery
Restoring lacquered furniture is a beautiful option for restoring it in order to update the appearance of interior items. Basically, to eliminate a scratch you just need to remove the varnish coating from the problem area and apply a new layer of varnish. This method helps remove all types of damage.
Unfortunately, there are difficulties worse than scratches. The varnish coating gradually begins to darken and become cloudy, as a result of which the furniture sets lose their attractive appearance.
If the problem is darkening of the varnish coating, then there will be a need to eliminate the old layer of varnish and apply a new one. Such manipulations can be successfully carried out without the help of others.
Steam treatment
This is perhaps the most radical way to disguise scratches, the use of which should be approached with extreme caution. Just in case, it’s better to first try steaming some inconspicuous area of the damaged furniture to make sure that such exposure will not damage it.
If your piece of furniture turns out to be immune to such manipulation, you will need to place a piece of wet gauze or cotton fabric folded several times over the scratched area. After this, you need to place a hot iron on the wet gauze or cloth. The essence of this method is also to expand the wood: it should swell under the influence of steam and, expanding, remove the scratch.
Kitchen 2022: 5 key trends
We tell you what kitchen design to choose today so that it is relevant tomorrow
Sand the surface
Your product should be completely covered with small scratches. To do this, use fine sandpaper, but if one of your friends has a sanding machine, it’s time to remind these friends about yourself.
Prepare for painting
To do this, you need to remove dust and degrease the surface: wipe it with a damp cloth, and then with a cloth with degreaser or alcohol. The remaining glue from the film will also have to be sanded off and degreased. After this, you need to putty the products: remove all holes from old handles, shelves and fasteners, cracks and irregularities. After this, sand and degrease the surface again.
Apply primer
To ensure that the paint adheres to the surface, cover the surface with primer. Choose an unscented primer, such as Otex Akva from Tikkurila, it doesn't smell! Liquid, water-based, dries quickly. Prime in two layers, allowing each layer to dry.
Professional products
There are also many special products designed to hide damage on the surface of wooden furniture:
- soft furniture wax;
- hard furniture wax;
- the so-called “furniture touch”;
- stain.
Working with some of them requires the presence of certain professional knowledge and skills, with others (for example, with soft wax or a touch) - it allows for the possibility of success even in the absence of experience. The most difficult task if you take on the use of such products will be choosing the right shade. However, it is worth noting that if the scratches on your furniture are very deep and numerous, and “folk remedies” have not helped to significantly improve the situation, perhaps you should entrust the repair of the damage to professional restorers.
Assessment of the degree of coating wear
After looking at numerous photos before and after restoration, many people are inspired. After that, they try to work on improving their own furniture.
I can say that it is no more difficult than restoring a mirror. But it’s no easier compared to repairing wooden chairs or, even more so, restoring a Viennese chair. We have already talked about these procedures, and therefore I suggest you follow the links and read our materials, leave reviews and share your personal experience.
At the first stage of restoration, it is necessary to visually assess the current condition of the surfaces. The first sign is visual aging. Darkening often appears near threaded connections, the varnish cracks, and a large number of chips can also form. The aging of the varnish and the end of its life cycle are indicated by small meshes on the surface. Yes, small defects do not always significantly affect the overall picture.
But there are also cases when simply removing the old layer and applying a new coating cannot be done.
Consider whether restoration makes sense. If yes, then get to work.
Durability of home methods
In fact, there is no way to hide a scratch “forever” as such - you will probably continue to use the treated furniture, and you may well damage its surface again or gradually remove the layer of the seal. To make the removal of unevenness last longer, you can resort to coating with furniture varnish. In any case, there is a very obvious rule here: in order for your furniture to look beautiful and well-groomed for a long time, you need to treat it with care and precision. And in extreme cases, all of the above methods will again be at your disposal to quickly remove a scratch.
How to remove scratches from furniture?
A private house or apartment is not only your own living space, but also comfort. That is why, when arranging their homes, people try to create the most pleasant conditions for themselves by furnishing the rooms with the necessary furniture. During prolonged use or careless use, small cracks and scratches may appear on the furniture, which are immediately noticeable. If furniture is expensive to replace, and its external imperfections haunt you, then the question immediately arises: is it possible to remove scratches from the furniture and how to do this, restoring its attractive appearance? With the help of this article, everyone will find the answer to this simple but important question.
What materials and tools are needed?
Of course, the exact set of tools will depend on the piece of furniture you will be restoring. But there is a universal list of tools that come in handy during work. So, in many cases it is more convenient to use an electric tool rather than a manual one, so it would be advisable to borrow such devices from friends in advance or even rent them.
Professional tools not only save effort and time, but also give better results. Those planning furniture restoration may need the following:
- jigsaw;
- grinding (orbital) machine;
- a screwdriver with a good long-lasting charge;
- construction hair dryer;
- a powerful construction vacuum cleaner (to prevent dust from spreading throughout the room).
Popular models of construction vacuum cleaners
Achieving a smooth surface by hand is time consuming and difficult, so it is better to use a grinder
Advice! In addition to large tools, you will also need smaller accessories: brushes and rollers, spatulas of different sizes, sandpaper of different grits. Do not forget to purchase protective durable gloves, as well as a respirator that will not allow toxic fumes of varnishes and paints to enter the respiratory system.
In addition to tools for restoration, consumables are also needed - all kinds of removers for varnish surfaces, furniture wax, sealant or wood putty (compositions that fill cracks or chips), as well as paints and varnishes: enamels, paints, waxes or impregnations.
The modern market offers hundreds of types of finishing coatings for furniture
Note that furniture finishing can be purchased without any problems in any store, but restoration accessories (special pencils, adhesives, furniture edges) are best looked for on specialized online sites.
In addition, on advertisement sites in your city you can find a seller of the material you need - often people sell surplus or goods that do not suit them in color or texture.
Almost any furniture product can be ordered in the online store
How to remove scratches from furniture?
The list of products used to remove scratches from furniture depends on the material that was used for its production (chipboard, MDF, solid or polished wood). In general, the following means can be used to return interior items to their original appearance:
- Wax for wood.
- Masking pencils.
- Marker or pencil.
- Vegetable oil.
- Nut.
- Vinegar.
- Alcohol.
- Stain.
- Furniture polish.
- Iodine.
- PVA glue.
- Shoe cream.
- Black tea.
- Paraffin.
- Cigarette ash or ash.
- Nail polish.
In addition, you need to prepare equipment that may be useful during external restoration of furniture:
- Soft sponge.
- Lint-free fabric.
- Paint brush.
Removing scratches from polished furniture
Method 1
- Mix water and vinegar in a 3:1 ratio.
- Pour 2 tablespoons of vegetable oil into the solution.
- Soak a cotton swab in the mixture.
- Rub the scratches until they disappear.
- Polish the surface of the furniture with a flannel cloth or lint-free cloth.
This is interesting! Thanks to this method, you can not only get rid of scratches on furniture, but also protect its surface from dust, because it will settle much less.
Method 2
A labor-intensive but effective option is to use furniture polish:
- Take special equipment.
- Apply it to damaged areas of furniture.
- Rub until the scratches disappear.
Method 3
Uses of walnuts:
- Peel one nut and remove its core.
- Rub the inside of the walnut onto the scratches on the furniture so that the nut oil penetrates into the material.
- Wait a couple of minutes until the scratch begins to darken.
- Repeat if the effect is not fully achieved.
Getting ready to repaint
First we need to prepare the tools and materials with which we will clean the old coating and apply a new one. You need to choose where the work process will take place: there will be a smell of paint, and it will take time to dry. The piece of furniture will be completely ready for use a day after repainting.
You also need to take care of security measures. These are not only safety glasses and gloves, you also need a respirator or a gauze bandage on the face. You will need it to protect against odors of paint and chemicals, and to remove dust when removing the old coating and cleaning the surface.
Again, you need to decide where you can repaint the furniture. The room should be well ventilated and there should be no small insects in it, which, clinging to the freshly painted surface, will waste all the work.
What tools and materials will be needed
To clean a piece of furniture from the old coating and paint it, we will need:
- Detergent diluted in warm water - for cleaning and degreasing the surface.
- A soft brush is used to sweep away dust after sanding.
- Primer – to level the surface of the product.
- Putty - for filling deep cracks, scratches and chips.
- A set of screwdrivers – to disassemble a piece of furniture.
- Rubber spatula – for priming and putty.
- A hair dryer or special chemical products are used to remove old varnish.
- Acrylic paint in cans or spray cans.
- A tray for paint, if it is in a can.
- Matte or glossy varnish – for protection and shine of the painted surface.
- Roller – for painting wide surfaces.
- Brushes – for painting small details and corners.
- Masking tape or film - to protect unpainted surfaces (mirrors, glass).
Advice! Select a primer with a shade that matches the color of the paint. When choosing brushes, make sure that the bristles do not fall off.
Removing scratches from wooden furniture
The easiest way to remove scratches from the surface of interior items is to use proven products that are sold in any hardware store or household chemicals supermarket.
Method 1
Using leather shoe cream:
- Select and buy a cream in a shoe store, the color of which matches the tone of the furniture.
- Using a sponge, apply a little cream to the damaged area.
- Polish with flannel cloth.
Method 2
Using a masking (restoration) pencil for wood:
- Treat the scratch with a pencil.
- Wait until it dries.
- Polish with a clean soft cloth.
Method 3
Using special wax to protect wood:
- Apply the product to a soft sponge.
- Rub it onto the problem area.
- Rub until the scratch disappears.
Method 4
Using wood stain or oil:
- Choose the product of the desired tone.
- Apply the substance to the surface using a paint brush.
- After reading the instructions, wait for the specified time period.
- Re-treat the surface, taking breaks between approaches.
Important! This method is most effective if the furniture is made of solid wood.
Removing scratches from furniture using traditional methods
Solution 1
Using used black tea leaves. This is possible as follows:
- Brew strong black tea and let it brew for a couple of hours.
- Treat scratches with a cotton pad soaked in tea.
- Periodically allow the surface to dry, checking intermediate results.
Solution 2
Smoking is a bad habit that is harmful to health. However, sometimes even this can be beneficial by using cigarette ash:
- Collect some ash while smoking.
- Mix it with ash in a 1:1 ratio.
- Add a couple of drops of water to create a paste.
- Treat damaged areas of furniture.
Important! This method is suitable for dark-colored furniture, but if you use only ashes, you can remove scratches from light-colored interior items.
Solution 3
You can remove scratches from light-colored furniture using paraffin from candles:
- Knead the paraffin in your hands.
- Apply it to furniture with scratches.
- Rub in circular motions until the scratches disappear.
Important! This method is suitable for all types of furniture: it is enough to remove excess paraffin from ordinary furniture; polished furniture needs to be rubbed until shiny with a flannel cloth.
Solution 4
- Mix water with iodine to make a weak solution.
- Paint over the scratches with a paint brush, dipping it in iodine.
- Leave until completely dry.
- Cover with clear nail polish.
Important! Iodine has a brown tint, so it is not used to cover scratches on light-colored furniture.
Solution 5
For women who wear a lot of makeup, scratches on furniture are not a problem, because they can be covered with special eyeliners or pencils. In addition, you can use regular markers for drawing, the main thing is to choose the right tone.
Solution 6
Using PVA glue (only possible for inexpensive furniture):
- Dip a paint brush in glue.
- Cover the damaged area.
Replacement of accessories
To restore the functionality of furniture, you can use modern fittings, fasteners and guides.
By complementing an old coffee table with railings and a pull-out shelf, you can transform it into a table for a laptop; such an impromptu workplace will not take up much space and will help to highlight a work area in the living room.
