Sometimes the master has to make a screen under the bathtub with his own hands:
- if the presence of this element is not provided in the plumbing supply package;
- the existing option does not suit the interior of the room.
Installing a fence is not considered mandatory if the bathtub is decorative on the outside, but in some cases the space under it must be closed.
View of the screen under the bathtub.
Why do you need a bath screen?
If the outer surfaces of the bowl do not have a neat finish, then the screen will help harmoniously fit the plumbing item, which takes up a lot of space, into the bathroom interior. In addition to aesthetic benefits, apartment owners often receive additional benefits:
Compartment for household items
- Possibility to use the space under the bathroom to store small items. In a small and cramped room, it is difficult to install an additional cabinet for storing cleaning products, household supplies, etc. All this can be easily left under the bathtub, covered with a decorative shield.
- Masking of communications. Sewer pipes and connections to the mixer have an unsightly appearance; you always want to hide them. An elegant screen will allow you to hide unattractive details and make the bath part of the bathroom interior.
- Protection of plastic containers. Inexpensive acrylic and plastic models can crack if accidentally hit if children play in the bathroom or move some objects. Only a screen made of durable material will protect the wall of the bowl from mechanical damage.
- Insulation of the space under the bathroom. It is quite difficult to dry and ventilate the skylight and floor under a plumbing structure. To prevent moisture from getting in and mold from developing, impenetrable screens are installed. All communications must be reliably sealed against leaks.
Peculiarities
The main task of the screen is to hide unaesthetic legs, the side of the bowl and communications from the eyes of the owners. And although the appearance of acrylic and plastic products is not too repulsive, compared to the outside of cast iron or steel products, they should still be decorated. The screen will hide all unsightly elements, small things in the form of jars and bottles. If the walls are tiled, use the same material to create the screen so that all the cladding items match each other.
When designing a screen, you should remember the need to leave free access to communications to eliminate possible malfunctions and leaks. To do this, you will have to build a hatch into the structure through which you can easily access the pipes.
Requirements for barriers under the bathtub
The humidity level in the bathroom is higher than in other rooms of the apartment; this fact must be taken into account when choosing the material for making the screen. If you use unsuitable samples that are moisture-intensive and unstable to temperature changes, mold will quickly grow on the surface of such a screen, and bacteria will make it unsuitable for use.
The requirements for the fence itself are as follows:
- mechanical strength;
- waterproofness and tightness of joints;
- the presence of windows for servicing communications.
Foot niche
When installing a screen, the comfort of using the bathtub for washing and servicing the inner surface of the bowl is reduced. In other words, the feet rest against the wall, preventing you from getting close, for example, to clean or wash large items that do not fit in the washing machine.
There are four design options to make this task easier:
- a cutout 5–10 cm high between the screen and the floor;
- niche at the same level;
- screen surface beveled downwards;
- a niche with a beveled plane in the middle part of the screen.
The video shows the technology for assembling a frame with a niche for the feet:
The main disadvantage is the accumulation of dust/dirt at the junction of the niche with vertical surfaces and floor coverings. It is possible for horizontal tile joints to shift due to an increase in the length of the inclined surface. It is also considered bad design practice.
Barrier design options
The design of a homemade screen depends on the shape of the bowl, the location of its installation, and the individual wishes of the owner (for example, a decorative screen with steps, a smooth transition to the floor, etc.). You need to choose the type of cladding before starting work, and design the structure taking into account its features.
Slab barrier.
Fencing with wide sides
If the sides of the bowl are wide, this increases the space under the bath if it is used for storage. It is rational to use the horizontal surface of such sides as a shelf.
This design requires careful sealing of the junction of the edge of the bathtub with the wall and screen so that water does not accumulate on the sides, unlike the standard type, when the casing is hidden under the side. What the solution lacks, it makes up for in the elegance and practicality of the product.
If the protruding parts of the screen interfere with a comfortable approach to the bathtub, the vertical wall can be tilted, moving the lower part inward. You can tilt the entire screen or part of it in the desired location. It is advisable to design a niche for the feet with a height of approximately the middle of the bowl. The dimensions of the structure are designed in advance, determining the accessibility of the cranes from the points where the screen sheet will stand.
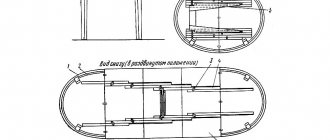
How to make a sliding screen
A sliding screen allows you to open the space under the bathtub when you need to get out cleaning supplies or other household items stored there. The simplest design is 2-3 panels mounted on a special guide profile with runners.
Sliding screen doors are carefully adjusted to the distance between the upper and lower profiles. The movement of the panels will be smooth and easy if there are no burrs or nicks on the edges of the material used.
When closed, all parts of the panel should overlap each other by about 5 cm. This requirement is taken into account when marking the sheet, adding the required distance to the length measurements. For ease of movement, handles are placed on the panels. They should not interfere with the movement of part of the screen. The sliding parts of the screen are placed in different grooves of the profile, as is done in a wardrobe or shelf with a glass screen.
Screen under the bath: top view.
Dimensions
Panels for decorating the facade of a bathtub can differ not only in design features, but also in size. The choice of product depends on the dimensions of the standard bowl. There are standard and non-standard models. They can have a length from 105 to 190 cm.
The most common products are of the following dimensions:
- with length – 120, 130, 140, 150, 170 cm
- with a width of 50-56 cm
Before designing the screen, it is necessary to measure all sides of the bathtub, and only after that begin to calculate the materials.
Types of frames for screens
Different materials are used for the frame on which the fence sheet will be attached. The easiest to process are a wooden block and a metal profile for gypsum boards. They are used most often, but there are other options for setting up the base for the screen.
Wooden frame for bathtub
When using bars or boards as frame elements, it is necessary to impregnate them with an antiseptic composition. This will help reduce the risk of mold in humid environments and when the space under the bath is insufficiently ventilated. The optimal cross-section of the timber used for installation of the sheathing is 4x4 cm.
A simple version of the screen frame (without removing the top part) is assembled step by step like this:
- Mark the projection of the sides of the bath on the floor to get the outline where the beam will be installed. To do this, a plumb line is lowered from the corners of the bowl near the wall to the floor and straight lines are drawn along the thread on the wall. From them you need to retreat 2.5 cm in depth under the bathtub (side thickness) and draw parallel lines. The points where they connect to the floor are the marks between which the lower block will lie.
- If the bathtub has a free corner that is not adjacent to the wall, a plumb line is also lowered from it and a point is marked on the floor. From there, a square with sides of 2.5 cm is built in depth. The far corner of the figure (diagonally from the first marked point) is the mark at which the bars of adjacent sides should touch.
- According to the markings, place the block on the floor and attach it with self-tapping screws and dowels.
- Vertical supports are installed along the lines on the wall and secured with the same screws. For a free corner, a vertical stand is placed at the junction of the bars on the floor, secured to them with metal corners and wood screws. The height of the racks should allow the top beam to be installed on them so that it is hidden by the curved edge of the bathtub side.
- The top bar is attached to the main supports using angles and screws. If a sliding type is planned, then an additional rack is placed so that it does not interfere with the movement of the panels (you can do without it if the space is planned to be opened to the full width). For a fixed panel, it is advisable to install several additional verticals on the long side. The pitch of the parts is 50-60 cm.
The markings for the screen with extension, with steps and other details are made according to the same principle. All parts that will protrude beyond the contour of the sides are marked by retreating from the first mark on the wall to the required distance and lowering the plumb line to the floor.
Wooden sheathing.
Frame made of metal profiles
It is convenient to make a frame for lightweight screens made of sheet material from the PN 27x28 profile (for gypsum plasterboard). When planning tiling, preference should be given to more durable corrugated pipes with a cross-section of 2-3 cm.
Marking is carried out in the same way as for a wooden frame. The lower trim is placed on the floor and secured to it with dowels. The side verticals are attached to the walls, then the top trim is placed. Finally, additional vertical racks are installed.
When using a profile for gypsum boards, the parts are connected to each other using standard short self-tapping screws. If the sheathing is made of corrugated pipe, then you will have to use a welding machine to connect the parts.
Metal sheathing.
Brick screen base
Brickwork is suitable as a base for tiles or stone. This screen is stationary; when erecting it, you need to leave a window for servicing communications, hanging doors or installing a hatch.
Laying begins along the bottom marking line (on the floor), from wall to wall. If there is a free corner, lay it out first, carefully aligning it with the square. Then continue each side towards the walls.
When laying the top row, space remains under the side of the bowl. To isolate it from water and dirt, it is filled with polyurethane foam or cement-sand mortar.
Brick sheathing.
Bath screen of complex shape
The main difficulty is to correctly project the contour of the sides onto the floor. This procedure is carried out in the same way as for a straight bathtub, but the plumb line is lowered not only in places where it abuts the walls. The best option is to place dots on the floor every 20-30 cm. On rounded areas of the contour, the marks may be more frequent.
From the initial line of marks, an indentation is made inward by 2.5 cm (if the screen is without extension) or outward (to form a shelf around the bathtub). The new line should repeat as accurately as possible the contour obtained using a plumb line.
If the cladding is made of tiles, it is best to make the base from brick: it can be leveled with cement mortar. For lightweight screens, the choice of frame materials should be focused on metal profiles for gypsum boards:
- measure the length of the contour using a cord or tape measure;
- cut off the required piece of profile;
- use metal scissors to cut its sides every 3-5 cm;
- attach along the contour, bending the guide.
The remaining stages of assembly are carried out as on straight baths. The upper profile can be curved along the contours of the sides.
Brick base
A brick bathtub stand is rightfully considered the most durable of all similar structures. After arrangement, it can be decorated with any finishing material. If you plan to use tiles, then such a base is best able to withstand decent loads. Masonry work is performed in a quarter or half brick, shifting each next row by half a brick.
The upper part of the bathtub and the brick wall is usually separated by a small void 20-30 mm high. To blow it out, use foam. It is important not to forget about organizing access to internal communications, for which an installation window is left in the masonry. It can remain open or be closed with a plastic hatch. In some cases, a recess for the feet may be required.
Materials for making the screen
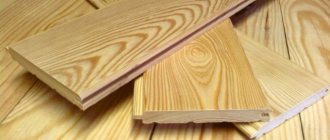
The material of choice for the bathroom screen is plastic. It is convenient to use monolithic types of polycarbonate (opaque, colored, etc.) or PVC panels. Less suitable are MDF and gypsum board, plywood or fiberboard. When choosing fences for the bathroom, you need to use the most moisture-resistant types.
Screen made of plasterboard.
Laying ceramic tiles
Brick walls are installed as a base under the tiles or a rough gypsum board screen is assembled. The tiles are installed using standard moisture-resistant tile adhesive:
- you need to start from the open part of the bathtub or from its free corner, from above, so that the cut elements are under the sink, against the wall, near the floor, etc.;
- to maintain uniform seams, use dividing crosses, inserting them in the corners between the plates;
- when the glue sets, the crosses are removed and the seams are filled with special grouts with antiseptic and hydrophobic properties.
In addition to tiles, the bath screen can be finished with mosaics, natural stone, porcelain stoneware, etc.
Features of using MDF panels
The material is not moisture resistant enough for use in the bathroom. Before installation, it is advisable to treat all sections with water-repellent impregnation so that the canvas does not deform when exposed to water. The outer side of the panel is laminated and is resistant to drops and splashes, as well as high humidity. For a bathroom, you need to choose MDF with a protected underside of the sheet (most often painted).
Installation begins with attaching the starting profile for walls made of plastic panels (U-shaped). It is fixed to the top bar or profile so that the top edge of the MDF can be driven into the recess. If you do not plan to install a plinth on the floor around the bathtub, you can fix the lower edge in the same profile, filling it with sealant or glue. Fastening to the frame elements is carried out from the inside, using short self-tapping screws for gypsum boards.
MDF panels under the bathtub.
Finishing the screen with plasterboard
Making a screen or base for tiled cladding from gypsum plasterboard with your own hands is no more difficult than other architectural elements. The sheets are cut according to width and length measurements, and then mounted on the frame with short self-tapping screws. The head of the fastener must be recessed into the surface of the material.
After installing all the sheets, the joints are glued with reinforcing tape and putty. The holes from the screw heads are also smoothed with putty. After installing the gypsum board, it is necessary to paint the surface or tile it, since the material does not have sufficient moisture resistance.
Cladding with plastic panels
Plastic panels are convenient not only for wall decoration, but also as a basis for a screen under a bathtub. When using this material, you can decorate rooms in a single color scheme and style. For installation, the same profiles are used as for fastening to the walls (starting and finishing), and the lathing is performed by placing 2 horizontal strips along the height of the bowl (a distance of about 30 cm).
Before installation, U-shaped profiles are attached to the floor (on a wooden frame) and under the side of the bathtub. Installation of panels is carried out from wall to wall or from a free corner to the wall (so that the cut panels stand near the wall). To design the external corner, special profiles are used.
Cladding with plastic panels.
The work is done like this:
- fasten the starting molding using a stapler;
- a corner or starting profile is placed on the outer panel, inserted into the guides at the top and bottom;
- carry out to the outer corner or close to the wall;
- fixed to the sheathing elements from the side of the wide mounting flange;
- insert the next panel into the recesses of the moldings (with the short flange towards the already installed part), connect tightly, closing the joint, fix the wide flange on the sheathing and repeat until the work is completed.
If the last panel in a row needs to be cut to width, measure out the required size, cut off the excess material, and cover the cut with molding.
Panel screen.
Preparatory work and tools
A full-fledged screen, even from light plastic, cannot be made without a special tool. It is advisable to purchase not only it, but also all the accompanying materials, this will save time and contribute to the proper organization of work.
In addition to the selected plastic blanks for the screen, you will need:
- lightweight UD profiles, fastenings are included with them;
- marker;
- liquid Nails;
- building level;
- perforator;
- plumb line;
- wooden blocks, they can replace supports and help create a stable structure;
- construction stapler;
- screwdriver;
- drywall knife;
- square
Separately, you need to think about how to carefully bypass the toilet and communications that cannot be hidden under the bathroom. It is important to leave access for their repair or installation. For example, when going around a sewer pipe, leave a gap of 5-10 mm around its perimeter. If necessary, it can be easily replaced.
Photo
Openwork
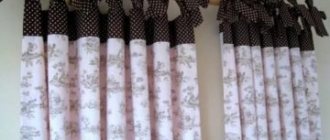
Curtain screen
Lattice
Sliding
Original screen
Screen with footwell
Under the bath with a door
Tiled
From mosaic
Wooden screen
Did this article help you?
Installing a hatch on plasterboard boards
In this example, we will tell you how professional builders install a hatch in a bathroom. Initial data - the box with pipes and fittings is completely sewn up, the location of the taps and measuring instruments is drawn on the outer surfaces of the plasterboard boards, and the approximate size of the hatch is indicated.
Tools for installing a hatch
Hatch to be installed
For ease of installation, you can detach the door from the frame
Step 1. Mark the tiles along all the walls of the bathroom, taking into account the general laying rules.
Step 2. Start finishing the wall adjacent to the utility box. If necessary, slightly adjust the position of the tiles; this will not affect the final quality of the bathroom.
Step 3. Transfer the markings to the box, determine exactly the location and dimensions of the hatch.
Step 4. Cut a hole in the drywall to the desired size. To make the work easier, you can first use a grinder with a metal disc; as soon as a slot of sufficient length appears, use a hacksaw with fine teeth. Make sure that when making a hole, the metal frame installed for mounting the drywall is not damaged.
Step 5. Fix an additional profile around the perimeter of the hole to secure the hatch frame. It is screwed with self-tapping screws to an already mounted frame for plasterboard slabs. This is not difficult to do; the algorithm for fixing additional profiles is ordinary.
Step 6. Drill holes in the hatch frame to secure it to the installed profiles.
Frame holes (factory)
Step 7. Reinstall the hatch and open the door. Using a level, check the position of the structure and, if necessary, correct it using small wedges. Lock the hatch in the desired position.
Installing the frame in the opening
Step 8. Screw the frame to the metal profiles with self-tapping screws of the appropriate length. Check the position of the structure again.
We fix the frame with self-tapping screws
Step 9. Using special screws on the curtains, accurately adjust the position of the door, achieve smooth opening and equal clearance around the perimeter.
If the door has been removed, now is the time to put it back in place and adjust it
Checking the operation of the hatch door
Step 10. Close the hatch cover and begin covering the box with ceramic tiles. After the glue has hardened, trim the seams around the perimeter with silicone to match the color of the putty. The silicone has dried - cut through it to its full depth. We described above how this is done.
