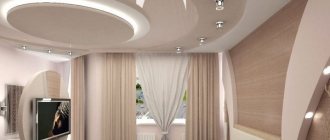
Drywall hangers are an important element of many drywall structures. These products are used for reliable fixation of profiles on a load-bearing surface when leveling walls with gypsum plasterboard and gypsum plasterboard sheets, for laying insulating materials, and creating simple and multi-level suspended ceilings. Several types of suspensions are available, differing from each other and used in different situations.
Using drywall hangers with maximum efficiency
When preparing to renovate your apartment, you involuntarily think about using drywall. With its help, you can get perfectly smooth walls, add additional insulation, or construct a suspended ceiling. When working with this material, various fasteners are required. Drywall hangers are used not only to create a suspended ceiling. They are also used when creating gypsum plasterboard walls. With their help, the frame becomes strong enough to support the weight of plasterboard sheets and finishing.
Advantages of the material
Knauf acoustics is a material of so-called “dry construction”. By installing such slabs in your home, you will receive the following benefits:
- you can effectively correct the acoustic background in the room for low frequencies;
- simple and quick installation that can be carried out even by one person;
- the slab can be painted without any problems;
- absence of unwanted “wet” processes;
- safety and environmental friendliness of the material. The material does not emit hazardous and toxic substances into the air, such as formaldehyde.
In addition, with the help of such sheets you can finish both walls and ceilings. In this case, no external seams remain. During the installation of the slabs, a continuous surface is formed. This can be achieved by applying light putty if the sheets have a straight standard edge.
Acoustic gypsum boards on the ceiling
Such an acoustic system is very convenient for installation, as well as further operation. Inspection hatches are easily integrated into the system, through which access to a variety of engineering systems is possible.
Thanks to these advantages, acoustic plasterboard has become widespread throughout the world. Today it is used in various situations:
- wall and ceiling cladding to create excellent sound insulation;
- implementation of various architectural projects;
- finishing of residential and non-residential premises: private houses, government institutions (schools, universities, kindergartens), concert or theater halls, etc.
As you can see, Knauf acoustics is an excellent solution for creating reliable sound insulation in almost any room.
Why use a gimbal
Attaching sheets of drywall to the created frame is the norm. There are options when installation is carried out without assembling the frame, but they are rare. To create a flat wall or ceiling, a special structure is assembled from metal profiles. For more reliable fastening of profiles to the surface, a direct hanger for drywall is used.
If the frame is small in size, then you can simply fix the profiles together using jumpers. If the area of the assembled structure is too large, then profiles without hangers will “play.”
Initially, direct suspension was used when assembling ceilings (it was called ceiling), but it worked well when assembling wall frames.
The longer the metal profile, the more it can bend. As a result, there are situations when it bends under the influence of drywall during installation of the latter. To avoid this, the profiles are fixed with additional fasteners. A ceiling hanger for plasterboard is well suited for this.
Installation features
Direct hangers for the gypsum plasterboard frame are universally suitable; when fixing them to the ceiling, only iron anchor fasteners are used; for the walls, nylon dowels are sufficient. They are positioned along pre-marked axes and then used to hold the 60× ceiling type. Ordinary piercing screws are required to connect the iron parts.
If transverse inserts are needed, it is recommended to purchase “crab” products; if they are not available, the profile is cut and bent in suitable places, but this takes time.
Suspensions with traction and vernier systems, similar to straight ones, are fixed to the ceiling using iron anchors. To hold the frame, both special and universal options can be selected; an example of the extreme is the Knauf combined suspension. Its load-bearing capabilities depend on the type of upper fastener; in vernier systems it can withstand at least 40 kg; in wall-mounted ones - the usual dimensions are 60 mm in width, - in length and 40 - in height; the presence of a perforated section allows you to control the level of the gypsum plasterboard ceiling
Regardless of the type of fastening used, final fixation is carried out after checking the level of the profile and its alignment.
In some cases, it is necessary to lengthen the direct suspension without introducing anchor and vernier systems. There are two possible solutions - installing products with unusual dimensions (for example, a vibration control panel) or fastening two ordinary parts with metal screws and bolts. Both methods have their drawbacks, but in the conditions of limited space and insignificant level configuration, they are the most economically advantageous (the price of PP is several times less than other varieties).
Types of suspensions
Like any fastening element, the suspension is sold in several modifications:
- straight;
- vibration suspension;
- sliding (with wire traction);
- anchor;
- vernier.
Direct suspension
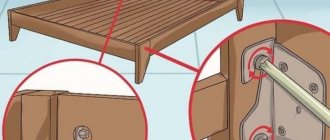
Direct suspension is the most common. It is made in the form of a straight plate that needs to be bent into the letter “P”. It is attached to the surface with its back (there are special ears for this), and the petals are screwed to the profile with self-tapping screws, fixing it.
It is believed that a direct suspension for gypsum boards for the ceiling can withstand a load of up to 40 kg. For greater reliability and to prevent the sheets from sagging, it is installed every 60-70 cm.
The advantage of this fastener is its ability to absorb noise. Vibrations that come from the wall (ceiling) to the drywall are partially absorbed, which makes life in the apartment more comfortable.
A visual diagram of the placement of all elements of the suspended ceiling frame
It is recommended to fasten the suspension using galvanized dowels, since the nylon counterpart is considered unreliable.
Vibration suspensions
The use of vibration suspension is required in cases where high-quality sound insulation is needed. For most apartments there is no need to resort to such fasteners, and they are used in rare cases.
There is no point in using only vibration suspensions. If such fasteners have already been chosen, then soundproofing material should also be laid between the plasterboard and the ceiling.
To suppress sound waves, vibration suspensions are equipped with a special element that should dampen sound vibrations. Due to the use of an additional soundproofing element, the vibration suspension will be able to withstand less load than a conventional suspension for gypsum boards.
You can make vibration suspensions for drywall with your own hands. To do this, you need to glue insulating tape to the back of the fastener. You will also need to use rubber gaskets under the screws so that the fastener lies flat on the surface. The process can be clearly seen in the video.
Sliding suspension
In apartments with high ceilings, during renovation you want to make them lower. In some layouts, the height of the walls is 3 meters or more, which causes a lot of inconvenience. Naturally, I want to lower the ceiling not by 10 cm, but by at least half a meter. For these purposes, a sliding suspension is used. It is suitable in the following situations.
- It is required to create a multi-level suspended ceiling.
- It is necessary to hide the ventilation duct, which occupies a significant part of the space.
- It is necessary to reduce the ceiling height in order to lower the lighting and save on materials for wall repairs. Walls 2.5 meters high require less money than walls 3 meters high.
In all these situations, it is rational to use a sliding drywall hanger. However, it should not be used on walls or low ceilings.
The sliding suspension has two rods in its design that are inserted into a spring. It is called sliding because by simply pressing the butterfly you can adjust its height. It needs to be installed in increments of 60-70 cm.
Which is better: heated floors or radiators?
Warm floorBatteries
It is believed that this fastener can withstand a load of up to 25 kg, but after a few years the spring may stretch and weaken. This is the biggest drawback of the fastener. Also, the suspension rod itself for drywall is not one of the reliable fastening elements
Anchor suspension
For attaching a ceiling profile, the anchor mechanism is considered the most reliable, although it is 4-5 times more expensive than a direct suspension. The anchor principle of the fastener allows you to adjust the height of the structure from the profiles.
This fastener conceals the height, so it is not used in rooms with low ceilings. It has a simple installation diagram:
- holes for the anchor are drilled;
- the rod is fixed to the ceiling;
- the profile is inserted into the guides, and the suspension itself is put on the rod;
- a profile is inserted into the suspension, after which the structure is aligned and fixed in a given position.
Vernier
Vernier is rarely used when working with drywall, but it is worth mentioning for completeness. It can withstand loads of up to 40 kg, which allows it to be used for fastening heavy structures.
It consists of two elements that are connected with special screws. Thanks to this, it is possible to adjust the desired height of the vernier.
The upper element of the vernier is fixed to the ceiling, and a profile is attached to the lower element.
Marking and installing lathing on the wall
Depending on the structure and the supporting structure on which it is necessary to install the sheathing, we take an element with which the direct suspension will be attached.
I propose to consider the option with a brick wall in an ordinary apartment. In this case, we will need a 6/40 dowel nail (provided that the wall is not made of foam blocks or tripod bricks). The best solution would be to use a long level or profile for gypsum boards to make markings over the entire surface of the wall. The distance between each vertical row must be 40 cm (in some cases, when finishing with iron siding or decorative stone, the lathing frequency is reduced to 30 cm).
You can first mark the installation locations, specifically the points for drilling for the dowel. Then, having drilled the required number of holes with a hammer drill, we fix the suspension for PP 60x27 and hammer the dowel.
I think the second option is faster; I personally work using this method. Press it against the wall at the marking level. In the 2nd hand we hold a hammer drill and drill holes directly through it. The drill is a little wider, so it will slightly break up the place for fastening, but not dramatically. The dowel-nail fits perfectly into the resulting hole together with the plug.
A drywall hanger is an element made of high-quality zinc-coated steel that holds the profile on working surfaces - the ceiling or walls. The choice of a specific type and the number of fasteners depend on the purpose and complexity of the frame.
Almost all manufacturers sell products of good quality; Knauf, Metallist, AS-Krep and Eurostandard have the best reviews. Development of installation is considered easy; fastening is carried out by 1 person.
- Classification and scope of application
- Installation technology
- Cost and sizes
Types and purpose
The main functions of these devices are to support the frame profile, which is then sheathed with plasterboard sheets. GKL and iron elements make a single system; the safety of its operation and appearance depend one hundred percent on the reliability and correctness of the selection of fasteners.
A single additional place appears under the ceiling and behind the walls, wires, lamp housings and communication boxes are hidden, hangers are selected and fixed taking into account their arrangement. The ultimate consideration is corrosion resistance, these products are made from low carbon zinc coated steel and are designed to last a long time.
Based on the type, multifunctional purpose and installation method, all hangers for plasterboard frames are divided into straight ones, with traction and clamps, and vernier systems. The first type is the most common and widespread; these are perforated plates with a width of about 0.9 mm.
Their middle is fixed to the working base using dowels, and the edges are bent, forming a U-shaped structure for attaching ceiling or load-bearing profiles with alloy screws. The protruding ends are simply hidden inside the frame after installation is complete.
The advantage is to ensure reliable retention with little concealment of the internal space; when assembling a conventional suspended plasterboard ceiling, when using them and the usual thickness of gypsum boards, the height of the walls will be reduced by no more than 6 cm. But their abilities are limited; if it is necessary to lower the lower level, a different type should be purchased. Typical overload withstand ranges from 25 to 40 kg, the placement pitch depends on the weight.
When lowering the ceiling or developing multi-tiered structures, fastenings with traction and anchor clamps are used.
The extension element in this case has the form of an iron rod with the usual dimensions (diameter 4 mm and length from to ). The end of the rod, fixed to the working surface, has the shape of a loop; on the other side, a suspension with a spring clip is put on it, which can be moved along the wire without any problems.
If necessary, the rod is trimmed; excess does not interfere with installation. This conventional solution allows you to change the height of ceilings sheathed with plasterboard sheets within the specified range.
Vernier hangers are represented by a system of 3 elements: the 1st is attached to the base, the 2nd holds the frame profile, the outer one has the shape of a bracket and connects them together. Their lower part is perforated; at the moment of fixation, its size is adjusted, and as a result, the ceiling level. Designs with a huge amount of internal space are considered a good area of application; they are designed for the highest weight loads (at least 40 kg).
The advantages also include simple installation and reliability, but the disadvantages are that they are overpriced compared to straight strips.
They are mainly chosen when carrying out work independently.
Specifications
A hanger for a drywall profile has certain characteristics, based on which you can plan the size of the structure, as well as other details. For example, the height of a direct suspension is 75mm or 125mm. Based on this parameter, you can know in advance what the maximum distance from the wall to the drywall can be. This is necessary to properly plan the layout of communication systems and make heat or sound insulation.
Direct hanger for drywall and its dimensions
Do not be afraid that the mount will not support the weight of the frame with drywall. Although an ordinary sheet weighs more than 20 kg, and the frame does not make it lighter, the hangers are not afraid of such a load.
The maximum possible load on suspensions of different types:
- straight – 40 kg;
- vibration suspension – 56 kg (there are specimens that can withstand no more than 12 kg);
- sliding – 25 kg;
- vernier – 40 kg;
- anchor – 25 kg.
Tools for starting renovations in an apartment: dowel-nail, hanger and level
One of the main parts for the production of “lathing”, a frame made of a ceiling profile (PP), onto which plasterboard is subsequently attached, is a direct suspension.
To attach it you need screws, nails or dowel-nails. The design of a wall or ceiling using this device is the most common and reliable.
The straight suspension, the photo of which you see, allows you to easily adjust the distance between the main wall and the new one (the one we plan to mount). If necessary, insulation, hydro- or sound insulation is placed in the gap between the gypsum board and the wall; there is currently a large selection of different types of insulation on the construction markets.
Rules for working with fasteners
There is nothing difficult in understanding how to properly attach drywall hangers. Depending on their type, hangers are installed immediately before or after placing the profile that will be attached to them.
First you need to make markings to indicate all the important places where the fastening will be made. Holes are drilled in the wall or ceiling into which dowels are inserted and hangers are attached. After this, you need to align the profiles and check whether they are in the same plane. Next, you can fix the profile with self-tapping screws.
Schematic placement of suspended ceiling elements
The distance between the hangers on the plasterboard ceiling should be about 60-70 cm. The more specific fastening step depends on the size of the room, because it should be approximately the same.
Sometimes there are situations when the profile moves far away from the wall due to reasons beyond our control. In these areas, the standard hanger length may not be sufficient. A completely logical question arises here: how to lengthen drywall hangers? The solution is quite simple. You just need to insert one suspension into the other (not completely), securing them from the sides with self-tapping screws. This way the fastener will be extended by the missing centimeter.
Fasteners
According to the markings, holes for anchors are drilled in the walls or ceiling. There are suspension models with only 1 hole in the center, and some with 2. The 2nd option is the most reliable. Installation on the ceiling must be done only with the use of iron fasteners. Nylon dowels can stretch under overload. Profile hangers are screwed to the walls or ceiling.
The sides bend down at an angle of 90°. To check the reliability of fastening, you can pull the hangers down; they should not fall out of their places. Next, the profiles are installed at the desired height.
If the hangers have “ears” left, that is, extra length on the sides, they need to be bent in the opposite direction so that they look inward and do not interfere with the sheathing process.
Using drywall hangers
Everyone knows that sheets of drywall (gypsum board) cannot be fixed in the air. This requires a frame or base. The base is a wall; drywall is fixed to it using glue. But what to do if you need a distance between the wall and the drywall? That's right, you need to assemble the frame. To create a full-fledged frame, it is necessary to use various metal profiles, as well as suspension elements to connect them; no complex structure can do without them. In this article we will study all the frame elements used for drywall, as well as fastening joints and hangers, understand their purpose and find out their sizes and in what cases they are used.
Dowels
Dowel butterfly. Simple and convenient fasteners for small interior items hung on a plasterboard wall. It got its name because of its shape. Originally sold flat. During installation, the self-tapping screw is screwed in and folds the dowel, increasing the support area and forming a butterfly shape.
Drywall fasteners butterfly dowel
It is mounted in a sheet of plasterboard in a vertical position. To prevent turning, it has special ribs. Requires sufficient space inside the wall.
Dowel Molly. Structurally similar to the butterfly dowel, but made of metal. The dowel itself is always the same, but the pin can have different options - a ring, a hook, an angle and a screw.
Types of Molly dowels
When the threaded element is tightened, the body of the dowel turns into a kind of umbrella, resting against the sheet of drywall on the back side.
An example of fastening with a Molly dowel
This increases the support area of the fastener and its reliability. To prevent rotation, the dowel is equipped with spikes.
Dowel Driva. It has both an external conical thread and an internal self-tapping thread. It comes in both metal and plastic.
Types of Driva dowels
Using a sharp drill, it bites into a sheet of drywall and is fixed in it using an external thread. The dowel is screwed in using a screwdriver.
An example of fastening with a Driva dowel
After this, you can screw in the self-tapping screw and hang light objects.
Doubel Hartmut. Knauf fasteners. The threaded element is only a screw.
Doubel Hartmut
The metal support is folded along the plastic guides, inserted into the hole in the drywall, aligned parallel to the wall and secured with a plastic clamp. The extra mustache just breaks off.
Type and purpose of profiles for drywall
When installing all gypsum plasterboard structures, two main types are used:
- intended for covering a separate plane;
- septal
Materials for covering walls and ceilings made of plasterboard
In order to create a reliable wall and ceiling structure from plasterboard, two main types are used: UD, CD, and arched. Their sizes are standard, and you can distinguish them from each other by knowing the thickness of the metal and the length.
Let's look at the UD guide first. Creating a plane of the sheathed surface is its main purpose. If we are assembling a frame for covering walls or ceilings, then it is necessary to install a guide profile for drywall along the perimeter of the frame. Width 25 mm and length 3000 mm are their standard sizes. The thickness of the metal from which they are made is the most important criterion. It is necessary to understand that the thickness of steel is the key to reliability and opens up great opportunities. If you use a profile with thin steel, it is only suitable for wall cladding, but if you use it from thick sheet steel, you can also mount a ceiling structure.
It's time to look at the carrier (CD). This type will help us finally form the metal frame. It is responsible for the rigidity and reliability of the frame, since it is to it that the gypsum boards are attached. Just like the guides, the carrier varies in metal thickness. The number of elements for fastening is regulated by the thickness of the steel used. We can conclude that the smaller the thickness of the metal in the profile, the more elements for fastening will have to be used. The dimensions of the load-bearing element are standard: width - 60 mm and length 3000 mm, but also produces structures 4000 mm long.
Now it’s the turn of the arched profile. It is the same as the others: guiding and supporting, but differs only in that it is weakened and has all sorts of cuts and holes. This was done so that it could be bent in a smooth arc without resorting to special efforts. Its dimensions are absolutely the same as those of other species.
Drywall partition profiles
Comparing the profiles for cladding planes and for partitions, you can notice the difference in size. Septal ones are somewhat larger in size, this is not surprising, because they have a different purpose. Their sizes are different, for example, the width has a range of sizes 50, 75, 100, 125 and 150 mm. When choosing one option or another, you must be guided by certain technical parameters of the wall.
- For partitions, a guide profile (UW) is used. It is mounted on the floor, ceiling and walls and sets the plane and direction.
- It is also necessary to use a rack channel (CW) to strengthen the frame and give it strength. It must be installed in increments of 40 cm in order to attach the sheets on both sides.
Type of suspensions
When creating complex structures from plasterboard, not only profiles are used. It is also necessary to use various additional elements - hangers, which are designed to fasten the frame and reliably connect the entire structure to each other.
First, let's look at the U-shaped bracket - this is a metal plate that can be bent into the letter “P”. Using this element, the frame is connected to the ceiling or walls. When installing a U-shaped bracket, it is necessary to fix its ends to the profile using self-tapping screws, and secure the middle to the sheathed plane.
Instead of a U-shaped bracket, you can also use a quick hanger. Sometimes the length of the U-shaped bracket is not enough to fasten the metal frame and then it is necessary to use a quick hanger. In appearance, the quick-suspension consists of two parts: a spoke, at the end of which there is an “eye” and the suspension itself, which can be snapped onto the CD profile.
With the help of a special spring, the spoke and the suspension are connected to each other, which gives a lot of advantages during installation. By pressing your finger on the spring, you can adjust its position, but this type of fastening has disadvantages. During operation, the spring wears out, weakens and the ceiling may sag. When installing walls, this fastener is not used.
When installing lintels of inter-supporting structures, a crab hanger (CD) is used. Using it, structural elements can be connected crosswise. To install this connector, you need to snap it into the profile and then screw it to it using self-tapping screws and special antennae. The jumper is installed in a similar way - you need to snap two crab fasteners located next to each other and secure them with self-tapping screws. To make it more reliable, when installing this product, you need to tighten eight metal screws.
To extend the supporting profile, you need to use a CD mount. Working with this mount is very simple; one end of the structure needs to be installed at the end of the CD connection, and the other end must be put into the second part of the connection. And then secure the connection using metal screws.
Tile cutting device
It's been a while since I added anything here.
Preface: why exactly this way, and not using a machine.
Firstly, I’m not entirely sure that the so-called wet tile cutter will cope with this task, and I’m sure that a cheap one definitely won’t cope, and an expensive one, let’s say from 50 thousand rubles. Maybe he can handle it, maybe he won’t.
Therefore, with such a daisy, I refused to buy an expensive machine because the work will not pay for such costs, and cheap rubbish is not needed.
This means we work the old way, proven and cheap.
In general, I have a tile cutter, it’s not the worst, it successfully coped with various tasks, but there was a problem with this porcelain tile. It (porcelain stoneware) breaks off along the cut line completely uncontrollably, it can clearly break, or the arrow can go to the side. The second problem is that the surface is very fragile, just like a glass surface; even behind the roller, chips can occur. A diamond cup can also chip even with a light touch. There is no need to talk about a diamond disc at all, the surface after it is jagged and chipped, which means that not every water-powered tile cutter can cope with such a task.
How to extend drywall hangers
The easiest to use when attaching the frame to the main ceiling are direct hangers. Depending on what material the load-bearing surface is made of, direct hangers can be attached to it with anchor elements, dowel-nails or using self-tapping screws. Direct hangers, as a rule, are used in cases where it is necessary to ensure a minimum distance between the base and mounted surfaces - about 10 cm. Irregularities in the ceiling in this case should not exceed 3 cm.
Suspensions with clamps, the design of which allows you to quickly adjust the mounting height of the main profile, have proven themselves well and are in demand.
The main element of the metal frame structures for suspended ceilings made of plasterboard sheets are guides. Structurally, the guides are a U-shaped profile of various lengths and thicknesses made of galvanized steel.
How to attach profile hangers to the ceiling Direct hangers should be used only if there is a small height of the interfloor ceiling.
When attaching a metal profile using direct hangers, the maximum ceiling space will be about 6 cm.
Homemade options
If necessary, pendants can be made with your own hands from available materials. For large-scale work, this will take a lot of time, so self-production is more suitable if there is an acute shortage of conventional components.
Options:
- Using UD fragments. The distance to the wall is measured, an element equal to the thickness of the rack profile is cut off with a margin of 5–6 cm. At the level of 50–60 mm, the ribs are trimmed and the product is bent. Overlapping areas are screwed with self-tapping screws. The resulting corner is set and secured.
- Manufacturing of parts from steel sheets. From leftover material with a thickness of 0.5 mm, strips of the required length and width are cut out. The plank is drilled out and a U-shaped figure is formed. For rigidity, you can insert a fragment of a wooden board into the center.
- CD pendants. As in the first option, the required size is determined, but with a large margin. The edge facing the base is trimmed along the ribs. The sections are bent so that three support legs are obtained, in which holes are drilled for the dowel. The other edge is formed using the same algorithm, but only the back of the profile is bent. The two remaining ribs will extend onto the frame post.
Making homemade hangers is justified only for small volumes of work; they can also be used on large structures, but time losses can reach up to 30%.
Homemade parts will complicate the process a little, but will allow you to achieve the desired result.
How to lengthen hangers
Modern methods of finishing walls and ceilings require the creation of a frame from a metal profile. To make the structure rigid and securely fixed, it is necessary to use hangers. They connect the profile and the main ceiling or wall.
They determine the load-bearing capacity of the frame.
Dropped ceilings
Plasterboard ceilings, like any other suspended ceilings, are worth buying just because they are easy to maintain. It is enough to periodically wipe them with a dry, clean, lint-free cloth in order to preserve
Best pumps
Borehole pumps are used to lift clean water from the depths of the earth. The equipment is indispensable for uninterrupted water supply in the private residential sector or suburban areas.
Pumps of this type X-ray viewer
Devices of the first category vary in size; they can be designed to view one radiograph or simultaneously several images that are recorded on the screen by the system. Many argue that high-quality amateur photography from a phone is impossible, or at least it is difficult under non-ideal conditions. Probably many professional photographers would be okay with this
What is needed for fastening
If for guide profiles it is quite enough to select only the fastening material that matches the wall material, then with ceiling slats everything is more complicated. After all, it is necessary to connect the various parts of the frame to each other. So, what kind of fasteners will be required? This is what vibration suspensions for mounting a ceiling profile look like. An example of attaching a profile to simple suspensions
Self-tapping screws
Self-tapping screws for the profile connect most of the metal parts of the frame to each other. Moreover, such hardware requires a fairly large number and different names.
- press washers and bugs (fleas). These are two different types of metal screws. The first ones have a wide head and a larger size, the second ones have small hardware with parameters up to 10 mm. To connect the profiles to each other, you can use the appropriate option. However, on the planes where drywall will subsequently be installed, you should still give preference to fleas; their small caps do not interfere with the installation of the sheathing. Such fasteners are used for connecting ceiling and guide profiles to each other, as well as for fixing suspensions to base rails;
- dowel-nails. In appearance, it is an ordinary self-tapping screw with a plastic dowel, however, with its own installation technology. They are not screwed in, but driven in with a hammer or impact drill. For this purpose, the tip of the dowel-nails has a sharpening point, not a gimlet. Such hardware is necessary for attaching direct hangers to the floor surface of a building. Another alternative for fixing suspensions is to use a wedge anchor.
It is important to make sure that the dowels-nails will provide reliable fixation in the thickness of the ceiling; they are not suitable for ceilings that have a fragile structure, for example, in old houses with clay-wood ceilings!
Additional items
Suspensions. The type of fastening that will be required in assembling the suspended ceiling frame (U-shaped hangers). They ensure the connection of the entire structure with the load-bearing floor. Drawing with the dimensions of the suspension for profiles. Most often, in residential buildings, direct suspensions are used - metal plates with perforations. But, this part can only be used with a small distance from the ceiling to the ceiling (usually 125 mm).
An example of attaching a ceiling profile to suspensions. The process of attaching suspensions according to level A. Also, in some cases, it is quite possible to replace the suspensions with homemade ones from a guide profile for plasterboard, cut to size with bends for attaching slats. In the process of assembling the suspended ceiling frame, you may also need such elements as:
- Single-level connectors Crabs for fixing the ceiling profile and cross bars in one plane;
- Two-level connectors. In contrast to the first option, they provide fastening of intersecting frame slats superimposed on one another;
- Extension cords. They are necessary in the case of end connections of two ceiling profiles;
- T-connector. The part is necessary for joining profiles at right angles, as well as for fixing ceiling slats with guides.
Another element that will be necessary when creating soundproofing ceilings is a vibration suspension. This is practically the same U-shaped fastening option, but with an additional lining to dampen vibrations. An example of a vibration suspension design for mounting a frame on a ceiling. Most often, during the work process, many of these elements are replaced by craftsmen with homemade products made from sections of guides and ceiling profiles. Fastening diagram frame on the ceiling using vibration suspensions When you have all the necessary materials, you can begin assembling the suspended ceiling frame, during which you will install and secure the ceiling profiles to the ceiling. Watch the video on how to properly attach the profile to the ceiling.
https://youtube.com/watch?v=xfnCojacrk8
How to pin a profile
in such cases it is better to use a rack-mount (partition) profile. And without suspensions and any unnecessary nonsense! And to make the wall stand more rigid, install double partitions! it is beaten along the contour with 5*40 guides and the profiles are placed after 40 cm, but what this craftsman has come up with is nonsense! after 60 cm the cage is assembled only on the ceiling!)
Respect to you! Many people simply cannot understand that the material costs money and they still have to earn something themselves. There are many mounting options, you still need to take time into account. The wall itself is not going anywhere!
I forgot to add: If you already want to level the CD wall (60*27) with profiles, then they should also be attached at a distance of 40 cm from each other in height! A CD, when mounted to the wall as in the video, simply from the slightest blow, or when hanging furniture on the wall, will bend along with the drywall, sagging in the place where there is no suspension (from the bottom or from the top). Well, this is a controversial issue, 1. partition profiles are more expensive + double 2. the height is not always suitable, there are walls of 5-6 meters, and at such a length it will bend like paper 3. Personally, it is more convenient for me to cut not PN (like the author) and the same PP 27x60 with 2 ears at once. Such a suspension is much easier to install (1 hole, and drilling according to marks, every 60 or 40 cm) and less material is used; it’s faster and more reliable, I don’t agree =) 4 holes!! 4 screws. this is not faster, in terms of reliability, as I understand it, they are at an angle of 90 to each other to maintain vertical movement, but a self-tapping screw connecting the PP and PN drilled to the floor copes with this perfectly, the angle between the aligned PP and the suspension is not right, this is always worse than the suspension under right angle to the PP =) Yesterday I promised a photo, because I come across this very often. And don’t pay attention to the ragamuffin in the photo))
How to treat the surface → Room decoration → How to choose the right paint → Surface treatment technologies → Leveling and finishing the walls → Selecting and applying a primer → Removal from the surface → Stretch ceilings and technologies → Reviews and testimonials
Recommendations from experts
Despite the fact that installation is not considered an extremely difficult task, not every user can perform installation work efficiently. During the installation process, great attention must be paid to such criteria as the mass and thickness of the material. According to available information, make a choice of products for fastening. Experts strongly advise paying attention to the following points:
- Before installing the fasteners, it is necessary to mark the fastening points on the surface. At the same time, they should be as close as possible to the profile joints; ideally, the distance between wall hangers made of plasterboard sheets should be 0.7 meters. When fastening plasterboard sheets, it is required that there be small gaps between the plasterboard sheets of the building material.
To ensure maximum density of the leads and guides, a special spacer tape can be glued between them.
- The supporting profiles should not be too close to the surface, and the self-tapping caps should not be left lower than the level of the drywall.
- The simplest method of checking a structure for the strength of fasteners is to pull it with little force. If all the components remain in place, this will mean that the fixation is as strong as possible and the fastening is done correctly.
- To secure the structure, galvanized fasteners must be used. They help prevent the formation of corrosion, but also increase the fire resistance of the structure. Nylon-coated dowels are best used for attaching guides to wall surfaces.
It is also important to determine in advance the places where lamps, decorative elements and wall cabinets will be. This makes it possible to avoid further partial destruction of the plasterboard coating.
Types of frames
There are several criteria by which frames for suspended plasterboard ceilings are classified. The first and main one is based on the material used.
- Wooden frame. Made from timber, it is rarely used, as it is more expensive, but does not have high strength and durability, and is susceptible to moisture. In addition, wooden beams require mandatory treatment with antiseptics to protect against bacteria and rot and with a fire retardant - a composition that protects the frame from fire. The main advantage is environmental friendliness.
Wooden frame for mounting drywall
- Metal carcass. Created from various profiles. Relatively cheap, strong and durable. The installation technology has now been proven, the process is simple and not too tedious. If the plasterboard ceiling will be created in a room with high humidity, then use a galvanized metal profile.
Metal carcass
In turn, the metal profile frame is divided into two main subtypes.
- Cellular. It consists of linear elements and jumpers installed between them at equal intervals and perpendicularly. That’s why the frame is called cellular – the profile and lintels form identical square or rectangular cells.
Cellular frame for plasterboard on the ceiling
- Transverse. Here the frame consists of transverse metal profiles fixed in guides. Compared to a cellular system, less material is consumed, but the design requires a more careful approach to design and layout.
Transverse frame
Another criterion by which the frame is classified is the number of levels.
Drywall prices
drywall
- Single-level frame - the profile or beams are in the same horizontal plane, the result is a flat plasterboard ceiling that has the same height throughout its entire length.
- Multi-level frame - used for installing several tiers of ceiling decoration, creating complex patterns and smooth contours. Sometimes a multi-level frame is created, where drywall is attached only along the perimeter of the walls, and in the center there is a tension fabric made of PVC or fabric.
Frame for a multi-level plasterboard ceiling
Now let’s look at the components that, when combined in a specific system, result in a finished and durable frame.
