Curtains are increasingly being chosen to frame windows. Recently, blinds have been considered fashionable, but roller blinds look much more attractive. With their help you can adjust the lighting in the room. Windows are not only the eyes of apartments, but also a connection with the outside world. Stylish curtains are often called light filters.
Roller blinds protect the room from the sun and give an original and attractive look to any room
For the kitchen, housewives usually purchase things that are easy to clean. More dense ones are suitable for the bedroom, colorful and bright ones for the nursery, and transparent ones for the dressing room. So, a product made of non-toxic, natural material is selected for the bedroom. This should be noted. Today there are products with the following systems:
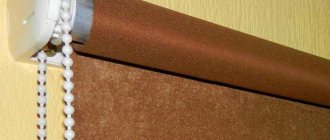
- Open type, when the curtain is wound directly onto an open roller.
Open type roller blinds are the most inexpensive - Closed sample, when the fabric is wound onto a roller. The directional line is located on both sides. The weighting makes the fabric fit very tightly.
In closed curtains, the shaft with the fabric is hidden inside the body
Components of roller blinds
In order to prepare the box, light wood species are used. The fabric must be environmentally friendly and non-toxic. The components of the cornice include:
- canvas;
- plugs on the sides;
- inside – control mechanism;
- on the side is the control chain.
Main parts of roller blinds
An example of an open type roller blind configuration
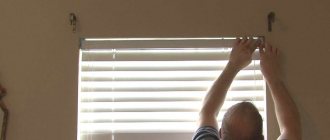
Thus, the package includes the required components, fasteners and instructions with pictures. Let us add that installation can be in the window opening, on the frame or simply on the sash. The last method is most often chosen. They can even be installed on a glass door. It's comfortable!
Installation with drilling.
2.1. Break off the upper part of the adjustable brackets. Drill two holes with a diameter of 3 mm on the protrusions of each bracket.
2.2. Insert the MINI brackets into the throw-on brackets. The holes must match.
2.3. Mark the proposed mounting locations for the brackets. The brackets must be installed horizontally. Screw the brackets with screws so that the protrusions of the throw-on brackets for attaching the additional profile are located at the bottom.
2.4. Install the inserts into the control mechanism and into the plug in the pipe. Insert the product into the brackets. The roll of fabric should be visible.
Multifunctionality
When assembled, the canvas is rolled into a roll. The material used ranges from completely transparent to dense. The basic one has dust-repellent and antistatic qualities.
In the open position, the curtain fabric is wound onto the shaft; when closed, the curtain falls down thanks to the weight strip
Important! Housewives purchase stain removers for cleaning based on the type of fabric.
The advantage of mini-roll is that the frame remains free. If you want the curtain to have a long service life, it must be dense and moisture resistant. When choosing, it is advised not to settle on the cheapest options. There are currently such types of roller blinds as:
- cassette;
- open;
- large rolls;
- mini.
Cassette roller blind with guides
Open roller blind in the window opening
Large roller blind on a panoramic window
Mini roller blinds on the window sash
Please note that assembly requires some skill and sleight of hand. Each method has its own advantages. The installation process may vary depending on the model. Experts call fixing with glue the fastest method of fastening. But this method is quite controversial.
Lightweight devices can also be attached with Velcro. The cheapest installation method is installation using liquid nails. So, self-tapping screws will hold a heavy structure perfectly. It's comfortable! Many models are designed so that installation is not too difficult.
Fixing directly on the window is widespread. Experts advise using removable latches. Devices that are installed without a drill look very neat. You can find out how to assemble a roller blind on a plastic profile here.
Mini-curtains are usually installed directly on the window sash using double-sided tape
Important! Before starting work, the surface must be degreased with alcohol. Also, before installation, you need to measure the width and height of the roller blinds.
If necessary, the curtain can be cut to the desired width
Installation features
Before installing day-night curtains with fishing line, it is important to choose the appropriate model and take all the necessary measurements. It is better to do installation with the help of specialists, rather than on your own.
Before installing day-night roller blinds with fishing line, you need to choose a method for this. Installation is possible using self-tapping screws, brackets and special tape. The choice depends on the type of window opening. The first two are suitable for inclined windows and openings in the ceiling, also for frames with sashes. Installation using adhesive tape is possible for ordinary vertical openings.
Detailed assembly sequence
- First, assemble the bracket and fix the parts until they click.
- Then double-sided tape is glued to the platform (if the installation takes place on it).
- The brackets are connected to the platform until there is a characteristic click.
- The structure is assembled on the windowsill first.
- Place it on the window sash and mark with a pencil the placement of the left and right landings. Then glue the pad into place under the markings.
- The right bracket is installed, and a shaft with fabric is put on it. Next, add the left one, make a note regarding the location of the left site. Then the left one is disconnected from the platform. The empty part must be glued to the marked place on the profile.
- You need to place the shaft in the right one and fix the left one.
- Then release the curtain and mark the position of the latch.
The process of assembling and installing curtains is quite simple, but requires precision and accuracy
Note! It is recommended to attach the curtain to the sash based on the width of the material. Double-sided tape can only be applied once. Although they are installed quickly in this way - in 10 minutes.
If you are not confident in your own abilities, it is advised to turn to specialists. It is recommended to call a surveyor by leaving a request on the appropriate website.
Another roller blind assembly is proposed, step by step instructions below. There are the following stages of installation on a “blind sash” using adhesive tape:
- Use fastenings without self-tapping screws. The window profile must be degreased in advance, markings must be made and the installation locations must be marked with a pencil.
- Then remove the protective layer of double-sided tape and attach the brackets. First, they are mounted where the manual or automatic control element will be placed.
Installation on hanging brackets is only possible on movable window sashes - Next, the shaft with the blade is placed in the cavity of the bracket. When clicked, the other side of the shaft is attached. Free movement of the part that rotates will help to do this without problems.
- It is believed that to secure curtains with a width of up to approximately 75 cm, tape fasteners are sufficient. But they recommend drilling holes in the profile and tightening the screws.
When installing curtains on glazing beads, the length of the screw should not exceed the depth of the glazing bead, otherwise the glass unit may be damaged - The final stage is the installation of device covers.
Where to begin
Installation work begins with checking the complete set and assembling the roller blinds in accordance with the manufacturer's instructions. The next step is marking for the brackets.
In order not to make a mistake with the choice of places for fasteners, the curtain fabric is unrolled and applied to the window so that the shaft is at the desired level.
The side part of the canvas will mark the vertical for the guides, and the bottom – for the fishing line clamps.
Aesthetic and practical
The use of plastic profiles has led to changes in the design of houses. Heavy curtains have been replaced by functional devices. They are easy to maintain. This should be taken into account.
Roller blinds, often used in modern interior design, are easy to care for and use.
The only disadvantages are that they cannot adjust the direction of light and look a little “laconic”. Although the entire space of the room is used as rationally as possible.
Let us add that plastic windows differ from their wooden counterparts. Ordinary curtains do not look very aesthetically pleasing with such glazing.
Installation of fishing line
5.1. Install guide lines into the 12 mm bottom tube plugs on both sides.
5.2. Install the bottom brackets onto the window frame. There are 2 installation options: a) the bracket is installed on opening sashes without drilling (similar to a drop-down bracket); b) when installed on a fixed window with drilling, the protrusion of the bracket breaks off, then the bracket is screwed to the frame with one screw.
5.3. Thread the line through the line guides on both sides.
5.4. Pass the fishing line through the hole in the bracket cover; the fishing line should extend at least 3 cm from the cover.
5.5. Insert the cover into the bracket, the fishing line should pass through 2 grooves in the bracket. Turn clockwise to tighten the line. Cut off the remaining fishing line.
How to take apart curtains
It will be easier to disassemble the curtain if you understand its structure. The diagram shows a typical open type roller blind design
- If the material is attached to adhesive tape, you will need to peel it off.
- If the product is attached to self-tapping screws, they should be unscrewed, then the base should be removed.
- If the curtains are mounted on a spring bracket, you need to pry up one of the fasteners and remove the roll.
Installation procedure
1.1. Unpack the blinds by carefully cutting the packaging sleeve. Be careful with cutting objects that may damage the product. Unwind the chain of command.
1.2. If the product has a side fixation, then before installation it is necessary to tie a knot at one end of the fishing line. Thread the end of the fishing line with the knot into the upper (or lower) rectangular hole of the bracket. After installation, the assembly should be clamped between the bracket plane and the frame (tape platform or throw-on bracket). Perform this operation with another fishing line. Note: To install the line in a fully closed state, a minimum of 2.5 cm of height must be provided under the bottom bar of the finished product to install the bottom bracket.
Additional Information
Such devices must be kept clean. The housewife's dust is removed with a vacuum cleaner at low power or with a steam generator. To wash, it is recommended to rinse in the shower, unfolding the fabric in a horizontal position, or clean with a natural-based stain remover. As a last resort, there is also dry cleaning.
When cleaning the fabric, try not to rub or press too hard on the fabric.
Operating rules
Raising and lowering the fabric web is carried out using a control chain. The lower tube is fixed at any level automatically.
The product is intended for indoor installation on window frames with a relative air humidity of no more than 70% and above-zero temperatures.
It is necessary to avoid any mechanical impact on the fabric and components, as well as getting dirt on the fabric.
Only dry cleaning of the fabric with a soft brush or vacuum cleaner is allowed.
Sudden rise and fall of the canvas is not allowed.
Self-repair of the product by the customer is not permitted.
It is not allowed to operate the product without circuit limiters.
Tips for use
If you need to wash them, you should:
- roll them up;
- disconnect the fishing line;
- unhook the weight plug;
- remove the protective capsule;
- remove the tube with tissue using a screwdriver.
To pull out a roll of fabric, you need to press on the latches located in the side brackets
Important! This item cannot be wrung out. You can iron the curtain with a slightly hot iron.
The advantages of such curtains include:
- variety of control systems;
- the ability to fix the material at almost any height;
- cleaning with a damp cloth;
- technology of impregnation of the product with a special composition;
- combination with traditional curtains;
- Possibility of placement in doorways;
- large selection of textures and shades.
The only disadvantage is that the working mechanism sometimes quickly fails.
Lubricating the rubbing parts of curtains increases the service life of plastic parts
Installation on tape
4.1. Place one piece of tape on both platforms.
4.2. Insert the MINI brackets into the adhesive tape platforms.
4.3. Mark the proposed attachment points, degrease them and glue the brackets with the platforms. The brackets must be installed horizontally. The protrusions on the platforms for attaching the additional profile should be located at the bottom.
4.4. Install the inserts into the control mechanism and into the plug in the pipe. Insert the product into the brackets until it clicks. The roll of fabric should be visible.
4.5. Insert plugs into the additional profile on both sides. Install an additional profile on the protrusions of the cap brackets.
4.6. Insert plugs into the lower tube on both sides.
4.7. Insert the bottom tube into the fabric.
4.8. Check the functionality of the product by lowering and raising the blade.
4.9. Set the chain stops to the upper and lower extreme positions.
User manual
- Movements are made without jerking, smoothly.
- Do not touch the fabric with wet hands.
- Do not hang products near radiators or stoves.
- If the mechanism jams, experts advise lubricating it thoroughly.
You need to use roller blinds carefully, as they have plastic fasteners
A variety of colors will help you choose a product for almost any room. The window will look unusual. It's economical and practical! With their help, it is quite possible to create a unique apartment design.
Which folding mechanism to choose
Manufacturers of window accessories typically offer standard systems that include manual chain mechanisms, or more innovative automated systems. The latter are somewhat burdensome for the pocket, so there is a “Solomon solution” - semi-automatic roller shutters.
Gradually, a spring mechanism is gaining more and more popularity, which allows you to adjust the level of installation of the canvas with one pull. This system is especially suitable for families with small children because it does not expose them to the risk of injury from the sudden lowering of the roller shutter or chain. The “smart” system is characterized by ease of installation in two stages. Installation of a self-folding mechanism allows you to quickly open the window towards the light without causing any noise.
Photo ideas for decorating windows with roller blinds
PreviousCurtainsDescription and types of lambrequins: what they are, what models there are
Next
CurtainsCurtains: what is it, what are they, what is it called differently
Operating principle
Roller blinds contain small features of classic curtains and standard blinds. In the situation of blinds, the principle of operation involves winding them onto a shaft, thereby covering the window opening. And in a roll system, day and night, the strips of fabric remain in the same plane.
The darkened part will block the sun, but, nevertheless, transmit sunlight through the light areas. If necessary, you can raise the product, and then sunlight will fill the room.
Description
Roller blind guides made of high-quality plastic are a necessary accessory for installing roller blinds. They are fixed along the edges of the window frame to ensure smooth movement of the canvas when lowering or lifting, preventing distortions. Includes 2 strips and double-sided tape for installation. Suitable for white and light-colored double-glazed window frames. The harmonious combination of reliability and durability with a low price makes this product a profitable purchase. Advantages: - aesthetic appearance; — ease of installation; — versatility; - practicality and durability.
