Hi all! When buying a kitchen set, we try to adapt it to the shape and area of the kitchen. At the same time, the main task is to make the room practical and comfortable. An impressive part of the space is occupied by countertops. And they don’t always go in one continuous pattern. This raises the question - how to connect the tabletop to each other.
The easiest headsets to install are straight ones, which are located along the wall. There is no need to connect anything here. But U-shaped and L-shaped structures are more difficult to install.
You can install the same cabinet or shelf without any problems. But the tabletop needs high-quality joining. It is necessary to ultimately obtain a solid canvas.
Corner joining of tabletops
The corner tabletop can be made in two different versions, which fundamentally affect the joining of the tabletops.
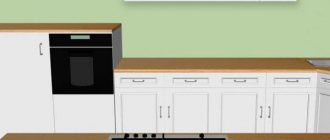
First option . This is a corner tabletop without a segment. That is, two sheets of countertops are taken and placed on the kitchen cabinets at right angles.
Easy docking
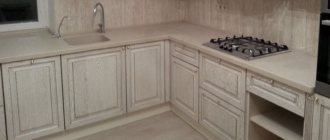
The second option for rotating the tabletop is rotating through a segment. It is more bulky and is done if the kitchen furniture includes a corner kitchen cabinet.
Tabletop segment
Kitchen. How to extend the countertop and fit a compact dishwasher.
When buying an apartment, I received a good kitchen set from the old owners.
The downside is that the kitchen is not large, I wanted to install a dishwasher, but there was no room for it in the unit. But everything turned out somehow on its own!
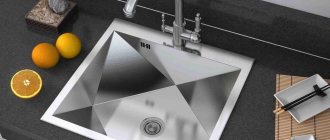
The old owners inherited a round sink, so a new large two-section sink was purchased from IKEA. It turned out that the new sink is wider than the old round one, but the length is the opposite. If I had taken this into account right away, there would have been no continuation of this story, but I had to think it out and finish it! I tried it on, cut out a new rectangular hole instead of the old round one, and after trying on the sink, a “bald spot” was visible.
After consulting, I decided to make a patch. I placed a sheet of paper to the edge and traced the outline of the opening. I applied my stencil to the scrap of the hole and cut out a “patch”. Afterwards I further refined it with sandpaper and a file so that the joint would be as tight as possible.
I glued transparent tape to the laminate of the tabletop (you could have used masking tape) and cut it along the edge of the cutout so that the glue would not stick to the laminate.
I marked and drilled holes for self-tapping screws to tighten the patch. I made sure that the tap would not come into contact with these screws during installation.
I mixed up household epoxy resin and liberally coated the patch and the cutout itself. I tightened the patch with screws, and tightened it with clamps from below and above through even pads. I also coated the entire perimeter of the cutout under the sink with epoxy to protect it from moisture penetration.
A day later I removed the fasteners
The epoxy resin soaked into the chipboard very well and we had to additionally add epoxy into the gap until it stopped being absorbed. I cut off the protruding remains with a knife.
Unfortunately, the pattern of the patch did not match the tabletop, but this is not very noticeable. The tabletop initially did not have a corner plinth. I also decided not to install it, because... it eats up 2 cm, and screwed aluminum strips to the ends at the back and right of the tabletop. I couldn’t coat them with varnish, no matter how much I degreased them, the varnish still flowed into drops in some areas. I wanted to coat it with a thin layer of epoxy diluted with a solvent, but I didn’t have time to wait 24 hours for curing.
After installing the flat siphon, it turned out that there was quite a lot of space under the sink! And after taking measurements, it turned out that a compact dishwasher fits there!
After acquiring it, two new obstacles arose. 1) The drain in all the drawings of the instructions is connected below the level of the dishwasher, but in mine the hole in the bellows is higher 2) The door hinges reduce the cabinet opening and the dishwasher does not fit
I began to solve these issues sequentially. Having surfed the Internet, I found several similar installations of dishwashers, there were no complaints about the work. I called the manufacturer’s hotline, where they didn’t tell me anything worthwhile, being puzzled by the pictures in the instructions. You cannot simply connect the hose to the sewer, because... Without a siphon (water seal), sewer gases will penetrate through the hose into the dishwasher, which is far from good. The dimensions did not allow installing an additional siphon from below, so I decided to connect it as is, cutting the drain hose to the minimum required length. I made the loop of the drain hose higher at the top so that when the wash siphon overflows, the water does not flow into the dishwasher.
Dishwasher on site
I solved the second problem by replacing and re-hanging the hinges from the door to the cabinet. The doors had hinges of the “overhead” type, which is when the door closes the cabinet opening. I drilled new holes in the cabinet and installed inset hinges. In my version of installing hinges, the front of the door still covers the cabinet opening, but the thickness and seating depth of the hinge is less than the previously installed “overlays”. One of the peculiarities is that now the cabinet door goes behind the cabinet wall, so I had to move the set a couple of centimeters to the left.
A filter for drinking water was installed, for which there was a place in the cabinet on the left. To install it, I cut a hole in the back wall of the cabinet with a grinder; there was a lot of smoke. The filter was attached to the wall. The cabinet drawers do not reach the filter by some 3 millimeters!
In the end, everything turned out functional and compact! I have used the dishwasher more than once since then. There are no leaks, problems in operation or maintenance.
Source
Joining countertops at an angle without a segment
The joint of the tabletops should be tight, with a minimum gap between the ends of the tabletops. This is difficult to achieve if the end of the tabletop has an oval and rounded front edge.
A simple option is to use a special corner connecting element. It costs about 170-190 rubles and quickly solves such a connection.
A more aesthetic option, with the claim to create a single surface of the tabletop, is an option called “euro saw”. It is suitable for chipboard countertops with any front edge.
Eurozapil
The next option is joining using a Euro saw. In general, Euro-cut tabletops have already been discussed in detail. But some points are worth repeating and also clarifying.
The joining is carried out after the end parts have been previously processed according to the patterns. This is the euro saw. To process elements, you need a high-precision milling machine. This creates a locking connection. And here the screed is actually no longer needed. During assembly, a minimal seam remains, the thickness of which does not exceed 1 mm.
This method has its advantages:
- low processing costs;
- no additional materials are needed;
- attractive appearance;
- on stone panels, as well as in motley and dark colors, the joint is invisible;
- The sealant additionally protects against moisture.
But the euro saw also has a downside.
The disadvantages include the following:
- It is not recommended to use a euro saw near the sink to prevent moisture from getting there;
- on light-colored countertops, the euro-cut will be visually noticeable;
- Euro-sawing can only be done in production conditions where there are patterns and machines;
- It is almost impossible to make a Euro saw at home.
Also keep in mind that the Euro-joint is suitable for furniture installed in rooms with smooth walls. If you deviate even slightly from 90 degrees, a gap will immediately appear. And this is considered unacceptable for a Euro saw.
Docking with a segment
A tabletop segment is essentially the top table for a segmented base cabinet. The standard dimensions of the segment are 900 by 900 mm, with a width of 600 m. Along the front, the edge of the segment can be straight or semicircular.
Related article: How to choose a chipboard countertop for the kitchen: types of chipboard countertops
Since the ends of the joining of the table tops are sawn off smoothly, wood glue is used for joining. If such fastening seems insufficient, use special metal connectors for countertops (see photo).
By the way, similar parts are used for household trimming of countertops.
Marking and milling of drywall
First, we measure the dimensions of the future countertop by laying out the tiles on some plane. Don't forget to take into account the seams between the tiles. We reconfigure the router to work with 15 mm thick drywall.
insulation of the external wall of a brick house
We make a test pass and, making sure that everything is in order, we begin making the tabletop.
We make three passes on each side in order to simulate the thickness of the countertop, and the thickness of this countertop will be a multiple of three small mosaic tiles.
Our vacuum cleaner does not cope well when milling such thick drywall, so we had to work in respirators. We remove the corner elements and cut out the embed so that later we have something to attach the legs to.
We make the embedment from 20 mm plywood, although 12 mm would be perfect, I just happened to have 20 mm on hand at that time. Next, we cut the corners at 45° with a hacksaw, bend them and get a rigid and perfectly even blank for our future tabletop:
Polyurethane foam is excellent for gluing such parts.
Joining tabletops through a connecting element
You can join chipboard countertops through a connecting element. To connect the tabletops through a special connecting element you need:
- Treat the open cut of the tabletop with acrylic sealant to prevent water penetration. The sealant is applied with a rubber spatula in one or two layers.
- The connecting element is attached to one of the ends of the tabletop. To protect against water ingress, sealant can be applied to the element shelf before fastening.
- The second tabletop can also be sealed (video 2).
- If necessary, the tabletops are pulled together (video 1).
Connection methods
There are several options for how to connect the tabletop to each other.
This need usually arises in a corner kitchen, in U-shaped sets, as well as in long surfaces where the length of one panel is not enough.
As a result, straight and angular connections, which can go at 90 or 45 degrees, have to be made from 2 or more elements. Depends on the specific situation.
Today I propose to find out how to connect the countertops together, and also take a look at the main pros and cons of the solutions.
The connection itself can be:
- straight;
- corner.
In both cases, the following methods can be used:
- without strap;
- with connecting strip;
- using a euro saw.
Now we will consider each method separately, after which we will draw the appropriate conclusions.
If you are interested in learning in detail how to make a connection without a strip or without a joint, at an angle and with direct contact, then I will compile separate detailed materials for you.
Now let's go through the methods in general terms.
Metallic profile
Also called tile nesting corner.
It closes the gap between the wall and the countertop without the use of sealant. Look great paired with a gray countertop, stainless steel sink or chrome faucet. To mount the profile, you must first install the kitchen, then secure the corner. Only after this should you begin tiling the apron with ceramic tiles.
In addition to metal profiles, corners are made from plastic: they are more flexible, making it possible to mask wall unevenness. But such products look cheap, so if you have ordered an expensive kitchen, we recommend not spoiling its appearance with a budget solution.
Natural migration
“We are already afraid to look at them, but soon we will bow to them and wash our feet.” Police Major General Vladimir Mikhalevich issued a prophecy about the future of Russia, which is already being divided with might and main by migrants.
After another mass fight between migrants in Moscow, society started talking about the need to urgently solve the problem with newcomers. A member of the presidium of the all-Russian organization “Officers of Russia,” Police Major General Vladimir Mikhalevich is sure: if we do not address this issue right now, we will lose the country.
They are dividing our country. We’re even nobody here anymore, and they’re sharing—not sharing with us anymore, but with each other. And they will not calm down,” the general expressed concern.
The critical mass has already been reached. And everyone understands this, it is impossible not to see it. At the same time, it seems that migrants no longer consider us to be people. They don’t even behave the same way at home as we do, allowing themselves to do whatever they want, but we can’t even give them a reprimand.
Look what's going on in the metro, especially in the evening. It feels like you are no longer in Moscow, not even in Russia. And look how defiantly they behave. Why is this so? Because we allowed them - both the authorities and society.
There is no good way here. You can’t use exhortations here,” Mikhalevich is trying to reach the authorities. He explained that the “guests” perceive each of our retreats as our weakness: “If we are weak, then they can continue to treat us like this.”
At the same time, a high-ranking police officer is confident that no new laws are needed - you just need to monitor the implementation of those that exist:
There is no need to invent anything new, we have everything. What are you doing here? Collected and checked. You had to work, are you labor migrants, do you have a work permit? Yes, I have. All work permits have been raised. They are at least 50 percent, I think even more, fictitious. We figured out who. Firstly, there is already criminal liability for these work permits; this is Article 327, a document granting the right. The right to work, but they don’t work. This is a fictitious document. We have everything in laws.
“If we start working, we will restore order,” Mikhalevich promised.
Experts say a goose flying upside down is just showing off
This photo was taken at the beginning of the year by a Dutch amateur photographer.
The trick is that the geese turn their body upside down and turn their neck and head 180 degrees to their normal position.
Why are they doing this? There has been a lot of debate on this topic. It was assumed that this is how they protect themselves from land-based predators that can grab them by the paws, or that it is easier to fly in a headwind.
But experts have studied and given the answer: Geese simply show off in front of their relatives in order to become respected in their flock.
I can just imagine this picture: “Guys, look what I can do. Hoba!
