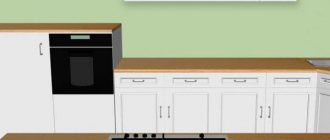
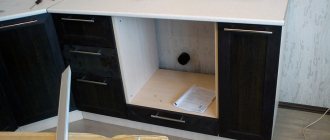
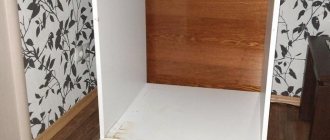
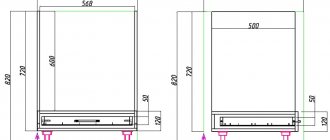
Installing a hob (gas or electric) into a kitchen countertop made of chipboard is a simple matter. Especially for a man whose hands grow from the right place.
However, if you are encountering this for the first time (that is, you have never installed a hob before), we recommend that you read the step-by-step instructions in this article.
The information will be useful to those who assemble a kitchen with their own hands, novice assemblers, as well as customers, so that they can personally monitor the progress of the work being performed.
We will consider in detail the entire process of installing a hob into a countertop with your own hands - from marking to connecting to a gas supply or electrical network in an apartment or private house.
In addition, we will tell you what to look for and share useful tips.
And we’ll give you the first advice right now. If you do not have experience in connecting household gas or electrical equipment, then entrust this work to specialists, because the cost of an error can be very high.
All other work on installing the hob into the countertop can be done independently. But again, it is advisable to have at least some experience with power tools.
In general, if you follow the step-by-step instructions, there is nothing complicated here. The main thing is to make the markings correctly. And here you need to adhere to a simple but important rule: measure seven times - cut once.
Installing the hob: instructions
Manufacturers produce panels powered by electric or gas energy. Installation features depend on the type of device. But there are also general requirements for the process:
- safe installation of a finished kitchen hob should only occur with ventilation or an exhaust hood;
- It is allowed to use cooking surfaces with a heat resistance of at least 100 degrees and a thickness of 25 mm;
- when installing between sections of the headset, it is necessary to maintain a distance from the walls to the slab of at least 1 cm;
- the hob should not be closer than 5 cm to the load-bearing wall of the room;
- thermal insulation is placed between the wall and the equipment;
- The stove is placed only on a thick tabletop - from 38 mm.
Advice! If exhaust hood is not possible, place a very powerful fan on the windowsill.
Necessary materials
To install the hob you will need the following tools:
- jigsaw or hand router;
- screws and clamps;
- silicone-based sealant or nitro varnish;
- roulette;
- self-adhesive seal or thin aluminum tape;
- pencils, ruler and meter board.
Important! In some cases, you will also need a drill.
Taking measurements
How to install a new hob correctly so as not to damage the set? Refer to its dimensions from the instructions. If the brochure is lost, use the following technique:
- Turn the product over onto the table;
- Measure the width and length along the inner edges;
- Measure the parameters of the protrusion for fixation and draw it with a pencil on the surface;
- Mark these parameters on the table with a pencil;
- Find the center of the segments and make markings;
- Check clearances carefully. For a protrusion with a length of 15 mm, a retreat of 10 mm is sufficient. To install the cooker itself, a 5 mm indentation is required.
Installation opening dimensions
Important!
You can simply trace the tabletop with a pencil, but there are risks of inaccurate dimensions and damage to the furniture. Experts recommend making calculations step by step and sequentially:
- Marking the cabinet based on the dimensions from the instructions by drawing a rectangle;
- Determining the center using a tape measure. You need to draw a cross on the table so that one line corresponds to the front edge of the tabletop, and the second is perpendicular to it;
- Painting tape is glued to dark table surfaces and markings are made on it;
- Taking measurements of the panel itself with a margin of 1-2 mm;
- Drawing lines - there should be 4 of them.
At the last stage of marking, the evenness of the figure is checked with a ruler or level.
Advice! If you doubt the measurements are correct, make a cardboard mockup and use it.
Cutting holes
For ease of work, you need to drill the central point with a drill with a drill diameter of 8-10 mm, which is held perpendicular to the surface. Through this hole, further insertion and installation of the kitchen hob into your countertop will take place. The optimal tool is an electric jigsaw or a saw with fine teeth. Elements must fit freely into the material.
Important! The sharper the saw teeth, the smoother the edges of the cuts will be.
Further work is carried out according to the following algorithm:
- Several holes are made with a screwdriver or drill in the corners of the figure;
- Painting tape is glued to the tabletop so that no traces of the jigsaw remain;
- A jigsaw or file is inserted into one of the holes on the blade;
- An incision is made according to preliminary markings with the tool pressed;
- When working, the bottom of the tabletop is supported or fixed with tape;
- Sawdust is removed and the quality of the cut is checked in accordance with the dimensions. The plate can slide in freely, so it needs to be moved a little.
Check the quality of the cut according to the dimensions
Advice! Place a stool under the bottom of the set - this way you will not damage the furniture and maintain the evenness of the edges.
Sealing and sealing
To prevent moisture from entering and deformation of the countertop material, the holes are treated with sealant and sealed. The use of silicone sealant has several nuances:
- The surface needs to be prepared - wiped off dirt, dust and treated with a degreaser;
- Place mounting tape on the sides of the seams with an indent equal to the line of the material;
- Cut off the spout from the tube and put a syringe attachment on it;
- Load the tube into the gun and press the lever to release the pressure;
- Gradually squeeze out the sealant, spraying the seam with a solution of soap and water;
- Smooth out the seams with a spatula and remove the tape.
The edges need to be sealed
Laying a seal along the seam will prevent moisture from reaching the countertop and temperature changes. Use a special aluminum tape, which is glued to a degreased and dried surface, pressing slightly.
Before applying the sticker, it is important to check the consistency of the thickness of the seal and the internal depth of the panel sides. If the tape is thin, a gap will form through which moisture will flow. A single strip is laid around the perimeter of the cutout from the front of the cabinet. Ideally, the seal should protrude 1 cm below the side.
Advice! For sealing, polyethylene tape for plasterboard with a width of 30 mm is suitable.
Installation and fastening of equipment
How to properly install a new hob into a prepared countertop? Experts recommend working in stages:
- Try on the product and see if it matches the cut niche;
- Special metal corners are screwed onto the panel until it stops;
- The plate with fasteners is lowered into the cut rectangle;
- The product should fit easily, without being pressed down. Glass ceramics that fit tightly into the niche may crack when heated;
- The fastenings at the top, bottom, left and right are tightened and trimmed;
- On the front part, the metal tab is recessed into the furniture so that the cabinet does not warp;
- The fastening screws are tightened;
- The cut line is once again sealed with a sealant or silicone agent;
- The protruding parts of the materials are cut off with a stationery knife;
- The quality of fasteners is checked.
Advice! If the joints were uneven, they can be trimmed or additionally treated with sealant.
Possible problems with fasteners
The dimensions of the slab are almost completely equal to the width of the set, so it is difficult to fix the side parts. Correct installation of a finished hob into a kitchen countertop made of chipboard, MDF and wood with your own hands should provide for reliable fastening. The surface must be fixed so that there is no shift even by 1 mm during use.
The surface must be fixed so that during use there is no shift even by 1 mm
The problem can be solved very simply:
- Complete spring strips are attached to 4 sides, clamping the slab on the sides;
- The back and front parts are connected to the bottom of the tabletop using a metal plate, which is mounted on a 5 mm screw;
- The self-tapping screw must be installed in the hole, and the resulting structure must be screwed to the bottom of the cooking pot;
- The screw will rest against the bottom of the table, and thus fix the product.
Important! It is better to use complete springs. Others may increase the distance between the cut and the panel.
Conclusion
Now you know how to make a cabinet for an oven and hob and you can assemble it yourself. The video will show the process clearly, and if you suddenly don’t understand something, write questions in the comments.
Did you like the article? Subscribe to our Yandex.Zen channel
March 27, 2022
Accessories,Kitchen design,Kitchen
If you want to express gratitude, add a clarification or objection, or ask the author something, add a comment or say thank you!
Connecting the hob to the mains
Experts note how to correctly and quickly install a new hob into a kitchen countertop and connect it to communications. The device can be connected to a separate power line if there are RCD circuit breakers for the stove on the panel. In houses with a power supply of 380 volts, you need to make a uniform load per phase.
The panel may require a separate outlet, so first you will have to dismantle the headset. The canal is prepared, strengthened, and covered with a layer of putty or cement. After this work, they move on to cutting holes and installing the slab.
The hob may require a separate outlet
Connection with sleeves
Now you need to connect the wiring in the socket box with the cable going to the panel. Select GML sleeves that correspond to the cross-section of the cores.
If the sections of the cores are different, for example, 6mm2 comes out of the wall, and 4mm2 goes to the panel, then on one side (smaller) the sleeve is sealed with an additional wire.
After which the ends are pressed in with press pliers and insulated with electrical tape or thermal tube.
Now all this can be neatly hidden in the socket box.
Connecting gas communications
The gas supply is completely shut off. To simplify the installation process, the gas hose is immediately connected to the panel. The paronite gasket is secured using a union nut. It is screwed tightly onto the pipe at the bottom of the panel. To ensure a reliable connection, the gasket is treated with grease. You can check for leaks by applying soap to them. If there are no leaks, foam does not appear.
On combined panels, a thermal shut-off valve is advisable, shutting off the gas supply when heated by more than 60 degrees. The supply valve must be located in a place convenient for control.
On gas hobs, the burners must be adjusted. The flame should burn without yellow reflections.
Measurements
Before purchasing a panel, you need to know the width of the tabletop. The dimensions of most panels are standard and do not go beyond 55-57 cm. The documentation for the panel must indicate not only the dimensions of the panel, but also the size of the hole in the countertop for installing the panel.
Panel installation diagram
Related article: What a good refrigerator should be
What do experts advise when connecting hobs?
- The film from the seal must be torn off gradually;
- The equipment is tried on in a niche until it lies flat and beautiful;
- The fewer gaps, the safer it is to use the panel;
- Before installation begins, the stove must be connected to the electrical network according to the complete circuit;
- Gaps on the front part can be masked with silicone;
- You can place drawers and metaboxes under the panel, so indentations should be made so that they do not touch the device;
- Two-burner models are installed along the countertop if they correspond to the dimensions of the box;
- The minimum installation depth is indicated in the equipment passport;
- The sole of the jigsaw should be placed at a right angle - this way the surface of the tabletop will not be scratched;
- The hob should be installed only after assembling the kitchen, so as not to deform the table;
- You need to apply sealant over absolutely all end cuts - this will save the material from delamination.
Watch the video about installing the hob
Connection via junction box
Sleeving is inconvenient because, firstly, the connection is not dismountable, and secondly, crimping requires a special tool. Not everyone has a press, and you cannot crimp such connections with pliers.
In this case, the KlK-5S mounting box will come to the rescue. Apart from a screwdriver, you don’t need anything here, and the outgoing cable can be disconnected at any time.
True, its contacts can be quite delicate, so do not overdo it with the tightening force.
In addition, its overall dimensions, unlike powerful sockets, are small and the whole thing can be conveniently mounted behind kitchen cabinets.
The connection is made traditionally:
- zero via screw terminal N (blue wires)
- the ground is indicated by the “grounding” icon - yellow-green conductor
- There are three phase connectors on top. If you have 220V, remove the extra phases and isolate them.
Number of phases
The installation of all new European-made models is designed to connect equipment to a network with a different number of phases. In our homes there are two standards: a three-phase network with 380 V and a single-phase network with 220 V. The choice of the necessary connection diagram depends on the electrical wiring in the house.
The standard hob circuit is represented by a terminal group consisting of five items, marked for convenience with numbers, and one grounding, which is indicated by the icon:
The following symbols are used in electrical engineering:
- phases are designated as L1, L2, L3;
- zeros – N1 and N2;
- grounding marked PE.
Having understood the connection diagrams and wires, you need to study the instructions. The manufacturer's recommendations list all connections and describe in detail the main installation steps. After the selected scheme, we move on to practice.
Tags
induction cooktop refers to cooktops.hob operationsinduction cooktopinduction cooktopinduction cooktop installationspopularity of induction surfaces.induction cooktop installationsinstall an induction cooktopInduction cooktop installationinduction cooktop installationsInduction hobs and induction coils.install an induction cooktopInduction cooker installation full external cable external cable grounding power cable single power cable cable which cable to choose wires power cable, cable cores on Electrical wiring cable The cable must be carried out independently. The intersection is carried out parallel to the marks, straight lines are carried out. Then sealing is carried out. Sealing is carried out. Three wires are checked. old wiring old wiring is made of aluminum wiring cross-section.
Installing the surface into the countertop, securing it and sealing it
- Inside the box into which the panel will be inserted, markings should be made with a pencil, tracing the inner edges of the device on the back of the tabletop.
- Afterwards, the workpiece is placed face down on the floor and the middle is carefully cut out.
- The edges of the hole are covered with silicone varnish or foil - materials that reduce the possibility of water penetrating under the panel.
- Next, the tabletop is installed in its usual place.
- Adhesive tape is glued to the inside of the induction panel - this is another barrier to moisture. In some cases, plasticine is included instead. It needs to be glued to the tabletop along the cutout and the device installed on top.
Planning the space
1. First the kitchen, then the appliances!
One of the biggest mistakes buyers make is to take all the appliances first and only then order a kitchen plan. Thus, you become dependent on the dimensions of the purchased devices and can no longer experiment with the layout of the headset.
If you have never encountered built-in appliances before, preliminary consultation with furniture makers or appliance sellers is required! The fact is that different sizes of cabinets and pencil cases require different equipment. And if you take a 60-centimeter oven under a 60-centimeter cabinet, it simply will not fit there.
This is especially true for such specialized appliances with floating sizes, such as a washing machine, coffee makers, microwave ovens, and so on. You can choose appliances, but it’s better to buy them after creating the kitchen design.
2. You shouldn’t buy appliances from a kitchen showroom.
In many furniture stores, customers are offered to immediately select appliances when ordering a kitchen set. But it often turns out to be much more expensive than if you go to a specialized hardware store. In addition, there is a chance that they will sell you what is profitable for the sellers, or only those brands that they have and which they understand. In hardware stores, there is usually more choice, and the consultants themselves are more qualified, since they specialize only in technology.
Among other things, it is not always clear how a furniture showroom will provide warranty service if necessary. Do they have established partnerships with suppliers, connections with service centers and the ability to provide you with timely and quality assistance?
3. We move the sockets to the side
In general, it is best to have a kitchen showroom help you with the electrical layout before it is carried out. But if this is impossible for one reason or another, remember the basic rule: sockets cannot be located immediately behind the technical device. Otherwise, you will have to move the entire kitchen unit forward. Neither ovens, nor refrigerators or other appliances have enough space to accommodate a socket and ensure the correct and safe position of the plug.
Ideally, sockets are placed under cabinets at a distance of about 10 centimeters from the floor (under the kitchen plinth) or away from the appliance.
4. Built-in appliances are easier to update
Firstly, you do not depend on the manufacturer when choosing. No one will forbid you to take an oven from one brand and a hob from another. In addition, you don’t have to make compromises when, for example, you are completely satisfied with some parameters in a solid stove, but would like a larger oven. It is easier to change and repair built-in equipment, because everything goes separately.
Types of burners for glass-ceramic electric stoves
I will list the known heating methods that glass ceramics can hide underneath in order of increasing energy efficiency, but this does not mean at all that the latter will be the best. Let's not forget the fundamental purpose of any fireplace, cooking delicious food, and speed in this process is not always needed.
Rapid burners
Now this is the most common type of heating element for glass-ceramic stoves. Heats up in 10-12 seconds. Of course, due to low efficiency and high thermal inertia, these heating elements are far from perfect, but the ability to maintain temperature within the widest range and good maintainability to some extent compensate for the shortcomings.
Tape heating element
High Light Technology. Advantages:
Operating principle of an induction cooker
A new generation device - an invention that combines the action of magnetic and electric current - makes the cooking process fast and safe. During operation, the cooker generates a high-frequency magnetic field, heating the cookware by induced eddy currents. The glass-ceramic coating of the oven heats up only from hot dishes at the point of contact. Therefore, for the housewife, the risk of food residues burning on the stove is reduced to “0”.
By following all operating rules, new generation equipment will allow you to experience all the comfort and ease of the cooking process. This device provides maximum output of thermal energy - efficiency is up to 90%. The technology allows you to speed up the heating time of a certain oven element with which the dishes come into contact. There are also significant energy savings.
Locking and Unlocking
@tehnika.expert For the safety of small children or animals that like to roam around furniture, there is a locking mode. As a rule, there is a button on the panel with a lock depicted on it. Pressing it completely blocks the control. If you need to cancel an action, you need to press the “+” and “-” buttons simultaneously.
Marking
Inserting a hob begins with finding out the dimensions and applying them to the countertop. As a rule, the parameters are indicated in the instructions supplied with the equipment. If the manufacturer did not take care of this, then it is possible to calculate everything independently. In the first option, the panel is turned over, after which it is traced on thick cardboard or even directly on the tabletop. For this you will need a ruler of sufficient length, a pencil and a marker.
You can try to determine the mounting location yourself. First, the boundaries of the interior space of the cabinet, on which the panel itself will be placed, are transferred to the surface with a pencil. By the way, when a pencil does not allow you to apply bright markings, then it is wise to first glue masking tape and then draw. Next, the center of the hole for the housing is determined. To do this, it will be enough to draw the diagonals of the rectangle, which are created by the front and back parts of the tabletop, and the drawn boundaries of the cabinet.
At the point where the diagonals intersect, two lines are drawn to form a cross. This means that one should run parallel to the edge of the tabletop, and the second should be perpendicular to it. The dimensions of the part of the body that should be built-in are marked on the lines that appear. The exact numbers are either determined independently or extracted from the instructions. It is better, by the way, to increase them by a centimeter or two for greater convenience.
If parallel and perpendicular lines are drawn through the resulting marks, a rectangle is formed. Not only will it be exactly in the center, but it will also coincide with the part of the hob that needs to go deeper. If the gap prescribed by the manufacturer remains between the formed lines and other objects, then you can outline the figure with a marker and move on to the next stage.
