Home / Components and accessories / Installing a plastic cornice - how to cut corners correctly?
The concept of “plastic cornice” is perceived differently by many. It can be a hanger for curtains, or it can be perceived as a decorative overlay that hides the junction of the ceiling and the wall. In any case, it may be necessary to join two planks together or create a corner connection. Therefore, below we will talk about how to correctly cut the corners of such a plastic part as a cornice.
I cut down the cornice on the corner cabinet
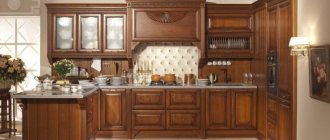
Once the kitchen assembly is complete, we understand that there are no limits to perfection. A kitchen set without a cornice often looks somewhat empty. For those who have decided to correct the situation, it will be useful to know where to start and in what sequence to act.
What is cornice?
The cornice is a decorative element. Serves exclusively for beauty. It does not provide any functionality. It is made of MDF coated with PVC film. In more expensive and classic kitchens it is made of solid wood. The height of the cornice is from 50 mm to 150 mm. So when ordering a kitchen, you should take into account the height of the ceilings of the room. Because it will simply be impossible to install it.
What to have on hand
First of all, you will need the cornice itself, in sufficient quantity, taking into account the trim. The kitchen set must be fully assembled so that the necessary manipulations can be made with it. Ideally, work should be done after assembling the kitchen furniture. In this case, access to the installation site should be provided in advance. Most likely, you will need a stepladder, a drill, a screwdriver, a special saw, and a vacuum cleaner - so as not to stir up excess dust.
Choosing a form
Before you start cutting down the cornice in the kitchen, you need to decide what we want to get in the end:
- You may prefer a small canopy placed on top of the cabinets and protruding from the body by about 3 cm. This way it will slightly overlap the fronts. In this case, the thickness of the visor will be 1.5 to 3 cm.
- Another type is the cornice, which protrudes more, leaving room for inserting lamps. The thickness of such a visor varies depending on the situation.
- The third type of cornice repeats the configuration of any of the two above, but is equipped with a “crown”.
- The “crown” can stand on its own, but securing it on top of cabinets can be difficult.
The language of numbers
First, about this nuance - upper cabinets can be of different heights. To prevent niches from appearing when installing the cornice, the roof should be made to the depth of the cabinet, taking into account the overhang. The ends of each roof part should be covered with an edge on all sides. On the front side of the cabinets, the end can be closed with a 2 mm edge. The roof parts are connected by metal plates. When installing the “crown”, the following should be taken into account: the joining angle of the profiles must be divided in half. To attach profiles at an angle of 90 degrees, the cutting angle must be 45 degrees. When calculating the length of the profile, you should take the perimeter of the roof, add two profile widths at each corner, and make a reserve for cutting.
The main thing is accuracy
You can cut the profile using a miter box. The process is delicate and requires patience and
accuracy.
If you are not confident in your abilities, order a cut with roof parts. You should also be extremely careful when calculating the space for lamps. The overhang should be 15 cm, of which 2 cm goes to the facades and 13 cm directly under the lamp. Most often, its diameter is 6.5 cm, this is how much you need to take into account when making an indentation from the edge in order to determine the center of the hole. And one more important point. Often, upper cabinets are suspended almost from the ceiling. In this case, it is advisable to tighten the roof on the floor and only then lift it onto the cabinets in its entirety, where it is tightened from below with self-tapping screws. For a more aesthetic appearance, the screws are closed with plugs matched to the color of the case. By strictly following all the recommendations listed, you can cut down the cornice in the kitchen yourself . In case of difficulties, we strongly recommend that you contact specialists.
We cut down the cornice in the kitchen ourselves
First, you need to understand that sawing down a cornice is not so easy and quick. And without the appropriate tool, you are unlikely to succeed. Many kitchen furniture assemblers refuse this service and offer customers to do everything themselves. And not because they are just lazy or don’t want to waste their time. In some cases, it is simply not possible to cut down a cornice at home.
For example, a miter saw takes a cut of 50-70 mm. And the cornice itself is 80-90 mm. Logically, the blade from the miter saw simply won’t cut through it. But there is, of course, the option of a miter saw with a moving carriage. But then the cornice will be cut in a lying position. That is, the cornice is placed on the bed of the circular saw, but not placed. And the angle of the cut is no longer set on the bed, but on the head of the saw itself.
To begin installing the cornice, measure the width of the corner element of the kitchen cabinet. (You must start cutting from the corner in different directions). Usually this size is 400 mm. But in Leroy Merlin kitchens this size is 330 mm. We will give an example with Leroy kitchens.
MDF cornice for the corresponding kitchen is an excellent solution
Hello, friends!
Today we will talk about very beautiful decorative elements that are installed, as a rule, on sets whose facades are made of a frame profile.
The profile from which such decorative elements (cornices) are made can come in different decors and configurations (there is a large choice, so choosing suitable elements to match the color of the kitchen is never difficult).
They are attached to the box using 4x30 (mm) self-tapping screws.
To make such a cornice for a kitchen set, you need to have the dimensions of the top of the kitchen along the perimeter with designated corners.
History in detail: a laconic corner kitchen with mezzanines
A kitchen-dining room in which only a small corner space can be allocated for furniture is a reality for most Russian apartments. In order to comfortably accommodate all functional areas, it is important to plan the kitchen down to the centimeter, and sometimes even resort to tricks so that the storage systems “work” at their best.
See how we overcame these challenges using the example of the Ariano kitchen - a corner set in a modern style, the design of which has no random details.
Task 1: convenient layout
We created a classic corner kitchen, since this configuration is ideal for small spaces: it allows, firstly, to organize two lines of the countertop and increase the working surface, and secondly, to design a convenient working triangle so that all functional areas are located in the correct order. Pay attention to the order in which we placed the refrigerator, sink and stove: in this way, the products go through all stages - storage, cleaning, heat treatment. At the same time, the owners do not have to “wrap kilometers” around the kitchen, because everything is at hand.
Task 2: facade design
The owners planned a monochrome interior in light colors, and the kitchen should not become an accent on a neutral background. But so that the set does not get “lost” against the background of white walls, we supplemented it with a line of suspended facades of contrasting design. The surface imitates light stone and harmonizes with both the countertop and the shade of the flooring.
Challenge 3: Organized Systems
To increase the storage area, we added a third level to the kitchen: hanging mezzanine drawers are located near the ceiling and are used for dishes and accessories that the owners do not need on a daily basis.
Other questions on this topic
There is a living room combined with a kitchen. Exits to the loggia are French windows. The expected style is minimalism, high-tech. Given: a black sofa and an armchair, strict shapes, fabric upholstery, there is a kitchen with white glossy facades and black countertops made of artificial stone.
Help with advice! For their long-awaited 3, the Czechs chose a minimalist style. But at the stage of rough work they discovered with HORROR how much the real costs exceeded the original estimate. It’s clear that you can’t save money on basic work, that’s why we.
I'm looking for a program to design my apartment in 3D. whatever I used, wallpaper, floors - everything doesn’t look like it was “in real life”. but I would like it like in the photo:
I'm looking for a program to design my apartment in 3D. whatever I used, wallpaper, floors - everything doesn’t look like it was “in real life”. but I would like it like in the photo:
Help me choose the color of the facades and countertops for the walls in the living room. The walls are milky, white oak laminate, wenge baseboard and dark brown sofa. I absolutely don’t want to combine wenge with bleached oak. Help me, what combinations might suit me? I was thinking about doing it.
It is necessary to saw down the cornice for corner kitchen furniture at an angle of 22.5*
On the site, more than 1060 furniture manufacturing professionals are registered in Moscow. Add an order - find out the prices for your work.
Masters online: 254 Average waiting time for first response: 9 minutes Last order added: 24 minutes ago
How to cut a countertop in a corner kitchen
Installing the countertop is the final step in assembling the “bottom” portion of the kitchen. Before installing the tabletop, all lower drawers must be in place, connected to each other with ties or self-tapping screws. Approximately level. The final leveling is done with the tabletop secured.
Sometimes it is convenient to make cuts for the sink in a loose countertop. Hidden cuts must be coated with silicone sealant, otherwise it will swell. The corner connection of the table tops is made using a special corner connecting strip (its profile must be matched to the front end of the table top) or a Euro saw. In both cases, the connection should be carefully treated with sealant. As a rule, there is usually a sink in the corner, and the result is increased humidity, which leads to damage to the countertop.
Before placing the tabletop on the drawers, holes should be drilled in them to secure the tabletop. Through these holes, the tabletop is attached to the drawers with self-tapping screws. After which, by twisting and unscrewing the legs on the drawers, the tabletop along with the drawers is leveled. When attaching the tabletop, you should pay attention to the distance by which the tabletop protrudes above the drawers - it should be the same above all cabinets. Otherwise, then the facades will protrude or be very deep under the countertop.
If the ends of the tabletop are adjacent to the stove, it is necessary to cover them with special end strips, having previously treated them with sealant. You should not glue the edge to this joint - it may still come off.
Before treating with sealant, the surface to be treated must be cleaned - blow off dust and sawdust; do not wipe with damp cloths, as the sealant may not adhere.
First meeting
First, let's talk about the furniture cornice, and I will also reveal its essence.
This is a decorative element. Usually wooden or made of MDF.
Unlike the same plinth for the kitchen, the furniture cornice does not provide any practical benefit. This is a purely decorative element. Serves for decoration. Gives the room, as well as furniture, a more sophisticated appearance. Moreover, most of the products are made to resemble classics. Therefore, they will go well with stained glass windows in the kitchen and with a classic-style interior.
The decor complements the set. It differs in its shape, size, configuration and other parameters.
In my practice, I encountered the following options:
- radius;
- straight;
- smooth;
- threaded.
Also, furniture cornice is divided into upper and lower. Everything is clear here. It depends on where the element is installed.
Mainly MDF and natural wood are used in production. Now you can buy cornices that have different sizes, colors, dimensions, etc. MDF-based structures are often layered. To do this, 2 blanks are connected to each other using glue.
Wooden decors are painted, treated with moisture-proof varnish, and also patinated, which also gives a sophisticated appearance.
With the help of a decorative ledge, you can give the kitchen a complete look, as well as emphasize the interior design. This is an accessory that frames the set along its upper or lower part.
Do-it-yourself corner kitchen, drawings and diagrams for calculations
The corner composition of the kitchen set is rightfully considered the most ergonomic and functional. Even in a small space, with the right approach, you can use every free corner to your advantage. A do-it-yourself corner kitchen can be made quite easily. We suggest starting with the design and calculation of modules according to the standard drawings and diagrams provided.
How to make a corner kitchen with your own hands, where to start?
In fact, a corner kitchen differs from a straight kitchen by the presence of a “wing” docked at a right angle. Therefore, we recommend that you read the article about the direct kitchen, with all the diagrams, drawings and calculations provided.
Any DIY furniture production begins with measurements, a sketch and a design project. There are a lot of nuances in designing a corner kitchen. Most of which are based on the design features of corner modules. It is not always possible to make them smaller or larger, or to change the standard design.
Let's consider the process of designing and calculating a corner kitchen using a specific example, with drawings and diagrams.
Let us be given a standard Khrushchev kitchen, with dimensions of 1600 mm along one wall and 2290 mm along the other wall. We will not place a refrigerator in a common row, only a 500mm wide gas stove.
- Let’s slightly reduce the short “wing” of the set to 1460mm, and also narrow the tabletop to 420mm in order to preserve free space for the comfort of the hostess and install a full-fledged dining table.
- Note that the length of the kitchen is 2290 along the wall. But there is a protruding window sill with a heating radiator that will not allow the lower cabinet to open. Therefore, the tabletop can be extended to 2290, but the row of lower kitchen tables will be 70mm smaller (2220mm from the corner).
A do-it-yourself corner kitchen with dimensions 1600x2290 in the drawing will look like this.
In fact, all the differences between designing and calculating a corner kitchen with your own hands from a direct set are the presence of end and corner modules. Let's look at them in more detail.
How best to make a kitchen table-cabinet under the windowsill
As a rule, in typical apartment layouts, the level of the window sill is lower than the level of the working surface of the kitchen unit. The “difference” is about 100mm, that is, 850mm versus 730-750mm. Take this nuance into account if you were planning to make a kitchen set with a transition to a window sill with a solid countertop. To implement this idea, you will have to change the window at the renovation stage - install it higher and raise the level of the window sill.
Pros and cons of wall and ceiling cornices
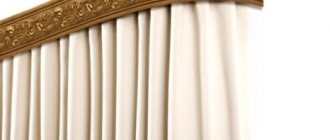
A metal wall cornice looks great if you need to emphasize, for example, the Art Nouveau style in a room.
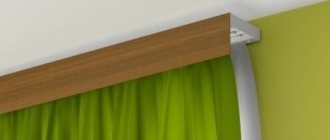
Ceiling cornices, of course, have their positive sides. For example, with the help of them you can hide defects in ceilings, visually increase the space, and their low price and the variety of colors of plastic options can attract the homeowner.
However, there are such disadvantages as:
- impossibility of installation on a suspended ceiling (without a specially equipped place);
- impracticability of use near ceiling lighting fixtures;
- Difficulties in installation sometimes make this type of curtain rods completely unattractive.
Also, such devices may not be liked due to their uniformity, which cannot be said about wall cornices, produced in quite extensive design solutions.
Ceiling cornice made of plastic, which, as a rule, always has the same design.
They come not only from plastic, but also from expensive wood, which is very convenient when the design needs to be matched, for example, to furniture.
In addition, they have the following advantages:
- relative ease of installation (if you know all the nuances, you can do it yourself);
- variety of shapes (rounded, rectangular, etc.);
- Possibility of wall mounting in niches;
- saving fabric for curtains and drapes;
- more respectable appearance.
A wall cornice made of wood will perfectly highlight exquisite furniture made of the same material.
In other words, wall cornices can be installed in any situation and, probably, that’s why they are still classics of the genre when creating a particular room design. Well, now, those who agree with this can further understand how to attach curtain rods to the wall, and also learn about the small but useful secrets of this process.
Note! Just like ceiling cornices, wall analogues can also have several rows, so if you need to hang curtains, drapes, and lambrequins, then there should be no problems with this when choosing the second option.
Let's sum it up
See also
Furniture cornice is a decorative element. Mainly used in the kitchen. But it can also be installed on cabinets and other furniture in rooms.
It can be white, black, gray, as well as for every taste. This is a matter of personal choice and individual preference.
It is impossible to say that this is a mandatory component. It has no practical benefit. The maximum can cover some defects at the top or bottom of the kitchen set.
Therefore, think for yourself, decide for yourself whether to buy or not to buy.
By the way, in this article you can get acquainted with all types of wood cutters. The material is useful, visual, and also interesting.
What do you think about furniture cornices? Is it worth installing them? When will they be appropriate? Do you have something similar in your kitchen?
Share your opinion and answer questions.
That's all I have, so it's time to say goodbye. Thank you for your attention!
Subscribe, leave a comment, and tell your friends about us!
Installation
It is very convenient when the kitchen is straight and the upper cabinets are located on the same level, without protrusions. Then all that remains is to attach the decorative blank, apply the markings, and then secure it.
It is more difficult if the furniture has a more complex configuration. It has internal and external corners when transitioning from facade to facade. Then you will need to make a cut at the right angle and connect the elements, perfectly joining each other.
It's like installing a ceiling plinth. You can't do without a miter box. The task is not easy. You need to take accurate measurements and then cut. If in doubt, you can contact specialists.
As for installation, there are 3 options:
- On the outside with self-tapping screws. To do this, a hole is made in the workpiece using a drill, and part of the facade is also drilled. Only the drill should be smaller in diameter than the self-tapping screw. Then the fastener is screwed in;
- From the inside with self-tapping screws. This way the screw heads will not be visible on the cornice. A hole is drilled from inside the furniture body, but not through the decorative element. And it is screwed with a self-tapping screw;
- On glue. Simple option. But it is impossible to guarantee that the decorative overlay will adhere well. That’s why they are mostly fixed with self-tapping screws.
Don't worry about the fastener there. It can be painted over if the cornice itself can be painted. Or cover with decorative plugs. Finding the right color is not a problem.
