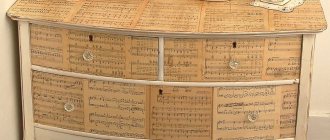
It is not always possible to purchase new furniture. But if you have an old wardrobe left as an inheritance, or a recently purchased shelving unit that is already tired of its boring and faceless appearance, we offer an interesting, and most importantly, simple idea on how to update furniture using leftover wallpaper. Decorating furniture with wallpaper is not a new thing; a similar technique was used by ancient cabinetmakers, decorating the back wall of cabinets and sideboards with colored fabric or paper.
Updating your furniture with wallpaper has a number of benefits. Firstly, almost always after renovation there are remnants of wallpaper. Even if they are not there, you will need one roll for decoration, which will not be a huge burden on your family budget. Secondly, the work process itself is very simple and does not take much time. Thirdly, such a simple and inexpensive renovation of old furniture amazingly transforms it, changing the style and mood according to your desire.
Photo printing and photo wallpaper
The equipment is suitable for restoring a kitchen cabinet or buffet. Photo wallpaper can be purchased at the construction department or contact a printing house.
Printing centers will help:
- enlarge the image without losing the quality of the picture;
- make a collage of several photos or pictures;
- apply an image to a film for gluing to a specific type of surface.
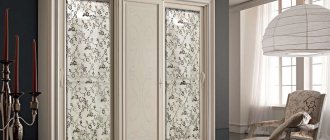
A boring three-leaf wardrobe has turned into a stylish and light wardrobe for the bedroom
Before applying photo wallpaper:
- Clean the doors (walls) from the old coating.
- Level the surface using sanding and priming.
- Paste the wallpaper. To secure the result, coat with clear or tinted varnish.
Expert opinion
Anastasia Mikhaleva
Furniture designer.
Note. The appearance of the photograph depends on the type of surface. The image applied to the glass will become glossy. When mounted on a chipboard facade, the image will become three-dimensional, as if printed on matte paper.
Possible problems when gluing the cabinet
Every job can cause problems. When pasting a cabinet, a person may encounter some difficulties:
- Taping corners can cause the problem of poor bending. To solve this you will need a hairdryer. It warms up the film and it becomes more elastic.
- An even joint cannot be obtained; the material diverges, forming a gap. To solve this problem, each subsequent canvas is superimposed on the previous one with an overlap of 1 cm, then a metal ruler is applied along the center and a cut is made with a stationery knife.
- Using the dry method, problems may arise with the rapid gluing of surfaces. This can be avoided by using talc or powder sprinkled onto the surface.
- If, after gluing, large inaccuracies are noticed, it is better to remove the film. To do this, use a hairdryer, it will heat the surface and the adhesive base can be removed without difficulty. Remove the remaining adhesive base with solvent.
- When bubbles form, take a regular needle and pierce the place where the air accumulates. Then, by lightly pressing, the air is expelled, the film in this place is smoothed out.
Cover with fabric
This method gives a smoother, more textured look than wallpaper. It is better to cover large elements such as wardrobe doors with fabric, fasten them with a furniture stapler or with glue. It is interesting to choose leatherette as a fabric for a luxurious look.
This is interesting: A small kitchen is not a problem! Expanding the boundaries
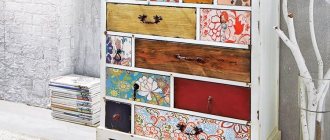
Fabrics made from pieces using the patchwork technique will make your closet more comfortable and will help you fit it into a child’s room or into styles such as Provence and country. The style can be embodied with wallpaper or film if you cover the panels of the drawers with materials with different patterns.
Decor of the facade, side walls and doors
You can wallpaper almost any surface of a closet, cabinet or chest of drawers. Most often, cabinet doors and drawer fronts are covered as the most important element of furniture, which is the center of attention. But you can do the opposite - wallpaper everything except drawers and doors.
Color and stylistic solutions may also vary. You can use the same wallpaper on all surfaces to be pasted, you can alternate different ones, or decorate using the patchwork technique, that is, paste them over with multi-colored squares. It is absolutely not necessary that the wallpaper on the furniture matches the wallpaper on the wall. Feel free to experiment with contrast, for example, for a room with pastel wallpaper, make a closet with bright colorful doors.
Paint
Paint will be a real savior in furniture restoration. Before applying paint, sand the surface and coat with primer.
You can simply paint the cabinet in 1-2 colors, or you can paint a real picture on it. If you don’t have enough artistic skills for painting, you can make a drawing using a stencil. Geometric lines and shapes can be easily created using masking tape - it will serve as a smooth border for the paint. And for more complex patterns and pictures, the stencil will have to be made specially.
We talked about ways to transfer images to surfaces here: “The Happiness of Drawing on Walls.” And this link contains detailed instructions for using stencils: “Experiment: painting a wall using a stencil.”
How to decorate a closet with your own hands with photos
There are different approaches to decorating furniture.
Wallpapering
This simple, quick and inexpensive method of decoration has significant artistic potential. To implement it you will need:
- Fragments of wallpaper. The most important part is to choose wallpaper with a good design or pattern. They should not merge with the walls of the room, surpassing them in color saturation by at least several tones.
- Wallpaper glue. Apply it to the prepared surface of the furniture, place the wallpaper on top and smooth it so that there are no air bubbles or wrinkles anywhere.
- PVA glue and water-based varnish. After gluing, cover the wallpaper with a neat layer of PVA glue diluted with water. Apply a final layer of varnish.
IMPORTANT ! Before you start gluing, make sure that the combination of wallpaper fragments you have come up with looks harmonious. Draw a detailed sketch or attach what you are going to stick to the doors.
Plaster pattern
A three-dimensional pattern of plaster on the surface of the wardrobe focuses attention on this piece of furniture, turning it into the highlight of the room. Technically, such a pattern is easy to make using:
- Stencils. Make it yourself from cardboard, plastic or thick film. Floral or geometric patterns, ethnic patterns, and stylized images of animals and birds are often used.
- Masking tape. Take the resulting blank and secure it with tape on the surface of the cabinet.
- Plaster. Apply decorative plaster to the surfaces of the furniture, over the stencil.
IMPORTANT ! The stencil must be removed before the plaster dries!
After drying, treat the resulting composition with paint or acrylic varnish.
Wardrobe decor with fabric
Fabric can be a good alternative to wallpaper. Textiles also have a wide range of colors and prints; they make up very expressive and effective compositions. To fix it on the surface of the wardrobe you will need:
- PVA glue, furniture stapler or liquid nails. In a word, what to attach fabric blanks to the closet.
- Varnish. To process the resulting surface. However, this stage is sometimes neglected. After all, textiles often have a characteristic, pleasant-to-touch texture that you want to preserve.
Decoupage technique
Decoupage is the transfer of patterns and designs from ordinary napkins onto a prepared surface, followed by fixing them with varnish. Create a whole collage in this way on the doors and body of your clothing furniture.
IMPORTANT ! This technique is best performed on a light base. There are no traces of glue on this one, and it’s easier to find napkins. If the cabinet has dark doors and walls, paint it white, beige or cream before decorating.
Use of craquelure varnish and gilding
Using these two ingredients, a very interesting cracked paint effect is achieved. Furniture treated in this way takes on the appearance of rare, exclusive antiques. To achieve this transformation you will need:
- Craquelure varnish. It is applied in two layers. After the first one, wait until it partially dries and thickens. And only then paint the surface again.
- Gilding. Rub the gold into the cracks formed in the varnish with a sponge.
- Matt lacquer. It is needed for the final processing of surfaces in order to reliably fix the resulting coating with characteristic golden cracks.
Mosaic decor
Another type of embossed and bright furniture design is mosaic. It is made from fragments of ceramic products, buttons, shells, glass, pebbles and glue. Any small multi-colored elements from which you can create a pattern or picture will do.
IMPORTANT ! Before fixing the mosaic pieces, mark their location on the surface of the cabinet - lay out the entire composition without using glue. And only after making sure that it looks harmonious, start working.
Aging
One of the methods of artificial aging of furniture - craquelure - has already been described above. However, it is not the only possible solution. There are other options. For example, painting a cabinet with a large dry brush with a minimum of paint will create the effect of a peeling surface.
Mirror decoration
Mirror mosaic, shaped elements cut from reflective materials, stripes, geometric shapes - all this can become a decoration for your closet. Such fragments are often used to hide defects in furniture, while visually expanding the space.
What to consider when choosing cabinet decor options
The interior of the room, the features of the cabinet, your preferences - these are the three fundamental things that influence the choice of how to decorate old furniture.
What you need for pasting
Gluing the trim is not difficult if you prepare everything you need first. Let's list what you need for the job.
Tools
- Construction or stationery knife. If the blade has been used, it is better to replace it with a new one. It should be very sharp. This is the only way vinyl can be cut smoothly and easily.
- Pencil or marker for marking. The marks are placed so that they are invisible after installation. Therefore, it is worth thinking in advance about how to clean them.
- Scissors for trimming and cutting lines of complex shapes.
- Ruler. It is best to take a long metal ruler. With its help you can measure and, if necessary, cut strips.
- Felt spatula or similar device. A soft tool smoothes the PVC film, allowing it to be glued without creases or bubbles.
- Hair dryer. A household hair dryer will do, but it’s better to take a hair dryer with a power control function. It is needed to warm up the vinyl when gluing.
Materials
You will need a preparation to degrease the base: any solvent, alcohol or gasoline. For not entirely smooth surfaces, a primer is required. It will improve adhesion to the decorative coating. If leveling is necessary or the base is too rough or grainy, a finishing putty is used and a primer is applied on top of it.
Now let's get to the instructions.
Cover with film
PVC film is quite actively used in the restoration of old furniture. It is durable, moisture resistant, highly decorative and easy to apply. The front side can imitate natural materials, have a metallic sheen, be plain, mirror, or matte. Film manufacturers often offer to print an image that fits perfectly into the customer’s interior.
The reverse side of the film is covered with an adhesive composition, which makes the gluing process simple and quick. The material is used both for decorating wooden furniture and for plastic and glass cabinets and cabinets. In the first case, the surface will have to be leveled and degreased in advance; in the second, it will have to be slightly moistened.
Toning
Changing the color of the facades can decorate boring furniture. Instructions for tinting a wardrobe:
- Clean the surface from dust with a dry cloth.
- Also treat the inner walls with an antiseptic (vinegar will do). It will get rid of the musty smell.
- Use wood putty to remove defects. The color must match the details.
- After the composition has dried, sand the treated areas with sandpaper.
- Coat the cabinet with a texturizing wood stain. It should be darker than the color of the furniture.
The tinting technique is suitable for decorating a cabinet in the bathroom, kitchen or hallway.
Remember that this method is only suitable for natural wood surfaces.
How to decorate furniture with wallpaper
To work you will need:
- wallpaper:
- sandpaper;
- primer;
- wallpaper glue;
- water based varnish.
If you need to restore or paint wooden furniture, do this before working with wallpaper. Of course, you can immediately glue the wallpaper using wallpaper glue or regular PVA, thereby simplifying the process, but it is possible that all the beauty will soon come off. According to the rules, for a longer service life of such decor, it is necessary to clean the wooden surface, prime it, then stick the wallpaper, preferably with wallpaper glue. If you are covering the front surfaces of furniture that you will often touch (drawers and doors), then it is better to take thick vinyl wallpaper that is easy to clean. Paper wallpaper should be coated with water-based varnish to protect it from damage and dirt. Remember that varnishing will make the color of the wallpaper a couple of shades darker. It is advisable to apply a layer of protective transparent primer or the remaining wallpaper glue under the varnish. As an option, you can use self-adhesive wallpaper or decorate with napkins using the decoupage technique, which is suitable for small areas.
Let's see what options there are for decorating furniture using leftover wallpaper.
How to decorate the back wall of a cabinet
A mirror often becomes a decoration for decorating the back wall of a cabinet. But don’t forget about other materials: MDF, plastic inserts, glass with a photograph. When choosing, take into account the load of decor on the furniture design.
To increase the cabinet's ability to withstand additional loads, you should disassemble the furniture. And strengthen it with new fasteners and inserts.
You can decorate the back wall not only with a mirror. You can decorate an old cabinet or wardrobe together with your children. You can get advice on how to decorate an old wardrobe for a nursery or living room with your own hands at home. It is mandatory to comply with all safety measures to perform the work. To decorate a closet with children, the best option would be to use decoupage techniques and regular painting.
Make decoupage
The art of decoupage, which is actively used for decorating interior items, can also be used to update old cabinets. Original images decorate cabinet doors, back walls of sideboards, and tabletops of cabinets. The technique is quite simple to implement, and the cost of materials is minimal.
At first glance, it may seem that decoupage will give the interior a touch of rustic style and is suitable exclusively for decorating a kitchen in a country or Provence style. However, there are many examples when a cabinet updated using this technique becomes a decoration for a study, a modern living room or a boy’s nursery. Instead of colorful napkins, newspaper clippings, geographical maps, and illustrations from old adventure books are used for work here.
How to change the finish if there is a built-in wardrobe?
Why glue wallpaper behind a built-in wardrobe if this place is intended for this item and its functionality will not change? If, for example, a floor-to-ceiling compartment is used, then there is no point in doing expensive finishing behind it. But it is necessary to put the wall in order.
It is easiest to replace the canvas if the cabinet is not installed up to the ceiling and not from wall to wall. In this case, you cannot save money, i.e. you need to buy good wallpaper for gluing. To decorate the interior space, they usually use budget but wear-resistant wallpaper . The hardest thing in this matter is to choose a pattern and make the joints invisible (how to join wallpaper correctly?).
There is nothing complicated in such decoration, and the result will be significantly different from if the cabinet had been varnished or simply painted. There are many original ideas on how to update the appearance of furniture. The main thing is to take into account the rules for creating color compositions and rely on your wishes.
Shelves at the end of the closet and more
If the wardrobe is designed for clothes on hangers, then its depth is quite large, about 600-700mm. If this space is located facing the hallway entrance, it is better to use it for an “extension”. For example, in the form of additional corner shelves of various shapes.
Shelves at the end of the closet can also become a full-fledged open hallway, designed as a continuation of a row of furniture with hangers, a cabinet for shoes, etc.
So they should be quite compact, designed for storing small-sized items.
Gilding
Gold can decorate not only women's necks, but also your closet. At the same time, it is not at all necessary to pay a lot of money for the sake of a luxurious look. Today there are many alternatives for decoration, one of them is gold foil.
It is good not only for its price, but also for its capabilities - completely covering an object or “looming out” in the form of sophisticated patterns. It is easy to work with, and the result can simply be sealed with varnish for reliability.
But keep in mind that the cabinet facade for such material must be appropriate. Firstly, it should be even and perfectly smooth, otherwise the foil will not stick well. Secondly, dark - to emphasize the “luxury” of gold.
Pasting process
There should be no difficulties with self-adhesive film, since all that is required of you is to correctly take measurements and cut out the parts on the roll. With simple wallpaper the process will take a little longer. First of all, you should prepare all the necessary parts for your cabinet. Here you will also have to take all measurements and transfer them to paper. Next, coat the surface of the product with construction glue or PVA. It will not be difficult to apply pieces of wallpaper, since they are not large in size.
When purchasing photo wallpaper for an old wardrobe, pay attention to the picture. It must exactly match the size of the cabinet, especially for certain patterns, for example, in a children's room. Pasting with them needs to be done more carefully, controlling the joints and transitions.
The pasted surface is carefully smoothed with a piece of soft cloth in order to remove any remaining air under the paper. When covering with fabric, a special pressure roller is used. When carrying out all work indoors, get rid of possible drafts. Just like wallpapering walls, this process can affect the quality of the result. As a result, the entire surface of the cabinet can be covered with a layer of varnish. This will not only protect the surface from external influences, but will also make it possible to care for the furniture without causing harm to it.
The final touch in decorating the backdrops is lighting!
Modern technologies have stepped forward significantly. And to make LED lighting, you don’t need to have any electrical knowledge or come up with connection diagrams. You can use ready-made solutions and long battery-powered lamps.
If you have children, it is possible that you will not have to buy lamps. Look among old toys - you will definitely find luminous elements that can be adapted for this purpose.
Interior decor in drawers and behind doors
There is another technique for decorating furniture with wallpaper, which is used extremely rarely. If the decoration on the facade of the furniture complements the interior, then the decor of the interior space is intended solely to please the user. Wallpaper can be used to cover the inside of drawers of a cabinet or chest of drawers, the back surface of doors, including radius doors, as well as shelves and the inner wall of the cabinet behind the doors. You can first purchase wardrobe doors and then decorate them. In this case, the choice of pattern and color of wallpaper depends on your wardrobe and your own preferences, and the color of the walls in the interior does not play any significance here. Again, experiment with contrast. If you have a lot of monochromatic items in your wardrobe, choose wallpaper with flowers and ornaments; if colorful dresses and skirts predominate, stick on striped wallpaper.
Did you like the article? Subscribe to the channel to stay up to date with the most interesting materials
Add volume
If you want to achieve a classic look for your cabinet, all you have to do is glue on wooden slats or stucco molding, and then paint - and the effect will add up. You can paste an inscription cut out of wood with words that are meaningful to you or the name of the contents of the box.
A voluminous texture can be created with colored sawdust or other similar material: the door is covered with glue, and the sawdust is inflated on top, then everything is secured with spray varnish. Please note that such a surface is very difficult to clean.
Do not forget that the appearance of furniture is greatly influenced by fittings. In any case, it is worth replacing the handles, and maybe this will be enough. Lighting can also enliven the familiar look of a cabinet or shelving unit.
Photos: bohemianjunktion.com, anangelatmytable.com, decorpoint.com, fondodejuventud.org, theroomedit.com, hfapconference.com
dressing room, bedroom, furniture, do it yourself
Decorate with wallpaper
Restoring cabinets with your own hands is an opportunity not only to cheaply refurbish old furniture, but also to find a use for the finishing materials left over after the renovation. Paper, vinyl, non-woven wallpaper can be safely used to decorate doors, shelves or completely cover cabinets. The process is not much different from finishing walls, but there are several subtleties:
- Before pasting, remove all the fittings from the cabinet, remove the shelves, and disconnect the doors.
- Using a hair dryer or sandpaper, remove the layer of old varnish.
- The surface to be pasted is washed and dried. Defects and chips are puttied in advance, uneven areas are sanded.
- Blanks cut from wallpaper are glued to the surface of the cabinet. The canvas is smoothed with a soft cloth or roller.
- After the glue has completely dried, the surfaces decorated with wallpaper are varnished. The fittings are returned to their place.
The main advantage of “wallpaper” restoration is the almost unlimited number of colors and textures. You can choose a material that imitates wood or brick, or opt for a classic stripe, cheerful polka dots or a delicate floral motif.
Replacement of accessories
When restoring a cabinet, don't forget to update the handles. They create coziness and complete the image of the room. If the wardrobe is in satisfactory condition, but the handles have lost their external gloss, it will look unkempt.
Replacing faded hardware with new ones will add brightness. For children's furniture, focus on accessories in the form of animals or plants.
Handles of an elegant curved shape will make a boring facade elegant and transform an old cabinet.
Criteria for choosing self-adhesive film
Before choosing film for a cabinet, you need to know what it consists of and what criteria to choose. The film has 3 layers:
All layers play their role. The very first one is made from:
- Vinyl, PVC or polyester are the most durable materials, the use of which allows you to glue the film to the front sides of the cabinet and are not afraid of damage.
- Staniol is a material that is susceptible to damage, so gluing should be done on the surface of hanging cabinets.
- Paper is a fragile material, easily damaged, it is best used for pasting the end sides of racks.
The film can be single-layer or double-layer. Single-layer is more durable, formed into rolls. Two-layer is made of a base and a top layer, but is less durable.
When buying self-adhesive film, you need to take into account the moment on the surface of which furniture it will be used. If it is in the kitchen, where it is constantly exposed to temperature changes, or in a children's room, where there is always a threat of spoilage, a protective layer is needed. The protective layer has:
- moisture resistance;
- protects against ultraviolet radiation;
- thermally stable.
Cheap options do not contain a protective surface.
Preparatory work
You need to start by preparing the piece of furniture for gluing:
- Remove the doors and fittings from it.
- Destroy the polish/varnish. This is done with coarse-grain sandpaper, a grinder, or a drill with a disc attachment.
- Clean off any accumulated dust and other contaminants.
- Check for gouges and cracks.
- Fill deep defects with putty.
- Using sandpaper, level the putty areas so that they are flush with the main plane.
- Start cutting out the finishing material and preparing the glue.
How to choose the right wallpaper
You need to choose fabrics with an easily soaked base:
- Vinyl and non-woven. Their elastic base stretches, which ensures a beautiful joint and clear corner edges.
- Paper. They are used, but rarely (due to the complexity of working with them). At the final stage they require varnishing (to increase water resistance).
Covering furniture with fabric: an original method of restoration at home
Wardrobes and chests of drawers are expensive pieces of furniture, so when changing the interior or carrying out cosmetic repairs, it is not always possible to change them. Sometimes furniture is used for decades, causing its appearance to lose its former luster - cracks, scratches, scuffs and chips appear.
- How to cover a chest of drawers with fabric
- Preparing the template
- Working with batting
- Covering with fabric and screwing on fittings
- Finishing work
- Decorating the closet with fabric
It turns out that there are many ways to update cabinets and chests of drawers and adapt them to a new room design. One of the simplest and most inexpensive is restoration using fabric.
Cabinet partition: types of designs and selection rules
Any, even the most stylish interior becomes boring over time, and there comes a time when some changes need to be made. For example: zoning space. Partitions made of different materials (brick, wood, drywall, etc.) can solve this problem. But this approach requires a significant investment of effort, time and money. A simpler solution is to divide the room with a closet. This method will not only solve the problem, but will also provide additional storage space.
Wardrobe partition in the interior
A wardrobe partition will become an indispensable piece of furniture in both one-room housing and a studio apartment. Its features are ideal for:
- divide the space into zones;
- effectively use the occupied space;
- buy another storage space.
However, it is worth considering the weaknesses in advance and be prepared for some inconveniences. This solution is not capable of providing a high level of sound insulation. You will also have to sacrifice some of the usable space. If you choose the wrong design, the structure will look too bulky, especially in a small room. The product will have to be ordered based on the characteristics of the room and the goals pursued. This will affect the cost of furniture.
There are several ways to use such a cabinet.
- Separating part of the living room with a double-sided product, including shelves and areas with doors.
- Placing a large closet the entire length of the room can increase sound insulation. For free movement there is a built-in door in the middle part.
- A small area fenced off with such a structure can become a working, sleeping area or children's area.
- This partition will allow you to separate the kitchen and dining room.
- A set of shelving and sliding doors can solve the wardrobe problem even in a small room.
If you equip the structure with a roller system, you can change the appearance of the room in a few minutes. This applies to small-sized products. Constructions of impressive size, on the contrary, should be securely fastened.
Types and purpose of partition cabinets
Design solutions for such products are quite varied.
- The sliding wardrobe partition looks impressive and stylish. It will cope well not only with the task of storing clothes, but will divide the room into 2 parts. If you design facades using glass or mirrors, you will be able to visually expand the space, add light and volume. This is especially important for that part of the room that does not have a window. By design, it can be one- or two-sided.
- The rack is a lightweight option, as it is transparent due to the absence of a back wall. It is appropriate to place it in a nursery or living room. It is suitable for storing books, collections, flowerpots, photographs or just beautiful trinkets. This method is appropriate when complete isolation is not required.
- An ordinary wardrobe can also cope with this function. This is the simplest method that has been used for a long time.
Types of cabinet designs for room zoning
By design, cabinets used as partitions can be built-in or stationary.
The first option not only allows you to store different things, but can also fully divide the room. Depending on the chosen thickness and location, it is possible to use it on both sides. The partition can include a retractable or folding table and a built-in sleeping area. Sometimes the design also includes mobile tubes.
Living room decoration with bed and sofa
Author: Angstrom Furniture
Placing a bed and sofa in the living room is a great way to economically distribute living space. The design of a studio apartment involves dividing the area into functional zones, while organizing sleeping and guest spaces. This becomes possible through the use of interesting design techniques.
Zoning options
Before arranging the bedroom-living room, you need to choose a place to sleep. Let's analyze possible zoning options:
- The sleeping place is placed away from the door. It is better to place the bed next to the window, on the opposite side from the entrance.
- Many people rightfully consider the bedroom a personal space where a person should feel safe and calm. The design of a living room with a bed and a sofa is developed taking into account the wishes of the owner, the presence of a partition is implied. The lack of natural light is more than made up for by floor lamps, spotlights and wall lamps.
- If the area is large, delimitation is allowed using a plasterboard partition. By installing a wall to the ceiling, a small bedroom is created. The disadvantage of such zoning is that light does not penetrate into the guest room. If you install a partition halfway up the ceiling, this will not interfere with sunlight and ensures isolation of the bedroom.
- The space is divided by a matte partition, which clearly demonstrates the line between the functional zones.
- Zoning of such a living room is possible using sliding curtains. Thick curtains will provide privacy, while light ones will highlight the edge of the bedroom, while maintaining the holistic significance of the room. Curtains made from faceted glass beads look interesting and unusual.
- Installing a bed in the living room is possible thanks to the use of sliding partitions that will not overload the space. The width of the partition may vary. Mobile screens allow you to change the area, increasing the living room or reducing the bedroom. When guests arrive, the entertainment area expands, then the partition returns to its original position.
- You can zone a small living room using a shelving unit without a back wall, which is used to save things dear to your heart. This design does not interfere with the penetration of sunlight.
- Zoning a room is possible through visual effects: different flooring structures, contrasting walls, etc.
- A small podium with built-in drawers allows you to highlight a sleeping area.
- The division of space is also possible through original lighting methods. For example, you can dim the lights in the bedroom and brighten them in the living room.
