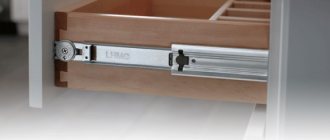
The functionality of furniture items is largely influenced by the installed fittings. To increase comfort when using pull-out structures (shelves, drawers, etc.), you can install hidden drawer guides. What is this type of fittings? What are its advantages and disadvantages? How to independently select and install hidden guides, read on.
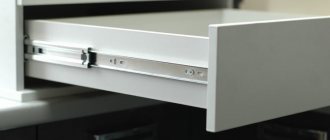
Drawer on hidden guides
The design and principle of operation of hidden guides
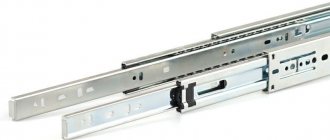
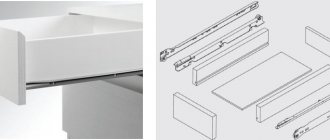
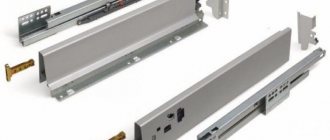
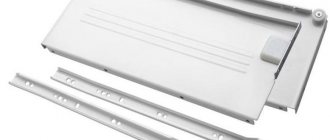
The flush-mounted guide kit includes:
- metal strips;
- metal bases along which the slats move;
- roller or ball mechanisms that facilitate the process of moving the slats;
- pins for fixing fittings to the box;
- fasteners.
Complete set of concealed mounting guides
Standard kits can be supplemented with:
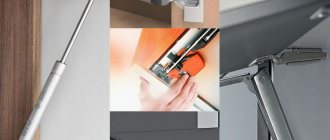
- soft closing devices. Fittings with a closer allows you to extend the life of the furniture, since the absence of cotton when closing eliminates the possibility of damage to the material;
- return springs, allowing you to smoothly and quickly close the extended drawer;
- locking locks that facilitate the process of using and dismantling the structure;
- opening systems by pressing on the drawer front (Push-to-open).
All concealed installation guides are made from high-quality materials and differ in:
- accessibility. The cost of the accessories is significantly lower than the currently popular metaboxes and tandemboxes, and the functionality is much closer to the specified kits;
- quiet operation;
- possibility of fully extending the drawer;
- compactness and the ability to use the maximum amount of space of a piece of furniture;
- durability.
The disadvantages include the complexity of installation, but the detailed instructions included with the hardware kit and the availability of basic skills in working with a simple set of tools will greatly facilitate the process.
Calculation of drawers for blum guides
Hello dear friends.
We have already talked about Blum tandems.
In this article I propose to consider the calculation of drawers for them.
If you have read the article about this sliding system, then you probably already know that drawers for it are designed and assembled completely differently than for other guides (the same “telescopes”).
The height of their side (dia2) and front (dia1) parts is different, and the bottom, which is slightly offset relative to the bottom, is made of chipboard.
As a result of this, protrusions are formed on the sides of such a box, between which the guides themselves should be located (in the installed version).
The size of such a protrusion should be within 13 millimeters.
So, let's look at the calculation using a specific example (it will be more clear this way).
All values proposed in the following will be measured in millimeters.
For example, we need to calculate a drawer for a box with a width of 550, a depth of 460, for an upper facade whose height is 150.
First, let's calculate the dimensions of the parts by width (depth).
In order to find out the width of the front parts (dia1), you need to subtract 42 from the size of the box body strip.
In this case, the width of the box body strip (550 wide) will be equal to:
550-32=518
Now, subtract 42 from this value and get the width (dia1):
518-42=476
Further, the depth of the part (dia2) depends on the size of the guide.
Since the depth of the box in which we are designing the drawer is 460, the guide for it is suitable for 450.
To find out the size (dia2), you need to subtract 10 from the size of the guide (450):
450-10=440
Now you need to decide on the height dimensions of the drawer parts.
When assembled, the tandem guides protrude down 15 degrees under the drawer (see picture below).
This must be taken into account when choosing the height.
So, if we take the height of the box (and, to be more precise, it will be the height of the parts (dia2)) equal to 100, and assume that there should still be a gap equal to 10 at the bottom of the guides, then let’s estimate how much free space will remain for the ceiling body strips on top:
150-100-15-10=25, where 150 is the height of the facade, 100 is the height of the drawer, 15 is the protrusion of the system from below, 10 is the free gap.
Great.
The body strips overlap and there is still a normal gap.
Well, the height (dia1) is determined taking into account the fact that the bottom of the box is made of chipboard, and it should be offset relative to the parts (dia2) by 13:
100-13-16=71
Well, finally, let's calculate the dimensions of the bottom itself.
The width of the bottom will be equal to the width of the part (dia1), that is, 476
The depth will be equal to the size of the part (dia2), that is, 440.
So, now you can write down the details:
- dia1 – 71x476 (2 pcs)
- dia2 – 100x440 (2 pieces)
- bottom – 440x476
But that is not all.
From the back edge of this box you need to make two holes with a diameter of 6mm, according to the dimensions shown in the figures below.
Thanks to these holes, the retractable system secures the drawer.
We will talk about how to mark the box for installing tandems in a separate article.
And that’s probably all, until we meet again!
Selection of accessories
The key to long-term use of hidden guides is primarily the correct choice of fittings. To choose the right mechanism for a drawer, you need to consider:
- overall dimensions of fittings;
- maximum load;
- variety;
- manufacturing company.
Types of guides
Concealed mounting guides can be:
Ball guides are made of two or more metal profiles connected to each other using rolling balls (cage).
Hidden ball-type guide device
The advantages of this mechanism are the complete absence of noise during operation, the possibility of regulation and the ability to use with loads of up to 60 kg - 65 kg. A significant disadvantage is the high cost of fittings.
The roller mechanism is a simpler and cheaper design. The guides consist of two metal strips, at the ends of which rollers are installed to facilitate the movement process.
Installing ball guides
In terms of design features, telescopic guides for drawers from different companies may differ slightly, but the base for all has the same appearance: it consists of balls that move along stamped grooves. Such products can be 2- or 4-row. The second type is considered more durable; it can withstand a fairly large load (about 30-40 kg).
Telescopic drawer slides have the following advantages:
- ease of installation;
- easy and silent movement;
- ability to withstand heavy weight;
- long service life.
Among the disadvantages of such structures, it is worth highlighting the rather high price and the need for precise assembly.
To carry out installation work, you need to prepare the following tools and materials:
- drill with drill bit;
- screwdriver or screwdriver;
- a simple pencil;
- ruler;
- guides;
- fasteners.
For proper installation, you need to calculate as accurately as possible all the dimensions of the parts and their attachment points. There should be small gaps about 12mm wide on the sides of the assembled drawer and on the sides of the furniture. This should be taken into account when calculating the dimensions of the furniture. The depth of the drawer and the length of the guides must be the same
. Standard dimensions of the telescopic mechanism can be from 25 to 80 cm with a length difference of 5 cm between the following models.
The installation principle of ball guides is quite simple. First, the telescopes are disassembled into 2 parts, one of which is installed on the inner side of the furniture, and the second on the side of the box. In this case, the main and most difficult task is to accurately determine the mounting locations of the product. To do this, a line is marked horizontally and strictly in the center on the side of the box along which one half of the guide mechanism is screwed with screws.
After this, you need to mark a similar horizontal line on the inner wall of the cabinet. To do this, you can use a drawing of a furniture product. After this, the second half of the telescope is attached along the marked line.
If everything is done correctly, then you can try to insert the removable fastening parts located on the box into the grooves of the guides and connect them. In this case, both parts of the product should fit smoothly into each other, and the drawer should move easily along them. Otherwise, everything will need to be done all over again.
Return to contents
Installation of hidden guides
So, each set of guides manufactured by Blum, Hettich, and so on, is accompanied by a hardware installation diagram, in accordance with which it is recommended to carry out installation.
Schematic illustration of the installation process
In general, installation of Boyard, Bloom, etc. fittings is done as follows:
- At the bottom of the box, the fastening points of the guides are marked with a guide lock in accordance with the recommendations of specialists specified in the instructions;
- the clamps are secured with self-tapping screws (included with the hardware kit);
Placement and fastening of the clamp for the guide bar
- opposite the clamps, holes are drilled for a latch hook, the size completely corresponding to this element of the retractable system;
- guide strips are installed;
Roller elements
This mechanism is the simplest in terms of design and installation, and has a low price. It can withstand a load of no more than 25 kg, so it is unlikely that you will be able to store many things in such a box. If you incorrectly calculate and install the roller guides, they will quickly fail. Therefore, the work process should be approached with full responsibility.
First of all, based on the furniture drawing, precise marking of the mechanism attachment points is made. After this, a blind hole is drilled for the screw (its depth should be about 13 mm). Next, 2 more similar holes are created, the location of which is determined according to the drawing.
At the next stage, a guide element is placed on the drawer so that the end of the part, which does not have a roller, rests against the front wall of the drawer. The wheel should be placed at the back wall of the drawer. Using screws or screws supplied with the product, the roller guide is secured in place. The fastening is done in the same way on the other side of the box.
Next, they move on to installing the guides on the walls of the furniture itself. Here they are placed perpendicular to the facade of the furniture product. In this case, the ball should be in front, not behind. Typically, all guides have round and elongated holes for screws.
Many people fail to complete all the installation work the first time. In this case, you will need to disassemble the product and re-mark it to achieve the required result.
The best solution for furniture - Quadro
Quadro slides guarantee flawless operation of drawers for many years. For designer furniture, where it is important to hide equipment from view, a hidden guide is especially suitable, in which all functional elements are hidden behind the fronts and sides of the drawer. Where you need maximum quality and stability, Quadro is the best solution.
The Quadro guide is designed for precise and smooth drawer movement. Up to 180 steel balls move along steel guide channels, ensuring precise performance day after day. The exceptional feature of long-lasting, flawless functionality is made possible by the perfectly developed Quadro technology. Pressure and loads on the drawer from any side are absorbed, again thanks to the Quadro guides, which are responsible for vertical and horizontal stability. Quadro guides are characterized by smooth and obedient movement even when the drawer is fully loaded - the ball bearing principle works for many years.
Silent System - the sound of silence.
Drawers that close smoothly and silently add a touch of exclusivity and have a positive effect on the mood of household members. No noises or pops when closing the drawer will no longer disturb the cozy atmosphere of the home. Silent System is silent closing. Small or large, lightly or heavily loaded, drawers always close equally smoothly with Quadro slides and the integrated Silent System damper. The Silent System damper is installed in the Quadro guide during production, which means that the installation remains the same, and the operation of the guides has new exclusive characteristics and special user convenience. Delight your customer with a unique combination of long-lasting functionality and the luxury of silent closure.
Smooth surfaces without handles – Quadro with Push to open mechanism.
Minimalism in furniture design is now at the peak of fashion. And the Push to open mechanism for Quadro makes it possible to use smooth fronts without handles. With this innovative solution from Hettich, the design and production of handleless fronts becomes simple and natural. The Push to open mechanism ensures convenient opening of any drawers and drawers by lightly pressing the front. A light press activates the automatic drawer opening function. Even if you pull out the drawer in the usual way, this will not harm the reliable Push to open functions. Push to open is ideal for drawers up to 900 mm wide.
You can read more about the Push to open mechanism in the article: Push To Open and TIP-ON opening systems - review.
Download instructions: Guides for Quadro drawers in .PDF format
List of the main advantages of Quadro hidden-mounted guides:
• Smooth sliding of the guides thanks to Quadro technology • Soft and silent closing thanks to the Silent System • Full extension - to see and conveniently reach all the contents of the drawer • Can be combined with PUSH to OPEN, mechanical opening system • Long service life • Convenient adjustment
Installation methods:
Slide-on installation • Quadro next close
• Slide-on installation. The drawer is placed at an angle on top of the extended guides.
The rear hooks of the guide are inserted into two holes on the back wall of the drawer. By pressing on the drawer, it is connected to the trunnions. The trunnions, tapering upward, ensure precision and tight fit. To remove the drawer, pull it out all the way, lift it slightly and remove it. The drawer is fixed using mounting pins, and the exact height is adjusted using the adjustment wheel. Slide-on installation • Quadro next close
• Slide-on installation Holding the drawer horizontally, simply place it on the guides and slide it inside. The latch will automatically securely fix the drawer on the guides. Removing the drawer from the slides is just as easy. The established height of the facade is maintained when the drawer is dismantled. The blue adjustment wheel integrated into the lock adjusts the position of the wedge between the drawer bottom and the slide, allowing for perfect height adjustment of the drawer front without the use of tools. What you need to know about the QUADRO guide system: • Silent System - a damper integrated into the Quadro V6 guide closes drawers smoothly and silently.
• Perfect stability in vertical and horizontal directions. Wear-resistant guide channels ensure perfect movement of the steel balls within the guide – for precise and controlled work. • The guide channels are maintenance-free thanks to the self-cleaning function. • Slide-on installation - simply place the drawer on the guides and slide it inside. Ready! • Robust locking mechanism with built-in adjustment wheel for tool-free height adjustment. • Interchangeability of system components – replacement of Quadro partial extension with Quadro full extension without changing the dimensions of the body, drawer and front panel. Guide systems according to the type of extension: full and partial extension.
• full extension - a system that allows you to pull out the entire drawer from the module body. • partial extension - the system leaves the back of the drawer in the housing module by approximately 100mm. Partial extension is an economical option.
Design and installation diagrams for Quadro guide systems
• Full extension slides for wooden drawers Quadro V6 Silent System - Load capacity 30 kg. • Partial extension guides for wooden drawers Quadro 30 Silent System Load capacity 30 kg. • Full extension slides for wooden drawers Quadro V6 Stop Control Load capacity 30 kg • Partial extension slides for wooden drawers Quadro 30 Stop Control Load capacity 30 kg
Calculation of a wooden box - QUADRO system:
— Drawer length: Nominal drawer length = guide length — 250;
300; 350; 400; 450; 500mm. — The width of the drawer is equal to: The internal width of the module body for embedding the drawer minus 8 mm. Accordingly, if the width of the module body for embedding a drawer is 500mm, then the width of the drawer = 492mm. The length of the front and back walls of the box = the width of the module body minus 40 mm. Accordingly, if the width of the module body is 500mm, then the length of the front and back walls of the box = 460mm.
— Drawer height: The required space in the body is determined independently, but it is recommended to deviate 10-20 mm from the top edge of the decorative facade of the drawer.
