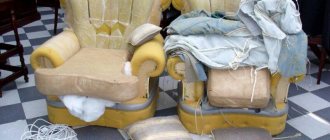
Modern people spend a lot of time at the computer, both in the office and at home. Obviously, it is better to work not sitting on a hard stool or listening to the creaking of an old chair, but sitting comfortably in one of the office chairs offered by manufacturers. Unfortunately, from active use, the upholstery of the chair quickly becomes unusable - the artificial leather cracks or becomes frayed, the fabric gets dirty and torn. What should you do - throw away your expensive office chair or try to restore it?
Cleaning chairs or updating them is quite possible at home - you can reupholster this piece of furniture standing near the computer yourself, without going to any special workshops.
You will learn how to replace upholstery or remove unsightly stains from this article.
Office chair repair
Organizations often send chairs for repair. Reupholstering office chairs is not a difficult task, but when the amount of work is large, only professionals can handle it quickly and efficiently. They can come to your office or home, take measurements for free and calculate the exact cost of the work. Also pick up products for repair and bring them back at the appointed time. Often the entire work takes no more than 2-3 days.
Not only upholstery replacement is included in the work of such companies. They can repair the chair frame itself, replace casters and legs, foam rubber and plywood. The cost of the service will depend on the volume and urgency of the work performed. The calculation is based on what parts were used and how much time was spent.
How to clean at home?
Sometimes you can update an office chair without such an operation as replacing the upholstery, simply by removing the greasy gloss that has appeared over time, as well as greasy stains. How to clean the upholstery of a computer chair, even if it stinks, for example, because beer or soup was spilled on it? This is not difficult to do. Apply the soap solution to the surface with a sponge and then remove it using circular movements. Some dirt can be removed using a regular vacuum cleaner - by moistening the brush in a saline solution and wrapping it, for example, in gauze, you just need to vacuum the chair.
Household dust stains can be easily cleaned with a vinegar solution (2 tablespoons per liter of water).
Features of re-tensioning the base with belts or a snake spring
To restore old chairs on canvas, you will need synthetic rubberized belts of approximately the same width. They are fixed in the center of the bar towards the frame. The new strip is secured with staples, rotated and fixed again. Then it is secured and tensioned on the opposite side. A soft substrate is placed on top. The tools you will need are a steelyard and a furniture stapler with staples.
You need to pull with a force of 1 kg on the seat, 8 kg on the back. When one side of the belt is already secured, a steelyard is hooked to the other end and pulled until the desired number appears. The desired length is marked with a marker.
To replace the snake spring, it must be fixed to the frame using special fasteners, and they, in turn, must be mounted using brackets on long legs. When positioned correctly, this part has a slightly curved shape. If you want the upholstery to last longer, place a fabric layer between the twisted wire and the pillow. This is done so that the foam rubber does not fray over time.
If the reupholstery of the chair is successful, you can try restoring other, larger upholstered furniture: an armchair, a sofa, a kitchen corner. The work is carried out according to the same principle, only the dimensions and shape of the product change. Restoring old broken things will help you save on buying new ones, and will also become a fun hobby for people who love to make things.
How to sheathe it yourself?
The process of upholstering a chair is slightly different from reupholstering, although in many ways it is very similar to it. This operation involves covering the chair with fabric. For such purposes, only furniture is used that was not originally equipped with fabric upholstery.
Upholstery technology involves performing several sequential operations:
Before upholstering a chair at home, you should stock up on some tools and materials. To perform such operations you will need fabric. Products made from bamboo, cotton and other natural materials can be used as this substance.
It is important that the fabric can withstand constant loads and retain its properties for a long time. You will also need a construction stapler, scissors, etc.
d.
At this stage you need to disassemble the chair into separate parts. This will significantly speed up the sheathing process. At the same time, try to remember in what order the elements were dismantled, so that in the future it is easy to assemble the structure back.
After this, fabric blanks are made. They are cut out in accordance with the dimensions of the individual element of the chair. Try to use substances with a small margin in order to be able to adjust the location of the material on the surface. If you are planning to make an upholstered chair, foam rubber is placed inside it. This substance also takes up a certain volume, which should be taken into account when forming a fabric blank.
The final stage is sheathing. They start with small parts, such as the armrest. The plating algorithm is quite simple. Initially, the fabric is placed on the surface of the product and stretched a little so that it is level. It is advisable to do this with an assistant, which will significantly speed up the process. When everything is in place, the material is nailed to the frame from the inside. It is important to constantly monitor the tension to prevent distortion.
Choice of upholstery fabric
Self-upholstery will help restore the product's attractiveness and save money. A standard chair becomes unique and designer. If you organize the process correctly, the entire work will take no more than one day. Restoration is necessary in certain situations:
- the filler has already changed shape;
- depressions appeared in the seat and back;
- there are stains or damage on the upholstery;
- The product does not match the style of the room.
First of all, reupholstering old chairs is needed to change the type of piece of furniture. The leading role is played by upholstery fabric. It must be durable, wear-resistant, and retain consumer qualities for a long time. The fabric must also keep its shape well, be cleaned of dirt, be dense and tear-resistant.
You can restore an old chair using any textile, leather, denim, flock, velor and other materials. If there are cats in the house, select raw materials that do not form snags on the surface (flock). For the children's room, where the risk of potential contamination is high, soft fabrics that are resistant to cleaning and abrasion (chenille, matting) are selected.
In the living room, more attractive options made of nubuck, tapestry, leather, and jacquard are appropriate. If there is a lot of smoking in the room, you should give preference to fabrics that do not absorb odor. The latter include chenille. An additional advantage of the upholstery will be moisture-repellent properties, Teflon or acrylic impregnation. The denser the product, the longer it will retain its original appearance.
The best models of bean bags, features of selection and operation
Flock ChenilleVelourMicrofiber
TapestryJacquard
Leather
This is interesting: How to choose a folding garden chair?
Second birth!
This entire project is surprisingly easy to understand and simple to do, considering you only need a few cans of paint, masking tape, and a screwdriver! You need to start with a high chair, of course.
The workshop features an interesting and old furniture decorator's find that had a deplorable and stained brown leather cover and a rusty base.
You can complete this creative project with any leather or vinyl chair. You can also purchase a completely new model for a minimal cost!
Vehicle seat reupholstery
In order for the car interior to look harmonious after reupholstering the seats, the color scheme of the upholstery must be precisely matched to its main shade and not stand out from the overall picture.
Material and tools for changing seat upholstery with your own hands
The upholstery for car seats can be made of leather, fabric, leatherette or Alcantara. The latter is a material with short pile, somewhat reminiscent of natural suede. It is necessary to work with Alcantara very carefully, taking into account the direction of the fabric hairs when cutting.
To replace leather coverings, artificial or synthetic leather can be a good alternative to a natural surface. It is more convenient to eliminate defects in velor upholstery or leatherette using special compounds that are available at any auto store.
In addition to the coating material, you must have the following tools available:
- set of hand needles;
- awl;
- chalk or a piece of dry white soap;
- thick silk threads;
- glue;
- hammers;
- keys and nuts with washers;
- cold welding;
- tow strap;
- pliers;
- hacksaw;
- screwdrivers;
- machine vacuum cleaner.
Also, do not forget about foam rubber for lining car seats. All this can be found on the Internet, including on your beloved Ali.
Step-by-step instructions for self-repairing car seats
Dismantling and disassembling seats into parts. It is advisable to do this on the table, signing each removed element and fragment of the structure. The covers and pillow should also be separated and marked for convenience in the future sewing of the upholstery. The case is removed by unclamping the metal clips on the back of the chair in an upward direction.
Ripping out the seams of the seat trim. To quickly and conveniently cut threads, the working area should be slightly stretched and an incision should be made along the line and stitch. If there are problem areas, you can use gasoline to soften the surface a little.
Completion of complete disassembly of the seat frame, upholstery, backrest and cushion structure.
Preparing to install new chair elements. Using the patterns of old covers, fresh patterns and sketches are created, which are carefully transferred to the work surface.
Assembly of prepared seat components. You can fasten parts using a sewing needle, glue or welding
Do-it-yourself car seat repairs are completed by connecting the cushion to the back of the chair and attaching the hinges with screws.
Secrets of replacing upholstery on car seats
Any reupholstery of car seats must be accompanied by reinforcement of the upholstery material with foam rubber. This is an important nuance without which high-quality repair of car seat upholstery is impossible. A prerequisite for a pillow is a fabric base with a synthetic backing and its thickness equal to 5 mm.
Small abrasions, scratches or cuts are best repaired using small pieces of upholstery. The main thing is that the quality and color are in complete harmony with the main surface. The material is sewn along the edges of the parts, strictly following the marks. Deviation or violation of the contours of the sketch will spoil not only the material, but also the entire result of the work done. It is better to glue the foam rubber to the upholstery fabric with spray adhesive and before connecting the elements of the case
This procedure should be done carefully so as not to burn the surface.
What to use?
To upholster an old chair, you should not buy artificial leather or thin fabrics - the former will quickly lose its attractive appearance, and the fragile material can even wear out quickly. Also, during such a process as reupholstering a computer chair, you may need foam rubber, since the old lining, as a rule, swells over time and loses its qualities.
If only the seat of the furniture is damaged, then the upholstery of the back of the office chair does not need to be retightened and vice versa. But to create a sample with an attractive appearance, it is better to make sure that both parts of the chair match each other in color and texture of the chosen fabric, that is, we will have to restore the chair as a whole.
The best option is thick upholstery fabric
Faux leather will quickly become scuffed and lose its original appearance due to constant friction.
Thin, lightweight fabric is susceptible to damage from sharp objects, including pointed elements on clothing. To replace the lining, you will need foam rubber
To carry out the constriction you will need:
- furniture stapler;
Furniture stapler
- screwdriver or screwdriver;
Screwdriver
- scissors.
Scissors
Alcantara chair upholstery
Self-adhesive Alcantara is an artificial suede equipped with an adhesive layer. Its service life is 3–7 years. Despite the low stretch coefficient, the elasticity of this material is sufficient to make it comfortable to work with when restoring furniture. It fits well on surfaces and takes their shape.
Tools and materials
We will be reupholstering a Chinese-made office chair. For this we need:
- self-adhesive Alcantara in beige and white (or any other color you choose);
- pliers;
- marker;
- scissors;
- ruler;
- tape measure;
- stationery knife.
Necessary calculations
To avoid unnecessary production waste, it is important to make the correct calculation of materials. Use a measuring tape to measure all parts of the chair. We will be working with the back cover, chair back and seat, and in our case the dimensions are:
We will be working with the back cover, chair back and seat, and in our case the dimensions are:
- 53 cm - cover;
- 53 cm – back;
- 45 cm – seat.
For the work, we bought 1 linear meter each of beige Alcantara and white, of which we needed:
- 50 cm of beige fabric on the seat;
- 58 cm of beige fabric on the back;
- 58 cm of fabric per cover.
Preparatory work
We will work with all the parts separately, so the chair will need to be disassembled using pliers for the nuts. As a rule, all parts can be easily unscrewed, some even by hand. The process takes no more than 5 minutes.
Then we start preparing the fabric. We take beige Alcantara, which we will need to reupholster the back and seat. Using a marker and a ruler along the back of the fabric, measure the required dimensions for different parts and cut with scissors. We do the same with the white fabric for the lid.
Master class on updating a piece of furniture with your own hands
Once the preparation is completed, you can proceed directly to the reupholstering process. Let's start from the back of the chair:
- We separate the white material from the paper protecting the adhesive layer.
- We glue Alcantara onto the back cover of the backrest.
- We carefully align the material so that it completely fits the product and follows its curves.
- We stretch the upholstery on the other side of the chair and bend the remaining ends inward.
- Excess material is immediately removed with a utility knife.
- Cut off the excess where the back is attached.
- We perform the same procedure with the front part of the back, using beige Alcantara.
Now we work with the seat:
- To do this, we again separate the beige Alcantara from the backing.
- Carefully glue the working material onto the seat.
- We level it over the entire part of the chair and bend it inward, gluing the ends to the back of the seat.
- Remove excess using a utility knife.
The work is done easily and quickly, the whole process takes about 40 minutes.
In some cases, the chair looks better after reupholstery than before it
Repair and design of the frame
Chair restoration begins with preparatory work:
Use rags and soft brushes to clean all surfaces of dirt. Any soap solution will do for this.
It is important to do this quickly so that the tree does not get wet for a long time. The stool is then completely dried. If the product has dried out, disassemble it as carefully as possible, inspect the parts for defects, and glue cracks, if any, together. After complete drying, sand all the spikes with sandpaper. Assemble all the parts of the chair into a single structure, carefully gluing the joints
Leave for two days until completely dry, securing the gluing areas with clamps.
Scratch removal work:
- Very minor damage is painted over with a special retouching pencil, marker, or rubbed with iodine.
- Deep scratches and cracks are initially sealed with wax of a suitable color or any of the above mixtures. After drying, the surface is carefully sanded first with medium and then fine sandpaper, dust is removed from it, and covered with varnish or enamel.
- Chips on the wooden surface of a chair are a serious defect, but it can also be eliminated with wood putty. Once dry, it completely imitates wood.
Step-by-step instructions for opening a chair with varnish:
- If desired, you can leave the color of the wooden product in its original form or use stain, which is tinted in 1–3 layers with a brush or swab. 2-3 hours are enough for drying.
- The next step is to apply a primer under the polyurethane varnish. To do this, mix three parts of varnish with one part of solvent and paint over it evenly, allowing it to gradually absorb into the wood. It takes half a day or a day to dry this layer.
- Since the surface of the wood becomes rough after drying (the wood “raises the pile”), it is carefully smoothed with a fine-grained sanding sponge (No. 100 or 120).
- Then apply 3-4 layers of varnish, each time allowing it to dry for 24 hours.
For quality coloring:
the frame of a dry, dust-free chair is primed in two layers, allowing each to dry for 24 hours; between layers the primer is sanded with fine-grained sandpaper (for example, No. 220); paint the chair 2-3 times, also allowing each layer to dry thoroughly (it is important that the paint does not leave streaks); treat the chair with matte varnish and wax.
To get a thing with a worn effect, paint of a darker tone is applied to the edges of the seat, back, and armrests and covered with wax. Then paint the entire chair in 2-3 layers in the main color. After which the dark “substrate” is exposed with fine-grained sandpaper.
Decoupage is a low-cost way to make even the most ordinary-looking furniture original and attractive. Decorating a chair with it yourself is very simple. This option is ideal for decorating products in the kitchen or a children’s high chair:
- after sanding and sealing cracks, the frame is primed and coated with water-based paint;
- cut out a suitable picture from a paper napkin or a special decoupage card, coat the surface of the chair with glue and carefully apply the picture;
- smooth the napkin from the center to the edges and allow to dry;
- the completely dry surface is varnished.
Stages of work
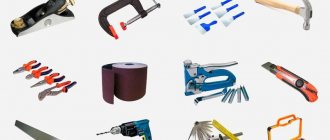
Upholstering an office chair with your own hands is not as difficult a task as it might seem at first. It is not necessary to call a specialist if you have the necessary tools and materials at hand. For work you will need the following elements: fabric for covering, foam rubber, scissors or a knife, screwdrivers - Phillips and flat-head, furniture stapler.
Before starting work, the chair must be disassembled. It's easier to do this if you have instructions. But often there is none, so you need to understand the device and properly disconnect the cover and seat. It is better to take a photo of the chair before disassembling and at the next stages, because this will make it easier to reassemble it after repair.
The simple product has standard fasteners, so reupholstering an office chair with your own hands will not take much time. It is enough to unscrew the bolts and screws in certain places. Once the parts of the chair are disassembled, you can begin to remove the old upholstery. To do this, use pliers, a screwdriver and an anti-stapler if there are staples. After this, using the measurements of the old cladding, we make patterns on the new material. To do this, simply attach the products to each other and trace the outline.
Next, you should lay the material on the floor in this order: sheathing component, foam rubber and frame (back or seat). Then fasten the first one well to the frame, while pulling it well - do not make folds, but carefully secure the result with a stapler. Upholstering an office chair with leather not only gives the furniture an updated look, but also increases the status of the organization, especially in the eyes of clients. When both parts are covered, you can put the chair back together and enjoy the work done.
How to take measurements and how much fabric to buy?
We have already figured out the correct type and quality of fabric. The amount of fabric can be measured in several ways.
If you plan to add additional foam, you should take this point into account when taking measurements. You need to add 5 cm to the data obtained (length and width of the back and chair). The fabric will be attached from the inside, for this you need allowances.
This can be difficult since the upholstery is tightly stapled to the frame pieces. Then you should measure the finished darts, adding allowances for using foam rubber.
Choosing a filler
If the inside of the sofa is perfectly preserved and does not require replacement, then this step should be skipped, going straight to creating a pattern and reupholstering.
If the sofa has exhausted its resources, then its filler should be replaced, which can be of the following types:
Periotec
Non-woven material that includes natural fibers (coconut, flax, corn) and artificial components that hold their shape well and also provide elasticity and strength. The material is hypoallergenic, and its characteristics are quite capable of competing with a spring block.
Sintepon
A more budget-friendly option in the form of non-woven fabric, which is sold in rolls. By increasing the layers of padding polyester, you can adjust the degree of rigidity of the sofa itself. It is usually used as a layer between upholstery and polyurethane foam, which makes the surface soft.
Polyurethane foam
A highly porous material that holds its shape well, while being soft and comfortable enough to fill the seat and back of the sofa. It is absolutely safe for health, has a long service life, does not accumulate dust and unpleasant odors.
Spring block
Made to order according to your measurements, or selected from those options that are available. Keeps its shape perfectly and does not sag. It needs a felt layer that will protect the foam from the effects of springs.
Struttofiber
It is called “non-woven independent springs”, which perfectly retain pressure, distributing it evenly over the entire surface. It is one of the most practical and durable fillers today.
If you are in doubt about which filling will have the best qualities specifically for your sofa, then try forming a sandwich from struttofiber, polyurethane foam and felt. This combination will be the most advantageous, since the struttofiber holds its shape perfectly, the felt protects it from sagging at a specific point of constant pressure, and the top layer of polyurethane foam provides the necessary rigidity.
Common breakdowns
As noted above, an office chair is a rather complex device and any of its structural elements can fail.
Damage to the cross
The problem with this element may be destruction at the junction of the beams. The material from which the cross is made is important here.
As a rule, the base is a hollow structure into which a polypropylene pipe of suitable size and cross-section can be inserted. It, in turn, must be rigidly fixed to the base and the damaged beam.
In order to dismantle the crosspiece of an office chair, you need:
- Remove the rollers. As a rule, they do not have a rigid fixation and are quite simply removed from the mounting sockets. To illustrate the process, it is recommended to watch the video:
- Dismantle the piastra. Fastening to the seat is done “on a cone”. Disconnection from the gas elevator is carried out by tapping on the attachment point. The correct process for disassembling an office chair is shown in the video:
- Remove the retaining clip located in the recess on the top of the hydraulic lift.
- Knock out the gas lift to repair or replace the five-arm.
The process technology and dismantling device are shown in the video:
Destruction of the swing mechanism
If the chair does not hold the “horizon”, then the problem is most likely in the destruction of the swing mechanism.
Fastening to the seat is done with four screws using a shaped screwdriver. The element is dismantled as follows:
- The bolts that secure the rocking mechanism from the seat are unscrewed
- The gas lift is knocked out of the device mount.
This element is made of metal.
It should be noted that most chairs originating from the Middle Kingdom are not suitable for domestic spare parts. This concerns, first of all, the swing mechanisms (size discrepancy).
- Chinese mechanisms: 200 x 200 mm.
- Domestic: 200 x 150 mm.
In order not to re-drill holes when replacing an element, we suggest using adapter plates. How it looks assembled can be seen in the figure below.
Air chuck failure
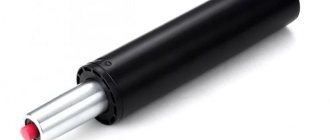
The pneumatic cartridge of the chair is a two-chamber structure filled with air. When you press the adjustment lever, the valve stops the flow of air between the chambers.
If, when pressing on the valve, the gas lift rod does not extend, it means that the integrity of the piston, seal, etc. is compromised.
The dismantling process is described above. To clarify the process, watch the video about replacing the gas cartridge on office chairs:
A fairly common cause of gas lift failure is the bending of the adjustment lever, which does not allow pressing on the cartridge valve. In this case, the repair can be easily carried out independently: you need to bend the lever to its original state.
Reupholstering an old chair
First, the filler is installed and glued. Then the resulting blank is placed on the upholstery fabric, which is spread face down. The soft side of the workpiece should lie on the fabric. The fabric is folded under tension and secured with a stapler. You can see how to reupholster a chair in a video or photo. Then it will become more clear how to carry out the work at this stage. If there are large unfixed folds between the staples, they are nailed down with small nails.
When the material is secured, it is trimmed so that the long edges do not hang down. Next, they begin to install the seat in place and fasten it.
If the seat had springs, they must be reattached, distributed evenly over the entire surface. After all, the springs themselves do not wear out. In addition to the upholstery fabric, you will also need a layer of burlap, which will help withstand the mechanical impact of the metal.
Stool care rules
Regardless of whether there is contamination or not, you still need to take care of your stool. Follow simple rules:
Don't eat at the computer desk
This is positive for both computer equipment itself and furniture. Periodically pay attention to the wheels; they need to be wiped free of dust and lubricated so that sliding remains normal. It’s also not a good idea to rotate and roll around on the chair, bending the back. This causes damage to stool elements. When washing the chair, do not use excessive amounts of liquid, as this will cause the upholstery material to stretch. Clean dirty stains carefully with soapy water.
All stains should be washed from the edges of the stain to the center, so as not to spread it over a large area.
Everything done with your own hands is a pleasure, and looks no worse than the work of a professional. In addition, you can know exactly what materials were used and what step after what was done.
Reupholstery and assembly
The chair must be reupholstered step by step in disassembled form. For example, first cover the seat, then the back and small parts.
Place the frame of the part in front of you and place foam rubber on it. The edges of the softening layer may protrude slightly beyond the frame: this will soften the ribs and make the use of the updated furniture more comfortable. If you purchased thick and dense foam rubber, the corners can be cut off, making the transitions rounded.
Figure 4. Example before and after reupholstering a chair.
A layer of padding polyester will protect the foam from displacement and will greatly simplify the process of installing new upholstery. This non-woven material must be placed on top of the foam rubber and secured to the base using a stapler.
Then you can move directly to the upholstery. The fabric part must be placed on the base and carefully straightened. You need to start fastening according to the diagram, this will avoid displacement and skewing of the material. First, use 4 staples to secure the fabric to the ribs, approximately in the middle. Next, proportionally, stretching the fabric, fasten with staples. For example, 2 - on one side, 2 - on the opposite, and so on.
After the last bracket is secured, you can move on to tightening the next part. To make the updated chair look presentable from all sides, the back part can be covered with lining fabric, also secured with staples.
After tightening the last soft part, you can begin assembly. It is at this stage that a detailed photo of the furniture will come in handy. Remember how you disassembled the chair and repeat all the steps in reverse order. All screws and fastenings need to be tightened. If the chair has wheels, it makes sense to replace them with modern bearing ones.
Related article: Outdoor kitchen: fireplace, barbecue, barbecue and oven in the country (20 photos)
If all the steps were carried out correctly, you should see a beautiful, updated chair (Fig. 4).
Knowing how to upholster a chair with your own hands is a very useful skill. Once you spend time and effort studying the technology, tomorrow you will be able to update the interior of your house or cottage on your own and without significant expenses.
The best posts
- Grout for Ceresit tile joints
- How to lay tiles on the wall: laying and how to lay them correctly with your own hands, ceramic tiles yourself
- DC voltage source from power supply
- How to create a Provencal style in your home
- How to attach a door frame: tools, recommendations
- Brick window molding
- Old interior doors like new - easy ways to update them yourself? |+55 photos
- Tongue and groove boards: floor installation and photos of tongue and groove boards, do-it-yourself tongue and groove boards for walls, how to make a video, size
How to repair it yourself?
Chairs today have different designs, on which the algorithm for repair work depends. If this is an ordinary wooden product, then repairing it is quite simple. It is necessary to identify the problem, which is often poor-quality fasteners or a violation of the structure of the material. This can be corrected by replacing the wooden element (backrest elements, frame base, etc.) with a new one or simply tightening the bolt.
More difficult to repair are shell chairs, which often have fabric outer upholstery. To get to the breakdown, you first need to dismantle the fabric. The process of repairing such chairs is much more complicated, so it is not always possible at home.
Office chairs are mechanisms that consist of several parts. There are many reasons why this design loses its characteristics:
Rollers falling out. Often this can only be corrected by replacing the crosspiece or these moving elements
It is important to first check the cause of the breakdown (broken hole, missing retaining ring on the roller, etc.).
Gas lift malfunction. There are also several reasons for this, including improper fastening of the piastrum or malfunction of the control lever mechanism
Therefore, you should check these attributes first.
Breakage of the cross. The functionality of this element can only be restored by replacing it with a new one.
The back does not spring. The main cause of this problem is the violation of the integrity of the metal parts inside. Sometimes the spring mechanism also fails. Operation can only be restored by replacing parts with new ones.
Upholstered furniture used daily quickly wears out and loses its attractiveness. It is not necessary to purchase a new chair right away: when the frame is in good condition, you can replace the upholstery yourself and give the product a “second life.”
- Screws are removed with screwdrivers;
- Use wrenches to loosen bolted connections;
- Nippers and staples are removed with wire cutters and pliers;
- The new casing is secured with a stapler;
- used if the fabric covering has a complex shape;
- In most cases, the flaps are held together with a needle and thread.
New fabric is selected according to density and quality; tapestry, jacquard or velor are suitable.
- Sintepon;
- Foam rubber;
- Batting;
- Coir;
- Horsehair.
The advantage of do-it-yourself restoration is the ability to choose the most convenient structure for the updated chair.
- Burlap and foam rubber are cut to size for the seat;
- The padding polyester is cut 50–100 mm larger on each side;
- The first layer is burlap, the second is foam rubber;
- Due to its large size, the third layer of synthetic padding covers the “pie”;
- The edges of the top material are hemmed to the frame;
- The pillow in the middle is additionally fixed with threads in 4-5 places.
The chair can be upholstered with any material, depending on the client’s taste preferences, interior design or financial capabilities. This can be leather, its substitute or another textile analogue.
Removing the lower part
After selecting the tools, we proceed to disassembling the lower part of the chair. Inside it there is usually a frame made of wood, foam rubber on the back and seat, and also plywood with which the back wall is secured:
Be sure to remove the tenon parts using a rubber hammer. It is important to maintain the polish and not spoil the edges. The grooves are cleaned with a knife or scissors. First, the back wall is removed, then the plywood bottom, then the foam rubber is removed, the nuts are tightened and all metal parts are removed. You also need to get rid of all fasteners and foam padding.
Removing External Parts
Here you need to remove the upholstery material. This is done like this:
- using a screwdriver, unbend all the staples from the back of the chair and cut off the fabric with a knife;
- Next, all the foam rubber is removed; if it is worn out, it must be replaced;
- the frame must be completely rid of glue;
- The old fabric should be smoothed out and secured to the back with a stapler.
You also need to get rid of the cushions and other external parts that exist on the old chair. There is no point in throwing them away if they are not worn out and look normal.
How to cut new material?
When there is a pattern on textiles, you should think about how the elements will look and fit together
If the fabric is fleecy, then it is important to check the direction of the pile. It should be pointing down. Cutting should be done with a margin, since the fabric does not always lie evenly and fit perfectly
After several fittings it will be clear what quantity is required. When performing fittings, you need to use needles. With their help, the fabric is attached and the appearance is assessed. Such a mark will not leave traces
Cutting should be done with reserve, since the fabric does not always lie evenly and fit perfectly. After several fittings it will be clear what quantity is required. When performing fittings, you need to use needles. With their help, the fabric is attached and the appearance is assessed. Such a mark will not leave traces.
How to secure the fabric correctly?
Before fastening the fabric, you need to lay the parts on the frame and put foam rubber on them. If the foam is thick, the corners that protrude can be cut off. Next, the padding polyester is placed on top of the foam rubber and secured with a stapler. The fabric is attached directly like this:
The material is applied to the base and straightened. It is necessary to fasten according to the diagram in order to avoid displacement and distortion. Using staples, textiles are attached to the ribs in the middle. Then stretch the fabric proportionally, securing with staples. Two on each side is enough. The fabric should not sag, so it should be pulled very tightly. It is advisable to cover the back part with lining material for an attractive appearance. After tightening the last part, assembly is completed. If you remember what the chair looked like, that’s good, but it would be better to take a few shots so as not to make a mistake during assembly. Next, in the reverse order, as we disassembled, you need to fold the chair
It is important not to make mistakes so that the furniture has a diligent appearance. All screws and fastenings are tightened. If the chair is on wheels, for example, an office or computer chair, then it is reasonable to replace these parts with bearing ones. If all operations are carried out correctly, the chair will look like new.
If all operations are carried out correctly, the chair will look like new.
Some people are interested in how to reupholster a computer chair with their own hands? Carrying out this work is easier than reupholstering a home chair, since they are smaller in design. By following the rules and instructions, you can put your computer chair in order without spending money on a new one. Masters of their craft can tell you how to reupholster an office chair with your own hands.
Types of chairs
There are many different types of chairs, varying in level of comfort, cost, and methods of placement in space. The design is an “improved chair”, which has a soft back and seat covered with textiles, leather, faux leather, fur, and in some cases, armrests, a footrest, and a rocking mechanism.
The main classification looks like this:
- by purpose - for relaxation (interior), for work (office);
- according to design features - with a rigid frame, without a frame;
- at the place of installation - in the living room, in the garden or on the veranda, office (computer), gaming (game) rooms.
The design of the item itself is also different, there are:
- ordinary - installed on four legs, have a soft back, armrests, coffee stands, poufs, and other details that provide maximum comfort;
- chair-beds - designed for cramped rooms, significantly saving space. It is not recommended to constantly sleep on such furniture, but it is possible to place an unexpected guest who is staying overnight on it, and also to use it in a summer cottage;
- rocking chairs - made classic (on ski runners), with a pendulum mechanism (have a fixed base), spring (rattan papsan rocking chairs), as well as “Viennese chairs” (runners are connected in a closed circle);
- advertisers are especially comfortable, expensive models that can be fully reclined and have a footrest. Transformable manually or electrically. A ventilation system, mini-bar, vibration massage, etc. are sometimes built in here;
- hanging - it can be a hammock, an “egg”, a ball, a “cocoon”. Hanging is done on the ceiling, wall, stand, beam.
Frame models are made of natural wood, metal, plywood, chipboard, and plastic. Usually several materials are used at the same time. Frameless options are pillow bags filled with foam balls and synthetic fluff. There are also convertible, lightweight inflatable items.
The reupholstering process: step-by-step instructions
The process itself is not complicated, it is easy to cope with alone.
The first step is to disassemble the chair. To remove the backrest, you need to turn the screw at the back (with a large head); you can remove the back panel by opening the latches (by carefully pulling each corner).
A chair with a detachable backrest.
To disassemble the seat yourself, you need to turn the chair upside down. Unscrew the screws and detach the armrests.
Seat mounting points.
It is better to put all the screws in one place, so that by the end of the chair repair you simply do not lose them. Now you can start re-upholstering.
- The old upholstery must be separated by removing the staples. Staples that need to be removed.
Next, you need to apply foam rubber and cut it along the contour of the chair, then nail it with staples.
We cut out the foam for the seat of the chair.
Handle the stapler carefully; this tool is quite powerful. Stretch the new upholstery, securing it to the back of the seat base and backrest
Stretch the new upholstery, securing it to the back of the seat base and backrest.
The outlines of the chairs are rounded, and this should be taken into account when reupholstering an office chair so that there are no folds in the fabric. Excess “tails” must be cut off.
Required Tools
To reupholster an old office chair you will need the following tools and equipment:
- Furniture stapler (for securing new upholstery) and staples for it. ;
The size is indicated on the stapler.
- Screwdriver or screwdriver; Both tools are suitable for disassembling the structure.
- Scissors.
For cutting fabric.
A screwdriver can be found in every home, and a furniture stapler can be borrowed from friends or rented from a furniture store.
Having prepared everything you need, you can start working.
Master classes on upholstery of chairs
So, how to reupholster a chair with your own hands step by step is quite a troublesome task; it is important to take into account all the manipulations described above. At the same time, there are certain secrets that will help you perform the job at the highest level.
Here are a few of them:
- If the chair stands on legs, then you must first cover the entire end part and the rear lower bar with fabric. Only after this the leg is fixed. In this case, you will need to carefully make a hole in the fabric. You should not leave the holes for the legs untightened at the time of reupholstery, as the fabric in this place will gradually stretch and tear.
- If the armrests are soft, then it is better to do the upholstery in this order - first the back, then the seat and only then the armrests. The elements are fixed to the frame in the same sequence. In this case, it will be possible to avoid distortions or so-called “bubbles” on the foam rubber. The work will look neat and high quality.
You will get a beautiful chair without extra costs.
Remember that these tips will help you upholster upholstered furniture - not just an armchair. If everything is implemented correctly, the result will be such that it will be impossible to distinguish it from the factory one.
Advantages of reupholstering a chair with your own hands:
- You don't need to pay a master for the work.
- Upholstering a chair at home will take from 30 minutes to 1 hour - this is much faster than in a workshop.
- You don’t need to take the chair anywhere; you can replace the upholstery in your apartment.
- The costs of the procedure are minimal.
- Everyone has the necessary set of tools.
- Disassembling and assembling the chair is not at all difficult; you do not need any special skills or abilities. By upholstering the chair yourself, you can save both time and money.
Assembling a computer chair on wheels
After the box with the chair is unpacked, you should carefully examine all the parts contained in the package for cracks, chips or scratches.
The standard kit includes the following parts:
- Seat with backrest or solid monoblock.
- Two armrests.
- Rollers (5 pieces).
- Screws.
- Pneumatic cartridge.
- Crosspiece and linings on it (if necessary).
- Mechanism for connecting the seat with the backrest.
- Gas lift casing.
First of all, the rollers are inserted into the cross. In order for the pin to enter the beam of the cross, you need to press the wheel with a little force. To make this more convenient, place the crosspiece on the floor. If you cannot insert the roller manually, you can use a rubber hammer and gently tap it on the base between the spheres of the wheel. However, you should not hit the rollers themselves, as they are made of plastic and may break. After mounting the wheels, turn the crosspiece over with the rollers down and install a pneumatic cartridge in its center. Then a casing is put on it
At this stage, you need to pay attention to the top of the pneumatic cartridge: some manufacturers put a decorative cap on its button, which should be removed. If this is not done, the chair may not lower or rise during use. Now you need to install the armrests
To do this, you need to turn the seat over and inspect the place where they should be installed. As a rule, armrests are attached with three screws. After carefully examining the armrest, you should determine where its front and back parts are. Next, the screws are inserted into the holes and tightened. In some models, the armrests are attached to the metal base of the chair and brackets are used for this
Now you need to install the armrests. To do this, you need to turn the seat over and inspect the place where they should be installed. As a rule, armrests are attached with three screws. After carefully examining the armrest, you should determine where its front and back parts are. Next, the screws are inserted into the holes and tightened. In some models, the armrests are attached to the metal base of the chair and brackets are used for this.
After the seat is assembled, you should install it on the pneumatic chuck and press on top. You can also sit down in a chair to ensure that the air chuck fits tightly into the base of the chair. If the seat is not monolithic, but consists of a separate seat and backrest, then carefully insert the backrest into the seat. Now you should tighten the large fixing screw. Next, the backrest is placed on the corner and tightened with a short screw. At the last stage, you need to check the chair for functionality. To do this, you need to sit in it and pull the lever, which is located under the seat, down. If the chair goes down, you can stand up and pull the lever up. The chair should rise. The computer chair assembly is complete.
Video instructions on how to assemble a computer chair
