Having a functional and special purpose, determined by the name of bookshelves, these structures have long become elements of stylish room design.
Designers in the field of furniture manufacturing offer a huge variety of non-standard solutions and original ideas suitable for decorating a room.
By looking at all the different photos of book shelves collected in this article with your own hands, you can choose the best option for making them yourself.
The creative process, which is not complicated and simply implemented, requires some preparation and selection of ideas, selection of the necessary consumables, accessories, and tools.
Advantages of homemade shelves
Shelves for books will help keep the interior tidy and also provide an additional storage area. The advantages of building furniture yourself include:
- The ability of the master to independently choose materials, decor, sizes, shapes.
- A large number of ready-made projects with drawings and diagrams.
- Sufficient ease of construction work and a minimal set of tools.
Beautiful and stylish interior furniture is obtained by self-assembling the structure. Photos of interesting homemade book shelves will allow you to choose the right model for the job.
Requirements for homemade furniture
Any shelf, regardless of its model, is important in interior design. Thanks to the sufficient depth of the horizontal panels, you can place not only books on the shelves, but also souvenirs, toys, and other stationery.
Good furniture with sufficient storage space will be appreciated by both students and zealous parents.
Requirements for a homemade design that the master must follow when carrying out work:
Construction material should be carefully inspected before assembly for defects. This criterion is especially relevant for wooden panels, chipboard, MDF, and plywood sheets. A defect should be considered the presence of cracks, chips, insect passages, traces of rotting and deterioration.
Even the highest quality material needs pre-treatment, which includes grinding sharp cuts, removing gaps, knots, and treating with moisture-resistant compounds. Today, impregnation oil is most often used, which penetrates deep into the wood, protecting parts from moisture.
Before starting work, you should decide on the design model, the type of its assembly, the dimensions of the shelf as a whole and the dimensions of the horizontal slats. It is better to prepare a drawing in advance or use ready-made assembly diagrams, which will also show all the fasteners and fittings.
Particular attention is paid to the reliability of fastenings for hanging shelves that are attached to walls. A fallen shelf of books can cause injury, fractures or bruises.
Preparatory work
Identical shelves are cut from boards. A support rod is made from a block (the required length is sawn off). You should draw diagonals on the shelves and draw a square in the center of their intersection. Its cross-section must exactly match the dimensions of the bar. A through square is cut out in the upper and lower shelves. It should be such that the support beam fits into it without difficulty. Wood can be removed using a chisel. Next, the side vertical partition walls are made. All finished elements are sanded. To make the process easier, you need to mark the shelves - on the bottom and top sides - where the vertical partitions will be located.
Types of shelves by location
There are several main types of book shelves, depending on the location of the structure:
Floor shelving. Such models are used, as a rule, in apartments of sufficient space or in a private home. They consist of supporting structures and horizontal planks placed in several tiers.
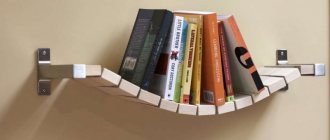
DIY hanging shelves for books. Compact and very convenient models. They can be arranged in the form of single hanging structures or in a checkerboard pattern, or in the form of original cubes.
Today you can find the most unusual shapes for shelves. But they are all similar in that they have sufficient depth of horizontal panels and reliable fastenings. A distinctive feature is the ability to free up space by raising the shelves up.
The second option is invisible fastenings
A book shelf can be mounted on the wall so that the fixing elements are completely invisible. In this case, the boards are installed on long screws (there should be 4 of them - 2 on each side). They are screwed in using wooden plugs (rods). The part of the screw that protrudes from the wall will support the shelf. To decorate the protruding element, you can use a plastic tube of the required diameter. It can be transparent or painted in any suitable color. It is recommended to use screws with a semicircular head. In the areas where these support elements will be screwed in, holes of the appropriate diameter should be drilled. Instead of metal screws, you can use pins made of hard wood. Being also supporting elements, they must fit into the recesses that are made on the underside of each shelf. Difficulties may arise with installing the pins strictly horizontally. To control the position (verticality/horizontalness), you must use a level. There are also supports in the shape of a violin, with a coupling or screw thread. It is quite easy to install shelves on them - both made of wood and glass. Such designs are quite durable and attractive in appearance. The holes for the supporting parts must be drilled accurately so that they are positioned strictly parallel.
Corner book shelf
Modular shelves are a very convenient accessory designed to fit modern interior styles. An excellent solution from modern designers is modular furniture, the size and shape of which can vary dramatically, depending on the situation.
Each individual shelf is presented in the form of one cube without a back wall or front. If necessary, such cubes can be stacked on top of each other, thereby increasing the area for storing books.
Tabletop designs are compact and practical models.
Assembly of boxes
The side walls are attached to the ribs of the rear side. For fixation, you can use nails and/or glue. After this, the top board and bottom are attached to the sides and back. After this, the entire structure is dried (if glue was used). All sides of the box must be proportional and equal to each other. The edges are ground, sharp corners and edges are rounded. Finally, the structure can be painted. If it is intended for storing children's books, then it can be decorated colorfully, make appliqués or use multi-colored paint. When choosing materials for finishing, it is necessary to take into account their safety for humans, especially for children.
What can shelves be made from?
The most important practical issue for the craftsman is the choice of base material. You can make original shelves or racks for storing books from the following materials:
Wood
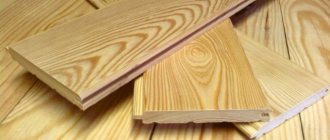
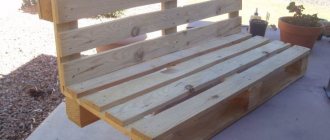
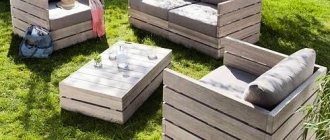
This can be either solid timber or wooden pallets. A very unusual shelf can be cut from a log frame. Before starting work, it is important to assess the condition of the consumable material and carry out high-quality pre-treatment with moisture-resistant compounds. Wood is a universal material for construction, delighting with its environmental performance and natural composition.
Plastic panels
Do-it-yourself plastic panels can be found in furniture and accessories stores, such as IKEA. The surface of the plastic is resistant to moisture, detergents, and tolerates temperature changes in the room.
You can easily remove dust and random stains from the surface of the shelf with a damp cloth. And the structure itself is low weight, thanks to the properties of PVC panels.
Fancy book shelves can be made from a combination of metal and tempered glass panels. The surface of the shelves has sufficient strength, and metal supports ensure reliable fastening and stability of the structure.
Rotating bookcase
It can be a piece of furniture and placed in a recreation area. The bookcase on roller wheels is very convenient to use. This design, painted in two colors (red and white or white and ocher), looks very modern and attractive. In general, the design is quite simple to manufacture. The main difficulty can only be fitting and fixing the components at right angles. To assemble the shelf you will need:
- A 2x2 cm block. It will act as a support rod. It is better to take timber from beech or oak.
- Boards 2 cm thick.
- Glue.
- Nails.
- Roulette.
- Square.
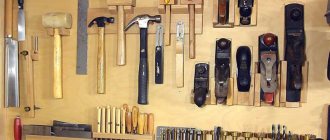
Tool for making a wooden shelf
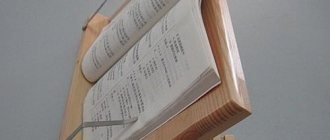
A classic example of self-building book shelves is the manufacture of a wooden structure (compact desktop shelf). You can install such a shelf on a wide windowsill.
To work you will need:
- Jigsaw.
- Planer and sandpaper.
- Moisture resistant oil and sponge.
- Compositions for decoration (paint, stain, acrylic varnish).
You will also need fasteners (dowels and screws) and drawings of the future design.
Step-by-step production of a shelf
It is better to carry out all assembly work in accordance with the prepared drawing, which clearly indicates all the parts with dimensions, fastener locations, and additional accessories (for example, built-in spotlights along the contour of the furniture). Instructions on how to make a book shelf with your own hands:
- Parts for the shelf are cut out using a jigsaw.
- Carefully grind the surfaces, trying to get rid of all gaps, chips, and sharp edges.
- After impregnation with oil, they proceed directly to assembling the structure.
Parts can be fastened according to various patterns: strictly horizontal direction of shelves, shelves at an angle, V-shaped shelves.
Assembly technology
The four vertical partitions are glued and nailed to the support rod. This will form the first floor. The entire structure is glued and nailed to the bottom shelf. The upper edges of the vertical partitions are lubricated with glue. The next shelf is placed on the rod and nailed. Next, the vertical partitions of the next floor are fixed in a similar way. The nails are driven in at an angle. Their caps need to be sunk with a rivet hammer. By the way, you can replace them with wood screws. Next, the next shelf is glued and nailed. The work is repeated until all parts are installed. At the level of the last vertical partitions, the supporting central rod is cut off. Next, the four side walls are glued and nailed. They should be such a length that their upper part protrudes 1 and the lower part 2 cm beyond the edges of the horizontal elements. Four rollers are attached to the axes at the bottom. Their total height is 9 cm. After this, the surfaces are carefully sanded again, all edges are smoothed, and the edges are polished. After completing this work, you can begin finishing the shelf. It can be painted, varnished or decorated with decorative carved elements. This design does not take up much space, is compact and convenient.
