Hanging height
Before you start assembling the set into a single “wall”, you need to decide on the height at which the furniture will be hung. To correctly carry out these manipulations, preliminary calculations must be made.
In addition, it is worth deciding on the mechanism that will hold the row of kitchen cabinets.
It is necessary to correctly determine the gap from the tabletop to the bottom of the set. This primarily provides convenience to the owners of an apartment or house in using furniture.
Often, GOST is used to determine this factor and the main value is taken to be a distance of 45 cm, but this is not entirely correct.
The boxes should be located at eye level of the owner to create the most comfortable conditions for their use.
The main measure for determining height is often the height of the household.
For people with average height, this value varies from 55 to 65 cm. The optimal height is considered to be the one when a person, without third-party devices, reaches the highest shelf and takes the desired item without risking letting it go from his hands.
The most important thing is comfortable use of kitchen cabinets.
If you do not plan to install the lower part of the set or tabletop, then you should take into account the calculations presented in the table:
Human height/mount height (in centimeters)
- 155-165 / 175-180
- 165-175 / 185
- 175-190 /200
You need to remember: attaching wall cabinets is a serious procedure; due to incorrect calculations, all mistakes will be noticeable.
Let's take a closer look at some of the issues that we will have to face during the installation of wall-mounted furniture.
Railing as a decorative element
“You can make the atmosphere more comfortable with the help of originally designed ceiling rails for the kitchen”
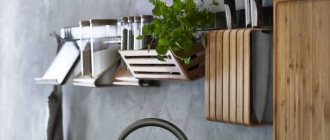
Modern roof rail systems are functional and beautiful in appearance. The last quality cannot be ignored, and in fact, no one intended to do so. Designers love to use roof rails for kitchen decor as independent elements. So, in Italian and Provence interiors, they often hang frying pans and saucepans of various sizes and colors on hooks. Properly thought out and not creating a feeling of untidiness and chaos, combinations of open shelves and rails help to avoid the bulkiness of wall cabinets.
Ceiling rail with dishes will fit perfectly into a country-style kitchen
In kitchens decorated in modern styles, priority is given to roof rails made of chrome and nickel, which have an unusually beautiful shine. But for classics and country, it is better to find products matte or designed to look like copper, old gold, or bronze. Fittings of this quality can bring the charm of antiquity into the kitchen space, thereby giving it a special coziness.
Bronze railings for a country style kitchen
In harmony with the rest of the furnishings, roof rails live in kitchens decorated in Californian, Mediterranean style. For a high-tech kitchen, you should look for a crossbar with a shiny chrome surface. It is desirable that it be made of high quality stainless steel.
Chromed railing for a high-tech kitchen
The ultra-modernity of techno and hi-tech style is not a reason to fill the entire kitchen space with roof rails, so place metal rods rationally and try not to overload the interior with them.
In a classic kitchen furnished with wooden cabinets and stone countertops, copper or bronze roof rails would look most appropriate.
Copper-look railing for a classic kitchen
Bronze will also be in demand for retro kitchens, although the bronze railing in their setting can be completely replaced with a gold-plated model.
You can make the atmosphere more comfortable with the help of originally designed ceiling rails for the kitchen. You can hang pretty baskets, onion and garlic bunches, and flowers in pots on them. Also, as decoration, laminated photographs, colorful potholders, bright napkins and other accessories are attached to the rods. You can equip it with railing and lighting. It will turn out both stylish and practical.
Railing with lighting will make the kitchen more comfortable
Those who want their kitchen to be minimalist are unlikely to be able to use open storage systems. The style does not involve displaying a large number of accessories. In such a strict, even ascetic, decor, there is simply no place for multi-tiered railings with various “fillings” like the bright and colorful decorative elements mentioned above. Although a mount of this type with one type of object placed on it can even emphasize the severity of the situation. A set of kitchen utensils made in a laconic design, or unusual spice jars in strict geometric shapes, would be appropriate here. Glasses placed on a chrome stand will not spoil the style, of course, only when we are not talking about the standard version of a minimalist interior, but about a more or less mundane home kitchen.
Multi-tiered railing for a minimalist kitchen
But let's return to the styles, unthinkable without charming details. What is important in them is not the presence of the railing itself, but what appears on it. For vintage, it is ideal to place on the shelves wooden mills that our grandmothers once used to grind spices and the same mortars, with a touch of time. The rustic direction will be impressed by potholders with a checkered or small floral print, as well as all kinds of jars decorated with decoupage.
Railings in the kitchen in vintage style
Shabby chic and urban style are simpler in this matter. Large railing sections can be filled with any kitchen utensils.
Mounting options
There are 2 methods by which fastenings for kitchen cabinets are made. Installation is carried out:
- One line, that is, the location of the fastener is equidistant from the ceiling;
It is considered the most common type of accommodation. This way you can easily secure the cabinets yourself. - Different levels are used for hanging, that is, objects are at different heights.
This method is used much less frequently, since its implementation is much more complicated than a linear fastening scheme.
The first method is popular because you can use only your own strength to attach kitchen cabinets, without turning to outside help.
The choice of option is determined by the number, size and depth of wall cabinets.
The second option for attaching fixation items is less common among ordinary people. This is because the roof of this furniture is used as an additional surface.
Any of the proposed variations is perfect for both a room with a small area and a large one.
What are the benefits of roof rails for the kitchen?
First of all, its ergonomics. The designs were first used in restaurant kitchens. In this simple way, the chefs provided themselves with unhindered access to the most frequently used accessories and managed to avoid crowding the space with additional cabinets. Later, the innovation was adopted by bars, and only then migrated to our home kitchens. Housewives liked that kitchen rails can be installed almost anywhere in the space and can be used in a wide range.
The railing can be installed in any convenient place in the kitchen
The popularity of the innovation was added by its reasonable price, ease of installation, structural strength and endurance, and the ability to easily fit the accessory into the interior.
Installation methods
By using new fittings used to attach modern kitchen cabinets to the wall, a person has greatly simplified his life, because the installation of wall cabinets has now become much easier. The new support system helps eliminate small errors associated with marking. In addition, it adds stability to the entire structure.
In addition, you don’t need to use a lot of force, and the owner can handle this task himself.
To make the fastening necessary for installing kitchen cabinets, you should use a special rail and hanger.
The hinge has a hook, thanks to which it is attached to the side wall of the box. At the same time, it is completely invisible.
There are 2 installation methods:
To attach the cabinet to the wall, a specially prepared rail and a device called a hinge are used.
This fastening method will use hinges and fasteners.
The advantages of the first option are:
You can do all the work yourself, without any help.
The second option is more accessible (it uses hinges as well as fasteners), but takes more time and requires additional help.
You will need help with this installation method.
Regardless of the option, the following materials are needed for work:
Materials and tools you will need.
Required tools:
What are roof rails made of?
Modern production offers roof rails:
- stainless steel,
- anodized aluminum,
- become,
- nickel,
- brass
Almost all products are chrome plated. The plugs and other railing elements are made to match the color of the main rod.
Often the roof rails are chrome plated
In order for the railing to fit harmoniously into the overall style of the kitchen, the accessory can be decorated in gold, bronze, or copper. Spraying of this kind is not just decorative, it performs a practical task, protecting the holder from the effects of an uncomfortable kitchen microclimate.
Kitchen railing decorated in bronze
In terms of weight load, stainless steel products are the most durable. Anodized aluminum is best used to create short sections.
Preparatory actions
To begin the process of installing kitchen cabinets, you need to follow these steps:
- Alignment of vertical walls, please note that for a corner kitchen the angle of the walls at 90 degrees is provided (most often this process is carried out using drywall, and thanks to this alignment occurs);
- Applying markings (this stage must be performed using a plumb line, pencil and level);
The points at which the kitchen cabinets will be fastened must indicate the required height. - Electrical installation (installation and connection of all sockets and lamps);
- Wallpapering or painting walls.
These points will be the basis for the work ahead.
The next step is to prepare tools and consumables.
Displacer built into the wall
This workspace organization idea is not about optimizing storage, but rather about effective time management. An additional tap can be placed above the stove! This reduces the time the cook spends walking to the sink and filling a pan with water, for example.
To install the faucet, you will need the services of a plumber. You also need to make sure that the surface around the faucet can handle large amounts of moisture. It is better if it is finished with tiles or natural stone.
Of course, installing such additional equipment will increase the cost of your kitchen remodel, but it is worth it, especially if you are constantly faced with the need to lift heavy containers of water.
Installation instructions
When finished, you need to attach the strip using dowels or self-tapping screws.
Fixing cabinets on fastenings.
Test doors must be closed and opened several times to determine whether adjustment is needed or whether they are attached smoothly.
Advantages and disadvantages of the plank
This simple design has a number of advantages, which is why it has gained its popularity:
- Even non-professionals - people with basic construction skills - can cope with the installation.
- When installing adjustable awnings, there is no need to measure and drill holes for each wall hanging cabinet separately. The general level is reflected.
- Using anchor bolts you can adjust the position of the cabinets. They can be placed on the same level, regardless of the flaws of the wall.
- Unlike fastenings for wall-mounted kitchen cabinets with dowels, a design with a strip is considered more “durable” and reliable. Even if a couple of screws loosen over time, the rest will hold well even when the cabinets are as full as possible.
The system has no global shortcomings. The only thing you should keep an eye on when purchasing a bar is the quality of the material. Low grade metal will bend a lot and may even break during furniture installation.
The locking mechanisms of kitchen cabinets have to endure heavy loads.
Installing the top of the furniture
The first priority is to fix the hooks in the middle position. For this, adjusting screws are used. After this, you need to fix them from the inside on the side walls so that the hook is on the outside by 2-3 mm and it is possible to fix them on the fastening bar.
The design of the hinge allows you to adjust the mount in height and depth.
The next stage is applying markings to the wall. But for this you must follow a number of rules.
This is done for clarity, so that you can see the number of centimeters that need to be taken into account when making the final marks.
The next step is to make holes in order to install the rail. Here are some useful tips that will come in handy:
- If the drill "jumps", make small notches using a nail or punch and hammer;
- If the wall crumbles during work, then first you should make a small hole, and then drill it out to an acceptable size;
- If you need to change the drilling depth, you need to use a prepared dowel;
- If you need to make a hole in a concrete wall, but there is no hammer drill, you can do it with a hammer and a punch.
Wiring locations require special attention.
Upon completion of all actions, the dowels are placed in the holes. Next, the mounting strip is installed on the fasteners. The cabinets are fixed to the mounting plate. To adjust their position, screws of mounted mechanisms are used.
To make the set look like a single “wall”, they need to be connected closely to each other.
The elements are fixed with clamps, starting from the corner, avoiding chipping (in accordance with the above instructions).
Thus, alignment of the overall ensemble of cabinets in one plane is achieved.
The next step is to drill holes between the tightly fitting parts of the headset to then fasten them with intersectional ties.
At the final stage, shelves are installed and doors are secured.
Complete set of roof rails
In addition to the supporting rods themselves, the railing configuration may include:
1. Hooks.
2. Mesh shelves.
3. Dryers.
4. Glass holders.
5. Towel holders.
6. Magnets.
This set of useful devices turns a simple metal crossbar into a full-fledged storage system.
Standard kit for kitchen railings
Features of hanging on drywall
The main difficulty when fixing a headset to drywall is its inability to maintain strength under heavy loads. For this reason, the use of standard fasteners is not recommended. Even the small weight of a cabinet installed using a mounting anchor will easily damage the plasterboard lining.
Therefore, only decorative shelves and paintings are allowed to be hung on plasterboard walls.
If the set needs to be fixed on a plasterboard surface, then a wooden beam or a thick board, which is fixed to the wall thanks to anchor bolts, will come in handy.
Shelf material
When purchasing or making shelves for the kitchen, you should carefully consider the frame material.
The base and horizontal strips must meet the following criteria: Durability, Beauty, Environmental friendliness.
The photo of the kitchen shelves shows that the most relevant solutions are the following options:
- From the array. This is an ideal choice for a kitchen location. Wood provides an opportunity to realize the most daring ideas. The advantages of solid wood products are strength, unique texture, aesthetics, and environmental safety.
- From chipboard. Such furniture is valued for its availability and low cost. On sale you can easily find models for every taste. Minus - there is a possibility of releasing harmful substances if the material is of low quality.
- Made of metal. These accessories are popular with many designers. They are in perfect harmony with all surfaces and, if properly treated, last for quite a long time.
- Made of plastic. The advantages of plastic models are moisture resistance, ease of maintenance, and light weight. Disadvantages: brittle edges, low resistance to high temperatures.
- Made from tempered glass. Such designs are distinguished by good strength qualities and stylish design.
Classification of fastening structures
Although the cabinets are fixed directly to the hangers themselves, there are still special designs that are attached directly to the wall. With their help you can carry out this operation. Among them are some of the most popular products:
- Self-tapping screws. A relatively simple option, which is used to fix structures that are not susceptible to significant loads.
- A crutch is the same self-tapping screw, but it has an L-shaped end, which limits the sliding of the cabinet of such a loop.
- The mounting strip (mounting rail) is a special metal profile with several holes. The upper edge of this product lags slightly behind the wall and forms a kind of hook on which the cabinet is hung.
Useful drilling tools
A jack of all trades always needs certain tools to work in a private house, on a summer cottage, in an apartment, or when building his own house. Many of them are not even worth purchasing if they do not require constant use. For example, for drilling, there are many different attachments that will greatly increase the functions of your drill and significantly expand them.
Let's look at some devices for auxiliary potential.
To obtain precise holes of significant diameter in different workpieces, a device such as a drilling and milling attachment will help to carry out individual milling work.
Make a milling machine out of a drill.
The next device worth mentioning is very expensive, but has the highest versatility. You will sharpen all the tools that you have on the farm, be it knives, shovels, axes, hoes, various drills, effortlessly with the universal sharpening device.
When purchasing drill attachments, be sure to check their compatibility.
Holder with clamp. With its help, you can fix the drill anywhere, use it with various kinds of devices, use it as a mini-lathe, sharpening, milling or grinding and polishing machine.
The drill holder allows you to quickly secure the drill.
All kinds of attachments are also designed for drills. These can be stops that limit the depth of drilling, platforms with which you can drill at a certain angle or perpendicularly. There are nozzles that are adapters and extensions of different designs: offset, angled, flexible.
The angle drill adapter is designed for hand and electric drills.
Metal cutting attachments turn your drill into a one-of-a-kind tool. Some resemble sheet metal shears, while others have a different feature, such as roller shears. The nozzle, called the “Cricket,” seems to cut through the metal.
The main advantage is that they do not damage the polymer coating of the metal.
There are also other attachments designed for monotype work.
- For installing aluminum rivets. There are types for both the same size and those with interchangeable bushings for different calibers.
- Tape-shaped attachment for self-tapping screws. With its help, you will significantly save time when working with plasterboard partitions or when you need to secure other materials with self-tapping screws.
- A belt sanding attachment will completely replace a sanding machine, and it will be much cheaper in cost.
- An attachment with which you can turn your drill into a hammer drill will not be superfluous.
- Using the corner pruner attachment, you can cut various cables, as well as tree branches.
- Using a variety of attachments, the drill will replace your jigsaw, circular saw, pump, and you can polish surfaces and sharpen drills.
- There are unusual attachments.
Whatever attachments we use, the main thing is that the work is enjoyable.
