The final stage of renovation work in a house or apartment is usually the purchase of window textiles - curtains, curtains and drapes. But in order for these decorations to harmoniously complement the design, they need to be secured to the wall with something.
Window cornice is an important element of interior decor
Before hanging a curtain rod on the wall, you need to accurately mark the surface and take into account all significant dimensions. Each type of cornice has its own installation method, non-compliance with which can lead to damage to the wall or window textiles. The rest of the article describes in detail how to hang a curtain in accordance with all the rules and regulations.
How to hang a curtain rod on the wall?
The cornice must be chosen such a length that the completely open curtains open the entire window opening
At first glance, the question of how to attach a curtain to a wall does not pose any difficulties. What could be easier: drill the wall and that’s it. But in reality everything is much more complicated. It is necessary to take into account the geometric parameters of the room, which are very often far from ideal. Also an important role is played by the material of the surface on which the fasteners are planned, as well as the side of the world on which the windows face.
Calculate the correct height at which the cornice will hang
So, let's summarize. What influences the suspension installation process?
- Dimensions of the room and its geometric parameters.
- Type of cornice.
- Mounting surface material.
- Type of window textiles, its weight and quantity.
- The side of the world that the room's windows face.
- The presence of a window sill and the size of its protrusion relative to the window.
- The presence of a heating radiator.
Important! Before you begin installing a hanging structure for curtains, find out the material of the surface to which you plan to attach. The choice of fasteners, as well as their quantity, will depend on this.
Basic parameters for determining where to attach the cornice
The first step is to decide on the gap between the outermost tulle and the window opening. Here attention is drawn to the most protruding surface. Usually this is a windowsill or a heating radiator. When renovating a room, carried out in compliance with all building rules and requirements, the width of the window sill should be greater than the edge of the open window, and the heating radiator should be installed exactly under the slope. Therefore, the indentation is made from the window sill.
Not all apartments have window geometry made according to GOST standards. Moreover, modern construction in our country is determined by European trends. This is also where construction standards come from, which clearly differ from those adopted in our country. Therefore, when determining the gap between the outermost (usually tulle) curtain and part of the window, immediately take into account these three distances:
- from the windowsill;
- from battery;
- from an open window.
The minimum gap value is 7-10 cm.
At the next stage, you need to pay attention to the geometry of the wall and ceiling. The curtain crossbar should be positioned strictly parallel to the ceiling joint with the window. With this placement, the visual qualities of the room will be properly respected.
Taking measurements when choosing cornices and curtains
Advice. Be sure to place the suspension or its brackets parallel to the ceiling.
To do this, step back the same distance from the ceiling for each bracket and make a mark for the holes.
We mark on the wall the places where the holes will be made
The height of the indentation depends on the brightness in the room. If the bedroom windows face south, then there will be a lot of sun during the day: in this case, it is better to hang the curtain almost right up to the ceiling (a 5 cm gap will be enough). If the room is located north, the indentation can be increased to 15 centimeters.
Making holes for the brackets using a drill
Materials and tools for work
For installation you will need:
- hammer;
- dowels and screws;
- hammer drill or electric drill, drills;
- pencil and tape measure;
- plumb line, level.
Additionally, you will need a stable ladder or stepladder, with which you can comfortably and safely reach the mounting location.
To increase the reliability of the entire structure, craftsmen recommend fixing the dowel with epoxy resin or liquid nails - this way the finished product will be properly secured and will withstand even heavy loads.
Assembling the curtain before installation
Installation instructions for metal cornice with decorative elements
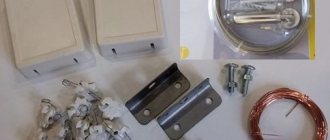
Before hanging the curtain rod on the wall, it must be completely assembled on the floor. The most common design is a direct suspension, consisting of:
- metal guide (crossbar);
- brackets;
- rings or clothespins for securing curtains;
- stubs;
- decorative body kits;
- fasteners
Rings and clothespins may be missing. Instead, loops are sewn onto each curtain, tulle or lambrequin through which the crossbar is threaded.
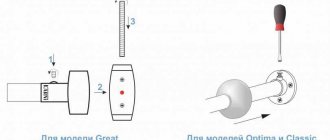
First, rings (if any) are put on the crossbar. Then the brackets are attached. The location of the latter depends on the manufacturer of the product. Some companies include compatible grooves in the brackets and crossbars, allowing you to easily attach the two elements together. Other models are fixed in an arbitrary place. In both cases, fastening is carried out using special bolts.
After installing the bracket, they proceed to installing the plugs and decorative components of the suspension. Most often, decorations are made in the form of metal forging and wood carving. For ease of installation, they are combined with plugs.
We fix the brackets in the selected places
Advice. When choosing forged metal products, pay attention to the finishing of the surfaces. In order for the curtain to maintain its beautiful appearance for a long time, it must be treated with a primer or special resistant paint. It is worth noting that it is difficult to repaint forged twisted parts yourself.
After fixing the plugs, as well as marking the wall, you can proceed to drilling holes for fastening the suspension.
Cornice mounted on special brackets
Color solutions
The color of the metal curtain rod is selected:
- Match the shade of the wall covering. The bar can match in color or act as a contrasting accent.
- For ceiling decoration. A bar in the color of the ceiling allows you to visually increase the height of the room.
- Depending on the types of curtains. Curtains and cornices should create a single stylistic ensemble.
- Under furniture or lighting fixtures. Forged elements that replicate the decor of a chandelier or the shape of furniture handles look interesting.
The metal bar looks great in its “natural” form. The noble shine and specific texture do not require painting.
How to attach the bracket to the wall?
Schemes for installing a profile cornice to the wall
The procedure for attaching to the wall (as well as to the ceiling) is the same in all cases. The only difference is the choice of fastening elements, which in turn depends on the wall material.
Installation of profile cornices to the ceiling
This is what material the wall can be made of.
- Brick.
- Cinder blocks.
- Gas silicate blocks.
- Reinforced concrete slabs.
- Wooden beam.
- Plasterboard cladding.
- Layer of plaster.
The last two points, of course, cannot be present in the apartment as an independent wall material. But as a finishing layer - easily. When installing a hanger for window textiles on a wall, the best base for mounting is wood, concrete or its derivatives. In the presence of drywall or an impressive layer of plaster, the inexperienced layman has to be puzzled.
For mounting brackets to a brick or concrete base, ordinary dowel-nails are suitable. The diameter of the fastener, as well as its quantity, is selected based on the weight of the product and the textiles on it. Accordingly, the higher the weight, the larger the diameter of the dowels you will have to buy. For “particularly severe cases” you may even need anchor bolts. They are made of metal, so they carry high loads.
Installing a ceiling cornice to a concrete ceiling
Anchors must be installed for large curtain formats. For example, Japanese sliding structures for panoramic windows have an impressive weight due to their steel base, as well as an automatic sliding drive. In this case, you cannot do without high-quality fasteners.
But ordinary dowels are not suitable for plasterboard sheets. Here you will have to buy special drop-down fasteners. A butterfly dowel works great. Thanks to the increased fixation plane, the gypsum board does not deform under significant loads. But for heavy objects you will still have to use the same anchors. In this case, the order of work is as follows:
- a sheet of drywall is drilled with a wood or metal drill to the base of the wall;
- after a complete passage of the drywall, the main wall is drilled with a drill in stone or concrete to the size of the anchor;
- the entire structure is secured through a bracket into a metal dowel.
Be sure to keep in mind that the anchor must extend into the concrete wall to its full possible length. With this method, the reliability of the structure will be high.
The most unpleasant case is the presence of a thick layer of old plaster, which also crumbles at the touch of a finger. It is very problematic to secure anything in such a wall, not to mention a heavy curtain. Here you have two options.
- Use an anchor in the base of the wall.
- Strengthen the plaster layer with special compounds.
If you are going to hang one light tulle in the kitchen, there is no need to drill the wall to the brick. Do the following:
- drill a hole of a larger diameter for the dowel (2-3 mm);
- insert the dowel, filling the voids with liquid nails;
- let the mixture harden;
- attach the bracket.
This is a very reliable method of fixing the suspension in a loose layer of plaster.
But if we are talking about the full design of a window opening (lambrequin, curtain, etc.), then only anchors will help here. The procedure is the same as for installation in drywall. Upon completion of installation, gaps in the plaster must be filled with cement mortar or tile adhesive.
Scheme for attaching a cornice to a suspended ceiling
If the ceiling is suspended or suspended: what to do?
Recently, suspended and suspended ceilings, which are not intended for additional loads, have begun to “appear” in people’s homes. In this case, you can use two options, such as:
- During the installation of such ceilings, it is necessary to take care of the installation of mortgages, to which, subsequently, either brackets or ceiling cornices will be attached.
Mortgages under suspended ceilings - During the installation of such ceilings, it is necessary to provide special niches so that it is possible to attach the products directly to the primary ceiling.
Second way
Both options are often used because they actually solve the problem. In the second case, you get a hidden cornice, which often looks more modern and mysterious.
When installing mortgages, there are 2 options: installing a solid block of wood or installing small sections. Naturally, installing a solid block will help save some time on fastening, and also makes the fastening more reliable, unlike separate bars. When installing individual bars, you need to remember the distance between them, knowing in advance which cornice will be installed.
Due to the curvature of the ceilings, when installing suspended or suspended ceilings, they have to be lowered by more than 5 centimeters, so installing mortgages becomes more complicated. In this case, the mortgages will have to be attached to metal corners. It should be calculated so that the lower surface of the mortgage is at the level of the ceiling frame.
If you need to lower it lower
If the ceiling is mounted from plasterboard, then the profile can be used as a mortgage, securely fastening it to the ceiling. To secure the cornice, you will have to use metal screws. This fastening is quite sufficient for reliable fastening of the cornice.
Hidden niche for a cornice on a suspended ceiling. Installing a niche under the cornice from Asta M
Attaching curtains to two windows
Very often people ask: “If there are 2 windows in a room, how can I hang a curtain on 1 cornice?” There is no particular difference when installing the suspension on two adjacent window openings instead of one. Here it is worth paying attention to the size of the room. If the room is smaller and you want to visually enlarge it, then it is better to install a separate cornice for each window opening.
But for large rooms, especially if there are high ceilings, installing one solid pendant will give the room a frantic grandeur.
The installation process is the same as for one opening. Maintain all significant gaps. If you plan to install one solid cornice, consider the number of brackets per crossbar length. There should be 2 brackets for every two meters. That is, if the length of the crossbar is 3 meters, then there should be three fastenings to the wall.
Self-installation of a tubular cornice
Size range selection
The size of the cornices is determined by the material and type of construction. It is selected taking into account the parameters of the room being decorated. Tubular models are equipped with rods with a diameter of 16-40 mm. Mini-bars are more compact - 5-15 mm.
At the same time, in two-row models, two versions of rods are usually included - the main one with a diameter of about 28 mm and the tulle one with a diameter of 10-16 mm. The length of the rods reaches 2-4 mm, although three-meter options are most often chosen.
Plastic tires are offered in two standard widths - 60 mm and 90 mm, although in some cases exclusive models are both narrower and wider (up to 300 mm). But their length reaches 4 m.
The length of the aluminum structure can reach 6 m, and therefore it can be installed on windows of various parameters. In addition, it is possible to use joining elements and lengthen the entire structure.
Dismantling rules
If you need to remove an old curtain hanger, there are a few rules to follow.
- First, remove the curtain from the rings, clothespins, or hooks.
- Next, carefully unscrew the screws, being careful not to touch the facing part of the brackets.
- After the last screw is unscrewed, the suspension can be freely removed.
The dismantling process is best done by two people. This way you are guaranteed to save the product.
If you are hanging a new cornice, you need to drill out the old dowels from the holes and seal the wall with cement mortar.
Check out the selection of photos below that show different methods of attaching curtains to walls.
The mounting of curtain hangers on walls can be determined by different cases. The presence of suspended ceilings that do not allow the brackets to be fixed without damaging the integrity of the coating, incorrect ordering of window textiles according to the length - all these shortcomings are easily eliminated by installing them on the wall.
How are curtains attached to the cornice?
Curtains are placed on a metal cornice due to:
- Kryuchkov. Inexpensive holders, easy to remove and hang, universal.
- Curtain tape. The tape is sewn onto the fabric to form folds. Attached to the cornice with plastic loop holders.
- Eyelets. They ensure the sliding of matter, look stylish, and are suitable for rooms in any style.
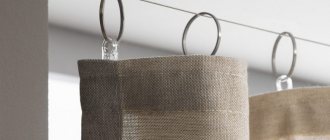
- Rings. A simple mount that gives the window design an interesting look. Provides effortless opening and closing of curtains.
- Kuliski. A pocket formed from the top of curtains. Minimizes friction, prolongs the service life of curtain rods, and ensures silent movement of the curtain. Option for thin materials.
- Loop. They do not damage the bar, move gently, do not create excessive friction, and do not scratch the profile.
- Alligator clips. They can ruin the canvas and sometimes look old-fashioned. Suitable for vintage and classic curtains.
Stroyobzor.info
Stroyobzor.info - the site provides a complete description of building materials used in both low-rise and industrial construction
- home
- Site Map
- Materials Zero cycle Piles
- Brick, stone, blocks
- Concrete, mortar, cement, additives
- Bulk materials
- Concrete products
- Construction fittings
- Foundation
- Window
- Facade materials
- Insulation materials
- Roof
Advantages
There are two types of plastic curtain hangers - round and tire-shaped. Ordinary round parts do not stand out in anything special and look like a simple tube with tips on the ends, attached to the wall. They do not have any particular advantages or disadvantages compared to standard metal or wood hangers, except for the difference in price - plastic parts are cheaper. Another thing is plastic wall curtain rods in the form of a tire. They have a certain set of advantages:
- The design is very light.
- The cost of the cornice is low.
- If necessary, installation can be carried out both on the wall and on the ceiling.
- There are one, two and three row models.
- The length of the structure is practically unlimited, since several tires can be connected into one large composition.
- There are corner curved modules that will allow you to assemble a structure with curves.
- The color of the plastic is white and does not stand out against the background of a standard ceiling design.
- If necessary, you can decorate the outside of the product using a special decorative tape.
- Installing the suspension is no more difficult than installing standard rods.
- Caring for the product is very easy, thanks to its water resistance.
The only disadvantage of such tires is the restriction on the weight of the fabric used to make curtains. However, a plastic tire can easily withstand most modern curtains.
How to choose a cornice
When choosing, consider the following characteristics:
- Correspondence to the curtain material.
- Type of cornice and its design (taking into account the material of manufacture).
- Durability.
- Width.
- Number of rows of guides.
- Method of fastening.
Let's look at each criterion in more detail.
Compliance with curtain material
When choosing a cornice, keep in mind that different models correspond to different types and designs of curtains: for example, it is impossible to install heavy lambrequins or other thick curtains on “weak” curtains even with all the desire, the structure will turn out to be extremely unstable. Therefore, you need to choose curtains and textiles at the same time, taking into account the weight of the latter and the strength of the former, already approximately imagining what kind of design solution interests you.
Type of cornice and design
They are made of plastic, wood and metal.
Plastic models are presented in the form of a hollow oblong part with slots for the movement of runners with hooks or in the form of a hollow tube. These are very light and fairly stable curtains of low cost, which are most often attached to the wall using brackets and decorated with decorative baguettes.
Wooden cornices are made from durable wood - oak, opex, beech, mahogany, pine, and therefore are very massive and are installed only in apartments with sufficiently durable steel by us. They can be covered with paint, patinated, decorated with carvings, varnished. They are used with heavy lambrequins and light tulles, as they can withstand heavy loads.
Metal structures are heavier than others. Aluminum, bronze, brass, and steel are used for their production. Forged models are made by hand and therefore are not cheap. As a rule, metal curtain rods attract with their stylish design - the rod of such curtains is a tube with engraving or reliefs, figured tips, often with silver that chromed, patinated surface.
But the most important criterion when choosing the type of curtains is the design of the system. There are string and baguette (tire) cornices and structures with a bar.
On string cornices, the fabric is suspended on a metal wire - a string - which is tensioned using a threaded mechanism. This is a simple and affordable option, which, however, does not support heavy textiles - it sag and breaks immediately or over time. Therefore, such designs are only good for airy fabrics - the absence of a massive curtain will emphasize the feeling of lightness and spaciousness. They will be relevant in minimalism, hi-tech, Scandinavian style.
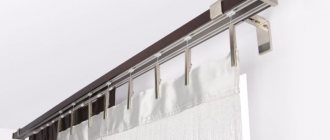
Curtains on baguette curtain rods can be secured with hooks installed in the guide profile or tire (the second name for such structures is bus curtain rods). Fasteners with fixed curtains move along one or several rails laid in the profile, on small rollers. Most often they are plastic.
You can play with the appearance of baguette cornices, since they are closed with a decorative overlay that can imitate stucco, wood, metal of any color and texture typ. They look authentic in modern, classic and Scandinavian interiors.
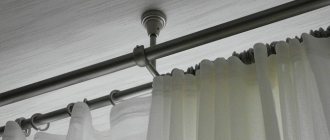
The most universal option is a curtain with a barbell. It is a long guide on which curtains are placed, secured with hooks, rings or loops.
Cornices can also be ceiling or wall mounted, but we will talk about this a little later - at the installation stage.
Mounting method
Fixation using brackets is the simplest, most common and reliable method, which is relevant for curtains with rods and strings. If the curtain is made in the form of a pipe, then the bracket is put on it, and the other side is attached to the wall using self-tapping screws.
The brackets are made of the same materials as the cornices: wood, plastic and metal. There are also combined models, the guides of which are made of metal, the fasteners, rings and tips are made of wood. Some models offer to hide the brackets using a baguette, decorative tape or foam plinth.
Also pay attention to the method of attaching the curtains to the curtain rod. They can be fixed in five ways:
- On the loops sewn onto the curtain, which are pulled onto the rod.
- For clothespins, hooks, clips, rings. The fabric is fixed to fastening elements that are put on or inserted onto the guide.
- On ties, including in the form of bows or knots, which act as an additional decor.
- On the eyelets. Eyelets are rings made of wood, plastic or metal, which frame the holes cut out in the top part of the curtains. A curtain is threaded through them.
- Backstage. This is a gathered pocket at the top of the curtains through which the rod passes.
General requirements
When choosing a product, you need to take into account several standard criteria. By observing simple requirements, it will be possible to ensure the reliability of the structure for a long time.
Strength
Some types of curtains are heavy, so you need to find out in advance what maximum weight the curtain rod can support. The strength indicator must be calculated for the weight of the curtains so that they do not fall and damage to the structure itself does not occur.
Environmental friendliness
Wooden products are considered more environmentally friendly varieties. Installing a highly environmentally friendly cornice indoors has a positive effect on human well-being, since the material does not emit hazardous substances.
Durability
To avoid having to constantly rehang the curtains, you should pay attention to the durability of the product. Designs with a long service life are able to withstand curtains for many years and retain their original characteristics
Easy to care for
During periodic cleaning, be sure to wipe the structure from accumulated dust and dirt. Most products simply need to be wiped with a damp cloth or polish.
Aesthetics
Depending on the style of the interior and your own preferences, you should choose a cornice with a design you like. Modern manufacturers produce a wide variety of designs for curtains, which allows you to make a choice taking into account any wishes.
What is the difference between one-, two- and three-row designs
The principles for installing single-row or double-row ceiling cornices in such cases do not differ from each other. The number of rows of cornice depends on the number and weight of curtains.
They came up with the idea of installing several rows so that you could easily hang curtains designed for different times of the day and control the level of lighting in the room. Also, such designs are used to create artistic decorations for draperies, when they hang in several rows in beautiful folds.
Thanks to this design, the weight of the curtains and curtains is distributed evenly along the entire length of the cornice. To make the curtains easy to open and move, they are attached to special runners.
Mistakes when installing curtain rods
Elegant cornice in Baroque style.
A real decoration for any palace, or a room simply stylized as one. Errors are inevitable during installation work. If you lack experience, it is difficult to perform all actions according to the instructions.
Below are the most common mistakes made when choosing and installing curtain rods:
- Weight discrepancy. When choosing a cornice, you should consider in advance what curtains will hang on it. Underestimating this factor can lead to the cornice simply bursting and the entire structure falling along with the fastenings to the floor.
- You need to start fastening the structure from the edge. Installation must be carried out from the middle so that the cornice is installed as parallel to the window as possible.
- Failure to maintain distance from the window. Too close or too far from the window. If you place the structure far from the window, this can ruin the view, especially if the cornice is not installed across the entire width of the room. Too close a location makes it difficult to open the windows normally. The curtain fabric often adheres to the radiator or window sill, becomes deformed, wrinkles, and unsightly folds appear.
Installation
The work begins with assembling the structure into a finished product. It is most convenient to use the manufacturer’s instructions, which indicate the required number of support elements and the distances between them. Before hanging curtain rods on the wall, you need to transfer the markings to the wall.
To work you will need a tape measure, ruler, pencil or marker. You should also prepare a screwdriver, drill, brackets and fastening material (dowels, screws).
All measurements must be made relative to the ceiling, since it often has a slope invisible to the eye. If you apply markings relative to the horizon line, after installation the tilt may appear and the curvature will be obvious. Work is carried out in the following order:
The first landmark will be the center of the window. This point simultaneously shows the distance to the ceiling (if it is intended to be left).
Marking with a ruler with a levelSource avatars.mds.yandex.net
- Segments are laid off from the central point in both directions, indicating the places where the brackets are fixed.
- At the designated points, holes are drilled and dowels are hammered into them, which have different appearances depending on the wall material. If the wall is brick, the dowels are replaced with wooden plugs into which self-tapping screws are screwed.
- When the dowels are fixed, brackets are hung on them and fixed; A cornice is installed on them, not forgetting to first place rings with clothespins on it.
- Before the structure is finally secured, it is necessary to evaluate it from afar.
Double-row model on ringsSource i.pinimg.com
About installing a cornice in a nursery in the following video:

