Hello, dear friends! Every furniture maker, regardless of his level, knows how important a role fittings play in furniture production. Therefore, today we’ll talk about one of the market leaders, which is Hettich fittings or simply Hettik, whichever is more convenient for you.
Reading the reviews of my colleagues, as well as those who assemble furniture at an amateur level, I made certain conclusions for myself. Now I want to share them with you. If you disagree or have something to add, be sure to write in the comments. Let's discuss and discuss controversial issues.
I suggest getting acquainted with the manufacturer, as well as the products offered. Plus, we will consider the strengths and weaknesses of products manufactured under the Hettich brand.
Pull-out fittings for drawers from Hettich: how to install
Today we will look at the installation of such a type of retractable fittings as the InnoTech system from Hettich. This is very good fittings, the quality is quite comparable to the well-known Blum. Personally, I don’t really like their characteristic movement dynamics (before sliding, the box almost stops, after which it seems to be quickly sucked into the box), but this is purely my personal opinion.
This system is a representative of full extension drawers with a double steel wall. The height of the boxes can be of three types: 70 mm, 144 mm and 176 mm. We will analyze the installation using the example of a high 176 mm box.
I’ll start my story with an additive scheme specifically for a 176 mm box. The rest can be viewed in the official file of the manufacturer attached at the end.
Now let's go over the calculations of the components (bottom and back wall) - for all varieties.
| Height 7 cm | Height 14.4 cm | Height 17.6 cm | |
| Bottom depth | NL - 1 cm | ||
| Bottom width | LB - 2 x 12.5 - 51.5 | ||
| Rear width | LB - 2 x 12.5 - 63 | ||
| Rear wall height | 65.5 mm | 144 mm | 176 mm |
where NL is the nominal length of the guide LB is the internal width of the housing
So, we calculated and sawed the dimensions of the components. So we can get to work. The following photo shows all the system components that we have to assemble and install.
These include:
- Pair of double side walls.
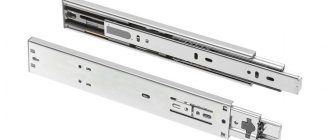
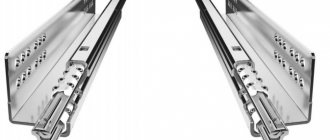
- A pair of Quadro full extension guides (there are also partial extensions, but that’s not about us today).
- A pair of rear wall connectors.
- A pair of front panel (facade) fastenings.
- Set of longitudinal rails (2 pcs.).
- Pair of end caps with Hettich logos.
The facade is calculated according to general principles for all drawers. In terms of width, I make them 3 millimeters narrower than the width of the box. In general, I make the interfacade gaps equal to 3 mm.
Let's start the work by assembling the box itself. First of all, the back walls are assembled. Why do you need to attach the rear wall connectors to it? First, the connectors are attached to the rear wall from the rear surface with a self-tapping screw, aligning the bracket along the bottom edge.
The second self-tapping screw in the upper part is screwed in from the end. For this purpose, there are wide holes on the sides of the connectors.
After this, the side walls are attached to the connectors of the rear wall, clicking on the sides. The bottom is inserted into the grooves of the side walls.
The bottom is wound in all the way, aligning along the front edge with the sides. The drawer is turned upside down and the bottom is secured with self-tapping screws (I usually put three on each side).
This completes the main part of the box.
All we have to do is attach the façade and the rails attached to it to it.
To do this, it is necessary to secure fasteners to the facade. They should be installed in 10 mm holes, which can be conveniently drilled with a Forstner cutter of the appropriate diameter.
For correct marking, we return to the first diagram. Considering that we have a bottom drawer, then to the size of 40.5 mm we add the thickness of the lower horizon of 16 mm, which gives a total of 56 mm. The remaining values correspond to the diagram. On the sides you need to set aside size A, which is 23 mm. That is, we retreat 23+15 mm from the edge of the facade (the thickness of the vertical pillar minus the inter-facade gap, which I usually make 1.5 mm - on each side. The lost millimeter is easily compensated by the adjustment capabilities of the system, but if you are a perfectionist, then on one side you need to add to size A 16 mm, and on the other 14 mm, or make 4 mm gaps between the facades).
Using a Forstner cutter, we drill these holes to a depth of 1.2 cm. We do this carefully so as not to drill through the facade. It is advisable to use a drilling machine or at least a stand with a drill depth limiter for this, but a simple hand drill can do the job.
We press fasteners into the holes, which, after pressing, are fixed with screws (they spread the jaws of the futor, tightly securing the fasteners in the holes).
Now we install the roof rails. First, we attach them to the rear wall connectors, snapping them into place.
We repeat this manipulation on the second side. It turns out something like this.
We snap the facade onto the side walls.
The front part of the railing is mounted on the fastening elements of the facades. They are inserted into the groove from above, after which they are closed with decorative bushings.
In the next photo I showed the position control panel.
Now we mark the guide. Let's focus on the first diagram again. To do this, we set aside 3.6 s from the bottom of the facade (remember that the lower facade will be lowered by another 1.6 cm). We draw a perpendicular and mark the traditional 3.7 cm on it.
We lay the guide on the perpendicular so that the line passes through the centers of the top row of holes. The attachment points of the self-tapping screws (at least three pieces) are pricked with an awl.
We assemble a furniture box. In my case, this is a box with lower drawers.
We place the box on the guides and push it until it clicks. It is not necessary to remove the façade.
But I dismantled the facade so that it would not be scratched during transportation and therefore put them in place.
Tilt in the frontal plane is produced by rotating the roof rails. At the same time, as they lengthen, they tilt the façade forward, or when rotating back, they tilt it backward.
The façade is shifted left and right by rotating the screw (which is located on the right side). You can move it up and down by rotating the wheels (they are on both sides of the box). To dismantle the facade, you need to press the blue button in front of the window.
All that remains is to close the technical window with a plastic plug with the Hettich logo.
That's it, the work on installing the box can be considered complete.
To conclude the story, I will provide a file from the manufacturing company, which contains installation information presented in official language. See here:
Furniture pull-out fittings InnoTech (1.7 MiB, 401 hits)
Manufacturer's assortment
Finding an online store that sells Hettich products is not a problem at all. Plus, you can find retail outlets in Novosibirsk, the city of Voronezh, Volgograd, etc. What can we say about such giants as St. Petersburg and Moscow. Sales are available not only at retail, but also wholesale for furniture manufacturers.
The birthplace of Hettik furniture fittings is Germany. If you wish, you can easily find their official website, where you can get detailed information about guides, door handles, lifting mechanisms and other options for products for the kitchen, wardrobe and other furniture.
Does Hettik have any competitors in the market? Yes. These include the company Blum, with which we have already introduced you, as well as Boyard. There is no point in talking about whether Hettik, Boyard or Blum is better and of higher quality. This is approximately one level. And very tall.
The range mainly consists of:
- furniture hinges;
- sliding systems;
- fastening products;
- folding systems;
- folding;
- lifting mechanisms;
- drawers.
To better understand the essence and features of the products, I propose to consider all these product categories separately.
Tension products
Even using online furniture design programs, BAZIS Furniture Maker will have to provide fittings. Hettich is great in this regard. The range necessarily includes clamping, that is, connecting types of fittings. Specialists know the true value of such products, since they create the reliability and integrity of all furniture.
Hettik offers trapezoidal and eccentric ties, screws, hangers and shelf supports. Ideal solutions for cabinet furniture, cabinets and more.
We will talk about the strengths and weaknesses of all products separately when we discuss the advantages and disadvantages.
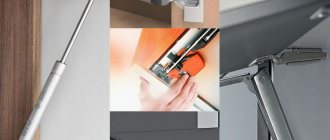
Tilt systems
Although the German manufacturer has a huge number of folding systems in its assortment, consumers have focused their attention on the Classic and Lift Up models.
An important feature and uniqueness of Lift Up is the ability to push the façade inside the cabinet, or rather into its upper part, during the installation process.
Classic models are actually folding type brackets, which have a braking system and magnetic fixation.
Lifts
They are reliable, yet simple in design, which greatly simplifies installation and further adjustment.
The most popular representative among lifting mechanisms from Hettik is rightly considered Advanced. Suitable for a wide range of facades and equipped with a device that creates conditions for perfectly smooth closing.
Folding systems
The emergence of folding systems in furniture fittings has made it possible to make a modern interior more stylish and at the same time practical.
The fittings from the German brand are suitable for different folding doors and are made in various designs. This makes it possible to move all kinds of structures, regardless of their weight and size.
It is worth highlighting the Wing Line systems. Their peculiarity is that nickel-plated and chrome-plated steel is used in production. This fitting folds the doors in the form of an accordion. If you are selecting products for folding doors, then you should definitely pay attention to Hettik.
Sliding fittings
Currently, sliding doors are becoming more and more popular and in demand. They are comfortable, functional and reliable. This is clearly evident in wardrobes.
Hettich sets itself apart from its competitors by offering durable, smooth and silent sliding door systems. The range is huge, which allows you to choose a model according to individual parameters and taking into account the needs of the client.
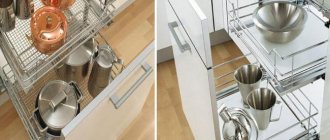
Drawer systems
If you need to buy hardware to make a drawer, contact Hettik. Of course, in the case when quality and durability are your priority, rather than low price.
Hettich has a lot of retractable systems. But here too there is a clear favorite in the person of Innotech. Sold in more than 100 countries around the world. Excellent for opening and closing drawers. Moreover, Innotech can be used on boxes of any configuration.
Quadro guides are partners for retractable systems. Add here the Easys electrical system, and you get an ultra-modern and incredibly comfortable solution for a furniture set. All systems come with clear instructions, so even an amateur or a novice in furniture production can handle the installation.
Loops
Hinges from Hettich combine such qualities as reliability, durability and simple installation. The entire range of hinges is divided into several categories. The list consists of:
- invoices;
- semi-invoices;
- deposits;
- quick installation.
If conventional fittings allow you to open hinges at 90-110 degrees, German Hettik are able to do this at an angle of 120-180 degrees.
Another undeniable advantage of the German manufacturer is the presence in their range of special hinges, which are used in the construction of corner cabinets and facades. But they are extremely rare on the market; few manufacturers produce them.
