[contents h2]
The retractable design is not to be envied - it is often pulled out and retracted. It often happens that we simply do not calculate the strength of something, rushing or being late. This is why the functionality of the drawers suffers. Sooner or later, the mechanism will not withstand such a load and various cracks, erased guides, broken side walls, and falling out rear panels will appear in the structure. Repairing dresser drawers will help restore them to their former location and functionality. This is exactly what we will talk about today. In our article you will learn about the most common problems with retractable furniture, how to eliminate them, and also familiarize yourself with the basic recommendations for the reconstruction of retractable drawers.
How to fix a drawer with a false bottom?
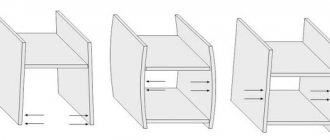
What to do if the drawers in the closet or desktop are damaged? The most problematic place of the retractable structure is the bottom. We can safely say that 90% of manufacturers moderately simplify the manufacture of furniture by strengthening the drawer with an overhead bottom, which is located at the bottom of the retractable mechanism and on the sides. This configuration greatly simplifies the technological process, and the bottom takes on the entire load of not only the placed objects, but also the pressure of the sliding elements.
How to repair a chest of drawers with a similar type of bottom fastening? Most often, the cause of failure was insufficiently strong and poorly installed fasteners. The bottom is secured with nails to the front and back of the box, and several guides hold it in place on the sides. Yes, indeed, at first this scheme works quite well, but then it fails: the nails begin to loosen and the bottom begins to move away, even if the chest of drawers is not overloaded. Let's figure out what and how this damage can be repaired:
- Staples. This is an excellent option for repairing retractable furniture. To work, you need to take special hardened staples 1 cm long. In this case, you can safely use nickel-plated hardened staples - they are even better than the previous ones: very durable and do not rust at all. Working with this type of fastening is a real pleasure. To do this, you will need to remove the old fasteners and drill through the bottom with staples around the entire perimeter of the structure, including the area under the guides.
Important! Removing such staples will not be difficult for you. They are held in place by three screws on each side. Punch the sides of the box in strict sequence so as not to disturb its geometry.
- Screws. If you have problems getting staples or a staple gun, then screws will be your salvation in repairing a drawer. Screws with a diameter of 3 - 4 mm and a length of 15 to 30 mm are best suited for the job. In order to repair drawers in the kitchen, you just need to take a 15 mm long screw. However, when working with low-quality porous chipboard, it is better to stock up on a 30 mm screw.
The two most common methods given are also suitable for replacing the bottom of a box - you will need to cut out material of a suitable size and fix it with the above material on the furniture box.
Detecting the Problem
The problem was very acute. The middle drawer stopped moving out altogether and became very skewed.
Outwardly, it all looked bad, and the point is not so much in appearance, but in the fact that every day I had to struggle with this chest of drawers, rattling the drawers, in order to get things out. After I once again pinched my finger, I decided: that’s enough! It's time to take matters into your own feminine hands.
I started by looking for the problem. I had to take out all the drawers and inspect the guides.
The reason for the misalignment was revealed almost immediately: these plastic rollers on the right side
This part simply crumbled under constant load. It's strange that this happened on one side.
How to fix a dresser drawer with a cut-in bottom?
The second type of bottom fastening in furniture is a mortise bottom, which most often consists of plywood that is glued onto the walls of the box. Manufacturers rarely use this fastening method, but it still exists. Such a bottom very rarely causes problems and in most cases they occur due to its destruction. So, if manufacturers used laminated chipboard for the bottom of the chest of drawers, then you are probably faced with the situation of tearing out the glued zones from the grooves. Of course, they can be put in place using the methods described above for attaching the overhead bottom, but it is better to change the chipboard sheet.
What is not necessary to repair pull-out chests of drawers?
We figured out how you can quickly and easily independently repair a drawer that wobbles and constantly falls. In some cases, there is no other option left than a complete replacement of the bottom. Let's discuss what is not recommended for doing such work:
- Nails. You should forget about this option, as it is not suitable at all. Today, only lazy people use nails to repair their furniture. Due to the fact that over time wood can change its previous shape, the heads of the nails will come out and damage the guide mechanism. No matter how long the nails are, they will not secure the structure as firmly as, for example, construction staples.
- Glue gun. It is not suitable for one simple reason - the glue will not hold the bottom of the retractable furniture well, since it is not able to withstand such heavy loads. When using hot glue to repair a drawer, you may encounter problems with the compound leaking out of the bottom.
How to replace roller guides with ball guides
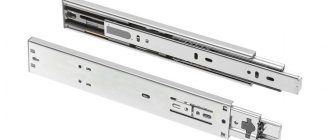
Standard ball and roller skids are interchangeable . To replace roller slides with ball slides, simply twist the slides, following the step-by-step instructions described in the last section of the article “How to Install Drawer Slides.” In this case, the holes on the sidewalls from the position of the roller guides will remain uncovered. They can be masked with self-adhesive plugs.
The exception is mortise-in full-drawout ball guides.
Unfortunately, they cannot be replaced with anything else, while maintaining the same dimensions of the drawer box. Only for a similar retractable system. Or saw the box frame to maintain the same gaps (read - calculating the size of the box for ball and roller guides).
The same can be said about narrow rail guides. They are also ball-shaped, but differ in design: the runners themselves are much narrower and the “balls” in it are arranged in one row, and not in two. It is unlikely that you will be able to find them on sale; they are usually used on foreign-made furniture walls and chests of drawers.
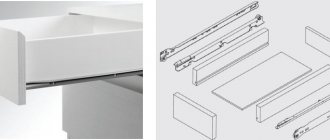
Dresser drawer repair
Today we will show you how to repair a drawer of this design yourself:
- Compensation beam.
- Bottom of the box.
- Side of the box.
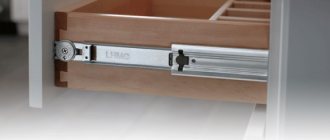
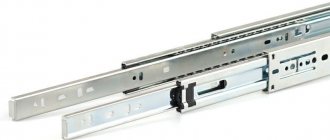
- Side guide.
- Sliding guide.
Preparatory process
The very first thing you need to answer is these questions:
- What parts of the furniture structure need repair?
- How are drawer guides and sliding surfaces arranged?
After you answer the above questions, you will need to do the following:
- Check the strength and rigidity of retractable furniture and the reliability of fastening of the guides.
- Using a level or plumb line, determine whether the retractable mechanism is skewed. If you find it, then check the reason for its appearance. Sometimes this is due to incorrectly adjusted legs. Then you need to disassemble the furniture, eliminate the cause of the identified misalignment and reassemble the structure. The presence of misalignment significantly wears out the chests of drawers, which then become difficult to move in any direction.
Important! If your box is made of natural wood, then during the process of repairing it, clean the surface from fungus, seal holes and cracks, and at the very end, coat the furniture with a special protective agent.
Troubleshooting minor problems
More often than not, the problem with retractable furniture lies in its lower part. The bottom, made of plywood, shrinks over time, and gaps appear where all the small objects from the box end up. Experienced manufacturers, aware of this problem, install a bottom with a reserve, where excess material is hidden on the back wall of the box. It is thanks to this safety net that you can eliminate the gap by performing the following manipulations:
- We take out the nails that hold the bottom of our box.
- We push the bottom forward a little and insert it into the grooves of the front part. As you do these steps, be sure to check to see if there is a gap between the bottom and the back of the dresser.
- We hammer in nails.
Important! If the bottom of your drawer is made strictly to size, then cut out another piece of material or place a small wooden spacer.
Instructions for disassembling retractable furniture:
We determine the method of connecting the parts of the chest of drawers. If the “tenon and groove” method was used, then insert a small wedge into the connection point and lightly hit it with a hammer until all the elements are wet. After separating all the parts, remove the remaining adhesive by treating the surface with a wet brush. After checking the box for dryness, we assemble all its parts, simultaneously adjusting the two side guides.
Side wall repair instructions:
Most often, the side walls of drawers suffer from cracks and chips. So, if we find this chip, then we need to glue the fallen part with regular PVA glue, and then paint the surface with pumice. If you do not find a broken piece of material, then cut out a similar-shaped insert from wood and glue it to the empty space. Detach the cracked parts completely and then glue them together.
Important! You can use the second option: pull the cracked parts as far apart as possible, apply glue inside the damage and connect with clamps.
Repair instructions for guide elements
Using an example, we will look at the old classic options, time-tested - wooden guides, which are fixed on the sides on the inside of the box and have a bevel. Let's look at how to restore such guides:
- We remove the guide that requires repair. We turn it over and put it back in its original place.
- If the guide does not want to be inserted, then we go over its surface with a plane and attach the gasket.
- But if we couldn’t get through it with a plane, then we clean it and apply polymer resin (ED-5 or ED-6) to the guide, press it on top with our hand and place a thin wooden plate.
Bottle holder for the kitchen - a wonderful idea
For the kitchen, the main thing is the functionality of the interior. Correctly and optimally organized kitchen space promotes quick cooking, a good mood, and, therefore, the prepared dishes become more healthy. Various storage methods help to properly organize your workspace in the kitchen: drawers, cabinets. Any housewife, when preparing a variety of dishes, uses sauces, oils, spices, which she stores in bottles and jars, stuffed in cabinets and the refrigerator. So you have to rush around the kitchen, wasting time and energy. Smart people have long come up with a wonderful device - a bottle holder for the kitchen . What kind of device is this and is it possible to make this miracle with your own hands? Let's figure it out.
Tips for repairing drawer chests of drawers:
- If you can’t get the nails out of the box because they are very rusty, then use a special hacksaw and cut off the head of the nail. After this procedure, you can easily remove the nails with pliers to reach the bottom.
- If, after disassembling the structure, you cannot remove the glue with a brush dipped in hot water, then remove it with a sharp knife or chisel.
- If the drawer is coated with paint and the parts are connected using the tongue-and-groove method, first remove the old coating with a hot hairdryer and then glue the parts together.
- Before gluing the sides of the chest of drawers, check that the top and bottom parts are level by applying a metal ruler or level to them. If they are uneven, remove the beveled part with a plane.
Attach the front part
Once the new piece is installed, drill holes for screws to attach the drawer face and handles. It's much easier to do this now while the drawers are still in place. To attach the new piece, drill a couple of small pilot holes on one side, then insert the screws. You just need to attach them, then it will be easier to attach the front panel.
What is a kitchen closer
The doors are attached to the body with hinges, which consist of three elements - a cup, a shoulder and a striker.
Door hinges consist of three elements.
A closer is integrated into this mechanism. It can be installed in a bowl, arm or hinge striker. If the soft closing system is working properly, the door will close silently, even if you deliberately slam it. But periodically, the closers fail, causing the cabinet to close with a characteristic bang.
If the cabinet closes noisily, it means the closer has become unusable.
The system consists of a spring, which is located in a metal capsule. It is filled with oil or a liquid silicone mixture that ensures smooth movements. When the door closes, its weight puts pressure on the closer lever. The silicone or oil moves to the back of the capsule and the door does not make noise when closing.
The closer consists of a spring and a metal capsule.
Causes of breakdowns
If it is used incorrectly or for quite a long time, sooner or later you will have to face the task of repairing the door closer yourself.
If the damage is serious, you will have to completely replace the product, which is quite expensive, so you should not delay repairs.
In order to eliminate the breakdown and prevent it in the future, it is necessary to find out in advance the cause of the defect. The most common causes of problems with door closers are:
- Adverse weather conditions. These include rain, constant dampness, sudden changes in temperature, especially for plastic boxes and open metal parts.
- Sudden movement of the canvas. If you open or close the door faster than expected by the closer settings using your own efforts, this will inevitably lead to its breakdown.
- Blocking door movement. This situation is relevant for those systems that do not imply a delay in opening the door by 90 degrees or more. If you place a stone under such a door, it will not close, but this will negatively affect the mechanism.
- Closer overload. We are talking about selecting an insufficiently powerful door closer for heavy doors; overload can also occur if you hang on the canvas or ride on it, which children love to do.
Schematic design of a door closer
In winter, temperature changes can lead to breakdown of the main part of the closer, which is responsible for the smooth movement of a heavy door. We are talking about a housing filled with an oil composition.
Without this liquid, the mechanism will lose some of its properties and turn into the most ordinary spring, as a result - the door will be attracted more sharply and with great noise.
To prevent complete failure of the closer, it is necessary to repair it as soon as possible, otherwise you will have to completely replace the part.
However, keep in mind that such measures will help eliminate only a minor defect; if the crack is too large or at the time of repair quite a lot of oil fluid has leaked out, further measures will not have any effect.
Then in any case you will have to change the door closer.
There are cases when the oil was not initially added at the factory. In this case, refueling is required. You can fill the closer with synthetic motor oil or, a cheaper option, with shock absorber fluid. Oil is poured through the holes of the adjusting screws after unscrewing them.
Regular motor oil is suitable for refilling the closer.
Reasons for its failure
The soft closing system can fail for several reasons. The most common is the human factor. If you regularly apply excessive force when closing doors or open them abruptly, the door closer will not withstand the load.
If you close and open the doors too quickly, the door closer may break.
Other causes of failure:
- increased air humidity or dampness in the room;
- temperature fluctuations;
- oil or gas leak from the capsule;
- door movement blocking;
- metal corrosion or deformation of the spare part.
Other factors may also affect the condition of the closer. The method of repair will depend on the cause of the mechanism failure. In most cases, installation of a new door closer is required.
As a rule, the problem is solved by replacing the old door closer with a new one.
Cabinet hardware manufacturers
Expensive oil closers use higher quality and more expensive oil. Let's look at the most popular manufacturers of kitchen furniture fittings:
- BLUM fittings. Austrian company producing various kitchen accessories. The most popular manufacturer of lifting mechanisms in Russia is bloom. The price of products is very varied (from 140 rubles to 800 rubles).
- Vauth Sagel. The second most popular manufacturer, popular in Russia. The German company is recognized as the best in the world. The price for closers is from 300 rubles to 1000 rubles.
- Hettih. German company - manufacturer. The cost of mechanisms and handles for kitchen furniture ranges from 150 to 400 rubles.
- Siro. Austrian company. The price of door closers ranges from 130 rubles to 500 rubles.
- agoform. The German company is a manufacturer of fittings for kitchen furniture. The cost of the company's products varies from 200 rubles to 900 rubles.
presentation of Bloom accessories:
Kitchen cabinets are used daily, which wears out the fittings. It is necessary to timely care for and clean the door closers from dirt.
- When a squeak appears, you need to tighten all the screws on the hinges.
- All fittings and roof rails in the kitchen interior are cleaned with soapy water and clean napkins.
- The hinges must be lubricated periodically.
- Do not clean the door closer mechanism with soda or other granular cleaning agents.
- You cannot “help” door closers close the doors all the way.
The mechanism of the closers is very simple, so breakdowns with proper operation are practically excluded. If a breakdown does occur, it is better to call a specialist or replace the broken door closer with a new one.
Make your kitchen more convenient
Interesting cuisine
There are many manufacturing companies with different prices for kitchen accessories, so choosing closers according to your capabilities and needs is quite easy. Installing the mechanism is also not difficult. The main thing is to follow the instructions exactly. You need to take care of kitchen fittings in the same way as all other household items. Proper installation and maintenance will allow you to enjoy silent closing of kitchen cabinet doors for a long time.
Lifting mechanisms
Furniture closers for the kitchen, used for hinged doors, are included in a separate category. Such doors can drop down or swing up.
There are four types of kitchen lifting mechanisms:
- Spring. A metal spring helps to pull or push the door. The design of the device is simple and rarely fails. It is not possible to leave a door ajar with a spring shock absorber; it must either be closed or completely open.
- Spring-oil. There is a spring in a sealed chamber filled with oil. By contracting, it overcomes additional resistance and ensures a slow, even opening of the door.
- Pneumatic (gas). Smooth running is achieved by displacing air from a closed, impenetrable capsule with a special rod. A pressure difference occurs in different parts of it.
- Electrical. Complex programmable mechanisms with electric drive. Allows you to set the opening speed and maximum angle. The doors close automatically after a specified period of time. They open by pressing the facade or touching the handle.
Why do you need a door closer: operating principle
A door closer is a device that allows large and heavy doors to close smoothly and quietly. The closer is often installed on doors in rooms with very high traffic.
Thanks to the closer, entrance and interior doors close tightly immediately after the leaf is released, which allows you to save heat or coolness inside the room.
In addition, closers significantly extend the life of door locking devices. The principle of operation of the mechanism is quite simple. The main working element of the device is the spring. When the door is opened, it is the door that contracts and accumulates energy, which returns the door to its original position. An oil shock absorber allows the door to close smoothly and silently.
Door closer allows large and heavy doors to close smoothly and quietly
Some door closers have more than one shock absorber, but several, but this does not change the principle of operation.
The type of closer determines the mechanism that drives the operating spring. Thus, gear-driven closers and devices with a sliding rod are distinguished.
The best furniture fittings manufacturers
Among the manufacturers most in demand on the furniture fittings market, the top lines of the ranking belong to foreign companies. Russian importers of Chinese products have also proven themselves well:
- The world-famous Austrian brand Blum (pictured) has conquered markets in more than 20 countries over almost 70 years of existence. The company began its journey from a blacksmith shop that produced horseshoes. In 1958, the first furniture fittings were released. Blum offers high-quality door closers of various types and price categories. It is worth paying attention to the lifting mechanisms and devices for retractable systems offered by the manufacturer.
- German fittings Hafele also occupy a leading position in the world market. The company has been operating since 1923. Eco-friendly, energy-saving production allows us to set reasonable prices for products. Of interest is the line of mortise shock absorbers, spring and gas lifts for facades.
- Hettich fittings are produced in Germany and are deservedly popular among consumers. The assortment includes products from economy to luxury class, a wide selection of furniture hinges with built-in closers. The site has the option of designing a furniture set layout with the selection of the most suitable fittings.
- The Siro brand in Russia sells accessories produced at a factory in Italy. Among the products, numerous groups of mortise closers and compact lifting mechanisms stand out. All products undergo testing and quality control in an international certification concern.
- The manufacturer Vauth-Sagel specializes not only in the manufacture of fittings. At plants in Germany, wire and sheet metal are processed. This ensures high quality material for the production of furniture components.
- The domestic company Boyard (photo on the right) sells products made in China. The assortment includes budget-friendly, high-quality fittings. It is worth studying the representative's proposals if you need hinges with a built-in closer or closers for drawers.
- The TBM company represents Chinese products under the Firmax brand. All products are tested in our own product testing center. In the company's retail outlets and online store, you can safely purchase hinge closers and components for retractable systems at affordable prices.
Merger stages
XP is reset upon merging and does not regenerate, item drops are regenerated unless the parent item is destroyed or sold.
| Lvl | Image | Item | Sale | Falls out | Recharge Time | Acceleration of Costs |
| 1 | Drawer handle | 1 Coin | — | — | — | |
| 2 | Drawer Handles | 2 Coins | — | — | — | |
| 3 | Drawer Box | 4 Coins | — | — | — | |
| 4 | Boxes Boxes | 6 Coins | Vase Pot Shard Closed Tool Box Drawer Handle | 16 hours 46 minutes | 72 Diamonds | |
| 5 | Drawer (I) | 12 Coins | 1 XP Vase Pot Shard Closed Tool Box Drawer Handle | 10 hours 26 minutes | 91 Diamond | |
| 6 | Drawer (II) | 25 Coins | 1 XP Vase Pot Shard Closed Tool Box Drawer Handle | 6 hours 16 minutes | 109 Diamonds | |
| 7 | Drawer (III) | 51 Coin | 1 XP Vase Pot Shard Closed Tool Box Drawer Handle | 3 hours 39 minutes | 127 Diamonds |
Match or fum tape
If everything is much worse, and the thread is broken, you need to take more decisive action. Take a standard match or bamboo stick and screw in a self-tapping screw. It is worth noting that this method of repair is short-lived. If you pull the handle harder, it will most likely remain in your palm.
There is another option using fum tape. Wrap a piece of tape around a self-tapping screw and screw it into the handle. In terms of durability, this technique can be compared to a match.

