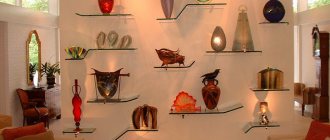
It is difficult to imagine the furnishings of any room, be it a residential apartment or an office, without shelves. In addition to their intended purpose, these structures serve as an excellent addition to the interior. Metal, glass or wooden shelves above the table not only greatly expand the functionality of this area, but also add coziness to it. You can purchase them in a specialized store or make them yourself - in any case, you get a simple, but at the same time practical piece of furniture that will be appreciated by all family members.
Product classification
The classification of shelves is based on four main principles that reflect the basic design and consumer properties of these products.
By location
It is the place where the shelves are supposed to be hung that determines their design, as well as their type. Depending on the functional purpose of the room or a separate zone in it, products are placed:
- Above the desk. This model can be used to store office supplies, books or to place decorative items. The main task is to create maximum comfort without standing out from the interior, without distracting a person from the creative process.
- Above the desktop. Functionality is the main task for such a model. Regardless of whose desktop it is, various tools are placed on the surface that should be at hand at any time.
- Above the computer desk. Until recently, a large number of laser discs could be seen here. Now they have been replaced by more compact storage media and cloud technologies, but various gadgets and literature still require storage space, and it is convenient to place them on the shelf above the computer desk.
- Above the dining table. Often shelves in this area can be seen in Provence style interiors. Bottles of wine or olive oil, jars of spices, and various dishes are placed on them, which creates a unique atmosphere of home comfort.
Above the desk
Above the desktop
Above the computer desk
Above the dining table
In addition, shelves can be successfully placed above a table located in a particular room:
- In the nursery. Perhaps, for no room in a house or apartment are hanging shelves more relevant than for a child’s room. The abundance of toys, educational structures and books requires a lot of storage space, and they must be available to their owner at any moment.
- In the kitchen. The shelves in this room are used to store utensils used directly in the cooking process, as well as to place decorative items on them. This is especially true for kitchens that are also used as a dining room.
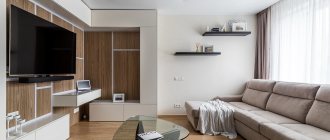
- In the living room. Traditional items for the living room include audio and video equipment, photo frames, antiques and books. All this, being correctly placed on the shelves, can highlight the taste of the apartment owner in the most favorable way.
- In the bedroom. In this room they can be used both for placing decorative items and for storing various small items; they are usually located above the makeup table.
In a residential apartment or office, any free space above the table can be supplemented with shelves that will be appropriate and organic in the most extraordinary design solutions.
In the nursery
In the kitchen
In the living room
In the bedroom
By type of design
The design of products largely depends on the shape, since not all design options are consistent with constructive capabilities. For example, curved, round or semicircular models often do not have side walls. Classic rectangular, diamond-shaped, triangular - on the contrary, they are simple and provide many design options. The main ones:
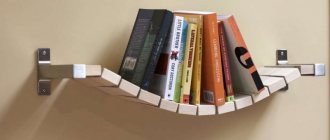
- Consoles. Products with a minimalist design, yet very comfortable and functional. Cantilever elements are often made of metal and have a removable structure, which is convenient if you need to change the geometry of the rack.
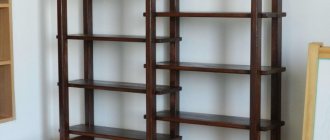
- Multi-tiered. They are extremely practical, since they allow you to rationally use the space of one conventional square of room area.
- With side walls. They are made in the shape of a niche and are convenient for storing books that do not fall due to the presence of sides. Such models can be equipped with either two or one side wall.
- With a back wall. This design does not greatly affect functionality, but it noticeably changes the overall appearance of the wall on which it is located.
- Universal options. These shelves are simple but functional. As a rule, they have correct geometric shapes, reliable fastenings with a margin of safety, and they can be used for any purpose.
Whatever the design of the shelves, it should always correspond to their functional purpose.
Consoles
Multi-tiered
With side walls
With back wall
Universal
By purpose
The main purpose of the products is the arrangement and storage of small and medium-sized items. However, depending on how they are used and who owns them, the preferred design will also be determined. For example, shelves in a nursery must be safe, which means they must have reliable fastenings that prevent the possibility of falling, rounded corners, and be made from environmentally friendly materials. For boys, it is preferable to install roomy structures where you can put a large toy or model airplane. For girls, more interesting options are those with many small compartments in which you can place your treasures and dolls.
A shelf for a schoolchild or student can have the correct shape and be made in a calm color scheme that will not distract from the learning process. For a young family of two people who do not yet have children, universal designs combined for their intended purpose - the so-called storage systems - will be relevant. Such a rack can have several tiers, while combining open and closed compartments in which you can place household items, as well as display room decor items.
Another option is shelves that serve a decorative function. Such interior items can have different shapes and be made of metal, glass, wood.
Designs for flower pots look no less interesting. Such products are simple and inconspicuous, but flowers or decorative items placed on them radically change the appearance of the room. In such cases, shelves can have several levels.
For schoolchildren
For flowers
As a storage system
Decorative
Depending on installation method
Wall shelves are not only a simple, but also a very versatile piece of furniture. Depending on the installation method, they are divided into:
- Wall-mounted. This is the most common way to place shelves, which makes it possible to effectively use the wall area. There are no downsides to this arrangement, except perhaps for the commonplace.
- Hanging. In contrast to the first, such models are not yet so often found in classic interiors. They can be attached to the ceiling or wall on a suspended structure and organically complement interiors in loft, modern or high-tech styles. This installation method has no disadvantages, but it cannot be used in all rooms.
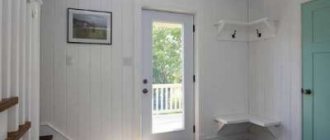
- Angular. Such shelves allow you to optimally use the internal corner space of the room between two adjacent walls, which is often unused. Elements made of plasterboard in the form of illuminated niches visually add space to the room. Simple rectangular products are suitable for the outer corner. This solution is especially relevant if there are columns in the room, the design of which will make the interior more stylish and extraordinary. One of the disadvantages of the products is the difficulty of manufacturing.
- Tables with add-ons. This design has both advantages, which consist in the ease of moving furniture along with the shelves, and disadvantages, which consist in the inability to change the configuration of products in height or width relative to the position of the table itself.
Also interesting are options for the combined use of shelves, for example, hanging and wall-mounted, as one of the ways to create non-standard solutions in the interior.
Wall mounted
Hanging
Corner
Table with add-ons
Wall protection in the dining area
Mirrors should be placed as far away from it as possible. Caring for them when they are regularly soiled can destroy the pleasure of viewing the decorative design of the kitchen. To solve this problem, designers offer an interesting option in the form of using slate paint. Modern technologies do not stand still, so the traditional black color of an imitation school board can be replaced with a brighter shade.
The advantages are practicality and the ability to make notes on it with crayons.
If you do not want to use slate paint, it is enough to equip the walls in the dining area with tiles. The upper edge of such a structure can be enlivened with floral patterns or images of culinary delights. It is recommended to monitor moderation in the need to decorate the kitchen walls to the maximum.
It is enough to use bright stickers that will be located in strict proportion.
Important! The dining area is an area that involves increased contamination of the walls around it. It is important to think about practicality, and not about the prestige of the material used to equip them.
Manufacturing materials
Modern manufacturers use a variety of materials to make shelves. It can be chipboard, MDF, acrylic. However, traditional types of raw materials have not lost their relevance:
- Tree. Perhaps the most popular material. Solid wood shelves look great in any interior; they are especially often used in Scandinavian style or in loft-style rooms. In addition, wood has high environmental characteristics, which cannot be said about artificial materials made using glue. There are also some downsides - the cost of the shelves is quite high, since high-quality raw materials are always prestigious, environmentally friendly and expensive.
- Glass. Designs made from this material allow you to create a variety of design solutions based on a combination of the properties of a transparent surface and lighting. Glass is not affected by most aggressive environments, including moisture, is easy to clean and has increased wear resistance. The disadvantage of glass shelves is that they are fragile and traumatic.
- Metal. Steel products are simple and easy to use. Such shelves often have fastenings for installation on metal guides, which allows you to change the configuration of the product if necessary. The disadvantage is their low aesthetic properties, which is more than compensated by their functionality.
- Plastic. Modern manufacturing technologies for building materials make it possible to use plastic panels to make shelves with an almost unlimited choice of textures and colors. Plastic or vinyl products are environmentally friendly, often used in interiors in high-tech and modern styles, where there are non-standard shapes and curved lines. They have few disadvantages, one of them is that under heavy load the product can change shape or bend.
- Chipboard. Perhaps this material can be classified as the most budget-friendly. Chipboard shelves do their job well, but they are very fragile, especially at the fastening points, and have poor environmental performance due to the use of glue in the manufacture of the material.
- MDF. This raw material is most widely used for the manufacture of not only shelves, but also other furniture in Russia and Europe. Compared to chipboard, the material is stronger and more environmentally friendly. When applied, the coating can imitate many textures and have different colors. At the same time, MDF is a budget material and is relatively cheap.
The main characteristic of the material is environmental friendliness, which is especially important in families with children. Therefore, when choosing shelves based on price-quality ratio, emphasis should be placed in favor of the second indicator.
Tree
Glass
Metal
Plastic
MDF
Chipboard
Modern artistic wall decoration
The owners wish to decorate the kitchen panels in a traditional or modern style. Modernism is a combination of practicality and making bold decisions when decorating a room.
The Art Nouveau style uses bright elements in combination with white, black, gray, and beige colors. Natural tones of materials are welcome.
The presence of a TV on the kitchen wall in a modern style is welcomed by designers, so it should be hung in the most visible place. Housewives of the 21st century have the right to learn new recipes while watching interesting plasma broadcasts.
The main decorations can be household electrical appliances, shades and lamps, gadgets such as wall-mounted kitchen scales and clocks, as well as a plasma TV.
Modern artistic decoration also involves the use of built-in cabinets on the kitchen walls. It is convenient to save on the use of space without compromising the convenience of the owners. In addition, decorating such cabinets is a tempting prospect for a person with taste.
To make the place for family gatherings and tea parties pleasing to the eye, you need to carefully consider the entire furnishings of the room.
Decorative design
Despite the many design options, there are basic rules that should be followed when creating a decorative or work area with these interior elements. For example, the shelves above the table in the children's room should not be of too bright colors, contain prints with cartoon characters and textures that can distract the child's attention from the main process - studying.
Bright colors in any interior are an irritant, so they should be used only consciously. If it is quite problematic to decide on the choice of shade, it is better to give preference to pastel colors and natural textures - stone, wood.
In order to highlight the shelves, you can resort to a little trick: use brightly colored materials to make the side parts of the product.
When creating a work area for a student, you can use models with cork covering elements so that the student has the opportunity to attach reminder sheets. Options with a built-in chalk board or marker are very popular, which will allow you to use notes and make the interior more interesting.
Shelves above the desk for a schoolchild
Every parent thinks about how to properly design a work area for their child. Modern students do not have room on their desks to accommodate all their notebooks, textbooks, various books, and all kinds of accessories in general.
This is where all sorts of storage system models come to the rescue. They are not only installed near the table, but also secured above the student’s workplace.
A well-designed work area is the main task of parents
Location recommendations
The arrangement of structures can be arbitrary, the main thing is convenient. However, when it comes to placing shelves above a student’s desk, you should follow a few simple rules:
- The hanging structure should not block the light, especially if the workplace is located in a dimly lit area.
- The furniture tabletop and shelves should be positioned in such a way that the child, sitting at the table, is facing or sideways to the doorway. It has been proven that a person sitting with his back to the door experiences discomfort while working.
- The structures must be at a sufficient height from the seated person’s head so as not to reduce the size of the working space. When answering the question about what height to hang the shelf, it is worth noting that its bottom panel should be located at arm's length so that the child can take the desired item without getting up.
There is one more thing to consider before hanging the shelf. It is advisable to place the upper part of the structure at a low height; the person sitting at the table should not have the need to use a chair and other objects to reach the farthest compartments, since this can be traumatic.
In cases where wall furniture elements perform an exclusively decorative function, the height of their location is not important.
Another criterion when choosing a location for a shelf above a table is the amount of free space in the room. For example, multi-tiered or corner models are great for small rooms.
The hanging structure should not obscure the light
The person should sit facing or sideways to the doorway
The structures must be at a sufficient height from the seated person’s head
chalk board
This decor can combine both a poster and a board for notes. You just need to pick up chalk and start writing, drawing, and being creative. Drawings and motivational inscriptions can change almost every day.
Small hanging boards in elegant frames look very cute and neat. But the board can also be the wall itself, painted with special black paint.
How to do it yourself
The modern furniture market offers a huge number of shelves of various models and price categories. However, this design is so simple and diverse that you can easily make it yourself. To work you will need:
- drill;
- hacksaw or jigsaw;
- roulette;
- level;
- several screws and dowels;
- shelf fastenings;
- decorative items that can be purchased in specialized retail chains.
The main element for self-production is a wooden board, chipboard or MDF panel. If the craftsman has not previously had experience creating a shelf with his own hands, you can start with a product of the simplest shape - rectangular, made from the most affordable material - a planed wooden board.
The main manufacturing stages will be as follows:
- Preparation of the drawing. There is no need to perform a detailed drawing of each individual element. It is enough to determine the dimensions of the future product, taking into account the place where it will be installed. If it is a wall, use a tape measure to determine the required length and width of the shelf, as well as where to install dowels for fastenings. Then a simple diagram, for example a rectangle, is drawn on a piece of paper, and the length and width of the product are noted in centimeters and millimeters. The drawing indicates the installation locations of fastenings or canopies.
- Making shelf parts. Based on the dimensions of the drawing, four boards are cut to create a top and bottom panel and two side walls of the same length. The edges of the boards should be sanded to remove roughness. To improve the appearance, the material can be coated with stain, which will improve the aesthetic properties of the surface and emphasize the structure of the wood.
- Assembly. The bottom panel is placed on a flat surface, the side walls are alternately applied from the ends and the places where the screws will be screwed in are marked. The side panels should be installed in such a way that their ends are open, and the edges of the bottom and top panels rest against the side walls and are not visible. Having attached the side walls, using a thin drill corresponding in diameter to the self-tapping screws, drill through holes with a recess into the horizontal bottom panel. This is necessary to prevent the board from cracking when screwing in the fasteners. Secure the side walls with self-tapping screws. The same is done with the top panel. As a result, you will get a shelf of the correct rectangular shape.
- Decoration. To give the shelf an attractive appearance and moisture resistance, you can coat it with wood varnish or use the so-called “Yacht varnish”; it costs a little more than usual, but is very resistant to moisture and creates a high-quality glossy finish. After the treatment has dried, you need to install fasteners with which the shelf will be hung on the wall.
- Installation of fasteners and hanging. Before hanging the shelf, the fasteners are installed on the top of the side walls at an equal distance (about 3–5 centimeters) from the top surface. The fasteners should not be mounted on the top panel, as this will reduce the product’s resistance to loads. The workpiece is applied to the wall at the place of its installation, using a level, give it a strictly horizontal position, and with a pencil mark the installation points of the dowels on which the product will be hung. If the wall is wooden, dowels are not required, just screw in the screws. Then, using a hammer drill or impact drill, holes are drilled in the wall and dowels with self-tapping screws are installed. Hang the finished product on the wall.
Making a simple shelf with your own hands is a fairly basic task. But models of more intricate designs using glass or metal are not as complicated as it might seem at first glance. The main thing is the desire to create a truly stylish and functional piece of furniture with your own hands.
Required Tools
Preparation of the drawing
Making shelf parts
Assembly
Decoration
Mounting and hanging
Accents in decorating walls with wallpaper
The main wall should immediately catch the eye, so it is important to use photo wallpaper.
The theme should be neutral and appropriate for the area where food is prepared and consumed.
The second function of photo wallpaper is to visually expand the size of the kitchen and optical illusion in the form of raising the ceiling.
It is best to place them in the dining area.
If you have a low ceiling, it is recommended to buy photo wallpaper with an elongated geometric pattern.
The presence of diamonds and vertical stripes in them will visually add height to the room.
Narrow openings will be made more spacious by a covering with horizontal lines. A dark kitchen will be enlivened by wallpaper in golden, peach or orange.
A striking example is a classic kitchen with a wall decorated with wall sconces and a painting.
Attention! If the room does not need to create additional “special effects,” then it is better to opt for any wall covering you like.
Traditions of ancestors
Since ancient times, the wall near the dining table has been decorated with a luxury item. For our ancestors it was a wall clock. 100 years ago they were rare and impressive to guests. A large original clock can become the highlight of the dining area even today. The wealth of choice allows you to choose a model to suit any interior.
No. 6. PVC film - temporary solution
If you need to make quick and inexpensive temporary repairs, then it makes sense to take a closer look at PVC film. For a while, just before you do normal repairs, it can serve normally. Its main advantage is low cost . In addition, the range of colors of such films is simply huge: natural materials, landscapes, ornaments, etc. You can handle gluing such material yourself; the film is resistant to mechanical damage, but that’s where its advantages end.
This material can gradually fade under the influence of sunlight, it is afraid of high temperatures, and if damaged it cannot be restored. It can be used as a temporary kitchen decoration, but is not suitable for permanent use.
How to decorate a kitchen apron cheaply?
12 options for a kitchen apron made from scrap materials are very affordable, easy and fast!
- 1 Perforated panels
- 2 Apron made from photo frames
- 3 Apron made of paper or card
- 4 Vinyl oilcloth
- 5 Apron made of wood or MDF
- 6 6. Mosaic apron made from old dishes
- 7 Stainless steel
- 8 Stone apron
Interesting materials:
What does deadlift do? What does the deadlift do? What is the salary for a kindergarten teacher? What does a stepper machine train? What is floor screed? Washing powder or gel, which is better? Page 1210 of the balance sheet what is included? What are OSS insurance premiums? Strict fasting, what can you eat? Super Mario how many levels?
Painting, photograph or poster
If you want your dining area to look more substantial, decorate it with a real painting in a carved frame. Reproductions and images from souvenir shops reduce the cost of the interior, so for decoration we recommend choosing inexpensive paintings by novice artists.
An even more economical way is to create an abstraction yourself, using the colors of the environment. There are many master classes online that describe in detail the technique of creating paintings from various materials.
Wood or its imitation
Wood textures give the interior a homely feel, dilute the coldness of light finishes, and attract attention. Treated barn boards look luxurious when contrasted with a neutral background. A simpler and more budget-friendly option is lining, which will add relief to the kitchen in the Provence style.
To imitate wood, decorative panels or laminate are suitable, which often continues on the wall, rising from the floor. There are also wallpapers with a wood pattern, but you should understand that this stylization does not replace the warmth and nobility of natural materials.
Choosing photo wallpaper for the kitchen: main criteria
The kitchen has a special microclimate and functional characteristics. Cooking and washing dishes is the storage of liquids and products on various surfaces. Therefore, it is worth understanding what to pay close attention to.
1. One of the most important indicators of kitchen wallpaper is density, which is directly related to the durability of wall coverings. In addition, the higher the density, the less impurities will accumulate in the pores.
2. Vapor permeability: affects the drying of walls, which has a great effect on the microclimate of the kitchen.
3. Wallpaper must have high light resistance, i.e., be minimally susceptible to fading in the sun. Otherwise, the drawing will fade and the image will lose its attractive appearance. This will deprive the entire room of its former aesthetics and lead to the need to replace the wallpaper.
4. Wet cleaning in the kitchen is common. That is why wallpaper for the kitchen must be resistant to moisture. During the cooking process, drops of fat, oil and many other unpleasant “guests” of the kitchen lining often fall on the walls. If the upholstery is chosen incorrectly, it will have to be replaced after a short service life.
There are also super washable wallpapers that can also resist brushing, but their extremely useful qualities come at a price, so make your choice according to your budget.
The market for modern photo wallpapers is represented by a large assortment that will satisfy even the most demanding customers. Arm yourself with advice and pay attention only to high-quality options - this way you won’t have to go through the difficult agony of choice.
No. 4. Glass: unusual and impressive
Glass has been used to decorate kitchen splashbacks not so long ago, but in vain. This is an excellent material that meets all the requirements for this zone. Glass panels with a pattern printed on them are also called skinali . They are made from thick tempered glass and decorated in various ways: by sandblasting, placing 3D polycarbonate material inside, or using ultraviolet printing. Sandblasting involves the impact of small abrasive particles on the surface of the glass under high pressure, as a result of which a relief three-dimensional pattern can be obtained, and for an even more spectacular result, some areas can be painted with colored enamels. Using UV printing, you can also obtain realistic, beautiful images, and apply any patterns and colors to glass.
The main advantages of this finishing method:
- high strength, because tempered glass is used, which is difficult to break, and even with a strong impact it is not capable of injuring anyone, because it shatters into fragments with blunt edges;
- practicality and ease of maintenance, resistance to aggressive detergents, while the appearance of the surface remains unchanged for many years;
- absolutely seamless coating, which ensures excellent hygiene, because dirt will not accumulate in the seams and microorganisms will not develop;
- unique appearance, because you can apply absolutely any image: be it fruit, a painting, or your own photograph.
As you can see, glass panels, or skinals, are distinguished by high performance and external characteristics, but are not yet used so often due to the high cost of the material and the work of organizing the apron in this way. Although the glass apron is easy to wash, you will have to do it regularly, because all splashes and stains are clearly visible on its surface . It will be very difficult to change the image if desired, and you will have to completely think through the interior in advance, because if it later turns out that you need to organize railing in the area of the work area, then this will not be possible. But a glass apron can be illuminated very effectively, and it will acquire a 3D effect.
Dishes
A charming technique that is gaining popularity again. To make the decorative elements look harmonious, we recommend choosing plates in the same style, but of different sizes.
The photo shows a dining table, above which there is a composition of plates with mirrors on the sides.
A good idea is to paint the plates yourself using acrylic paints. This is not at all difficult if you think through the theme in advance: it is better to start with ornaments and abstractions. To give your creations shine and protect them from the effects of wet cleaning, you need to coat them with varnish.
No. 9. Mirror: original, but troublesome
A mirrored apron will become a real highlight of any kitchen. It can visually significantly enlarge a room , so it is a good option for the smallest kitchens. The mirror is not afraid of moisture , and high temperatures, drops of fat, and detergents cannot harm it. This is a very original way of finishing that will transform the kitchen.
There are probably more disadvantages to a mirrored apron than advantages , although the issue must be considered individually in each specific case. The ability to reflect and double the area of the room can play a cruel joke: the amount of dirty dishes will also be doubled . There is often high humidity in the kitchen, so the mirror can fog up , and its appearance deteriorates. But the mirror will look much worse when it gets splashed with water and grease. Of course, it’s not difficult to wipe it down and put it in order, but such a procedure will have to be carried out constantly during active cooking.
