In winter, during severe frosts, ice, frost or condensation may appear on the inner surface of the door - this indicates freezing of the metal entrance door. What to do in such a situation? The difference in temperature outside and indoors leads to such consequences and indicates poor thermal insulation of the door. Therefore, we will consider in detail how to insulate a metal door in a private house and apartment.
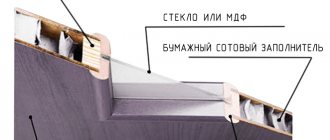
Metal by itself cannot serve as a heat insulator, i.e. it has a high thermal conductivity coefficient. Honeycomb cardboard, which fills most cheap, in particular Chinese doors, also does not cope with the function assigned to it. And it doesn’t have such a task; it is designed to reduce the weight of a metal door.
In rare cases, the cavity of the door leaf is filled with insulation, but it is impossible to check its presence in doors in the middle price range, so you have to take the seller’s word for it, and then think about how to insulate an iron door with your own hands.
Obviously, simple methods such as sticking a seal around the perimeter of the door leaf can do little to help in this situation. A more serious approach is required here, in particular, to insulate the entrance metal door in accordance with all the rules for carrying out thermal insulation work.
Choosing a material for insulating a metal entrance door
You cannot begin work without it, which is why you first need to decide on the best option, having previously examined each of them in more detail and purchase it. There are a large number of different insulation materials on the market, making it quite easy to choose the one that suits the cost and technical parameters. For thermal insulation, you can use not only hard but also soft materials.
Mineral and stone wool
Mineral wool is in quite significant demand on the market among consumers, which has an affordable price, perfectly absorbs noise, has the ability to restore its original dimensions after compression and, due to its soft structure, is easy to use. This insulation withstands temperature fluctuations, providing complete protection of the building from the penetration of cold into it, and it is also environmentally friendly, non-flammable and allows you to vary the installation height without the need for additional cutting.
Mineral wool is supplied for sale in rolls and sheets, which makes it possible to cut blanks of the required size, which are placed in cells created by the stiffening ribs of the door structure itself. To obtain the required thickness of the insulation, you only need to press it down (pressure), which in the end will in no way negatively affect the technical performance.
The disadvantages of mineral wool include softness, which leads to shrinkage over time, but this disadvantage can be easily eliminated by creating stiffening ribs in the door structure, which prevent the material from slipping over a long period. Its significant disadvantage is its poor resistance to the influence of moisture, often acting as condensation, which occurs due to a shift in the dew point inside the door leaf. To perform high-quality insulation and avoid this drawback, it is better to give preference to stone wool.
Unlike mineral wool, it withstands its impact and allows for effective thermal insulation even of the entrance doors of private houses. In another situation, mineral wool may be a suitable option only when insulating structures that are installed in heated vestibules or corridors of apartment buildings, as well as when additionally installing a waterproofing film inside it.
Foam plastic and penoplex
Preference is given to it quite often, since the insulation has insignificant weight, which does not lead to significant weighting of the door. The material has an optimal level of strength and excellent wear resistance, and due to its hygroscopicity, it does not require additional waterproofing. In addition, polystyrene foam has high soundproofing and thermal insulation properties, thanks to which it is possible to reduce noise levels and increase heat retention inside the house, as well as prevent the penetration of cold from the street. When choosing it, you should give preference to penoplex, which, unlike ordinary material, has a higher density, which is why such insulation, even of a finer thickness, has similar qualities as ordinary sheets of standard polystyrene foam. When using it as thermal insulation, it is advisable to additionally seal all seams with polyurethane foam to prevent the formation of cold bridges.
Note! It is not recommended to use ordinary polystyrene foam for insulation, since when heated it can release substances hazardous to health.
Polyurethane foam (polyurethane foam)
Not quite a traditional option for insulating doors, but which also has a number of positive qualities and even surpasses other materials in some respects. Initially, in order to obtain an effective result, you need to be able to correctly use a spray foam gun or the tube supplied with the container, thanks to which you will not only be able to complete the work fully, but also avoid spraying an excessive amount of excess.
The material itself, due to its airy structure, does not significantly increase the weight of the door leaf, withstands temperature changes and exposure to moisture, and if you know certain nuances, it is quite simply applied and evenly fills all voids, including hard-to-reach areas.
Step-by-step technique for thermal insulation of street doors with foam plastic ↑
Thermal insulation of street doors made of two-millimeter metal sheet and profile pipe is carried out both from the inside and from the outside. If forging elements were used when finishing the door leaf, then the insulation of the metal entrance door is done with your own hands only from the inside. In this case, various heat-insulating materials are used: insulation and sealants.
Weaknesses in the thermal insulation of iron doors
They begin work with preparatory activities related to measurements of individual structural elements and the acquisition of necessary materials:
- The depth of the cells formed by stiffening ribs made of a profile pipe is measured.
- Buy polystyrene foam of a thickness suitable for this measurement.
- All cells are measured in length and width.
- Foam blanks are cut into rectangular tiles, sparingly using the area of the entire sheet. The slabs are deliberately prepared slightly larger than the measured values to ensure a tight fit of the material into the cell between the profiles.
- Insulation blanks for an iron door are numbered so that you don’t waste time choosing the right part.
Comparison of foam plastic
Next, they begin to lay the cut pieces of foam plastic in the cavity of the “skeleton” of the door. To securely attach the heat-insulating material to the iron sheet, polyurethane foam is used.
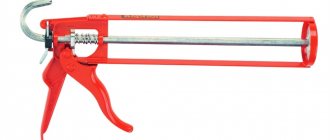
Applying foam with a gun
The work is carried out in the following sequence:
- Take a can of polyurethane foam and shake it vigorously.
- Turn the can upside down and begin to apply foam using a special gun, first around the perimeter of the cell, and then make several parallel foam lines inside it.
- Insert the workpiece with the required number into the cavity, pressing it against the applied foam.
- Move to the next cell, repeating all operations again.
- Then all the cracks and joints between the insulation and the profile, as well as between the composite pieces of foam plastic used to save money when insulating a cell with a door lock, are foamed.
Laying foam plastic slabs in cells
Installation procedure:
- The insulated door leaf is covered from the inside with a single-cut sheet of moisture-resistant plywood, which has a beautiful dark glossy surface that does not require additional finishing.
- To install the plywood sheet, the door is removed from its hinges and placed horizontally on two supports.
- A special U-shaped strip with a pocket into which a plywood sheet and an MDF sheet will be inserted is screwed to the iron frame on three sides (sides and bottom). The size of the pocket is calculated based on the thickness of the plywood, MDF panel and the height of the protruding screw heads.
- Cut from a standard size sheet of plywood and MDF panels of the required size. Insert them into the side U-shaped slats and push them to the bottom pocket, making sure that the sheets fit tightly and evenly into it.
- The top bar is made removable so that, if necessary, you can easily remove the damaged MDF sheet and replace it with a new one.
- The top strip is glued with silicone glue, applying it with a gun to the side of the plywood sheet and MDF panel.
See more details about the method of insulating the door leaf in the video.
Video: How to insulate the front door
Thermal insulation diagram
Here's how to quickly and easily insulate an iron door from the inside, making it an integral part of the hallway interior.
Before hanging a sheathed and insulated door on its hinges, do not forget to make a slot for installing the door handle, and it is better to install the accessory itself in advance. Otherwise, you can slam the door and remain closed in the room.
Please note that outdoor insulated metal entrance doors are thicker than the original version. This may result in the key not being long enough to open the lock. The problem is solved by lengthening the key. If you have a lever mortise lock, then the key should be long enough.
Due to the thickening of the door leaf, the square on the latching handle is also lengthened. The connecting rods of varying lengths required to install door handles on both sides are sold as separate door hardware items.
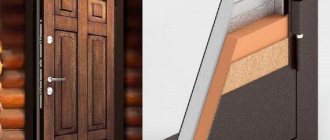
Standard thermal insulation pie
To prevent doors from blowing through the gap, D-shaped self-adhesive rubber seals are used. Before gluing the sealant, degrease the surface by wiping it with white spirit. Then remove the protective film and press the seal against the door frame around the entire perimeter.
An overlap of two seals is made in the corners, and then both materials are cut at an angle of 45 degrees with a sharp knife. Remove excess pieces by carefully gluing together the edges of the seals that meet in the corner.
Insulation of the door frame
Insulation of a metal entrance door should begin with the elements of the frame. If the box is made from a corner, then insulation is possible only in the places where the box adjoins the doorway. In this case, the gaps are filled with foam, and the excess insulation is cut off with a construction knife. If the box is made of a rectangular or square pipe, the insulation is placed inside the profile.
The better to insulate
To insulate the door frame, use foam or bulk insulation (sawdust, expanded clay).
Polyurethane foam is used to eliminate gaps between the frame and the doorway, as well as to fill the cavities of frame elements made from profiles.
Bulk insulation is used only for profiled frames. The profile is filled through a technological hole drilled in the upper part of the box. The diameter of the hole should allow the largest fractions of filler to pass through.
This method has a significant drawback: it is impossible to ensure that the entire internal space of the box is filled with bulk materials. As a result of uneven filling, voids are formed that freeze. Therefore, the use of bulk insulation is possible only in production conditions, when assembling the box in the workshop.
Materials and tools
To insulate the box you will need the following tools and materials:
- electric drill;
- metal drills with a diameter equal to the diameter of the nozzle of a cylinder with polyurethane foam;
- polyurethane foam;
- construction knife.
Insulation instructions
To fill the door frame with foam, you will need to prepare technological holes with a pitch of 500 mm. Through these holes, the internal space of the profile is filled with polyurethane foam. Excess foam coming out through the holes must be removed with a construction knife.
The gaps between the door frame and the doorway are cleaned of old insulation, moistened and filled with polyurethane foam. Excess foam is removed using a construction knife, after which the contact point between the box and the wall is masked with putty.
Door seal
Very often the cause of drafts is a large gap between the door frame and the leaf. Rubber seals can solve the problem. This element has a sticky base, due to which it is securely fixed in place. It can be found on sale in various profiles and widths. If desired, you can add glue to the adhesive part.
Rubber seals are available in stores, but if desired, you can make them yourself. For this purpose, take strips of foam rubber, the thickness of which corresponds to the size of the gap, and wrap them in upholstery material, for example, dermantin (it is desirable that the shade matches the shade of the door).
The resulting rollers are nailed along the perimeter of the canvas. Perhaps the look is not entirely aesthetic, but the quality of such work is beyond doubt.
Threshold insulation
Sometimes front doors release heat at the threshold area. This can and should be fought. There can be several ways:
- Replacing the threshold with a new one, with a clearly adjusted height and high-quality work.
- Creating a roller, similar to the one described in the insulation of the door contour. The object is fastened using nails to the bottom of the canvas.
- A special sealing brush, which, like the roller, is attached to the bottom of the canvas using nails.
Eliminating Gaps
Heat loss occurs not only through a metal leaf or door frame. During the installation of the structure, a so-called technological gap is created - a gap between the wall and the box, usually its dimensions are about 2 cm. For insulation work, it is best to use polyurethane foam. Simply covering the cracks with cement is not a solution, since such a mixture is not a heat-insulating material. It does not protect the room from the cold, but shrinks over time.
Thermal insulation of the technological gap must be carried out in the following sequence:
- From the side of the room, remove the casing in the place where the box comes into contact with the wall. Secure the polyethylene film.
- Remove the casing from outside the apartment. Moisten the space in the crack with water. You can use a spray bottle. This is necessary so that the polyurethane foam hardens much faster.
- Apply the first thin layer of foam. Its path should be uniform, without breaks or omissions.
- After about 20 minutes, when the first layer of foam expands, apply a second ball of it. It is necessary to ensure that the substance does not bleed beyond the perimeter of the door frame.
- When the foam has completely hardened, remove the polyethylene film that served as protection from inside the apartment.
- At the end of the work, install the platbands in place.
If the foam appears a little outside the box, it’s not a big deal. It must be carefully cut with a construction knife.
We insulate the door frame
The frame of the metal door leaf is made from an iron angle, which is secured in the opening with anchors. After removing the old door structure, large gaps often remain between the mounted door frame and the load-bearing wall or partition. When installing, builders blow them with polyurethane foam, but it has a certain drawback: the material is afraid of sunlight. If sections of the foam are not protected from ultraviolet radiation in time, it will crumble into dust over time.
The old deteriorating foam from the box must be removed and insulated again
How to do it correctly:
- We clean the wall adjacent to the doorway from the remnants of the polyurethane foam, spread the plaster down to the brick or concrete and remove the dust.
- Spray the surface with plain water and foam the visible indentations. The foam will stick better to the wetted wall.
- When the material hardens, cut off the excess.
Seal installation
Another weak point in the design in terms of heat loss is the area where the sash comes into contact with the frame. If it does not fit very tightly, a draft will appear. This problem can be eliminated by installing a seal. It is produced in the form of a self-adhesive tape, which can have a different profile (section).
If the gap is small, then an oval or round seal will be useful.
If the gap is more than 3 mm, then it is worth buying a tape with a cross-section in the shape of the letter P.
Before insulating a metal entrance door, in addition to the seal itself, for insulation work you will need to acquire scissors and some kind of solvent to degrease the door.
The scheme of work is as follows:
- If an old seal was installed on the door, it must be removed and the surface thoroughly cleaned.
- Degrease the area for the tape using a solvent.
- Glue the seal around the perimeter of the sash, retreating approximately 3 mm from the outer edge. In this case, the tape must be pressed well to ensure good adhesion (without waves).
Do not pull the tape too tightly while gluing. Otherwise, it will not adhere well to the surface of the door and may come off. It is not recommended to purchase a seal that is too thick, as this may cause the door to open and close poorly.
Why does heat pass through the door?
It happens that the canvas has high-quality insulation, but for some reason the heat leaves the room. What is the reason? Common causes of heat leakage include:
- Presence of cracks in the canvas. These defects may appear due to inaccuracies during the installation of the structure, subsidence of the structure, or, for example, such unfavorable factors as sudden temperature changes, etc. Sealing compounds or putty will help solve the problem.
- Insufficient fit of the front door to the frame. This is associated with deformation of the canvas or damaged loops. Replacing elements or adjusting the dimensions of the door will help correct the situation.
- Large space between the threshold and the bottom of the canvas. This situation can be changed by replacing the worn threshold with a new one.
Another possible reason is the insufficient thermal insulation properties of corrugated cardboard or other thermal insulation material. Sheathing, upholstery or the construction of a vestibule will help to cope with the problem.
How to insulate a door frame?
Many people think that to insulate a metal entrance door it is enough to insulate only the leaf. But in fact, the box also needs insulation. If it is made of a metal corner, then insulation can be done only along the perimeter where it adjoins the opening. To do this, just blow out all the cracks with foam. When the substance hardens, the excess can be cut off with a knife.
In the case when the box is made of a square or round pipe, then insulation can be placed inside it.
Suitable for these purposes:
- Polyurethane foam. It is convenient to seal the gaps between the wall and the frame, as well as fill all the cavities of the door frame.
- Bulk materials. This could be expanded clay, sawdust. To do this, make a hole in the profile and fill it with filler. If you perform this procedure yourself, then not all voids can be filled with material. Thorough insulation is only possible when the box is manufactured in a factory.
But you can try to do the insulation yourself. To do this, you will need a drill and suitable metal drills, the insulation itself (spray foam), and a knife.
Completing of the work:
- Holes are made every 50 cm.
- Using them, the cavity inside the box is filled with foam.
- All of its excess that has emerged through the holes is cut off with a knife.
- The gaps between the opening and the box are also filled with foam.
- When the substance becomes hard, it is cut and puttied.
Internal and external insulation of a metal door will reliably protect the room not only from thieves, but also from frost. You can carry out insulation work on your own by placing suitable material on the outside or inside of the sash. You should also take care of insulating the box and gluing the seal. Only a set of measures will prevent heat loss.
Common mistakes when organizing door thermal protection
No one is immune from mistakes: both an experienced master and a beginner can make them.
To avoid insulation defects, consider:
- Season.
It is better to insulate the door opening and the entire structure in the warm season. If it was not possible to complete the work before the onset of cold weather, postpone the procedure until later, even if the entrance area is located in a warm dressing room or entrance. - Attention to detail.
In addition to the canvas, thermal protection should cover the gaps between the frame and the wall, the frame and slopes. If you only nicely insulate the sash, it won’t make your home any warmer. - Saving.
When choosing mineral wool, you should additionally ensure that there is a membrane film that protects the material from moisture. Wet thermal insulation significantly increases the weight of the sash, which can cause bending of the fasteners.
A metal entrance door, insulated according to all the rules, in addition to providing reliable protection from intruders, will also increase noise insulation characteristics, creating a barrier against the entry of street noise and cold into the room. The presence of insulation protects the canvas itself from the appearance and development of rust, which increases its service life. Do not skimp on the quality of materials used for insulation and do not forget to periodically check the condition of the seal. Once completed, the insulation work will allow you to forget about the cold at home for a long time.
Do-it-yourself insulation of a metal entrance door
The process begins with the selection of the optimal thermal insulation material, which determines the effectiveness of insulation and its duration.
How to insulate a metal door
Types of insulation:
Penofol
Thanks to the reflective ability of the foil layer, it retains almost all the heat in the room. Used only as additional material.
Insulating a metal door with penofol
Rigid insulation
These include polystyrene foam and expanded polystyrene (penoplex). Their advantage is ease of installation and relatively low price. Since it is not hygroscopic, it does not require additional films. This is the only suitable option for installation in a cottage, country or rural house. Indeed, in this case, the door serves as a barrier to low temperatures and wind, which is not observed in apartment buildings where the door opens into the entrance.
Insulation of a metal door with polystyrene foam and polystyrene foam (penoplex)
Note. When choosing thermal insulation material, give preference to penoplex (expanded polystyrene). It is an order of magnitude denser than polystyrene foam and will provide the door with much more effective insulation.
Soft insulation
This category includes glass wool and mineral (basalt) wool. Their difference is only in the raw materials; in terms of their thermal insulation characteristics, they are not very different. Mineral wool is characterized by environmental friendliness, fire safety, and the ability to vary the installation height without additional trimming.
Cotton wool is sold in rolls or sheets, which makes it possible to cut blanks of the required sizes from it and place them in cells formed by the stiffening ribs of the door itself. To ensure the required height (thickness of insulation), simply press down the material (press cotton wool), the thermal insulation properties will not be affected.
But cotton wool has a drawback that prevents it from being recommended for installation in iron doors for private homes. Because There are different temperatures on different sides of the door, and sometimes the difference is up to 40 °C (-15 outside and +25 in the house). This leads to a shift of the dew point inside the insulation, and the wool gets wet. The effect can be neutralized by installing a hydrobarrier film.
But, nevertheless, professionals do not recommend insulating an iron door with cotton wool in a private house. It can become an acceptable option only if the entrance door to the apartment is insulated, since in this case there is not such a big difference in temperatures (it is much warmer in the entrance than outside).
Insulating a metal door with mineral wool
Inflatable insulation
Presented with polyurethane foam. Spraying makes it possible to fill all the cracks, but has a high price.
Insulation of a metal door with polyurethane foam (PPU foam)
Thermal insulation of luxury metal doors is carried out using three types of materials: foam plastic (main material), penofol (additional), polyurethane foam (filling the voids of the stiffeners and frames).
Note: a set of materials that can be found in stores is of little use for insulating an external metal door, because They use dermantin, foam rubber or synthetic winterizer as insulation.
How to insulate a door if it faces the street
In private houses or country houses, there is also a need to insulate an iron street door. Considering that the door is constantly exposed to weather changes and seasonal changes, it is necessary to take a responsible approach to the material that will be used inside the door leaf.
The following materials are suitable insulation for a street door:
- expanded polystyrene;
- Styrofoam;
- expanded clay
These materials have minimal hygroscopicity, so changes in temperature and humidity will not affect their thermal insulation properties.
The process of insulating street metal doors is no different from the process of working with apartment doors.
Step-by-step instructions for insulating a wooden door in a private house
The work is carried out taking into account the characteristics of the entrance group and the installation technology of the selected insulation.
Tools and materials
In the process of working, the following set of tools, devices and materials is required:
- nail puller, pliers;
- screwdriver, hammer;
- hacksaw, jigsaw;
- tape measure, stationery knife, scissors;
- construction stapler.
It is also necessary to prepare the estimated amount of insulation, sealant, sheathing material and fasteners.
Preparatory work
At the preliminary stage, the following work is performed:
- remove the door leaf;
- unscrew door fittings and hinges;
- remove the casing, if present;
- remove old insulation and sealant residues.
Next, the canvas and box are checked for structural defects, distortions and other defects are eliminated.
Cutting and laying insulation
Based on the measurements, blanks of the required sizes are made. When arranging a frame structure, the voids are tightly filled with layers of insulation. The material is fixed using a construction stapler.
Door trim
Dermantin is mainly used as a finishing layer. The upholstery fabric should be cut taking into account a margin of 10 cm on the sides in order to create the necessary thickening around the perimeter. The upholstery is secured with decorative nails and cord to form a distinctive raised pattern. Next, install the door hardware.
The surface of the door leaf is lined with artificial leather from the inside
Seal installation
To eliminate gaps, use self-adhesive strips or install a harpoon seal. Thanks to the special shape, the product fits as tightly as possible to the base, ultimately eliminating the risk of drafts and reducing the level of heat leakage from the room.
Additional measures and means of hydro- and thermal insulation
For maximum quality insulation of a street door in a private house, the joint around the perimeter of the frame is equipped with dermantine rollers with a foam insert inside. It is recommended to line the surface of the entrance sheet with artificial leather from the inside. From the outside, the structure is sheathed with a material that is highly resistant to aggressive atmospheric influences.
Nuances of external insulation
A factory or homemade metal door is insulated along the leaf located from the inside of the room. The same insulation materials are used. Protection against heat loss is carried out using two methods:
- Thermal protection using a frame on slats. After dismantling the fittings, the slats are fixed to the canvas using self-tapping screws or a metal profile is mounted by welding. The resulting frame is filled from the inside with thermal insulation, attached with glue. Fiberboard, previously cut to the required dimensions, is fixed on top of the resulting structure.
- A less labor-intensive option is lining with thermal insulating material. To carry out the work, the canvas is removed, cleaned and coated with glue on its surface, and a layer of insulation is laid. Thermal protection is masked using upholstery fabric secured along the outer perimeter.
Stages of plating an iron model
The sequence of actions when covering an old door depends on its design. If the design is more modern and the metal panels are attached to the base with screws, the insulation is done internally. When starting internal insulation, we remove the metal structure and place it on a work surface. Unscrew the screws and remove the metal panel (to ensure that the screws unscrew well, lubricate them with machine oil). Using a tape measure, take the dimensions of the internal cells of the door.
Carefully measure the insulation material and cut it off. Be sure to cut out a place for the door lock and peephole. For old doors, polystyrene foam or foil-lined stone wool are great. We treat the inner surface of the old structure with glue (liquid nails) and glue the prepared insulation. If there are any gaps between the old door and the insulation, fill them with foam. You must work carefully, squeezing out the mounting foam in small portions. It is important to ensure that it does not get on the bolt lock mechanism. For additional sound insulation, we lay foil insulation between the insulation and the metal sheet. We cover the structure with a metal sheet and screw in the screws.
If the old door is made by fixing metal panels by welding, then we proceed to insulate the old door using the external method. We prepare wooden blocks 20 (30) x 20 mm. We measure the parameters and cut the slats to the required length. Using a drill, we make holes for future fastening in the metal sheet. We assemble the base from prepared wooden blocks and fasten it to a metal sheet with self-tapping screws.
We prepare insulation according to the specified dimensions. We line and glue the insulation into the cells between the slats. We fix the MDF panel or board with screws. Additionally, for sound insulation, the door can be treated with leatherette from the outside or inside. To do this, we bend the leatherette and fix it with staples. Lubricate the lining and hem of the leatherette with glue (liquid nails) and press firmly against the metal sheet. This work is painstaking. At the last stage, we install door locks, handles, and a peephole. We return the finished door to its place.
When covering a single-layer metal door, it is necessary to measure the cells between the stiffeners. We cut the inner material to the specified size. We quickly glue the insulation into the cavity. We eliminate cracks and small gaps using polyurethane foam. We decorate with MDF panel.
Modernization of the canvas
At the beginning of the procedure, you will need to disassemble the door structure, remove all the fittings, and dismantle the lock. After dismantling, the canvas is thoroughly cleaned of dirt and dust.
A detailed guide will help you insulate the door from the inside yourself.
If the canvas is devoid of rigidity ribs inside, then it is reasonable to start the process by arranging the internal frame base. It is not difficult to make it from timber, attaching it with self-tapping screws to the crossbars and around the perimeter. It is important to calculate the consistency of the thickness of the bars and the door.
Insulation material is fixed in the spaces between the beams. For fixation, it is recommended to apply glue and fixation to the frame beams. The adhesive mass should be applied to the entire surface of the product, and sheets of material should be pressed tightly against it. Precise cutting of the insulation involves its tight fit into the cells of the frame. If by chance there are small gaps between the inserts and the beams, they must be filled with construction foam. The excess is removed after curing.
Beautiful ideas
The appearance of the front door always emphasizes the status of the owner. Therefore, in a private home the requirements are especially high. Here it is important to take care of a decent image. The market for metal doors is saturated with a variety of products. Another good thing is that doors can be ordered according to a personal project.
And yet, how nice it is to work on the design yourself! We offer several ideas for decorating metal doors with your own hands. The design of a door in an apartment is interesting because the outside can be decorated so as not to attract other people's attention. The simplest, most affordable way is to decorate a metal door with bright fittings. You can attach new numbers to the outside, add stylized handles, hinges, and locks.
For those who prefer natural materials, we can recommend covering the inside of the door with MDF panels or simple wooden slats. The design and color of the metal door of a private house, as well as the shape, depend on the style in which the house or cottage is built. For fittings, you can use forged parts, stained glass windows, glass inclusions. And instead of a modern bell, you can hang a knocker or gong.
Working with slopes
It happens that if installed incorrectly, frost regularly appears on the slopes of the front door. In such a situation, it is worth removing the slopes and installing them again.
Insulation of entrance door slopes
First, the surface of the walls is cleaned, primed and the cracks are filled with putty. If the slopes are damaged, replace them with pieces of drywall of a suitable size, and strengthen the corners with paint corners. In general, insulating a metal door is not difficult to do with your own hands: at minimal cost, the result will definitely please the owners and will become obvious in the near future.
Improving the characteristics of Chinese products
The Chinese-made door is a non-demountable structure. To insulate it, remove the door and place it horizontally. We remove the handles, peephole, locks. Then we begin to attach the frame and stiffeners to it, both from the inside and from the outside. Therefore, we choose a wooden beam with a thickness of 20 * 20 mm, or more (we start from the thickness of the insulation material). If desired, you can weld a metal base, attach it with self-tapping screws or weld it to the door leaf, and fill the joints with polyurethane foam.
The next step is laying insulation. If fibrous materials are selected (mineral wool, stone wool), we lay out a water-repellent material larger in size than the base cavities, approximately 200 mm, secure with glue (liquid nails) and line the wool, having previously cut out a canvas slightly larger than the size of the base cells, and cover with another layer of water-repellent material. We fold the edges of the film tightly onto the top layer and secure with tape.
We cover the insulation with foil isolon or penofol with the foil side facing the room. This will improve the soundproofing qualities of the door. Polystyrene foam, expanded polystyrene, polystyrene, foil-coated isolon do not need waterproofing, since they themselves have water-repellent properties. Next, use a tape measure to measure the distance between the stiffeners, cut the insulation a little larger than necessary to avoid the formation of a cavity between the insulation and the base of the door. We glue the insulation into the cavity with glue (liquid nails).
We coat the base attached to the surface with mounting foam at the joints. The next step is to decorate the structure with an MDF sheet, panel or alternative material. It is important to remember that the decorative panel must be attached from the bottom up. We secure it, install locks, a peephole and handles, and hang the door. Now the door keeps the house warm and also protects from noise.
How to deal with condensation?
If the insulation has high thermal conductivity, this can lead to the formation of condensation. The appearance of moisture here is associated with a large difference between the temperature indoors and outdoors. To eliminate it, it is necessary to create a thermal break, for example, install a second wooden door. That is, you will need an organized space between the room and the door, or better yet, between the layers of the door leaf inside and outside.
All this may not seem entirely convenient. In this case, ready-made metal doors with a thermal break will come to the rescue, which can be ordered in the store directly along with installation. You can find them by the name “thermal doors”. In fact, they are standard structures with inserts made of corrugated cardboard, polyurethane foam or other materials.
Tips and tricks
The following recommendations should be followed:
- It is best to insulate a plastic door with glass, using an additional double-glazed window;
- it is necessary to pay equal attention to both the insulation of the canvas and the thresholds and the perimeter of the doorway;
- standard Chinese metal doors immediately need to replace the insulation.
The front door requires special attention when protecting from the cold. The entire perimeter should be insulated, and the door should be closed tightly and quietly using a seal. The insulation process for doors made of plastic and metal with wood is different.
Characteristics of insulation
All door insulation must have the same characteristics. First of all, low thermal conductivity. This quality is extremely important when insulating dachas, garages and private houses - places where the doorway quite often opens directly onto the street.
Also valued is high resistance to adverse factors, such as changes in humidity, temperature, fire resistance, etc. In addition, the insulation should not lose its qualities over time. It is important that the material is elastic and easy to install. At the same time, its accessibility is not the least important. Good material should not be expensive so that doors are available to a wide range of consumers.
Plastic
Installation of insulation is carried out similarly to wooden structures. A plastic door, which is covered with dermantine on top, will provide good protection from the cold. Only here it is necessary to replace the nails with construction glue. The process goes like this:
- remove the door;
- remove the fittings;
- install insulation;
- lubricate the structure and all elements, and then install the handles back;
- decorate the surface according to personal discretion.
Which of the tools
In addition to the insulation itself, you will also need tools. Minimum standard set:
- roulette;
- a flat board, lath or metal ruler;
- knife (stationery or kitchen);
- screwdriver;
- hacksaw or jigsaw;
- hammer;
- screwdriver or drill;
- pull out;
- furniture stapler.
It is possible that in some situations other devices may be needed. You should also prepare fittings and screws. Now we insulate wooden doors with our own hands according to the instructions below.
We prepare the necessary
First, let's do the preparatory work. Carefully remove the door from its hinges using a pry and lay it on a flat surface. Next, remove all the fittings and put them aside. If there is internal lining, carefully remove this layer as well.
Tepofol NPE “S” Self-adhesive – Foil / Metallized
| Name | Thickness | Dimensions | Square | Photo | Price per m2 |
| Tepofol 3mm foil self-adhesive | 3mm | 1mx25m | 25m2 | Photo | 87 |
| Tepofol 4mm foil self-adhesive | 4mm | 1mx25m | 25m2 | Photo | 90 |
| Tepofol 5mm foil self-adhesive | 5mm | 1mx25m | 25m2 | Photo | 95 |
| Tepofol 8mm foil self-adhesive | 8mm | 1mx25m | 25m2 | Photo | 105 |
| Tepofol 10mm foil self-adhesive | 10mm | 1mx25m | 25m2 | Photo | 115 |
| Tepofol 15mm foil self-adhesive | 15mm | 1mx25m | 25m2 | Photo | 180 |
| Tepofol 20mm foil self-adhesive | 20mm | 1mx25m | 25m2 | Photo | 190 |
| Tepofol 25mm foil self-adhesive | 25mm | 1mx2m | 2m2 | Photo | 265 |
| Tepofol 30mm foil self-adhesive | 30mm | 1mx2m | 2m2 | Photo | 245 |
| Tepofol 40mm foil self-adhesive | 40mm | 1mx2m | 2m2 | Photo | 300 |
| Tepofol 50mm foil self-adhesive | 50mm | 1mx2m | 2m2 | Photo | 360 |
How is heat lost?
Pay your attention first of all to the main line of defense - the entrance doors. If there are gaps between the door frame, then no amount of batteries will protect you from cooling outside.
A draft makes its way into the house between the jambs and sagging doors, which are formed for a number of reasons.
There are 3 main types of thermal insulation failure:
- Gaps between the boards of the door leaf. The space can be created by the expiration of material or padding, which creates cold bridges through which the cold enters directly into the house. To avoid this problem, remove these boards when adding filler and cover empty cells with it.
- The gap between the box and the canvas. It appears due to frequent use, poor quality material or installation.
It is highly not recommended to buy a wooden entrance door made of pine and spruce, because this material tends to dry out quickly. But doors made of dark exotic woods will serve you for decades.
Also, be careful during installation, because a few carelessnesses and you will have to re-cut and align the openings.
- Gaps between the opening and the wall. A common problem in older homes and damp areas. Over time, the material dries out and thermal insulation failure occurs. The problem is solved by using polyurethane foam, but only with precise and dense placement of the platbands. If you install them loosely, the foam collapses and loses its protective properties.
When you are completely sure that the source of the cold has been eliminated, then start insulating the wooden door!
Insulation of the Chinese model
Insulation will help increase the level of comfort in an apartment or house. The technological process of insulation is relatively simple.
Thermal insulation is carried out by covering the canvas with insulating material from the inside.
- Before starting insulation, it is necessary to free the canvas from fittings and upholstery material.
Important! If you cannot carefully remove the structural elements from the surface, there is no need to worry, since the surface is updated with fiberboard strips.
- Wood slats are installed around the perimeter and secured with screws. The size of the slats is adjusted to the corresponding parameters of the canvas. Their immediate thickness can reach 2 cm.
- The space between the slats is filled with foam. Glue is used to secure the material. Large gaps become foamy.
- use fiberboard to sheathe the inside. Fastening is done using metal screws.
Standard insulation
Important! Holes for fittings are pre-drilled in foam plastic and fiberboard panels.
- Foam rubber is glued to the fiberboard panels.
- The insulated structure can be covered with vinyl leather.
- The final stage is the installation of fittings.
Tools and materials
When you have finally decided which filler to use to insulate the doors, it’s time to prepare all the necessary tools:
- hammer;
- decorative nails;
- measuring instruments (tape measure, ruler, pencil);
- wood saw;
- sharpened knife for cutting;
- stapler and staples;
- pliers or nail puller;
- sealing tapes.
The list is impressive, but all items are necessary. And for this case there is an English proverb - “Necessity is the mother of invention.”
It is best to choose a leather substitute for upholstery. This material has many advantages: moisture-resistant, tension-resistant and easy to clean. Plus, it's available in many hardware stores and chain stores, so your search won't take long!
Eliminating gaps between the canvas and the box
The appearance of cracks is considered one of the main reasons for low thermal insulation of a door. How to insulate a metal entrance door in this case? First of all, you need to attach a seal. The easiest way is to glue a ready-made rubber seal with an adhesive base. All that remains is to choose the correct thickness and measure the required length.
The effectiveness of door insulation depends on the thickness. If it is insufficient, the problem will not be eliminated. And if it is excessive, the door will not close well.
To determine the required thickness of the seal, place a thin piece of plasticine in a plastic bag and close the door. Now open it. The thickness of the plasticine roller will be the thickness of the seal that you need.
The procedure for installing the seal:
- The old sealant is removed (if any), the surface is degreased with a solvent.
- The sealing tape is glued along the perimeter of the canvas with an indentation of 3 mm from the outer edge. The material should be pressed well to avoid unevenness. Ready!
Installation of hinges and fittings
When the canvas gets a new appearance, you need to put the removed fittings back in place. The hinges must occupy their nests exactly as they were installed before work began. The seat for the lock must be carefully cut out so that there is no damage to the upholstery of the door leaf around it.
If necessary, insulation can be combined with replacing the lock on the front door.
The insulated door is mounted back
Clearance seal and door interior trim
When your canvas is ready for installation, begin twisting strips of leatherette and insulation to join the door.
To get such a detail, you need to wrap the filler in a tube made of leatherette. The shape will resemble shawarma or sushi! With their help, the entrance will be tightly closed, leaving no space for through jambs.
Rolls can be secured using standard methods - nails or paper clips.
You should end up with a box with leatherette lining on all sides, which will insulate the heat escaping from the house and will tightly secure the ajar door when closed.
