- Date: 05/23/2015 Comments: Rating: 44
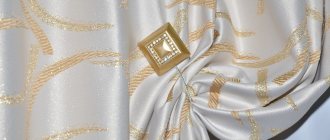
As a rule, any curtains in a room will look tasteful only if they are enlivened with some minimal accessories. They can be either purely decorative or have a certain functional purpose.
Figure 1. To make a holder from a disk, you simply need to insert the curtain into the disk from under the bottom, and then fix it at the selected desired height. Nowadays, more and more people prefer, in addition to blinds and tulle, to hang curtains on the windows, even if they are not used no direct use is planned. Therefore, do-it-yourself curtain holders are becoming increasingly popular.
This is easy to understand, since it is the curtains that give the window a complete look. Now there are many options for how to make curtain tiebacks with your own hands. Moreover, for this it is absolutely not necessary to use expensive materials and tools. Let's look at two of the simplest and most beautiful curtain holders.
Disc holders
Figure 2. For decoration, you first need to wrap the bead with tape, then take the end of the thread and fix it on the tape at the top of the bead, additionally fixing it with glue. The first version of the holders is based on the most ordinary computer disks. These elements are completely suitable for any style of curtains at any height ceilings and room volume.
It is only important to choose the right color scheme. So, for work you need: two standard computer disks; silicone transparent glue; pencil; compasses; scissors; satin ribbon in the curtains or in contrast with them (to end up with a good combination); two Chinese sticks; plain paper; additional small elements for finishing (optional). So, let's get to work. First you need to place a sheet of paper on a flat, hard surface and place the disk on it.
You need to trace the outline of the disk with a pencil. After this, remove the disk, and start drawing a new inner circle in the circle on paper. Please note that it should be positioned so that it is halfway between the edges of the main outline and the inner small circle. The circle is drawn using a compass. After this, you need to cut a disk out of paper along the contour, and cut out the middle in it along the line that was just drawn with a compass.
Next, this blank is applied as evenly as possible to the disk itself, on which the outline of the inner circle is drawn using a marker. It is along this boundary that you will need to remove the middle of the disk, as has already been done on paper. The same must be done with the other disk. Next, you need to cut out the centers from the disks, you can do this with a sharp knife, or you can do it easier - just burn the contour inside with a soldering iron, after which it will fall out on its own.
The bases for the holders are ready! Now let's start decorating them. To do this, a little glue is dripped on both sides of the disk along its surface, and after that a tape is applied, only a little obliquely, so that in the end it turns out to beautifully wrap the entire base. At the end, we additionally fix the tip with glue. Similar operations are performed with the second disk.
Figure 3. When you reach the back edge of the bead, secure the other end of the tail there tightly with glue and cut the thread. So, now we move on to the sticks.
There are two options: you can leave them as they are, or you can also wrap them with tape. Alternatively, the sticks can simply be painted with transparent or colored varnish. The round base itself can also be additionally decorated with all kinds of beads, butterflies, and sparkles, which are attached with glue. Here everything will depend personally on your imagination. To use such holders, you simply need to insert the curtain into the disk from under the bottom, and then fix it at the desired desired height by passing a stick under the fabric so that it rests on the other side of the disk, and its middle was covered with a curtain (Fig. 1). Return to contents The second option for do-it-yourself curtain tiebacks is based on wooden beads.
Figure 4. To string beads onto a ribbon, you need to thread a strong thread into a gypsy needle, make a knot, and then fix the thread on the ribbon. This is also a completely economical and accessible decor option, which is absolutely easy to do with your own hands if you stock up on the necessary materials in advance work: wooden beads of any size (about 14 pieces); scissors; transparent silicone glue; gypsy needle; satin ribbon; beautiful silk threads like “Iris”; strong thread; double-sided tape. Return to contents So, let's get to work! First we work with beads. It will be necessary to completely cover their surface with Iris threads so that only the holes remain free. To do this, you need to use double-sided tape and glue.
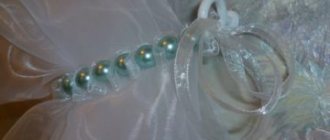
So, you need to first wrap the bead with tape, then take the tip of the thread and fix it on the tape at the top of the bead, additionally fixing it with glue. Next, the thread is wound tightly around the bead so that the wood is not visible. Again, if necessary, in those places where the fit is not tight enough, you can use glue, only in a very small amount. The work will look something like this (Fig.
2).When you reach the back edge of the bead, firmly fix the other end of the tail there with glue and cut the thread. The finished bead will look something like this (Fig. 3). In the same way you need to decorate all the remaining beads. Return to contents
Figure 5. The length of the ribbon and the fixing moments are selected so that in the end the ribbon is enough to wrap around the curtain. Next, you need to wait until the threads with beads finally grab each other, and then proceed to the next stage of work. It consists of stringing the beads onto the ribbon .
To do this, you need to thread a strong thread into a gypsy needle, make a knot, and then fix the thread on the ribbon, as when sewing (Fig. 4). After this, you need to use a needle to thread 7 beads through the ribbon. Then it is advisable to fix the ribbon in the places of the outer beads so that they do not fall apart.
The remaining piece of tape must be cut off. In this case, the length of the tape and the fixing moments are selected so that in the end the tape is enough to wrap around the curtain (Fig. 5). Similar work is done for the second pick-up. All you have to do is burn it a little or cover the cut ends of the tape with transparent varnish so that they do not separate into individual fibers.
This tie is placed on the curtain and secured by tying it with a regular bow. The holders are ready! So, two options for curtain ties that you can make with your own hands have been considered. As you have already seen for yourself, these options are very inexpensive and simple, so even a schoolchild can make them.
But originality and beauty will be guaranteed to you! “Kvartblog” continues to guard the originality of your home. Let's figure out what we can use to make unusual and funny curtain tiebacks. 1. Our girl editors liked the first idea the most. She is simple, sweet and elegant.
And besides, it allows you not only to decorate and secure the curtains, but also not to lose your decorations around the house. An excellent idea for women’s and family interiors are tiebacks made from bracelets and beads. Particularly suitable are those models in which the beads are strung on an elastic band. In this case, you don’t even have to nail hooks to the wall on which these strings of pearls and gems will be hung.
How to hang a cornice: a detailed description of the installation process
Installing a cornice usually takes no more than 20-30 minutes and can be done by anyone, even those who are doing it for the first time. The process itself is divided into two parts:
- Marking the installation site.
- Fixation of the product.
Marking the installation location of the cornice
Preliminary marking of the mounting location is necessary in order to install the cornice exactly in the right position and where it is needed, and not to redo all the work and drill new holes when it is noticed that the structure is crooked. It is performed in several stages:
- Decide on the location of the cornice - at what height it will be mounted.
- Take measurements between the structure holders. This will allow you not to calculate the distances between the support brackets and avoid accidental errors.
- Measure the required distance from the ceiling, make a main notch with a pencil in the center of the window opening - this is where the center bracket of the cornice will be attached.
- Using a tape measure, measure the required distance to the next holders from the central notch and make marks.
- Attach the bracket supports to the marked places, mark the points for the holes for fastening.
When marking the installation location of the holders, be sure to make sure that there are no electrical wires in the fastening areas. To do this, when performing work, you should check the project or use a special indicator that controls electrical interference.
Also, when marking, you should make all marks relative to the ceiling, and not the horizon line. The explanation is simple - in many rooms the ceiling has a slope, and if you install the cornice parallel to the horizon line, then it will appear crooked relative to the surface of the ceiling.
Installation of cornice
The mounting points are marked, all that remains is to fix the structure. To do this you will need a hammer drill or drill, dowels and self-tapping screws. Most manufacturers also include fasteners for fixing the curtain rods, but this does not mean that it is necessary to use them. It may not be suitable for you.
And all because the type of fasteners is selected individually depending on the material of the walls. For example, for concrete walls you need classic dowels, for foam blocks it is better to take special plastic bushings, and in wooden walls you can immediately screw the brackets with screws.
Hook as a type of curtain holder
The most popular decorative elements of a curtain composition are a pair: a holder made in the form of a hook and a curtain tieback. Most often, such curtain holders are made of metal, and can be decorated with forging patterns or various elements.
In this case, the place where the curtain holder is attached in the form of a hook plays a very important role, namely:
- At the same level with the window sill - this option for attaching tiebacks is considered the most common for use in living rooms, bedrooms and offices and allows more sunlight to come in. Above the window sill level - suitable for narrow windows using long tiebacks, creating an Italian style curtain composition. Below the window sill level – this fastening of the clamp visually narrows window openings that are too wide and is most often used for heavy and thick curtains in living rooms and halls.
Nowadays you can buy any hook-holders, while you can make curtain hooks yourself.
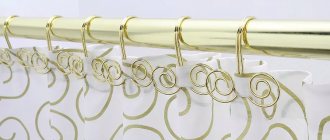
Curtain hooks: plastic or metal
The only issue, one might say, is the price. Of course, metal hooks will cost more, but the price will still be reasonable. Plastic hooks are cheap, but they are easier to deform. True, if the curtain is light, the same tulle, or transparent plastic is enough, there is a high probability that such hooks will last a long time.
Metal hooks, as a rule, have a more interesting design. Even a small hook can have various curls and indentations, and for those who are attentive to detail, this matters. The main problem with metal hooks is darkening over time.
Plastic hooks, being a budget option, can last up to 5 years if treated well.
How to clean metal hooks:
- Take a gentle cleaner and a soft microfiber cloth;
- Gently wipe the hooks, without strong pressure;
- Any abrasive products are prohibited.
Hardware that is exposed to direct sunlight darkens the fastest. Wipe it every week, and you won’t even notice the darkening.
Curtain hooks for the bathroom: metal (video review)
DIY curtain tiebacks
Handmade curtain holders will become an original accessory for any interior. This does not require great skills, just a little ingenuity and creativity.
There are many available materials from which you can make curtain tiebacks with your own hands:
- Strings of beads of various sizes and colors. Beautiful satin ribbons, decorated with various elements. Cords of unusual weaving. Pieces of leather belts with interesting buckles.
For those who know how to use a crochet hook or knitting needles, it will not be difficult to make curtain tiebacks with your own hands; it will be enough to knit several patterns and, if desired, decorate them with some elements.
Armed with imagination and the necessary materials, you can make excellent curtain tiebacks with your own hands.
Whatever design option is chosen, it is important to remember that curtain holders must fit harmoniously into the general direction of the interior, while performing all the functions assigned to them.
The influence of textiles on the choice of holder
The heavier the fabric, the more powerful the holders should be, and the more responsible their installation is considered.
If you decide to use powerful hooks to tie up curtains, the fabric must match them: in this case, velvet, brocade, gabardine, and jacquard look harmonious. Many expensive curtains have a lining, thanks to which they last a long time and do not fade too intensely. Fabric holders in the form of braid, pins or beads are suitable for light curtains.
Textile tiebacks often match the fabric of the curtains; unobtrusive harmonious shades are acceptable. Sometimes bold color schemes are used, where bright holders act as a kind of contrasting spot, enlivening the monotonous atmosphere.
If you decide to make textile tiebacks yourself, then take into account the following nuance: expensive fabric is used for the front side, and the inner side is treated with lining for reasons of economy.
The tieback is sewn with a lining even when thin fabric such as chiffon or silk is used to attach the curtains to the wall.
Inside rooms intended for official receptions, it is not recommended to take any liberties, so the tiebacks here are made strict and monochromatic.
If the interior is rich and deliberately luxurious, then tiebacks for curtains made of gold braid, twisted cords or silk ribbons are attached.
Holders made of wood and fabric are used for literally all types of curtains - these are universal options. Metal rings and hooks are used to decorate window textiles in rooms decorated in high-tech, minimalism or art deco styles. Artificially aged hooks for curtain tiebacks look stylish.
Weightless butterflies and flowers are suitable for window decorations in a romantic girl’s room, and small soft toys, which are used as curtain mounts on the wall, perfectly complement the atmosphere of a nursery.
MK for creating grabs
In order to create original curtain tiebacks with your own hands, you can read the master class or show your imagination by coming up with an original decoration yourself.
To make a pick-up according to the proposed master class you will need:
- Unusual buttons. Cord of matching color. Glue.
We glue the buttons to the cord in different sequences and wait for the glue to dry. After this, we wrap the curtain several times with the finished cord and attach it to the holder.
Buttons combined with your ingenuity will help you make great curtain ties
Another master class will tell you how to use a piece of twine as a grab. To do this, twine of the required length is fastened with metal rings, carabiners or other small metal objects and, grabbing the curtain, hooked to the holder.
The following master class will tell you how to sew a fabric tieback; you will need:
- Fabric for picking up. Threads, needle. 2 rings from any material. Various decorations.
It is necessary to make a pattern from the fabric into two rectangles of the required width and, folding it in half with the front part inward, sew up the long side without finishing the ends. Turning the product right side out, the ends are sewn to the ring so that the seams are on the back of the ring. After this, the scoop can be further decorated with tassels, pendants or other decorations.
A DIY curtain tieback will fit perfectly into your interior.
The last master class will tell you about using beads as a scoop. In this case, any strong cord is taken as a base, which can be decorated in the middle with a tassel, and wrapped with strings of beads in any quantity. It's okay if the base shows a little through the layers of beads.
How to attach a hook to a concrete wall
If the wall is made of brick, block or concrete, you will need screws and dowels (usually fasteners of the required size are included in the kit). If the holder will bear a large load, the dowels should be at least 5-6 cm in length.
To drill holes in such walls, you need a hammer drill or impact drill (nowadays, in many stores that sell power tools, you can rent one for a couple of hours). A drill for a hammer drill or a drill with a pobedite tip (for concrete) is taken according to the diameter of the dowel. Step by step:
- Drill the hole slightly deeper than the length of the dowel. During the process, you can bring a hose from a running vacuum cleaner to the drill, dust and sand will not fly around the room;
- dowels are inserted into the hole with light blows of a hammer;
- The holder is screwed on with screws. Installation completed.
Curtain ties: do it yourself
Today, curtains with ties, which do not require holders, are becoming especially popular; with the help of ties, you can add different drapery to straight curtains, creating various design options.
Beads and beads are just a godsend for creating handmade tiebacks
At the same time, ties decorated using the kanzashi technique will look very original. This technique is based on making jewelry using scraps of fabric. Self-created flowers, leaves, bows and other elements will perfectly decorate boring ties and transform the overall appearance of curtains.
We present to your attention a small master class on making a hairpin as a tie for curtains.
For this we need:
- Two thin rings from any material. Various decorative ribbons. Flowers using the kanzashi technique or any other decorations. Any stick for gripping curtains. Glue.
We wrap the selected ring with tape, and its edges must be securely glued. After that, leaves and flowers, or other decor are glued to the lower part of the ring.
Rings
This method has virtually no analogues or competitors
Methods of attaching curtains to the cornice are one of the important elements of the overall design, curtain and window design
Ring curtains rightfully hold a leading position among all mounting options. They are best suited for heavy and straight curtains of any design.
Rings can be made from different materials
Ring curtains do not require any special installation. A similar fastening is used in combination with curtain tape and hooks, and is also sewn directly to the fabric.
Curtain tiebacks (photo)
Attention, TODAY only!
Curtain holders look very impressive and can fit into any interior. Curtains have always been considered an integral part of the interior.
These textiles can be decorated with various decorative elements. In order to regulate the illumination of the room, various clamps are used. In addition, such products can change the appearance of drapery by creating folds in the fabric.
Content:
The most common curtain holder these days is the hook. Due to the simplicity of the design, it is very easy to use and does not fail. Choose a hook taking into account the features of the interior and the color palette in which the room is designed.
Metal holders are more durable and look much more noble than plastic models
Curtain holders come in metal and plastic. Experts recommend giving preference to the former, because they are more durable. However, if you are looking for a budget hook, then a plastic hook is quite suitable for you.
There are 3 ways to attach a hook:
- Level with the window sill. This option is perfect if you want to fill the room with sunlight. Above the level of the window sill. This mount will fit well into the interior if you have a narrow window opening. Below the level of the window sill. This mount allows you to visually narrow the window opening. It is recommended to attach the hook below the window sill level if you use thick curtains.
How and with what to tie curtains correctly - types of garters
Bandages are made from various materials - fabric, metal, wood, plastic, they have different shapes and sizes. Conventionally, these products are divided into several groups.
Hard
They are made from stainless steel, copper and copper alloys (brass, bronze), more expensive metals (for example, blackened silver), wood, and plastic. Rigid clamps are permanently attached to the wall using dowels and self-tapping screws. Moving them to a new place is quite difficult. Shape – a hook with decorative elements, a door handle or a special product stylized as a door handle. The product can be completely invisible against the background of the curtain or decorate it, thanks to the use of stones and forged elements in the decor.
Flexible
Such garters are made from non-staining practical fabrics or plastic polymers. To hold heavy curtains, products made of natural or artificial leather are used. The most popular form is “banana”.
Fabric tiebacks usually have a lining of the same color as the front part, a companion color, contrasting. For reinforcement, a wire frame, plastic or cardboard element is placed between the layers of fabric. Lace, beads, and hairpins are used for decoration. You can sew the products yourself or order them from a studio, where they will help you choose the appropriate option and carry out the work at a professional level.
Flexible garters are attached to the curtain itself. They either tighten the fabric or move it towards an additional holder mounted on the wall. For such fastening, it is better to purchase a decorative hook from a hardware store; as a last resort, get by with an ordinary nail. Light curtains can be fixed using a small hook, which is attached to a smooth wall with double-sided tape.
An interesting option is tackling using the kanzashi technique. They are not sold ready-made, but are made individually. Such garters are flowers and leaves made of satin ribbons, in addition to which are used: organza, lurex fabric, lace, and beads. The products look great in romantic or oriental style interiors.
Another way to decorate flexible tiebacks is to use foamiran, a foam material that can change shape when heated and retain it after cooling. Very realistic flowers are made from it. Foamiran can be embossed, is easy to paint, does not fade and is not destroyed when exposed to sunlight.
Non-standard
Such grabs can have a variety of shapes - animal, bird, flower. They are made from wood, metal, improvised materials - ropes, solid or woven straps, lace strips, elements woven using the macrame technique. Cords for tiebacks are tinted with gold, silver or other paint, either solidly or with an ombre effect (a smooth transition from a dark shade to a light one). Suspenders are suitable for informal rooms.
An interesting option for a nursery, kitchen, or living room is decorating garters with plush animals and textile dolls. In eco-styles, decor made from pine cones and reeds looks great.
Hairpins
Curtain clips are rigid round-shaped clips with two holes into which a fixing stick is inserted. They tighten the fabric, but do not fix it to the wall or window unit. Suitable only for light voile or thread curtains.
Magnetic
This is a convenient option for draping light fabrics. This type of pickup is a tape with two magnets, the front part of which is usually small metal elements of regular geometric shape. To beautifully tie curtains with belts with magnets, you can choose sets decorated with stones and other decorative elements.
From beads
For heavy, plain curtains, large beads are used, collected on a strong thread or fishing line. Light transparent and translucent curtains can be assembled into several rows of small beads. The interweaving of beads and chains looks impressive and elegant; beautiful buttons, medallions and other jewelry are suitable as additional decoration.
Garters with tassels
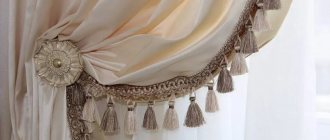
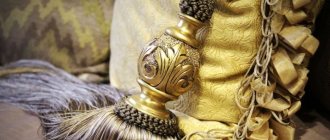
A spectacular option to decorate curtains in the living room or bedroom is to tie them with cords and tassels. To complement the tiebacks, voluminous tassels are usually used to match the curtains (for bedrooms) or in contrasting colors (for elegant living rooms).
Did you like the curtains? You can order the same in the Living Room section
Making curtain tiebacks with your own hands
You can make an extraordinary pick-up with your own hands if you have the necessary materials and a little imagination. To work, you will need wire, a hook, decorative items (you can use buttons or fabric flowers), scissors, glue, pliers, a needle, thread, metal rings, tassels and wire cutters.
Unique curtain holders can be made from old disks and satin ribbons
The simplest option is a lift with pendants. It is suitable if your curtains are made of thin materials, such as linen, cotton or organza.
The procedure for making a pickup with pendants is as follows:
- Using scissors, cut about 40 or 50 cm of wire. Then fold the wire in half and string beads or other decorative materials onto it. Twist the resulting piece into several turns. After that, hang one large decorative element on each end of the tie. Make a couple of twists. Unwind the strand a little, thread one end of the workpiece and twist it with the other end. Twist the ends of the wire and thread them through the cord, and then cut them. At the ends of the cord, make loops that you will put on the hook.
Fabric tiebacks can be decorated with tassels or eyelets
If you want to make a fabric pick-up, follow the following algorithm:
- Fold the wrong side and right side of the fabric and sew around the entire perimeter. Do not forget to leave a small section of the fabric unsewn. Turn the tie back inside out and sew up the previously left section. Fold the fabric at each edge to a distance that will be equal to the thickness of the ring. After this, thread the ring and sew up the seam allowance using plain threads and a needle. Place the resulting product on curtain
Hook characteristics
Fixing curtains on hooks is one of the most economical ways to decorate a space. These products can be used in any premises and decorated in different styles.
No knowledge or experience is needed to attach hooks to the cornice; anyone can easily do the job with their own hands. It is enough just to carefully carry out the process without damaging the fittings and fabric. Hooks can be sold individually, or ready-made curtain tape with hooks can be used.
This option is great if you have a problem with how to quickly hang curtains on hooks. It greatly simplifies the process of attaching curtains. But you need to immediately think about how to clean the material.
Metal hooks on curtains may lose their characteristics after washing, and may also turn the fabric into an unsightly rusty color.
Curtain tape with plastic hooks
What’s good about hooks is that if a part accidentally breaks, it can be easily replaced with a new one without dismantling the cornice. But with proper use and the correct selection of the model, the products will serve for a long period of time.
Hooks can be included in the kit of the curtain rod system (it must also include instructions for installing them) or can be purchased additionally.
Set of curtain rods with hook-runners
Important! When placing hooks on cornices, it is necessary to provide restrictive elements that do not allow the fasteners to jump off. Each type of cornice has its own stopper model.
Cornice with and without plugs for hooks
Hooks can be used to install curtains and curtains on all types of curtain rods.
Curtain holders made from scrap materials
In order to get an unusual hanger for curtains, you don’t have to attend a master class, because you can make the part from scrap materials. For example, a soft toy holder would fit perfectly into a child’s room. For example, you can take a small teddy bear, tie its paws around the drapery, and sew them together.
If you are looking for an unusual curtain holder for the kitchen, ordinary cutlery will help you get out of the situation. Take an unnecessary spoon or fork and simply twist the device in the desired direction.
Original tiebacks can be made from old beads or straps
If you have thick curtains in your room, then you can purchase a special magnetic holder. A variety of product configurations and sizes will help you choose the right clamp without difficulty. The magnetic curtain clip is distinguished by its durability and beauty.
You can also make a holder from:
- Ceramics. An original pick-up can be obtained from an ordinary cup. To do this, cut out its bottom using a special tool, and secure the curtain with the resulting product. The corner part of the pipe adapter. The coat hook.
How to hang curtains on a window in shabby chic style
Shabby chic is considered a delicate interior trend, so the question of how to beautifully hang curtains will always be relevant. Curtains are characterized by light pastel colors: beige, coffee, pale pink, pistachio. The curtain design can be complemented with a floral print. To emphasize that the curtains belong to the chosen interior, they create a chic drapery and edge the internal joints of the double-sided fabrics with ruffles.
They are mainly hung on wall curtains with a durable frame. They provide for making tiebacks and decorating them with roses embroidered from ribbons. For night curtains, denser materials are chosen: silk, linen, gabardine. If you also use a thin curtain, then preference is given to light materials: veil, organza. When the window in the room is large, then curtains are sewn with an upper lambrequin, divided into small tiebacks, complemented by decor.
Curtain tiebacks: pattern and manufacturing features
There are a large number of pattern options for sewing tiebacks. Everything will depend on your individual preferences. It is advisable that the pattern be the same color as the curtains.
An old porcelain cup with a neatly chipped bottom can be a stylish holder for a kitchen curtain.
Conventionally, there are 4 pattern options:
- Tieback with a rounded edge. Tieback with a triangular configuration. Tieback with smooth edges. Tieback with a semicircular configuration with rounded edges.
Before you start sewing, you need to decide on the position of the tie in relation to the wall and curtains. To do this, take a piece of fabric and experiment with drapery, and only then start working.
When sewing a tieback, take into account the following nuances:
- If you want the product not to deform, glue it with a layer of dublerin. When making a holder, leave a few centimeters for processing the edges. Attach loops to the ends of the tiebacks. This way you can achieve a tight fit of the drapery.
What do designers advise?
- in rooms located on the north side, it is preferable to hang tulle in warm shades - beige, orange, yellow, peach. It is better to decorate “southern” rooms in cool colors, therefore the curtains should be, for example, blue, white, turquoise or ash;
- To make the decor look harmonious, you should choose a curtain color that matches the wall decoration and furniture upholstery. However, sometimes tulle curtains are used as a bright accent;
- with the help of canvases with a suitable pattern it is easy to emphasize the stylistic direction in interior design;
- a small window will look larger if it is decorated with lush tulle flowing to the floor;
- in halls and living rooms where special shading is not required, it is recommended to use several layers of translucent fabric in pastel colors, draped in two ways;
- if the window openings are located nearby, it is not necessary to cover them with separate curtains. It is more advisable to place one large canvas over the entire width.
Making a curtain holder using the kanzashi technique with your own hands
Kanzashi style tiebacks look very unusual and are easy to make. In order to make this product you will need a satin ribbon 5 centimeters wide, 2 DVDs and hot glue.
The basis for the pick-up can be a wire bent in a certain way or a plastic bottle cut out from a pattern
First you need to prepare the base. To do this, take a disk, measure approximately 1.5 cm deep into the disk, and use a soldering iron or a heated utility knife to cut out the workpiece.
The further manufacturing procedure is as follows:
- Wrap the disc with textile tape. Secure the free end of the tape with hot glue. Repeat the same procedures with the 2nd disc. Secure the kanzashi to the curtain using sushi chopsticks. If desired, decorate the tie with flowers. Secure the finished holder to the curtain.
Braid (curtain tape)
The braid is sewn to the top of the curtain from the wrong side. It is a mechanism for pulling the curtains together to form many small vertical folds. The braid may have one or two rows of fastenings so that you can choose whether the fabric will cover the cornice or not. A curtain with braid can be hung on a cornice either by stringing it on a rod or using hooks.
Style.
A lush and richly pleated curtain with braid is perfect for luxurious classic interiors of a living room or dining room.
Pros:
suitable for curtains of any weight; easy-to-use and inexpensive fasteners; strong decorative effect;
Minuses:
due to frequent gatherings, you need to take the width of the fabric 1.5-2 times larger than the area to be covered; It is difficult to put the curtain on the curtain rod.
What types of curtain tiebacks are there (video)
A curtain tie is a very interesting addition to your interior.
When choosing a product, you need to pay attention to the density of your curtains. If you have heavy Roman blinds or drapes at home, use an iron hook or a magnetic product to secure them. If the curtains are made of thin material, textile ribbons or homemade garters made in the kanzashi style are perfect.
Matching fabric and holder
The denser and heavier the curtain material, the more powerful the grip should be and the better the installation of the fastening.
Curtain hooks must match the curtain fabric. Powerful hooks go well with fabrics such as velvet, brocade, gabardine and jacquard. Light curtains and curtains are in perfect harmony with hairpins, pins, ribbons and ribbons.
Rooms designed for official receptions are decorated with strict curtain holders.
The grip made of wood and fabric can be used in any interior - this is a universal option. Metal rings and hooks are used in rooms decorated in art deco, hi-tech and minimalist styles.
Butterflies and flowers in window decoration will perfectly harmonize with the mood of a romantic girl.
Which fastener to choose
The choice of fasteners directly depends on the weight of the product, the gap to the wall and the sheet of drywall. To install the cornice on drywall, the following fasteners are used:
- "Butterfly". Used for low weight structures. This type of fastening is placed together with a self-tapping screw in the ceiling hole. The side parts of the dowel are pressed against the gypsum board, thereby forming a spacer. Suitable for curtains whose weight does not exceed 12 kg.
- dowel-Driva. It is a hollow rod that is structurally reminiscent of a meat grinder snack. Can be metal or nylon. The fastener is screwed into the material and a self-tapping screw is inserted inside. Designed for weight up to 20-30 kg.
- Dowel-Molly. In the rear part it has a spacer element, which opens when installed behind the sheet, firmly fixed to it. Due to special spikes, the rod is completely immobilized. The permissible load varies between 40-45 kg.
[img] src=”https://tomdom.ru/upload/2017/1.jpg” class=”aligncenter” width=”411″ height=”521″[/img]
Different types of curtains require the use of certain types of holders for installation. They are selected depending on the design, weight and other characteristics of the model.
Main types of holders:
- Ribbon or braid is the simplest type of fastening, suitable for almost any curtains and classic curtains, allows you to fix the curtains on a wall or cornice and gather them into beautiful folds, creating draperies. The mount is inexpensive, looks aesthetically pleasing, practical and durable.
- Eyelets are rings that decorate holes in the fabric for threading a cornice through. They look elegant, emphasize the texture of the fabric, make the folds smoother and give them volume. They can be combined with many types of curtains; their color should be in harmony with the cornice. Suitable for bedrooms, nurseries and kitchens. Incompatible with lightweight fabrics, their cost depends on the material used.
- Hooks are the simplest and cheapest means of attaching curtains. They hold curtains securely and are often used in combination with braid. Not intended for models made of heavy fabrics.
- Rings - suitable for straight curtains, regardless of the type of fabric used. Practical and durable, but can create a slight problem when removing curtains for washing.
- Loops - are made from the same fabric as curtains, in various forms - in the form of bows, rings and knots. They are inexpensive and easy to use; you can easily make them yourself. Compatible with any cornices, they can add coziness to the atmosphere, and are popular when decorating bedrooms and children’s rooms.
Practicality and reliability
If you compare the price and quality, you can understand that the purchased item is quite useful and unique, its positive aspects will not go unnoticed and will certainly bring joy to the owner during use.
The reliability of the parts will be complemented by ease of use; taking a few hooks in reserve in awkward moments, broken fasteners can be very quickly fixed thanks to a clear algorithm of actions for installation.
The compatibility of different types of fabrics will allow you not to spend a lot of free time choosing curtains, tulle or curtains; each model will be harmoniously combined with the clamps.
Installation features
At least two brackets must be used to secure one curtain rod, but additional fasteners may be required. So, to fix wooden, plastic and metal cornices, the brackets supporting them are attached every one and a half, or even two meters, and for string ones - 0.9 - 1 m.
It is necessary to keep in mind the length of the bracket. In conventional ceiling and wall cornices, the distance between the surface and the cornice is 15 cm. If a larger distance is required, ceiling fastenings or fixation between two walls are used.
For exclusive products, brackets 40cm or more in length can be used. Most often, the installation of heavy metal curtain rods is carried out by qualified specialists.
Today you can find both adjustable and non-adjustable brackets on sale.
Knitting technique
Crocheting is a fairly simple type of needlework that originates from antiquity. Any product begins from a chain of air loops, and the pattern is made up of sequentially located half-columns and columns with one or more crochets. You just need to carefully follow the diagrams that come with each product.
There are several techniques that are most often used.
Sirloin
A technique loved by many craftswomen. The pattern is knitted on the fabric in the form of a fillet mesh by alternating empty and filled (double crochets and chain stitches) cells. From such “filled” cells entire paintings are created on the canvas. The pattern is formed both along and across.
Products using the fillet technique can be assembled from different elements, connecting them together and creating original compositions. The yarn is preferably natural (linen or cotton), with the addition of viscose, which can make the product easier to care for and ensure durability.
Bruges
This is a more difficult technique to perform. It is often equated to Vologda lace, which, unlike Bruges, requires special devices.
The basis of Bruges lace is braid. It is from it that various patterns and compositions are made, connecting fragments with half-columns, single crochets or arches of air loops. If you need a lightweight openwork product, then you can use a mesh of air loops as a base. Using this technique, you can knit either a stand-alone fabric or complement a curtain knitted using another technique.
Irish lace
A very beautiful and, accordingly, complex technique. A pattern is laid out on a mesh canvas from parts made in advance. The composition is made up of separately related diverse elements
Therefore, it is very important to think in advance and make a pattern, a sketch of the ornament, as well as select a diagram and carefully follow it so that every detail is in its place. The mesh base can be decorative, French or made using the fillet technique
Broomstick
It is also called simple Peruvian knitting. This exotic technique comes from Peru. When knitting, any flat surface (ruler) or thick knitting needle is used, the role of which was previously played by a simple stick. Hence the name, which in English means “broomstick”.
The uniqueness of this technique lies in the loops stretched in a special way, with the help of which beautiful patterns are created. The product is voluminous and dense.
