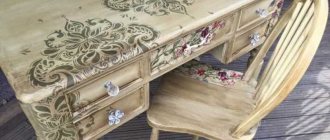
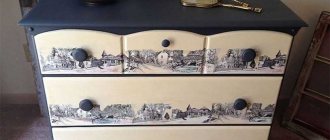
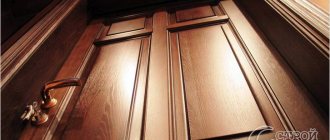
Redevelopment and repairs also require updating the door panels. One of the options for their transformation is decoupage of the door. Hand Made, the art of creating things and jewelry with your own hands is now experiencing its heyday. It is fashionable, beautiful, unique. Decoupage of interior doors, with images, patterns, appliqués applied to them, is one of the types of this direction.
An example of decorating an interior door with decoupage
In addition to the decorative effect, this technique can also bring practical benefits. With its help, individual defects, chips, and cracks are hidden. They resort to decorating interior paintings not only when renovations are taking place. They remake old doors when purchasing new furniture, replacing textiles (curtains, bedspreads, covers for upholstered furniture).
Interior door decoupage option
Interior design in the same style also means matching the appearance of the door leaf. Decoupage of doors with your own hands is a creative process, therefore it brings joy to a person, being one of the ways of self-expression. The door can be reincarnated in different ways and materials, so there is a free field for the imagination to play. Creative ideas for your home will help you find the works of masters presented on the Internet and specialized magazines. But before you decoupage the door, the canvases are carefully prepared.
Stylistic directions of technology
This technique became known and was popular back in the 17th century. Such items create a special aura in the house and make it more comfortable. There are several stylistic trends in the decoupage technique of an old door:
Decoupage option for an old door
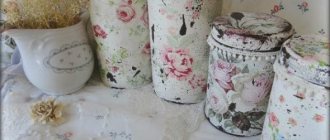
- The Shabby Chic style, popular in the West, attracts decoupage items. It uses elements of furniture and furnishings that have an aged appearance. For this purpose, when using the technique of decoupage of interior doors, artificial cracks and abrasions are made on the canvases. There are special varnishes to create the effect of craquelure (cracked paint). This style is dominated by pink, light beige, and white tones.
An example of wood decoupage in the Shabby Chic style - The technique of decoupage doors in the Provence style differs from Shabby chic in that the accents are placed on shades of olive color. Antique copper door handles look impressive in this style. The main technique is patination, a blurred coating on the main color of the paint, a copper, muted golden color. Floral themes predominate in the drawings. These two stylistic trends are suitable for decorating a kitchen door.
- Another unique style is Simplicity. Old magazines, pictures, newspapers, music books and photos are the main decorative elements. You can make doors in your apartment with a photo collage from a family album; they will become an exclusive interior decor.
- Victorian style is suitable for classics. The themes of paintings and engravings of the 17th and 18th centuries are used as pictures for the interior door. Basic tones: shades of burgundy, golden, the whole spectrum of beige.
Step-by-step process for decoupaging Victorian doors - In modern style, abstract images, single-color graphics, and vinyl inserts made of artificial leather are suitable as decor for the door structure.
Using photo wallpaper for subsequent work for beginners
You can stick photo wallpapers that are created specifically for doors (as shown in the photo). Of course, this option will not be very cheap, but it will delight the eye with landscapes, exotic flowers, wild animals or children's drawings. You can also redesign an interior door on a budget using napkins or ordinary wallpaper. There are several nuances for decorating with photo wallpaper: doors must be of a standard size, and after a long period of use, the brightness of the wallpaper changes. At home, doors can be decorated with vinyl and paper wallpaper.
What materials are used for decoration
The decoupage process provides ample opportunities not only in stylistic design, but also in terms of the use of materials. For these purposes the following is used:
- Special three-layer napkins. They are applied to the prepared surface using glue. The advantage is that the paper is thin and adheres well to the surface. Decoupage the door with napkins, application sequence:
- cut out the design;
- separate it from the base;
- glue to the surface using special glue or PVA (1:1);
- smooth with gentle movements, from the middle to the edges, squeezing out the air;
- wait until the glue dries;
- then cover the surface with varnish.
- Fabrics for door decoupage. It is best to use thin fabrics and transparent glue. They duplicate textiles that were used in the interior, for example, to decorate window curtains.
The glue leaves stains, so it can be removed immediately with a soft cloth. The use of fabric for decoupage of the door is combined with the installation of molding in the form of a frame. In this case, the decor will look more expressive. - Any drawing or picture on paper is suitable for do-it-yourself door decoupage. If the base is quite thick, so that the edges stand out less, they are rubbed with fine abrasive sandpaper.
The process of decoupaging a door with paperThis technique gives an additional decorative effect of a blurred outline and smoothes out the transition. The ideal option is to apply images printed on rice paper to the surface; it is durable and thin. The picture can be ordered from any advertising agency. Photo wallpaper is suitable as door decor.
- Decoupage of doors with wallpaper can be done using their separate sheets. In this case, the door panels will fit perfectly into the interior, since they will repeat the motifs of the wall wallpaper.
Example of door decoupage with wallpaper - Special, quickly hardening acrylic enamels are ideal for decoupage on glass doors and inserts. When hardened, they polymerize and adhere well to the surface.
Paint
This is the easiest way to freshen up your door. We remove it from its hinges. Use a spatula to remove the excess paint layer, level it with sandpaper and cover the cracks with putty. After that, we get to painting. It is best to paint in a horizontal position, this way there will be no drips from the paint, it will lie well and evenly. But if removing the canvas turns out to be problematic or simply inconvenient, then you can do it in a vertical position.
How to decoupage a door
The decoupage process must be performed in strict sequence, each subsequent stage is performed after the previous one is completed.
Door leaves that are painted white and light colors look more expressive. For dark tones, you need to choose decors based on the principle of contrast.
First stage, preparatory
If the door leaves were previously painted, it is better to update them.
Example of decoupage of cabinet doors
To do this, remove a layer of old paint or other coating. For this purpose, special compounds, sandpaper, and a grinder with cleaning attachments are used. Then the surface is carefully sanded, as a smooth surface is required. The doors are painted in 2 layers.
Second stage, applying decor to the canvas
Decorative elements are applied using decoupage glue or transparent compounds of universal use intended for this type of surface.
The process of applying decor to the door leaf
Straighten the images using soft cloth napkins; no air bubbles should form under them. Allow the glue to dry completely. Watch the video on how to properly decoupage a door.
The last third stage, coating the door leaf with varnish
For metal sheets, special transparent compounds are needed. When decoupaging glass doors, only the drawing and painting are covered with a layer of acrylic varnish. Wooden, MDF doors are opened completely, 2 times. The second layer is applied after the first has completely dried.
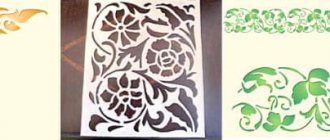
A selection of decor options and patterns for door decoupage.
With the help of decoupage, door leaves are transformed. From being an element of home improvement, they become an interesting, original part of the room’s decor. It is not uncommon for the process to become so captivating that it becomes a hobby, or perhaps a profession. The art of decorators is highly valued as an expression of taste and skill.
Children's fantasy
An excellent option that will satisfy both your taste and the desires of your child is to give your child the opportunity to paint his door the way he wants. Thus, he will have the opportunity to practice his artistic skills and thereby decorate the entrance to his room in an original and inexpensive way.
Method number 1. Large vinyl sticker
Vinyl decorative stickers for wardrobes, as a rule, are produced on a single-color German Oracal film, which greatly simplifies color matching. Outwardly, they look like a stylish pattern applied with paint. At the same time, you will be able to care for the cabinet in the usual way. Unless you resort to strong friction. And most importantly, when you get tired of one design on the door of a closet, you can literally remove the sticker in a minute without any traces and apply a new one.
This method is universal and can be used for doors made of any materials. You can safely apply stickers to glass and mirrors of sliding wardrobes. They hold up well and look very impressive. At the same time, you get rid of the obsessive reflection, and fingerprints that constantly appear on the glass surface will no longer be too noticeable.
The procedure for applying a large sticker on the wardrobe door:
- Preparation . Clean the surface from dust, fingerprints and other contaminants;
- Smoothing. Place the sticker on a flat surface and smooth it with a squeegee (smoothing spatula), which our store always sends in the kit;
- Fitting. Attach the drawing to the door and mark the position of the corners with a pencil or erasable felt-tip pen. For accuracy, we recommend sticking the sticker with a backing onto masking tape and seeing from a distance how the drawing will look.
- Removing the substrate and applying . Since the sticker is large, remove the backing directly from the canvas attached to the tape from top to bottom in small pieces. Immediately apply the freed pattern to the surface and smooth it carefully with a squeegee without unnecessary pressure. And so on to the very bottom. At the same time, remove the transparent mounting film from top to bottom. The work should be done slowly and carefully. Carefully smooth out everything, even the smallest bubbles. It is most convenient to apply non-adhesive adhesives to closet doors with two people. If bubbles still remain, pierce them with a needle closer to the edge and remove the air with a squeegee.
- Examination. After removing the backing and mounting film, take the time to carefully look at how each element is stuck. Even for a small flower, all edges should be level on the surface.
Drawing
After the paint has completely dried, you can begin to apply the design. To do this, prepare the following tools and materials:
Tools and materials necessary for applying decoupage to the door leaf
Do-it-yourself door decoupage is done as follows:
If you are immediately gluing a large piece of material, for example, to decorate entire panels, then you can work according to the standard principle: from top to bottom from the upper left corner. This will give you the opportunity to evenly secure the whole canvas to the surface, without distortions or creases.
Technology for performing decoupage using napkins
Method No. 3 Decorating a wardrobe with full-color posters
Wardrobe doors with photo printing are not a cheap pleasure. Color posters based on vinyl film are much more affordable, and often look much better. This is due to the highest printing properties. You can glue a poster to one of the doors or create a composition on all panels of the wardrobe.
Pictures on color posters can be very different: from abstract figures to your own photos with memorable places. They should be applied like regular vinyl stickers.
Design options
The decoupage technique today not only has not lost its relevance, but is also experiencing a new peak of popularity. This decoration method involves applying a pattern to the surface on a paper or fabric basis using glue. This way you can apply an image to both a flat and curved part of an object without much effort.
In the interior of a modern apartment, you can use decoupage both to decorate the front door and the interior door. In any case, the technology remains the same. In order to perform decoupage on doors, you can use various materials:
Napkins - the easiest way to make decoupage
The simplest, and therefore the most popular option is to decoupage the door with multi-layer napkins. They can be purchased at almost any store, and the range of images is incredibly large. Also, if you want to create a unique design, you can find a suitable picture on the Internet and simply print it on a color printer. The thinner the paper, the easier it will be to attach it to the surface in the future. You can also purchase ready-made samples in craft stores, so-called decoupage cards.
Textile materials deserve special attention. Almost any thin fabric can be used. If you want to create an unusual texture, you can use lace or old curtains.
As for the options for placing a decoupage pattern on the door, you can choose one of the following methods:
In fact, your imagination is not limited by anything, the only recommendation is that you should not place the decor in places that can be easily damaged during the use of the product. In order to better understand how to make decoupage of interior doors with your own hands, you should consider the whole process in more detail.
Examples of door designs made using decoupage
Surface preparation
The material that was chosen as a decorative finish is applied to a carefully prepared surface. It should be perfectly flat, only if the creation of a certain relief is not envisaged.
You should take into account the fact that the decoupage pattern on the door after gluing may be slightly translucent, and therefore it is necessary to paint the surface in advance.
Wooden interior doors most often require sanding. You can sand them using zero sandpaper. Be sure to remove all dust before proceeding. Next, to ensure good adhesion and remove cracks, a special wood primer is used. After it has dried, you can start painting.
Before applying decoupage, the surface of the door must be cleaned, primed and painted so that the structure of the wood does not show through the design
With MDF and other modern materials, things are simpler. For the most part, the surface is already ready for applying a decorative coating.
To perform decoupage on a door, you need to carefully consider the main background of the product. White is a universal option, but dark tones also look impressive. The color is selected to match the interior and the design itself that you plan to apply.
It is best to use acrylic mixtures. They are not only easy to apply and dry quickly, but also better retain further decorative details. You need to apply two layers, alternating the direction of strokes. If you want to add an aged effect to the door, you can use white paint as a base, and the selected shade on top. After drying, you need to go through individual areas with sandpaper to remove part of the top coat.
When applying decoupage to a prepared painted surface, the design will be bright and clear
Finishing touches
In order for the decoupage on the doors to look like a single composition and merge with the canvas itself, one or two layers of varnish should be applied over the finish. For this, it is best to use odorless and colorless acrylic water mixtures. Varnish performs another function - it protects the design from damage and abrasion. In addition, the surface of interior doors will be much easier to clean.
Also, when creating the effect of merging the pattern with the surface, you can use a special putty. With its help, the edges of the composition are processed. All this must be done before you open the canvas with varnish.
If the work is done well, the doors in your home will be significantly transformed. It is worth noting that the costs of this interior renovation option are minimal. In addition, decoupage is suitable for finishing any surfaces and objects, so with one drawing you can link several details of a room together into a single composition.
We recommend watching the video
Source
Method No. 2: Decorating wardrobe doors with corner patterns
If you don't want to cover the entire surface of the door, we recommend using vinyl stickers with stylish angular patterns. Here you will get additional benefits:
— corner patterns are smaller, so the sticker will cost less;
— applying small elements is much easier and faster;
- by decorating the corners, you will allow the mirror to serve as a mirror for you.
When applying a small vinyl sticker, we recommend that you remove the backing . Place it on a flat surface with the pattern down, pick up one of the corners and carefully remove it at an acute angle. If an element sticks to the backing, return the area to the space, iron it again with a squeegee and try to remove further. The sticker must remain on the transparent film with the adhesive layer facing up.
When applying the sticker, take the upper corners of the mounting film and stick it, smoothing it from top to bottom along the marking lines. It’s great if you have a second person to help you support the sticker from below so that it doesn’t stick prematurely.
How to decorate glass doors and walls from the times of the USSR?
Good day. The problem is this: there is a wall of excellent quality in excellent condition, although it is somewhat outdated. I'm irritated by the sight of dishes behind glass doors. Is there any way to decorate the doors? Purely theoretically, I think it could be covered with rattan. But I’ve never encountered this, I’ve only seen rattan in products where it’s sold - I don’t know, etc. Maybe you can recommend something useful?
- Matte the glass.
- Self-adhesive for glass
- Remove glass. Make a wicker out of veneer - insert it instead of glass
- Thin MDF panels with perforations
- Decorative plastic, perforated or textured. and much more.
I forgot to say that the wall is polished, and that the doors of other sections (on the sides, symmetrical to the glass doors) are finished with polished veneer of two types of wood - dark. and light - in a checkerboard pattern. I liked the proposed third option - veneer braiding, but now everything is offered from unpolished wood. Maybe someone else can suggest some other options?
2Patty A photo would be nice
The glass on the interior door is cracked and cannot be replaced. What to create?
Doors made of natural wood, painted with stain and varnish.
When replacing glass, scratches and chips from tools will remain on the door. What should I do? The doors are new, changing is not an option. If there is a problem with replacing the glass, then the only option is to decorate the crack. This can be created using artistic painting or a special sticky material that imitates an alloy. A combination of sculpting and painting would be even desirable. The crack will seem to be strengthened and will not go further; the glass will be additionally fastened, which will allow it to hold on better.
Change the glass, and later, if scratches and chips remain, contact specialists who are engaged in furniture restoration or something similar.
Chips can be carefully covered with a special putty. Clean the scratches, cover with stain and varnish on top.
There are also special pencils or crayons to hide scratches.
You can carefully remove the glass and nail plywood of the same color into its space. If this is, of course, acceptable.
You can decorate the crack, cover it with film, or create something else with it. But this depends on the size of the crack. This is easy to create with a small crack. But a large crack in itself is not harmless, and can cause some problems. For example, when gluing the film, bubbles may appear along the crack.
By the way, in order to stick the film without bubbles, you need to spray the glass and the adhesive side with a mild soapy substance. Later, apply the film to the required space, expel the liquid along with the bubbles and wait for it to dry. As long as there is a soap solution between the film and the glass, you can simply move it. It's comfortable and awkward at once. Because By chance, you can move everything and start fixing it all over again.
I would under no circumstances recommend painting over anything, because if there is a significant crack, it will grow if it is not fixed .
At the moment there is a very large selection of films, such a film will not only visually remove cracks, but also strengthen the damaged glass.
You can glue it on both sides of the glass.
You can even buy a film that imitates glass.
Or choose a wood one, matching the color of the door.
Be sure to watch the video on YouTube, it’s easy to glue, but there are tips on how to make it fit perfectly and firmly.
It’s better to choose film in Leroy or Obi, there is a huge selection there.
Make an artistic painting on glass with stained glass paints, play with the crack in the glass in such a way as if it was intended. A beautiful stained glass window will give comfort to the room, the glare from the sun will shimmer in multi-colored colors. For strength and bonding of the chip, you can paint the glass with clear nail polish.
Tint the glass with matte glass film. Almost like car tinting, only different. Or paint over the glass mosaic with discreet watercolors. Maybe not one hundred percent, but in the place of the chip. You can also turn to specialists; for cars, cracks are filled with a special transparent composition.
If the glass on the interior door is cracked and there is no way to replace it, then I would make a small repair of this damage. This method is better suited if the glass has broken and produced one or two cracks without small chips. To do this, you will need a solvent, glue, transparent or translucent film for glass, or a film for stained glass, depending on what you like best. First you need to make sure whether the burst seam is spreading or not. To do this, you need to carefully, so as not to get hurt, try to “move apart” the broken glass relative to the crack and see if a visible gap appears and if the glass “walks.” If the glass is loose, it needs to be secured. You can create this using transparent glue “Moment”, “Dragon”, “Titan”, etc.
The glass needs to be glued so that over time the film that we will glue does not cut through in the chipped areas.
If the glass “walks,” then we move these places apart, insert matches or toothpicks there, degrease the adhesive areas, for example, with acetone, and after the solvent has evaporated, carefully apply glue into the resulting gap, then remove the supporting matches. If the length of the crack is large, then additionally secure the glass with tape on both sides. It is enough to stick the tape in several places (2-3). It is necessary to glue not along, but across the crack, having previously removed any remaining glue. In order to prevent the glue from getting where it shouldn’t (where smudges can form), you need to glue these places with masking tape, and after finishing the joining and gluing work, remove it. By the way, it is possible and even better to fix the glass with masking tape rather than with tape. While the glass is sticking together, it is not allowed to move it. In other words, it is better not to use the interior door at this time. After 24 hours, you can remove the tape that we used to fix the glass and proceed to the next step - gluing the film onto the glass. It is easy to glue it if you have glued wallpaper at least once in your life. Often the film comes with a short {instruction} about its use and its correct installation. Depending on the film, it can be glued on both sides or on one. It depends on your preference or how it will look. If you have a huge glass, then you can glue one type of film in the center, and on the sides, which will represent some kind of frame, a different type of film. In other words, using several films you can create a combination that looks like a work of art. You can select the film according to color, transparency and other characteristics. As a film for glass, you can also use car tinting film, which comes in different colors.
