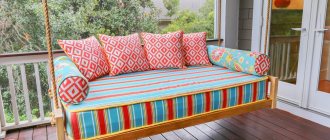
About designs
Like most outbuildings, swings are most often made of wood. The posts and crossbar are made from timber, logs, the seats are made from planks and even from parts of home furniture.
It’s easy to make such a swing-sofa with stands made of logs yourself: fast, cheap, convenient
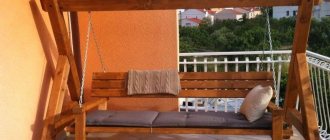
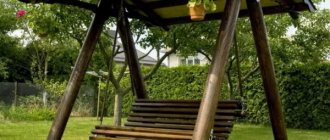
A little about the designs. There are three main types of hanging swings, or as they are also called - boat swing, sofa, bench, etc. The main difference is in the type of supporting structure: there is A-shaped and U-shaped. You can see an example with racks folded into a triangular structure above, and in the photo below an example with a U-shaped rack. This is more like a pergola with a hanging bench and it is built according to the same type, only taking into account swaying loads.
There is a third type - this is a complex structure that requires certain skills - it is based on hinged joints and they swing from the feet resting on the floor. We will immediately provide photos and diagrams for those interested (you can expand them to full screen if you click on the arrows in the upper right corner of the picture).
Useful tips for beginners
Below are some tips from experienced craftsmen for beginners:
- Before making a swing bench, you need to decide where the structure will stand. The area is selected with a flat surface, where there are no hills or depressions. This arrangement will ensure maximum stability and safety.
- It is better to concrete U-shaped supports for stability.
- There is no need to undertake the manufacture of a complex structure if nothing like this has been done before, otherwise the result may be very disappointing. It’s better to start with a swing-bench on chains for your summer cottage.
- If you can’t make a drawing yourself, it’s better to take a ready-made one on the Internet and substitute your own parameters.
- The wider and deeper the seat, the smaller the amplitude when rocking.
We make a swing with our own hands from wood
Most often, they make their own design in the shape of the letter “A”. It is simpler and requires less material consumption. Let's look at the components and fastenings in more detail, talk about materials, protection against destruction and stability.
Materials
Let's talk about what to make a wooden swing from. The choice of lumber cross-section depends on the planned load. If it is assumed that one adult will sit, the posts and the top crossbar are at a minimum - 50 * 70 mm. If a larger number of “seats” are expected - two or three, then the cross-section of the beam is at least 100 * 100 mm, preferably 100 * 150 mm. It has been experimentally established that such a design, when using 100*100 timber, can normally withstand a total load of about 200 kg. If you need more, take a larger section, or place logs))
About what the bench/sofa is made of. The frame will use a 70*40 mm block, the backrest height will be at least 600 mm, and the seat depth will be at least 480 mm. You can experiment with the depth of the seat and the angle of the backrest: there are options for a “lying” position. Accordingly, the length of the sofa and the dimensions of the structure change greatly due to this. For fastening, use 200 nails or studs of at least 10 mm in diameter.
How to position the racks
A diagram with dimensions and a list of required materials is shown in the photo below. To be honest, few people make them from such materials as indicated in the specifications. More often they install beams.
There are varieties of this design: with or without a lower frame. If the swing is installed on a rigid platform and the fastenings are made rigid, on studs, without the possibility of play, then such a structure will stand without problems. If in doubt, you can make a timber screed along the bottom, nail it to the covering with pins, or drive the staples into the ground.
For those who are afraid of lateral loads - the design in this axis is not the most reliable - you can suggest installing the racks with a slope. The area will be large, but the stability will be high.
Racks with a slope will make the structure more stable
If installation in the ground is intended, parts of the racks that will be buried must be treated with bio-protection. A cheap option is to place it in a vessel with used oil for several hours. Dry, then bury. They bury it to a depth of at least 50 cm, pour a little crushed stone on the bottom, set up racks and concrete it. If you are afraid that this is not enough, attach several strips of metal crosswise at the bottom. The hole will have to be dug larger, but the retention area will be larger.
Swing made of timber on the ground. Traces of concreting are visible
Methods of fastening the crossbar
In all swings of this type - with the bars of the posts sawed at the top - the problem is the attachment point of the crossbar, to which the bench is then attached. In the photo above it is solved reliably, although not entirely aesthetically pleasing. The trouble is that aesthetic methods are difficult to implement. And, if you're not selling, it's quicker to make something inelegant but reliable. So, in order to secure the crossbar, an overhead beam is attached below the intersection, pulled to the posts with pins. The cross member rests on it, which is held against lateral shifts by uprights and fasteners - nails and studs.
Another way to install the crossbar is to attach the side posts in an "X" shape. With this option, the supporting beam fits perfectly. It is additionally secured with nails, and the posts are tightened with studs. See the next photo for this option.
Everything is fine, but the length of the sofa is not enough...
Using the same principle, a swing is assembled with your own hands from logs: the sides are fastened crosswise, and a support log is laid on top. If timber is sometimes assembled with nails, then in the case of logs, pins are mainly used.
Swing on log chains
For those who are familiar with carpentry, there are other options: half-wood. Such a project is in the photo gallery below with close-ups of some of the key components.
Photo gallery of homemade swings on chains
And a few photos of different swings made on the basis of an A-shaped structure.
Attaching the swing to the crossbar
The mounting for the swing also requires clarification, that is, it is not obvious to everyone how to hang a bench-sofa on the crossbar. First, the crossbar is drilled from bottom to top through. A bolt is passed through the hole, to which a ring nut is attached. One or two wide washers are placed under the nut head so that it does not press down under the weight.
Instead of a regular nut, a ring nut is screwed onto the bolt passed through the hole in the crossbar.
It turns out that the ring nut is located at the bottom. You can attach a carabiner to it, throw a rope or cable, etc. Just pay attention that the carabiner should hang normally and freely on the ring-nut. And two chain links should fit freely in the carabiner. Therefore, it is advisable to buy everything together in one store: you can try on the entire knot at once.
How to assemble a chain mount for a swing. Then this carabiner is threaded through the ring nut and the safety ring is screwed in
By the way, in the rigging store you can come across other devices that can be adapted to attach chains or ropes from the swing seat. For example, such as in the photo below.
More rigging options. You can also make a swing unit from them for attaching to the crossbar
They are designed to lift a load of 0.5 tons, so there is no point in using them for children, but for swings for adults it is fine.
This type of fastening has a significant disadvantage - a creaking sound is heard when rocking. You can get rid of it temporarily by lubricating the unit, but this operation will have to be repeated periodically. The solution is to make a unit on bearings, but you can’t do without welding.
Tools and materials required for work
Before you start assembling a soda rocking bench with your own hands, you need to stock up on the necessary materials and tools,
Wooden swing
The choice of lumber cross-section depends on the expected load. For a 2- or 3-seater swing-bench, you will need 5 bars with a cross-section of 100×100 mm. It has been experimentally proven that a support console using 100x100 beams can easily withstand a weight of up to 200 kg. If the load is greater, it is better to choose a larger section or install logs. The length of the beams is no more than 3 m.
For the seat you will need: bars with a section of 50x50 or 50x70 mm, or boards - 25x100.
For suspension - rope, chain or polymer cable.
Tools
- drill and screwdriver;
- clamp - a vice-like device that allows you to fix a part;
- wood saw or hacksaw;
- emery and plane;
- building level, tape measure, square and pencil.
DIY metal swing
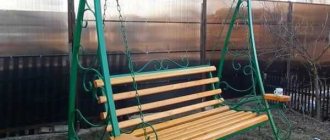
Their design is exactly the same. The material is different, and the method of fastening it is different. This is welding. For those who are familiar with welding inverters, it will not be difficult to weld something similar. And for inspiration, a photo report.
Below is a drawing of this swing with dimensions. Some clarification is required. In the figure there is a pipe welded around the perimeter (this plane is shaded). It is buried and therefore not visible in the photo. It was made in order to increase stability: friends have considerable masses. For the same reason, metal plates are welded onto the ends of the racks. The installation was complicated, but the swing is firmly in place.
Drawing of a swing from a profile pipe with dimensions
For production it took 22 meters of profile pipe 50*50 mm, for a seat 25*25 mm - 10 mm, boards 2000*120*18 - 7 pieces and the rest - fasteners, paint, anti-rust.
There is another way to attach the swing to the crossbar. He's in the photo.
A way to attach a metal swing to a crossbar
No one can explain it better than the author of the work. Watch the video to see how to make a swing with your own hands from metal.
A swing made from a profile pipe has an original shape - the posts are not linear, but curved. If it is possible to do something like this with wood, it can only be done by a master.
Several photo ideas from the authors and owners of similar structures.
Baby swing
For children, you can make the same design, but smaller in size.
Approximate sizes of swings for children. The height, of course, may be less
There are several other models for a playground, and you can read about how to make a sandbox here. Here are the first ones - a swing-scale or a balance beam.
Swing for children - balancer or scales
Everything is clear, questions may only arise regarding the fastening unit. Below is a drawing with dimensions. To decorate the upper part, steel plates are fixed inside. To make them swing, a hole is drilled into which a pin is threaded. You can improve the “rolling” by inserting bearings.
Stands for swing-balance
How to make a swing nest from a tire
Source
Pros and cons of homemade swing benches for the garden
There is nothing special or supernatural about the design. The swings differ only in the design of the seat. Instead of a chair or board, there is a comfortable bench with a backrest. To decide whether such a design is needed in the garden, you need to consider its positive and negative sides.
If you count on a comfortable stay, then all the shortcomings must be immediately discarded. A swing with a bench is considered the best design.
Types of garden benches-swings
The main difference between the swings is the material of manufacture. Here you can also highlight the presence or absence of a canopy, the design of the racks, and the method of hanging the seat from the crossbar. However, this is all the technical side. Based on the material used, swings are divided into wooden and metal structures.
Wooden swing benches
Wooden swings are considered a classic. The structure is assembled with your own hands from timber, logs, and boards. Wood lends itself well to processing and looks beautiful after painting with stain or varnish. The disadvantage is the fragility of the swing. Being outdoors all year round, the wood gradually disappears from exposure to natural phenomena. Protective impregnations and paints help to partially save the structure, but they only slow down the aging process.
It is optimal to assemble a wooden swing with your own hands from hard wood. Linden, oak, and larch are excellent. The wood of these species is more difficult to process, but the structure will last longer.
Metal swing benches
The advantage of a steel structure is increased strength. However, the metal is susceptible to corrosion. The swing will similarly have to be periodically painted and cleaned of rust. The frame is welded from a round or profile pipe. They try to use thin-walled materials to reduce the overall weight of the swing. However, the finished product is still heavy.
Craftsmen make a frame and a folding bench for a swing with their own hands using a bolted connection. The design is convenient in that, if necessary, it can be easily disassembled and moved in parts to another place or stored in a barn.
Design features, advantages and disadvantages
In terms of their design, the do-it-yourself swing-bench differs in:
- according to the material of manufacture: metal, wood or made of several materials (for example, a seat is made of wood, supports are metal);
- types of seat fastening - using ropes, bars, chains or metal pipes;
- installation methods - a bench swing made by yourself can be mobile or installed permanently.
Advice! When choosing one or another model, you should immediately take into account the possibility of storage and repair.
Advantages and disadvantages
Before choosing which swing you will make, you should consider all the pros and cons of a particular model.
For example:
- completely wooden structures are more massive and stable, swings with metal supports are less stable and require more careful calculation;
- wood is susceptible to climatic conditions, if not properly cared for, wooden swings may begin to dry out, crack, etc.;
- when making metal elements of a swing, you need to remember that you will need additional tools - a welding machine, electrodes, as well as certain skills - the ability to cook (if the welding seam is not beautiful, it can ruin the entire appearance);
- hanging a seat with ropes is the easiest way to attach it, but rope is not a durable material and is very susceptible to weather conditions; a bench with chains would be a good solution.
Advice! If you are making a rocking bench for a summer house with or without a canopy for the first time, it is recommended to choose a completely wooden model. Wood is a softer material than metal and any defects can be easily corrected.
What is needed to make a country bench-swing
The list of required materials depends on the type of swing chosen: wooden or metal structure.
Lumber is needed for any swing. Even if the frame is steel, the boards are used to make flooring for the bench. It is more comfortable to sit on wood than on metal. When making a wooden frame, additionally for the racks you need a beam with a minimum cross-section of 100x100 mm or a similar log diameter. Boards for the seat are used with a thickness of 20-25 mm. Even pine will work here. It is better to assemble the frame yourself from hard wood.
If you initially prepared a drawing of a bench for a swing from a profile or pipe, then it is optimal to purchase galvanized material. The protective layer reduces the likelihood of corrosion. The best option is stainless steel, but it is expensive.
The type of tool you will need depends on the material you choose. In the case of wood, take a standard carpenter's kit. This includes: plane, saw, grinder, measuring and marking tools. You will need a drill and a screwdriver.
To connect a metal swing, you need a welding machine, an angle grinder, and a hammer. For a collapsible structure you will need bolts and wrenches.
The finished swing must be painted. The choice of paint and varnish depends on the material of construction. The wood is impregnated with an antiseptic, opened with varnish, stain or drying oil. After degreasing, the metal is primed. Enamel is often used for painting.
Care and operation
To extend service life, follow these tips:
- the wooden elements of the swing must be treated with a special anti-rotting agent every 3-4 years;
- metal - from rust and darkening;
- fabric covers, if available, should be periodically cleaned or washed;
- If the swing is painted, it is recommended to renew the paint at some intervals.
A swing bench made by yourself will give you special pleasure and pride in your work, because inspiration and imagination are put into it.
How to make a swing bench with your own hands
Simple and complex swings are created from wood or metal. The designs differ in size and design, but they are all divided into two groups. Bench swings are made at home with or without a canopy.
How to make a bench-swing for a summer house with a canopy
The roof on the swing is usually attached at the stage of manufacturing the support frame. If this has not been done before, the canopy is adapted to the finished structure. The roof frame is assembled from the same material that was used for the support posts.
For wooden swings, the base of the canopy is made of thin timber. The roof shape is often gable. It is easier to make a lean-to canopy with a slope on the back side of the swing. The frame is a frame with rafters. The structure is fixed to the side support posts of the swing. Light materials are used for roofing: polycarbonate, ondulin, soft roofing.
A tube frame is welded over the metal swing for the canopy. Here, the best roofing option is a stretched awning or thick fabric.
How to make a swing bench for a summer house without a canopy
Making the swing itself begins with assembling the bench. Drawings are at hand and cut to size.
When making a swing bench, the frame is first made. The blanks are connected in pairs, immediately setting a comfortable back angle. For reliability, it is better to fix the elements with bolts. You should get 4 pairs, which are fastened with horizontal bars. There are similarly 4 of these elements: 2 each on the back and seat. The finished frame of the bench resembles the skeleton of two shields connected to each other at an angle.
To give a wooden swing bench a complete look, the frame is sheathed with boards. The planks are fixed with self-tapping screws at an arbitrary short distance from each other. It is optimal to leave a gap of 1-3 cm. Water will flow through the cracks when the bench is flooded with rain. The wood will dry out faster, reducing the likelihood of fungus formation.
After covering, the bench is equipped with armrests. The design is an L-shaped element, the sides of which are attached to the side ends of the back and seat. For fixing, it is optimal to choose bolts. If necessary, the armrests can always be removed.
When the hanging swing bench is ready, the boards are sanded again. Hard-to-reach places are rubbed with sandpaper. The structure is impregnated with an antiseptic. After drying, the wood is painted. The color is chosen at your discretion.
When the paint has dried, it is time to hang the bench on the supports. A tree branch for such a swing is not the best option. It is optimal to assemble the support posts with your own hands:
After choosing a suitable support design and making it, all that remains is to hang the pre-assembled bench on it with your own hands. Ropes can be used, but it is not advisable, since under heavy weight they gradually stretch. There are two options left: chains or suspensions made of timber or metal pipes.
If the frame of the bench is steel, then the chains are secured with bolts. The fixation points are two points on the upper corners of the backrest and two points on the corners of the seat.
A small wooden bench is placed with the back of the seat on hinges made of chains. They are fixed with overhead clamps so that they do not move out. The chains are suspended from the crossbar using eye bolts.
For a metal swing, the chains are attached to the crossbar, suspended on loops welded by hand. Despite the rigidity of the fastening, the chains will allow the bench to swing freely.
The suspensions are rigidly attached to the bench. To ensure free swinging, two hinge units with bearings are placed on the crossbar. Suspensions are attached to them.
In the video there is additional information about making a swing:
General description of a DIY swing bench
A swing in the form of a bench is classified as a family type model. They come with or without armrests; mattresses or pillows are often placed on the hard seat. Also, a swing-bench assembled with your own hands for a summer residence is equipped with a canopy, this makes them feel homey and protects them from direct sunlight.
All rocking bench models consist of:
- supports made of timber or metal pipes;
- seats assembled from boards or small bars, with or without a back, armrests;
- suspensions - chains, polypropylene ropes, ropes;
- fastening elements.
If a canopy is intended, then it is assembled from light, durable roofing material.
All wooden elements are fastened with bolts, self-tapping screws, or with additional gluing of the joints. In some cases, staples and corners are used.
Reference! Metal elements are connected by welding or bolts, anchors, etc.
Selection of material, tools and place to work
If possible and good carpentry skills, hardwood should be used as a material. A bench made of such wood will be especially resistant to precipitation and, therefore, more durable. However, processing hard wood (oak, hornbeam, beech) is a labor-intensive task. Therefore, without a good tool and knowledge of the matter, it is better not to take on such material.
A simpler option is to use high-quality dried pine. The tree must be free of large knots, which significantly reduce the strength of the structure. In order not to have to plan wood to the required size yourself, purchase ready-made blanks (timber, board) right away.
Tools you will need:
Don't forget to make sure you have:
When setting up a workplace, you should take into account the presence of:
Note! An unstable “flying” bench can cause serious injury. This explains the importance of maintaining the sequence and timing of all technological processes.
Manufacturing of cantilever supports
You should begin your work by making the elements of the seat and backrest. It is necessary to prepare 6 bars 500 mm long (section 50x80 mm).
Rice. 1. Three ready-made support elements assembled from 6 bars.
They are connected in pairs at an angle of 110° using the tongue-and-groove method or using a “half-tree” pattern. The strength of the connection is achieved by setting the M 10 bolt and wood glue. The manufactured structural elements are identical, however, the corner that will be installed in the center of the bench will have to be trimmed after final installation. The reason is that the load on it will be shelves of slightly shorter length.
Rice. 2. Finished support element in profile
The horizontal part of the cantilever support parts, located along the edges of the bench, needs to be reinforced on 2 sides with overlays made of 10 mm plywood, glued and secured with self-tapping screws. After gluing, the bench bases should be given time to dry. The identity of all 3 elements will be achieved by using a conductor template. The collection is carried out one by one, strictly according to the pattern.
Manufacturing of backrest, seat and armrests
For the seat and backrest, beams 1500 mm long (section 40x60 mm) are used. The indicated dimensions are not dogmatic; it is important that the beam or board, without bending, holds the sitting people.
Rice. 3. Attaching long bars to support elements
The beams are fastened to the supports using self-tapping screws. There is no need to lay the bars closely; the presence of gaps will have a beneficial effect on the speed at which the swing dries out after rain and will reduce the weight of the structure. The recommended gap is from 15 to 20 mm, for the back it can be increased to the width of one block.
Rice. 4. Assembled bench for swing (without armrests)
How to make a hole in a block so that a crack does not appear? Very simple: first use a drill, then screw in the screw. The diameter of the hole made with a drill must be smaller than the size of the self-tapping screw. When making the top crossbar of the backrest, you can show your individuality: give it a smooth bend, add some decorative element, etc.
Rice. 5. Installed armrests
The presence of armrests significantly increases the comfort of rest. They are made from the same bars with a half-wood connection and subsequent rigid fastening to the load-bearing elements of the bench.
The final step in making the bench is to screw M 10 bolts into the external load-bearing elements (on top of the back and at the beginning of the horizontal part). A wide washer is used on the outside; the inside of the bench is reinforced with a steel plate. Once the installation is complete, the swing chains will be pulled here.
Creating a swing base
After making the swinging part, it was time to work on the frame, the base of the structure. To create side A-shaped racks, bars 2000 mm long (section 100x120 mm) are used. They intersect at a distance of 300 mm from the upper end, the recommended angle is 40°. Based on these considerations, it is necessary to mark and select half-tree grooves.
Rice. 6. Prepared bars for the fixed part of the swing
At the bottom, the bars are connected by a horizontal jumper. The distance from the intersection to the bottom edge is 300 mm. The timber for the lintel is taken of the same cross-section, and the fastening is made “half-wood”. The joints are secured with bolts and wood glue, and the A-shaped posts acquire the required rigidity.
When marking and preparing the bars on them, you need to mark the places for future grooves into which two crossbars will be attached. The first of them is a powerful beam, which will hold the suspended part. The second will be located below, at the rear of the structure; no significant load is expected here. This is an additional connecting element that gives stability to the frame. A beam of 40-50 mm is enough for it. It is attached with self-tapping screws to the half-tree side posts.
Rice. 7. A-shaped side design
The upper cross beam is securely attached to the assembled A-shaped structures with metal corners. At the connection point, fastening elements with a ring are installed, to which chains are attached using a carabiner.
Making your own bench swing
Assembling a rocking bench with your own hands will not be difficult if you strictly adhere to all stages of the process.
Manufacturing of cantilever supports
To build a cantilever support, you must complete the following steps:
- We lay two beams or logs 3 m long on the ground in the form of a triangle. The angle at which the upper edges are connected is 30-40 degrees. The distance between the lower parts of the support is about 1500 cm.
- We lay a beam between the vertical part of the support (a chain with a bench will be attached to it in the future).
- Next, we drill a hole through the vertical posts and the beam between them. We fix it with a screw and nut, strengthening the structure.
- We cut the lower part of the supports at an angle for stability.
- Place the support in a vertical position.
- Then we attach wooden spacers between the posts using metal corners and screws.
To make a support, you can take a profile pipe or corner instead of a beam. The elements are fastened together with bolts or by welding. The stages and dimensions remain the same.
Advice! If you are not sure of the stability of the supports, it is recommended to concrete them to a depth of at least 0.5 m. Wooden posts must be treated in advance to prevent rotting. For greater stability from below, the ends of the racks are connected with a jumper or a rectangular frame is assembled.
How to make a bench for a swing
The first step in assembling a swing bench begins with the frame. To do this, 8 bars are connected in pairs at an angle of 110-130 degrees using bolts. For reinforcement, pre-glue the joints with glue.
Horizontal bars are attached to the assembled four paired elements - two on the back and two on the seat. The frame of the future shop was formed.
The frame is sheathed with convenient materials: lamellas, thin boards, beams using self-tapping screws. The bottom is reinforced with metal corners.
L-shaped armrests and metal rings are attached to the base of the bench using bolts, to which the suspension will subsequently be attached.
Creating a swing base
To make the swing bench more stable, the ends of the posts are connected from below with a jumper or a rectangular frame is assembled.

