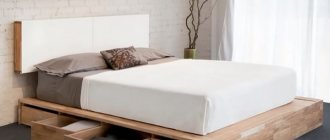
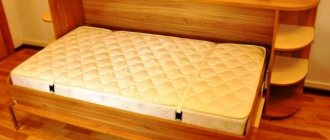
Finding non-standard furniture in furniture stores is quite difficult, and custom orders are more expensive, so for many, the optimal solution is a do-it-yourself folding bed. Typically, the decision to make a folding bed-wardrobe is made by the owners of small-sized apartments, where every bit of usable space counts. The lifting mechanism that transformable furniture is equipped with allows you to lower the bed at night and put the sleeping area in the closet during the day, freeing up space that a regular bed would take up all day long. Having drawings, available materials and a standard set of tools, a folding bed is easy to make yourself.
What materials and tools will be needed
First of all, you will need a special transformer mechanism. You can buy it either in a furniture fittings store or on the Internet. Please note that these mechanisms differ from each other. First of all, they are divided according to the method of raising the bed, i.e. the transformation process can be carried out both horizontally and vertically.
It is important to purchase a quality lifting mechanism.
In addition, each transformer has its own power, calculated based on the size and weight of the bed. If you take a transformer of lesser power, then the gas lift will not be able to fully raise the bed, and may soon fail; if it is larger, then you will need to use additional force to lower the bed.
A wardrobe bed can be an independent piece of furniture, but most often it is part of an entire furniture set.
Next, if you want to have a folding bed built into a closet with your own hands, you will need material for the cabinet body, bed frame, and false panels. In this case we are talking about the use of MDF or chipboard materials with a minimum thickness of 16 mm.
It is better to make the body of the bed itself, especially the invisible internal parts, from laminated chipboard, since MDF is much more expensive.
As for everything else, it all depends on personal tastes and budget. Laminated chipboard is sold in sheets. Depending on the manufacturer, they can be 4, 5, or 6 square. MDF is made to order and calculated in squares.
Depending on the film and the presence of milling, its cost varies greatly.
The approximate ratio with laminated chipboard is the difference in cost with the simplest version of MDF - 4 to 1. That is, approximately one square meter of MDF costs the same as one sheet of laminated chipboard. On the other hand, you will receive MDF parts of the required size and do not require processing, whereas you will need to saw and edge chipboard at the ends.
You will also need at least two sheets of fiberboard.
You will also need components in the form of euroscrews and self-tapping screws. You need to buy Euroscrews 50mm long, self-tapping screws 16mm.
All furniture work consists of three stages:
- cutting (includes the edge of parts);
- drilling and assembly;
- Accordingly, each of these stages requires a specific tool.
Furniture is assembled using Euroscrews.
You will need the cutting step if you decide to use chipboard as the material. Laminated chipboard sheets are cut on CNC machines, formatting machines, and also with special saws. Each such tool is quite expensive, so it is better to order the cutting and edges of the parts. This can be done directly from the sheet material seller; as a rule, they all provide this type of service.
It is important that the cutting is done professionally, otherwise the parts will have the wrong diagonal, which may affect the final assembly.
At the drilling stage, you will need a drill, two drills of 7 and 5 mm, a tape measure, a square, a ruler or a template.
At the assembly stage, you will need a hammer drill, as well as a Phillips screwdriver and an attachment for Euro screws.
It is unlikely that you will have to purchase all of the tools listed; most of them can be found at home.
Basic criteria for choosing a suitable model
The market for transformers is represented by large combined wardrobes with built-in beds and dressing rooms. Small narrow pencil cases, modest corner models, do not take up much space in a tiny room. When choosing a folding bed, you must be guided by the following criteria:
First, they decide on the type of structure and think about what piece of furniture the prefabricated bed should turn into. Required number of beds. It affects the dimensions and type of folding mechanism. Is functionality important?
Will the model's shelves and drawers be just props, or can you really hide some clothes inside and place books and trinkets outside. Particular attention is paid to the folding mechanism. The transformation process should not require extra effort even from a fragile girl
Everything should unfold and rotate like clockwork. Operational safety directly depends on this point. Which mattress to choose is a private matter, but for good posture, experts strongly recommend hard filling. The optimal shape of legs for a heavy structure is L-shaped or made in the form of a wide board. Fashionable ecological coconut fillers are not the best choice for a transformer; they will create an excessive weight load. Orthopedic latex mattresses do not deform and do not burden the mechanism.
Drawing up drawings and patterns of parts
You can find ready-made drawings on how to assemble a wardrobe bed with your own hands. You can also make them yourself. In this case, drawing up the drawing should start directly from the bed itself. It will consist of a bottom, four sides and stiffening ribs or an orthopedic base. The bottom must correspond to the overall size of the bed, in this case the sides will be attached to it at the ends, two along, two across.
Making a wardrobe bed is impossible without a pre-drawn drawing.
Note! The thickness of the two longitudinal ones should be subtracted from the transverse sides (bottom size – (16mm +16mm)).
To fill the inside of the bed, you can use an orthopedic base or make stiffening ribs from laminated chipboard, at least 10 mm high, and put fiberboard on top of them. Each mechanism requires a certain gap, add it to the size of the bed and you will get the internal width of the cabinet, its height will be equal to the length of the bed plus the size of the gaps so that the bed fits inside without problems.
Without a detailed diagram, making a high-quality bed with your own hands is much more difficult than if you have one.
Calculate the depth of the closet so that the bed can fit completely inside. The fronts attached to the bottom of the cabinet can be either overhead or internal. It depends on your taste. Do you want them to lie on the sides of the cabinet or go inside. It is important - if they are internal, then you need to subtract 3 mm from each side. If you are using someone else's drawings, diagrams and instructions for making a wardrobe bed with your own hands, you should definitely check them, otherwise you will simply ruin the material.
If problems arise with the development of the drawing, it is better to seek help from specialists at this stage.
What is a lift bed
What kind of lift-up bed is this? In essence, this is an ordinary bed, which, when assembled in a vertical position, is placed in a closet or chest of drawers. At the moment, furniture manufacturers use the most modern materials, thanks to which such a product will last for many years, and the varied design will help you choose furniture to suit any interior.
Pattern of parts
In order to make optimal use of laminated chipboard sheets, download the demo version of the Astra program. It is quite easy to use even for a beginner. In it you enter data about the parts - their width, height and quantity, as well as the sizes of the sheets that you plan to use. The program will calculate the most optimal cutting option, as well as the number of sheets you will need and provide a visualization. These pictures can be printed and taken to the workshop where you plan to make the cut.
An error of a few millimeters will not allow you to make a wardrobe bed with your own hands as provided in the drawing.
Types of folding bed designs
Today, consumers are offered several options for beds that differ in design. Most often, the bottom surface of the product is the front of the cabinet when folded. There are also models of cabinets that are equipped with folding, sliding or hinged doors.
The bed is built into a wardrobe with hinged doors
Step-by-step description of the DIY manufacturing process
Once the cut is ready and all the parts are edged, you can begin the drilling and assembly process. From the front side, the holes are drilled with a 7 mm drill from a 5 mm end. To ensure that the holes match, first mark them with a pencil. The ends must be drilled exactly in the middle, and the drill must go perpendicularly.
It is quite possible to perform each action yourself, even if you lack the relevant experience.
Assembling the frame and box
Separately assemble the cabinet frame and mattress box. For proper operation of the mechanism, it is important that the cabinet has a diagonal. Checking for its presence is quite simple; first measure the distance from one upper corner to the opposite lower corner, then repeat the procedure on the other side.
The difference in diagonals should not be more than 3 mm; if you get more, press one by one on the corners of the frame to give it the shape of a regular rectangle.
For ease of use, you need to choose the right size mattress: 150 mm smaller in width and 400 mm in length than the base.
Installation of the transformation mechanism
The transformation mechanism is attached with bolts and nuts to the sides of the bed and the walls of the closet. Each mechanism is accompanied by instructions with the exact location of the fastening; this diagram must be followed with the greatest possible accuracy. When assembling it yourself, it is better to use the simplest mechanisms based on hinges.
When attaching transformation mechanisms, it is necessary that the box and frame are on the same level. After the fastening stage is completed, it is necessary to check the operation of the mechanism. It should open smoothly.
In order for the box built into the frame to be lowered and raised without problems, it is necessary to install a lifting mechanism.
Installation of legs and headboard
Legs for bed wardrobes can be purchased ready-made at a furniture fittings store; they are connected using a strip, the rotation of which makes them disappear inside the box. In addition, specially designed decorative handles located on the false panels can also be used as legs.
The headboard for the bed can be ordered from a studio, or you can sew it yourself using foam rubber for this purpose. It is important that the cape on it is removable, which will allow you to remove it and easily wash it.
Metal products are the most convenient, especially if they are connected to each other by one strip.
Final finishing and decoration
After you have made sure that everything works, the last step is finishing the bottom of the bed to imitate the cabinet. There are many options here; first of all, it all depends on your tastes and imagination.
First of all, of course, you should take into account that the cabinet should be harmoniously combined with the interior. The decorative facade does not have to be solid. Someone breaks it into several parts, attaching a handle to each, thereby creating the appearance of a cabinet with several doors.
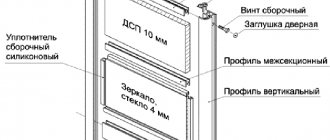
You can also use double-sided furniture tape to attach a mirror insert or glass with photo printing. In addition, a large facade does not have to be cut into several parts. You can create the appearance of several doors using decorative tape.
A wardrobe built into a furniture wall will be difficult to mistake for a bed if its bottom is designed in exact accordance with the front side of the other elements of the set.
The final stage is decoration
The facade of the final product is often decorated with false doors - an overhead element that is part of the decoration, onto which handles are attached. Do not use mirrors in such beds under any circumstances, as they are not designed for such loads and may soon crack.
Even the simplest folding bed design can fit into any room interior.
This will also affect the weight of the structure being lifted, which may affect the durability of the mechanism. Be sure to install the legs into the pre-drilled holes and magnetic latches. Now the work is completed, and the new decoration of your interior is completely ready for your relaxation.
A single folding bed can be installed in the front room, and no one outside will even think about its presence, since it will be disguised as a closet.
Examples of design and arrangement of do-it-yourself wardrobe beds
The version of a transformable bed with an imitation of a wardrobe is the simplest. The main thing is that such projects are individual, and therefore everyone can create something original for themselves.
In this design, furniture can be of any size: single, double, non-standard.
For example, on top of the section above the closet you can make a mezzanine for storing linen. Someone is installing shelving along the edges of the closet. With these options, the closet looks more harmonious. With the horizontal method of raising the bed, glass shelving can be installed above the section, and the false front can be designed as dresser drawers.
There are options in which the bed is transformed not just into a closet, but into a small cozy sofa.
After familiarizing yourself with the basic rules, you can easily figure out how to make a wardrobe bed according to an individual project with your own hands at home.
When folded, such a bed takes up minimal space and does not harm the spine during sleep.
How to assemble a crib with a pendulum?
In order to assemble a crib with a pendulum with your own hands, you will need a small screwdriver, “plugs” and screws.
First, a fence is installed, which must be stationary. Using screws, using a screwdriver, the head of the bed, the side and the bottom are connected to each other. Then the sleeping place itself is installed: it is fixed on all 4 sides, and only after that the movable fence is mounted. It is installed in special grooves that are located on the sides of the crib. The final fixation of the movable fence is done with screws.
The pendulum is assembled like this: four guides are mounted between its bottom and top. The bottom is installed between the two guides located on top. Then the bottom of the pendulum is mounted. All fasteners must also be secured with screws. The box is assembled according to the same principle as the pendulum. It needs to be placed inside the pendulum itself, and the bed should be placed on top. To install the bed, two movable parts are mounted at the top of the pendulum, to which the bed legs are attached. The screws are additionally secured with plugs.
Sequence of work
Installation of the transformer begins with the box. For the side panels, material 25 mm thick is used, the top panel can be thinner, from 16 mm. Sometimes the box is assembled without a bottom, but a platform is attached to the floor - a piece of double-thickness slab on which it will rest. If the bed is large, additional stiffening ribs are needed inside the box, at least one board installed horizontally closer to the floor, but it is not necessary to create a back wall. The parts can be connected to each other using furniture dowels - wooden cylinders for which holes of the required diameter are drilled.
Markings are made on the walls of the box for mounting the lifting mechanism. The floor and wall are marked for installation of the box, holes for fasteners are marked (fastening spacing is 25 cm). It should be taken into account that each time when raising or lowering the berth, part of the applied force will be directed to tearing the box away from the supporting structure. Therefore, it must be securely fastened; the best wall for these purposes is concrete or brick. Fastening to the wall is carried out using metal corners and self-tapping screws.
Then the bed is assembled - the frame frame is assembled from timber, and if necessary, stiffeners are made inside. The frame is sheathed on the sides with boards or pieces of slab, and lamellas or a sheet of plywood with ventilation holes are placed on top of the frame. This creates a box in which the mattress will be placed. To the bottom of the frame you need to attach the parts of the bottom of the bed, which will imitate the facade of the closet. You also need to think about what the outer edge of the bed will rest on. Traditional legs will stand out when the folding bed is tucked away in a closet. The following solutions are possible:
- removable or swivel legs;
- when disassembled - a support, when assembled - a hanger, a handle that can be pulled to set the transformer in motion;
Decor elements
Mosaic
You can decorate your closet with different elements. For example, make a drawing from a multi-colored mosaic. This decor will add brightness and elegance to the interior.
Typically used:
- ceramic fragments;
- pieces of multi-colored glass;
- beads;
- shells;
- sea pebbles;
- artificial flowers.
First you need to prepare the surface with sandpaper and putty (level it and cover up cracks, if any). Next, you can attach multi-colored elements with rubber-based glue. The glue should be applied to the middle of the element, not along the edges. It is better to prepare a drawing in advance: draw a sketch and place the mosaic on a flat surface so that you can carefully transfer it to the cabinet.
Rivets
You can add metal parts to furniture pieces. Cabinet doors can be decorated with nails with decorative heads, rivets or staples.
Metal elements can be combined with fabric and painting: the product turns out even more interesting.
Cabinet doors can be decorated with metal rivets or staples
Self-assembly of the structure
Before making a folding bed, you need to prepare a set of tools, raw materials, elements and installation diagrams. You will need a wooden beam for the frame, edged boards for the crossbars, and furniture panels for the sides and headboard. The kit includes plywood sheets, loops for attaching the structure to the wall, and bars for the legs. The set of tools includes a tape measure, a level and a square, a jigsaw, a set of screwdrivers and screwdrivers, a drill, and a grinder.
Work on assembling the structure is carried out on a smooth surface. At each stage it is necessary to check the perpendicularity of the corners using a square. A typical design involves the assembly of an internal mechanism, a sleeping surface, front walls, handles, and straps for securing bedding and a mattress.
DIY vertical folding bed
The vertical lift design includes a box, a sleeping surface, and a lifting device. For the type of fastening, the strength of the walls is important; concrete or brick panels are preferred.
Work begins with the assembly of the frame, the dimensions of which are influenced by the size of the sleeping bed. The main components of the box: vertical and horizontal walls, back panel, supporting shelf and baseboard. The depth of the frame is determined taking into account the thickness of the mattress, 32 cm is added to the indicator. For a furniture box, the width of the mattress is important, to which 16 cm is added. The parts of the box are attached with self-tapping screws, the elements located on the facade are attached with glue.
Then the sleeping area is assembled, which consists of the sides, headboard, and slatted base. The mattress is attached to loops of belts. The box and the bed are connected with a lifting mechanism using self-tapping screws. The work is completed by installing the parts. Shelves are installed on the sides of the box, and cabinets for linen are installed below.
DIY horizontal folding bed
The design of a bed with a horizontal lift includes a box, a sleeping bed, and a lifting device. The dimensions of the product are affected by the size of the mattress. The headboard is made of a slab with a thickness of at least 1.9 cm. The wood is treated with stain before installation.
The transformer frame requires sidewalls, plates for the bottom of the sleeping bed, elements for shelves, 2 roller guides, cornices, and a fastening device with which the horizontal structure can be folded back.
It is necessary to drill holes in the parts. Then the sides and base of the bed are connected with dowels and glue. The remaining elements are fastened with self-tapping screws. Metal plates connect 2 plate doors, which are the reverse side of the structure. Roller guides are screwed to the canvases.
Steel stops are mounted between the adjacent frame elements and the legs. The elements are additionally connected by a rod. The sides are screwed around the perimeter of the bed. The support, which is retractable when the furniture is assembled, is secured with a bolt. Guides for door panels are installed at the bottom of the structure. The elements are placed in the marked places and secured with self-tapping screws. The final stage is the installation of fittings on the facades, screwing the supports to the side elements of the sleeping bed.
What does a folding bed consist of - drawings
Let's look together at what the folding bed will consist of, the drawings for which are presented in this article. Perhaps the most important element is the mattress.
Fortunately, such a bed can “accept” almost all known types of mattresses, but it is better, of course, to choose an orthopedic model.
The bed will also have special mechanisms designed to raise or lower the structure. The effort with which you put the bed into a niche will directly depend on their quality. If it is high, then the model practically takes its original position.
Today there are three types of mechanisms:
- Mechanical.
- On springs.
- On gas shock absorbers.
