Any experienced summer resident knows that to grow seedlings, in addition to good soil and regular watering, you also need a large amount of light. Of course, you need space to accommodate all the plants. It’s good if you live in a large house where you can equip a whole greenhouse. But what if your living space is too small? An excellent solution would be to create a rack for seedlings. It is possible to purchase the product in the store.
Or you can put in a little effort and create it yourself.
See how many benefits you get.
- Saving money - the cost of the necessary material will cost much less than the cost of the finished rack.
- You yourself will create a design that is absolutely suitable for your interior.
- There is no need to adapt to the standard dimensions of the product - you create the appropriate parameters yourself.
- Having made a rack with lighting, it can be placed in any convenient place.
- You personally make the product and therefore are confident in its durability.
The imagination of gardeners is not limited by anything - no one forbids inventing an original “recipe” for a rack for seedlings.
Types of racks
Racks are very convenient both for those who grow seedlings for themselves in small quantities, and for those who do this on an industrial scale. In total, they are allocated for the type of construction:
- window;
- floor
The first includes small shelves, which are actually a shelf fixed between two or three racks. This design solves the problem of free circulation of warm air from the radiator: if boxes with seedlings are placed on the windowsill, then due to contact with a cold surface, moisture stagnates in the ground.
Floor shelving comes in two types:
- stationary , which are installed indoors regardless of the light source. Such a rack requires round-the-clock illumination with phytolamps;
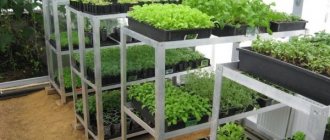
- collapsible , which solve the problem of insufficient space in the room. The advantage of such a rack is the ability to regulate the number of shelves and its installation location depending on specific tasks.
Regardless of what material the rack is made of, its design is very simple.
Alternatively, a collapsible rack can be made in the form of steps.
The main reasons for installing shelving
A window sill as a platform for seedlings is not the best place. In addition to the small size, there are other reasons for installing shelving:
- Lack of natural light. They begin to plant seedlings in February, when the weather is often cloudy. And the sun's rays do not have enough power to warm the soil. Equipping the rack with lamps completely solves the problem.
- Low temperature. The optimal temperature regime for seedlings ranges from 20-25°C, but the cold from the glass often causes a decrease in the required parameters.
- Small area. To get a good harvest, you will need a lot of seedlings. Window sills are usually not enough. Shelving of any type greatly increases the area where seedlings can be placed, without taking up much space in the apartment.
Having once spent energy on making a rack for seedlings, you will enjoy the results of your labor for a long time.
Requirements for racks for seedlings
As a standard, the rack is made according to the following parameters:
- total height of the structure – 2 m;
- number of shelves – 3-6 pcs.;
- rack length – from 50 cm;
- distance between shelves – 40-50 cm;
- The minimum distance from the floor to the bottom shelf is 10 cm.
At home, shelving can be made from:
- Metal. They are considered the most durable and durable. The main disadvantage is the possibility of rusting.
- Tree. Pros: durability, strength and aesthetic appearance. The downside is the need for impregnation with moisture repellents.
- Plastic. The most budget option. Even pipe cuttings are suitable for such racks. The design is very light, but at the same time stable.
- Plywood. This material is suitable exclusively for window structures. The downside of plywood is its low moisture resistance.
Corner rack
For assembly you will need:
- metal corner;
- bolts with nuts and self-tapping screws;
- plywood sheet 15 mm thick or OSB board;
- hacksaw for metal;
- screwdriver or screwdriver;
- roulette.
A bookcase is used as a basis. Dimensions are calculated individually based on the area of the room.
Using a hacksaw, cut parts for racks and fastenings for shelves from a corner. The blanks are coated with anti-corrosion paint. Drill holes for the bolts and assemble the frame.
If a non-separable structure is assumed, then the joints are fixed by welding for strength. A prerequisite is the presence of connecting crossbars on the side posts. There should be at least two of them: at a distance of 10 cm from the bottom and top edges.
Attention: in order to be able to change the height of the shelves during use, it is recommended to use corners with single-row perforation as a basis.
Shelves are cut out of a sheet of plywood or OSB board and secured with self-tapping screws to the base from the corner. If the plywood is thin, then plastic ties can be used for fixation. If the rack is planned to be located near the balcony door, then the bottom shelf is fixed at a minimum distance from the floor. As a standard, it is fixed at a distance of 30-40 cm from the lower level.
Attention: to reduce costs, you can use fragments of old furniture for shelves.
Material selection
The rack must be strong, waterproof and durable, which should be taken into account when choosing a material. Let's take a closer look at the possible materials for making a rack:
- Tree. One of the most popular materials, because it breathes, looks natural and beautiful, but has a significant drawback - it absorbs moisture. In this regard, when choosing a breed, preference should be given to hard varieties, since they absorb moisture worse than others. These include maple, ash and oak. In addition, it is worth using special impregnations that help solve the problem of wood getting wet.
Metal. It is better to choose stainless steel as it will prevent corrosion. You can use profiles and even metal pipes as racks, and the shelves can be made from sheet metal or durable mesh. In general, iron structures are durable and quite reliable, but they will be more expensive and will require significant effort in the manufacture of the rack, since working with metal requires certain skills and the presence of expensive equipment. Plastic. This material has many advantages - it is durable, easy to wash, and does not absorb moisture. When making shelving, you can use not only plastic sheets, but also pipes. Plexiglas. From this material you can assemble a transparent original design that looks stylish and modern. Plexiglas comes in different colors, so you can assemble a rack with multi-colored shelves. Plywood. It is easy to process, but gets wet quickly, so it is not the best choice when making racks for seedlings. However, if you still use plywood, then you should prepare several pieces of film or oilcloth to wrap the shelves with it, otherwise their rapid deterioration is inevitable.
The choice of material depends on financial capabilities and engineering and design decisions, however, if the choice is between plywood, plastic and plexiglass, then it is better to give preference to the second or third option. Such materials have a long service life and do not require any coating to protect them from moisture.
Rack made of plastic pipes
One of the most budget-friendly options for collapsible racks for seedlings.
For it you will need:
- PVC pipes and adapters for them;
- hot glue;
- self-tapping screws;
- hacksaw or special scissors for PVC pipes;
- sheet of plastic or plywood for shelves.
The assembly process takes no more than an hour.
- Cut the pipes into pieces according to the overall dimensions of the future rack. There should be a total of four long and four short parts.
- Each long part must be fitted with T-shaped fasteners, placed at the same distance from each other and secured with hot glue. These will be the bases for the shelves.
- Using triple adapters, fasten the parts together, making two rectangles. These will be the side posts.
- The resulting rectangles are fastened with pipes at the top and bottom to form a parallelepiped. If the structure is collapsible, the pipes are inserted into the fasteners and secured with self-tapping screws.
- The base for the shelves is made in the same way: pipe sections cut for this purpose are inserted into T-shaped fasteners that are pre-attached to the frame.
- The shelves are cut out of plywood or plastic board and placed on a base prepared for them.
Attention: the rack can be made from leftover pipes. In this case, more adapters will be required to fasten short lengths together.
Types of structures
Racks according to their design are divided into stationary, collapsible and window.
- Stationary racks are installed in a permanent place and fixed in several places for reliability. They are distinguished by their strength and durability. They are installed in rooms where plants are supposed to be grown for more than one season.
- Collapsible racks for seedlings are convenient for limited space spaces. This rack can be easily and quickly disassembled and moved to another location. When the seedlings are planted, the stand is dismantled and put away.
Window racks are installed on the windowsill. They are suitable for planting a small number of seedlings. These devices allow you to grow greens all year round
The advantages of using each type of structure are confirmed by many years of experience of gardeners and gardeners.
Wooden rack
Stationary floor racks are usually made from wood.
For them you need to prepare:
- wooden beam;
- boards;
- tools: saw, drill (screwdriver), nails, screws.
Considering that this will be a stationary rack, the height of the entire structure should be 150-170 cm to ensure free care of the plants.
Sequence of work:
- Cut the timber into long, medium and short fragments according to size. There should be four long and medium parts, and four short parts – the number of shelves*2.
- Fasten two long parts together with short crossbars. This will be the base for the shelves. The distance between the crossbars is up to 60 cm, from the floor to the first level – 10-20 cm.
- Fasten the resulting racks together with parts of medium length. Their size should be at least 50 cm (depending on the length of the lamp for illuminating the seedlings).
- Cut the boards into fragments equal to the length of the shelves. Secure them to the base using nails or self-tapping screws.
Features of brackets and mobile structures
The stationary rack can be made in the form of a bracket. Initially, two vertical posts with holes of the required size are attached to the wall. Brackets are inserted into them, onto which shelves are laid. The top shelf serves as the basis for mounting a lamp that heats the seedlings at the previous level of the structure.
The algorithm for assembling mobile racks is not much different from the formation of a stationary structure. The key point is to additionally install a horizontal support at the bottom, which is 2 times the width of the rack. This measure will prevent the risk of the structure with seedlings tipping over.
Window rack
When growing seedlings on a windowsill, small shelves are useful, which allow you to increase the usable area without blocking the light.
For the rack you will need:
- wooden beam;
- boards or drywall;
- file or jigsaw;
- screwdriver;
- self-tapping screws
In fact, such a rack is made similarly to a model made of wood or a metal corner, only on a smaller scale. The only difference is the length of the finished product. Window openings do not always allow placing a 50 cm long shelf on the windowsill, and this complicates the choice of lamps.
Installing the backlight
The central feature of any planting rack is the light source. Lamps are mounted above each shelf, making sure that the light evenly covers the entire workspace. Most often they put on homemade structures:
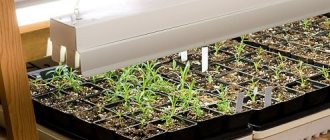
- Fluorescent lamps. They provide “cold light” and only work to artificially increase the length of daylight hours. Their thermal radiation is low, so you should not expect rapid germination of seeds under them. If just such lamps were chosen for the rack, then they must be fixed at a distance of 15-20 cm from the cups with seedlings and additional reflectors must be installed.
- LEDs. In terms of efficiency, they are placed on a par with phytolamps. Their advantage is the combination of the red and blue spectrum. LEDs are characterized by an increased service life and high lighting intensity. When adding additional lighting, it is possible to maintain a constant temperature and avoid evaporation of water.
- Sodium metal halide lamps. Their spectrum is almost 90% identical to sunlight. The advantage of such lamps is stable operation regardless of service life. When choosing metal halide lamps for your home grow rack, you need to consider their wattage to ensure that the light source is kept at a safe distance from the top of your plants. Otherwise, young leaves may get burned. When installing metal halide lamps, you should follow safety rules: they can explode if exposed to water.
- Mercury lamps. Used for window shelving. They are not efficient and only provide heating. The disadvantage of mercury lamps is the flickering of light and instability of lighting due to voltage changes. When choosing mercury lamps for a rack, it is necessary to provide a ballast for them.
- Phytolamps. They give a violet-pink-blue spectrum. Such lighting is ideal for plants, but harmful for humans. When installing phytolamps on racks, it is necessary to provide reflectors on the lamps. Plants with such additional illumination will also benefit from screens, and matte ones at that. It is undesirable to be in a room where phytolamps are working, so such sources of additional lighting are relevant for stationary racks installed in non-residential premises.
How to make it yourself from scrap materials?
This version of a rack for seedlings demonstrates only the idea of the design of a collapsible rack. It can be realized in various materials and dimensions.
- Wooden T posts are made from planed pine beams.
- Metal crossbars K and metal bars P are made from steel strip 50x5 mm. However, for K bars you can also use a steel angle (then the fastenings will look a little different).
- The corner for the crossbars K will add additional rigidity to the structure, but then the spans will not be able to rotate relative to each other.
- The crossbars K are connected to the wooden posts T using bolts or screws through pre-made holes of the required diameter. These connections are permanent and can be secured in any convenient way.
- It is necessary to drill a hole in the center of each of the crossbars and use a bolted connection to connect the crossbars of each level to each other in pairs. This connection will be movable and will allow, by changing the angle N between the spans, to adjust the ratio of sides A and B.
- Tires P secure the spans in the desired position using bolted connections. For these purposes, a number of holes must be made in the P tires and in the crossbars K to allow the crossbars to be secured at different angles.
- Wooden legs H will be needed to make the structure more stable and not scratch the window sill.
- Since the main idea of this rack is that it can be folded for storage, the bays must differ in size so that one of them, when folded, can fit inside the second.
With a steel crossbar thickness of 5 mm, it is necessary to provide for a difference in the height of the racks of 12 mm, one of the spans must have smaller sides (according to the formula, the height of the racks = 2 thicknesses of the crossbar + 2 mm for the gap), and with a thickness of wooden beams of the racks of 50 mm, the difference between the length of the crossbars should be 106 mm (according to the formula, the length of the crossbars = 2 thicknesses of the racks + 6 mm for gaps).In this case, the gaps should be made a little larger, since the wood may be subject to deformation to a greater extent.
- The wooden legs should also vary in thickness by 5 mm to compensate for the difference in height of the lower crossbars.
- It is better to make the shelves from welded steel mesh. The size of the cells is not of fundamental importance, however, the mesh, on the one hand, must be strong enough to support the weight of the boxes with seedlings, and on the other, have maximum light transmittance.
- If you plan to use the rack in several working positions, you should immediately cut the mesh shelves in different sizes.
When the crossbars K are positioned at an angle of 90° relative to each other, the shelves will be square; with an increase in the angle N between the crossbars K, the shelf will have a rectangular shape. The larger the angle, the longer side A in this rectangle, and the correspondingly shorter side B becomes. You can secure the shelves to the frame using clamps. - To protect against metal corrosion and wood destruction, it is recommended to paint the entire structure.
In addition, painting the rack in one color will increase its aesthetics. The easiest way to do this is to use spray paint. If metal parts with elements of rust were used for assembly, it is better to use hammer enamel in a can. It will restore the oxidized metal and further prevent the reappearance of rust.
Advantages of this design of a rack for seedlings:
- it is easy to store when folded;
- shelves made of welded metal mesh allow light to pass through well between tiers;
- If necessary, such a rack can be folded and taken to the dacha and installed in a greenhouse for growing seedlings.
From PVC pipes
In recent years, craftsmen have chosen PVC pipes and adapters of various configurations as construction materials. This allows you to assemble various shelves quickly and without special skills. The only tools you will need are a pipe cutter for plastic pipes.
You will need:
- Adapters for PVC pipes:
- 16 tees (1);
- 4 2-plane crosspieces (2).
- PVC pipe (diameter 25 mm 6.2 meters):
- 14 pieces of 30 cm;
- 4 pieces of 20 cm;
- 8 pieces of 15 cm each.
Step-by-step instruction:
- Measure and cut the pipes into the required lengths.
- Collect.
- Enjoy how quickly everything happened.
