Today, many furniture and doors are not made from solid wood, since the material is quite expensive and is not always functional for the manufacture of such structures. Wood is replaced by fiberboard and chipboard. These materials are based on wood fibers and shavings. Due to the use of such materials, the products are light and hollow, so often with a careless movement you can touch the canvas and make a dent or hole in it. Even with the most careful handling of such a design, scratches and chips are still inevitable. But this problem can be fixed. In this material we will tell you how to quickly and easily repair a hole in a fiberboard door.
Find out everything about repairing wooden doors yourself
To restore and repair antique wooden doors, you will have to spend quite a significant amount. Therefore, in most cases, we choose the path of least resistance: we buy modern analogues, usually imitating wooden surfaces.
Door in need of repair
- Frequently encountered problems
- Restoration of a deformed structure Option 1
- Option 2
- Enlarging the sash
But is it worth getting rid of a door block made from natural, high-quality material? After all, in most cases you can repair the door yourself.
First you need to figure out how to seal the hole in the door if it is interior. So, in the process you will need the following materials and tools:
- construction knife;
- medium width spatula;
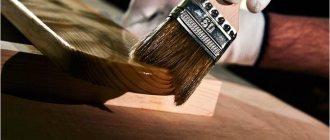
- brush for applying varnish;
- sandpaper of different grain sizes (or a sander);
- construction tape;
- polyurethane foam;
- solvent;
- putty;
- polyester or epoxy resin;
- paint and varnish composition for working with wood;
- primer for wood.
If you need to fill a hole under a door or repair a frame, a building level, a pencil, a tape measure, and hinge lubricant will come in handy.
How to remove a hole
When repairing a hole, you must have the following materials and tools:
To repair the door you will need the following tools: hammer, saw, plane, chisel, screwdrivers, pliers.
When repairing a hole, you first need to cut a hole that is slightly larger than the hole itself. The easiest way to do this kind of work is with a construction knife. In this case, if possible, you should try to make a chamfer to a depth of about 0.5 cm.
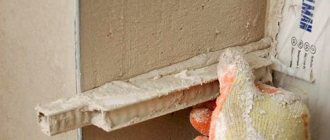
Then, from the inside along the edges of the hole, you need to fill it with newspapers or just paper. If this is not done, then when filling the door you may need a very large amount of foam. After this, the hole must be filled with foam. As soon as the polyurethane foam has dried, the protruding part must be cut off to create a flat surface.
Polyester or epoxy resin must be applied to the resulting surface to form a solid surface. It is best to carry out this operation while wearing rubber gloves, since when it comes into contact with the skin, the resin easily sticks and can only be removed with a solvent. And the solvent, in turn, like the resin on the skin of the hands, can cause irritation.
Once the resin has hardened, wood putty must be applied to it. The dried putty must be sanded with sandpaper to obtain a smooth and even surface. You should use paper with the markings indicated slightly above.
After cleaning, you need to apply wood primer to the putty. It is best to do this several times with a time interval of at least 20 minutes. After the primer has dried, the selected paint must be applied to the surface of the entire MDF door.
It should be noted that the primer is best applied with a small paint brush: this will help avoid streaks.
As can be seen from all of the above, repairing an MDF door is not so difficult. And the time spent doing DIY repairs compensates for a significant amount of money.
Professional and artisanal methods
Repairing a door usually requires not only material investments, but also specially selected tools, selection of materials, and, most importantly, skill.
Handicraft restoration is possible if the damage to it is minor and simple material was used as the door leaf. It is almost impossible to repair complex damage to wooden doors made of noble species with your own hands, especially when they end up in places where there was a designer curly treatment. In this case, it is better to involve specialists who have the necessary skills.
There are a number of differences between do-it-yourself and professional repairs:
- professionals have the necessary repair skills;
- the pros have a special set of tools in their arsenal;
- experience in the selection of materials guarantees high-quality repairs;
- The master has the ability to make repairs of any degree of complexity, while you can only perform simple manipulations with your own hands.
Decorating the door leaf
In conclusion, we will deal with the question of how to decorate the damage. We figured out how to repair an MDF door with a hole. Decorating does not require any special skills. The simplest options:
- cover the treated area of the hole with a mirror or any other decoration;
- stick self-adhesive decorative film;
- hang a poster or collage with your favorite photographs.
The tips and recommendations discussed in this publication will help you eliminate damage to the interior door structure with your own hands.
Now you know what to cover and how to decorate a hole in the door. Back to all news
Repair methods in different situations
If you are interested in how to repair a hole in chipboard, then depending on the nature of the damage and the goals you are pursuing, you can use different methods to restore the surface.
- Cosmetic method - to restore appearance. They resort to it when you just need to get rid of a small hole or deep scratch.
- Restoration for screwing in new fasteners. Most often, such work is needed when you made a mistake with the markings when drilling a hole or a furniture hinge on a cabinet door broke out.
Since surface restoration is carried out for various reasons, you can fill a hole in a door or other chipboard part with different materials. In one case you will need a little sawdust, and in another you will have to prepare a wooden insert of a suitable size. There is a third case - when a large defect is being repaired and in this situation it will also be necessary to reinforce the repaired area with thin wire. At the same time, such restoration refers to cosmetic repairs.
Repairing the box
The most undesirable problem is the destruction of the box, but you can deal with this yourself if you carry out repairs in time and seal all the cracks. To do this, you will need to temporarily remove the fabric from the loops. Assess the extent of structural damage and identify the most vulnerable areas. Distortions are easy to notice if you use a building level, plumb lines and a square. Make the appropriate notes and get to work.
To eliminate the distortion, it is necessary to align the door frame at the level
First you need to remove the trim and level the loot. If the foam crumbles, scrape off the old layer and re-foam. For additional strengthening, the side strips are equipped with dowels. To do this, drill several holes in them along the entire length and drive them into the wall. If we are talking about a load-bearing wall, the repair becomes somewhat more complicated. You will have to carefully disassemble the box, drill holes with a hammer drill, and then reinstall it. Afterwards you need to seal up the traces of intervention with a special mastic.
In some cases, it may be necessary to re-foam the door frame
We correct shortcomings caused by incorrect installation
- If the door does not open well or friction occurs, the excess is removed from the edge with a plane, sanded, painted and varnished. The gap between the frame and the doors should be no more than 1.5 - 2 mm.
- If the door springs back when closing, it may be because it is resting against a quarter of the frame. In this case, the door leaf or frame will be trimmed. The problem may also lie in the installation of hinges on the door.
- Door sag can be repaired by placing washers on the top and bottom door hinge pins.
Correcting the magnet
Another problem that you may encounter is that the closet door constantly opens and cannot be closed. Previously, people took a piece of newspaper, rolled it up and put it under the door. Now you can solve the problem yourself by first determining the type of structure:
If the cabinet door is on a small magnet and is held closed by a metal strip, then it is enough to adjust the magnetic fastening using a screwdriver. Procedure:
- Loosen the screws holding the magnet (do not remove).
- Move it forward a little.
- Tighten the screws back.
- Completely replace the fastening if the desired result is not achieved.
Features of repairing damage without obvious cracks
It happens that there is no obvious hole, but there is a dent. In this case, the issue also requires an immediate solution and is not complicated.
The repair is carried out in several stages:
- Before repairing the dent in the fiberboard door, armed with a drill, we begin to make holes around the damaged area.
- Take a drill of such a diameter that it is slightly larger than the foam packaging tube. The more holes you make, the better the problem will be corrected.
- Next, we place a little foam in each hole. It should not come out of the holes. We act very carefully, because if there is too much foam, it can inflate the door. Do not allow this to happen, otherwise you will have to remove both the entire top coating and the foam underneath.
- If flaws and cracks run along the perimeter of the canvas or across the entire area, you should very carefully fill the space with foam. In addition, it needs to be blown not only under the crack itself, but also 10 cm further from its ends.
- When the mixture hardens, again using a construction knife, remove all excess and sand with sandpaper.
- The next stage is applying putty. When it dries, the surface is coated with a primer. We apply 3-4 layers of this substance, each ball dries for about half an hour.
- After this, you can begin the final finishing of the door.
- It is advisable to apply paint to the canvas using a small paint brush.
How to seal a hole in an MDF door without an open gap
A wooden door does not always have open damage, but the presence of dents and other defects also require repair.
To evenly fill the internal space and prevent bending of the structure, you will need drills and drills. We drill the wooden sheet in several places. We insert the tube of the cylinder with polyurethane foam into the resulting holes. We fill the internal space with foam. We work carefully to prevent deformation of the structure.
The next stage is leveling the door leaf. You can use construction foam. Such a work plan requires certain skills, since the application of the material must be uniform. The further algorithm of actions is no different from the previous option.
Repair of a hollow door with restoration of the pattern
So, all repairs and restoration of a hollow door can be divided into five main stages:
- Filling the voids under the dent with polyurethane foam to give strength to the area for further processing.
- Surface putty.
- Making a stencil with the original design of a tree.
- Restoring the pattern on the door surface.
- Painting.
So, we remove the door from its hinges. Place it on stools or another flat surface, with the damaged part facing up.
Filling the voids with polyurethane foam
To fix the dent and fill the holes, we will use universal polyurethane foam, which is used in construction and repair.
If the hole does not have open cracks or holes, then you need to make them yourself, using a drill and a screwdriver.
Take the diameter of the drill slightly larger than the tube of the foam container.
Filling the space under the crack.
Let the foam harden. This usually takes a day.
After hardening, cut off the foam sticking out of the holes and cracks flush.
We sand, removing paint from the area to be restored, making it smooth and even.
We putty the surface
When the surface is prepared, we move on to the putty, having previously primed the application area. There are special requirements for the putty; it must be epoxy-based so that the surface being restored is durable. It’s not difficult to buy or prepare it yourself. We use a rubber spatula. We putty, filling all the unevenness and potholes. It may be necessary to apply several coats to achieve the desired result. We leave it to dry and move on to the next stage.
Making a mold with a pattern
We find on the same door an area of similar size with a good texture of the pattern. We gnaw it with slats. And in order to secure everything and seal a kind of bath, we coat it with plasticine, clay or other plastic material. Pour liquid rubber (or silicone rubber) into the resulting bath. Please note that the door must lie very level. Distribute evenly over all surfaces. It is not necessary to make a very thick layer, about 5-7 mm. Leave and wait for it to harden. The time can be found in the instructions for use. When the time has come, remove the sides and peel off the layer from the door. The result should be a clear shape on a piece of rubber.
Restoring the wood grain on the door
We make a border, about a millimeter thick, around the damaged area. We take epoxy-based glue and mix the components. Apply the required amount to the area inside the frame. We put the pattern protector on top and roll it a little with a foam balloon. Remove excess glue with a brush. Press the stencil against the door and leave to dry. Once the glue dries, peel off the stencil. The surface is almost ready.
How to remove scratches
When repairing scratches on a door, you may need the following tools and materials:
You can remove scratches from the surface of an MDF door using grease-free colored wax chalk to retouch minor scratches, cracks and small holes.
First, you need to sand the scratch and the area around it about one centimeter. Then you need to clean the cleaned area of the door from dust and small wooden particles.
The next step is to apply wood putty to the cleaned area, and then use a spatula to remove its remnants and at the same time try to make the surface perfectly smooth. After the putty has dried, it must be cleaned again in order to even out the remaining unevenness. It should be cleaned with fine sandpaper.
It should be noted that putty should be applied to the MDF surface very carefully, trying not to create new scratches. To avoid this, you need to use rubber spatulas.
Then apply wood primer to the treated area in an even layer and wait for it to dry. After the soil has dried, cover the entire door with an even layer of wood enamel (paint).
Glue + sawdust
The solution is as old as time, and it should be noted that it works well. Perfect if you have a piece of chipboard torn out.
The idea is simple - we take sawdust (you can take it from a chipboard, a piece of which has been torn out), or find it near furniture factories, next to large construction supermarkets (usually there are pieces lying around that no one needs), crush them, mix them with glue (previously we used PVA) this Apply the mixture to the broken areas and let dry. And that’s it, tighten the “screws”. It's holding up well.
However, now there are a large number of adhesives; on the Internet I even saw a guy pouring a lot of glue from a glue gun into broken places. And everything seems to be holding up
I used to repair hinges in the kitchen a long time ago. BUT due to the fact that the sash was used often, it broke quite quickly.
So this is again an option for a while, for constant use (10 - 15 openings per day), this is not the best way.
Regular matches
Everything is simple here, if your broken holes are not large, say, a piece of chipboard has not fallen out, then you can use ordinary matches.
How it works? Just hammer a match into the hole (great if the diameter is not large). And then we screw the screw in there. The match is pressed against the wall and thus the fastening is restored.
However, it is not suitable for heavily loaded doors that you rarely use. If you constantly open or close the sash, it will not last long . BUT as a temporary solution, why not?
Decorate with wallpaper
When covering a door with wallpaper, you can, of course, use classic options, but fabric wallpaper will look much more aesthetically pleasing.
Before you start gluing, you need to properly prepare the surface of the door, eliminating all irregularities. Remove the paint and sand the door thoroughly, then coat it with a coat of primer. Now you can proceed directly to decorating with wallpaper. An alternative option may well be ordinary matter, which will first need to be prepared. It is not necessary to decorate the entire door in this way - it is enough to disguise only the location of the defect using stencils, stickers, stickers with the designs and shapes you like. A door like the one in the next photo will undoubtedly become a bright accent in the interior.
How to decorate a glass cabinet door?
Stained glass films from the Crystal Frost series are perfect for decorating wardrobe mirrors, glass doors and partitions, and shower stalls. An exquisite translucent pattern will make the glass surface attractive and open up space zoning possibilities.
Interesting materials:
How to tame a stray pet in Sims 4? How to train a dragon in Minecraft with the Ice and Fire mod? How to tame the dragon Everwing? How to tame a lizard? How to tame a robber in Minecraft? How to tame Dont Starv pigs? How to tame the beast in Far Cry 4? How to welcome someone to your site? How to greet in Korea? How to link your Steam account to Gaijin?
Causes of problems
Mechanical damage occurs due to careless operation or installation:
- scratches and dents are a common occurrence in families with small children;
moving or falling objects sometimes cause holes in fiberboard doors.
Due to improper installation, they encounter the following difficulties:
Wood is hygroscopic - it easily absorbs moisture and releases it. In this regard, violation of production technology and operating conditions leads to the following unpleasant consequences:
- Increased indoor humidity or operation in unheated buildings (uninhabited new building, basement) leads to swelling and deformation.
- Drying of wooden doors occurs due to the use of raw lumber in the manufacture. Leads to warping, formation of gaps and cracks.
- Unsticking of the product occurs due to poor quality assembly of parts during production or insufficient varnish finishing.
Stained glass
When decorating glass door elements, stained glass compositions are used. This type of decor can be used to enliven a space in your home. Applying a design to glass is a somewhat labor-intensive process. You need to be patient to implement this idea.
Materials
- Stained glass paints.
- Sketch of the drawing.
- Marker for drawing a diagram on glass.
- Liquid for degreasing surfaces.
The glass surface is cleaned and degreased. The drawing is carefully applied. Afterwards, the process of applying the ornament to the glass occurs. After the design is completely completed, the stained glass window dries, only then the door can be hung in its original place.
For a simpler design of glass surfaces, stained glass self-adhesive films are used. Before use, the glass is wiped and the film is applied from top to bottom.
Important! When fastening, do not allow the formation of air bubbles.
Photo wallpaper
Photo wallpaper intended for doors is an even faster option than pasting with regular wallpaper. No measuring or cutting, just choosing the desired theme and size. The result is a complete transformation of the door.
The gluing procedure is the same as with regular wallpaper.
After a while, having parted with a certain amount of money, the boring wallpaper can be replaced with a new theme.
Decoupage
The latest fashion boom is decoupage. The very essence is that ornaments and appliqués are glued to the surface. Often the material for drawing is simply napkins.
You can use decoupage cards purchased in specialized stores.
Materials
- Applications.
- Sandpaper.
- Putty.
- Varnish.
Before starting work, it is necessary to clean the surface of the doors, prime them and paint them with white enamel. The next stage involves applying miniatures to the door surface. The drawings are soaked in water and glued with light movements. You need to make sure that no air bubbles remain. Remove the air by stroking and leave until the applications are completely dry.
The edges of the drawings must be puttied. After drying, sand with fine-grained sandpaper and then coat with clear varnish. You can use other colors of varnish, depending on the project.
Yacht varnish is more durable and gives the coatings some dullness.
magSpace.ru
Open registration
Useful tips
Live
Related Posts
IDA November 20, 2012, 6:34 pm
gennaddii November 17, 2015, 02:41
Axelerator February 26, 2015, 08:16
Awant 23 August 2014, 15:59
Skiminok 11 July 2013, 18:00
Top rated
Blogs
- Jokes and humor179367.98
- Interesting143442.27
- Unknown98305.46
- And again NEWS93635.13
- proGames69492.58
Selection of decor options
There are many ways to decorate and update a door. Even without any artistic skills, you can turn some of your ideas into reality.
The easiest way to decorate an old door is to repaint the door with new paint. In the modern building materials market, in addition to ordinary enamel, there is a large selection of different paints.
The best option at this time to decorate an old door yourself is to use acrylic paints. When using them, you will definitely be convinced of the ease of working with them, the absence of odor, and a wide color palette. To paint doors, you can use not just one color, but several - the main thing is to combine them correctly so that the result will only please you.
As an option, you can use latex paint, which is water-resistant, to decorate the door. This option is more suitable for doors to the bathroom and children's room. Latex paint is odorless, the drying speed is very fast, and in the end the whole job can be completed in about an hour. By painting the door to the children's room, you can attract the children themselves and come up with a unique design with them.
Using stencils
Even if you are not a professional artist, you can use a variety of stencils to create a beautiful interior door. Using them is quite simple: you just need to attach the stencil to the door and apply paint. As soon as the paint has dried, the stencil should be carefully peeled off from the door leaf.
And if you have the skills of a painter and artist, you can get an incredibly attractive drawing. If the resulting pattern does not suit you in some way, you can always fix it - repaint it again.
If you want to get the effect of wood or an antique object, you can use some available tools: a sponge to create stains on the surface, steel wool to imitate an antique surface, a stiff brush for a jeans effect. There are also special paints on sale that can be used to imitate denim.
Using Film
An equally simple way to decorate doors yourself is to use vinyl film. However, this method is only applicable to canvases that are in good condition. It will help complement the interior of the room with bright colors. Simply select the desired option and transfer the self-adhesive film to the door. Despite the minimum time spent, the result will please you for a long time.
Ready-made stickers are available in many hardware stores. If you want to make some kind of pattern from films, you can purchase self-adhesive PVC film after making a cardboard template. Now you need to transfer the contours of the template onto the film, cut out the decorative elements and glue them to the door.
Application of moldings
Moldings will help you get an original decorative finish. Using them, you can create an imitation of stucco - an excellent option, combined with a classic interior, antiquity. Moldings are special elements made of polyurethane or foam. Fixation on the doors is carried out with glue, which is liquid nails. With the help of moldings, any composition of door decor is possible, but it is necessary to take into account the limitations of its shape. This decor option is not suitable for sliding doors.
Textile
To decorate old doors, you can take leftover fabric, especially if they were used for upholstery. Such an intersection of patterns will look appropriate in one interior.
In any case, fabric is a textural, eye-catching solution that will definitely help refresh an old item, covering up minor imperfections. You can fix it on the door using regular glue or furniture clips. The second option is good because over time the annoying part can be removed.
Lace is popular not only in clothing, but also in decoration. Here, with their help, you can emphasize the refined taste of the owners by decorating the door with them.
Doors perform two complementary functions:
- they limit and separate the spaces of one room from another
- secondly, they are elements of the general interior of neighboring rooms or even the entire apartment, which form the visual and functional space of rooms limited by doors.
However, decorating a door can be done not only due to the aesthetic renewal of the living space, but also for trivial reasons, such as the appearance of scratches or cracks, as well as chips on the canvas. In these cases, the main purpose of decoration may be to hide various defects in the door leaf, but this may become an opportunity to update the design of the entire living space.
There are a huge number of ways to decorate interior doors with your own hands, as well as decor the front door, and the simplest and most affordable of them involve decorating door panels using wallpaper.
Wallpapering the door
To carry out such decoration, doors are used both on paper and on another basis, as well as fabric and various types of liquid wallpaper. Any method of updating doors using decoration involves preparing the door leaf for this procedure.
Decorating an interior door is no exception to this rule. In the process of preparing for decoration, they not only get rid of the previous coating - this makes it possible to identify and also eliminate previously unnoticed hidden defects of the product.
Wallpapering doors
Preparation for door decor is as follows:
- In removing old paint. To do this, use a hair dryer to heat up the old paint and scrape it off the canvas with a spatula.
- In sealing with putty, detected defects, as well as eliminating irregularities. Then all problem areas leveled with putty should be treated with fine-grained sandpaper.
- In carrying out puttying the entire surface of the canvas. This makes it possible not only to level its entire surface, but to additionally fasten its individual elements, which is very important especially for paneled canvases. After applying the putty and letting it dry, you can go over it again with fine sandpaper.
- In painting doors with a primer.
Sequence of work
The first step is to remove the old coating. This is a prerequisite to ensure maximum strength of the new coating and the removal of many microbes that the old paint has absorbed. After you have removed the door leaf from the hinges, you need to place the door on a flat surface and remove the fittings. If there are glass inserts, they must be removed during decoration. To remove old paint, sandpaper or a solvent designed for this purpose can be used. To work with solvent you will need gloves and a respirator. A hair dryer can also be used.
Once the paint is removed, it is necessary to assess the condition of the canvas. If there are cracks or chips, you need to fill them with wood putty. To ensure an even, smooth surface, you need to sand it manually using sandpaper or a sander. Wood should not be wetted! You need to wipe the surface of the door with a slightly damp cloth and treat it with an antiseptic.
In order to preserve the natural texture of the wood, it is necessary to apply several layers of varnish. If you cover the canvas with stain, the tone will be a little darker. Thus, you can turn pine into cherry (a kind of imitation of noble species), while the natural beauty and naturalness of the material are preserved. If the door is not repainted, as soon as the antiseptic has dried, the surface will need to be covered with two layers of primer.
