More and more manufacturers of interior doors are producing telescopic frames or, as they are also called, Euroblocks, trying to facilitate the installation process in the future. It is also worth noting that such a block looks more civilized compared to a regular one due to the almost complete absence of joints. What is a telescopic interior door frame and how to use it correctly - read on.
What it is
The term "telescopic" is usually applied to objects consisting of several parts that extend from each other. A door frame of this type, in accordance with the definition, is assembled from several slats, only they do not slide out from each other, but snap into place using a system of grooves, forming a single whole. Thanks to this connection, the parts of the block are easily adjusted, and the end result gives a perfect rectangular shape. Today, two types of telescopic block are produced:
- The design of the box and platband as a single whole;
- Two separate components - a box and a platband, connected by grooves.
What does a telescopic box consist of?
The expansion door frame system includes strips that are fastened together in a similar way to laminate flooring. If the room has uneven walls, inserts and extensions are used to install a standard structure. Such measures also help to adjust the door to the size of the opening. It is not always possible to disguise them with platband, which negatively affects the appearance.
To avoid such difficulties during installation work, manufacturers produce a telescope box. Thanks to a specific fastening system, they look holistic. No nails are used during installation of platbands, which preserves the integrity of the product.
The telescopic design expands, if necessary, up to 15 cm using the free sliding of elements along the groove. This allows you to hide wall defects without compromising the integrity of the platband.
What is it for?
In houses with thick interior walls, it is quite problematic to aesthetically design the doorway, since additional finishing of the slopes is required. Most often, such passages are decorated with platbands on one side, and painted, covered with wallpaper or covered with plastic or MDF panels on the other.
If the width of the slope is small, then you can install an additional strip and attach the second set of platbands to it. But here comes the difficulty. The additional board is available in standard sizes (from 100 to 250 mm) and does not always correspond to the thickness of the wall.
In this case, you will have to cut along the extension, which requires precision, the presence of special equipment (a jigsaw) and the skills to use it. In the absence of the latter, there is a possibility of damaging the board, which entails the purchase of a new one (accordingly, additional costs) or the loss of the decorative properties of the door block.
This process can be facilitated by installing a telescopic box with the function of adjusting the expansion strip (extension), which allows you to decorate the opening on both sides with platbands.
When might narrow door frames be needed?
Narrow trims are flat or semicircular strips with a width ranging from 3 mm to 7 cm. When choosing narrow models, the width of the technological gap should also be taken into account.
According to SNiPs, the technological gap between the wall and the side posts of the door frame must be at least 3 mm wide.
In order to beautifully close this distance, it is important to choose platbands that are at least a few mm wider. In addition, the choice of platbands is determined by factors related to the location of the doorway.
For a door located in a corner, narrow trims are perfect
Narrow platbands can be useful if:
- The doorway is too close to the walls that frame it.
- The door is in the corner. You can decorate a corner door beautifully by gluing a narrow trim onto a shorter wall.
- The door is narrow and elongated. A wide frame of a standard size of 7-10 cm will look quite ridiculous on a narrow and high canvas.
- The door leaf has many decorative elements. In this case, the platband should be as inconspicuous as possible and perform the only function - to mask the technological gap between the frame and the wall.
- The opening is located between two walls of different lengths: this solution will avoid cutting off the standard casing.
Often, simple, narrow platbands are purchased in order to save money for decorating utility room doors: the narrower the platband, the lower its cost. Narrow plastic cashing will also look good on inspection hatches.
Advantages and disadvantages
The main task of a Euroblock for doors to a room is to eliminate passage defects if they exist, for example, a thickening of the wall closer to the floor. Most often, this occurs in old houses or apartments, the decoration of which was carried out by unscrupulous craftsmen.
The telescopic frame of an interior door is easier to fit into such openings. The grooves into which the platbands and extensions snap into place allow you to adjust the width of the block depending on the thickness of the wall, hiding imperfections. Therefore, some manufacturers call such a box an expansion or compensation box.
The main advantages of the Eurobloc are:
- Saving time and effort. There is no need to spend a lot of time adjusting the components or waiting for the polyurethane foam to dry before installing the trim and additional board. There is no need to glue or nail the final nails onto the finishing nails, as they simply snap into the grooves of the box;
- Financial savings. Structural features make finishing the opening unnecessary, since all defects are perfectly hidden by the Euroblock;
- Stability and long service life. The structure, assembled into a single whole like a construction set, has no gaps either between the components or between the wall and the frame;
- A wide range of sizes and the ability to adjust the additional strip allows you to install the Eurobox in any room, the width of the walls in which reaches even 0.27 m;
- Versatility. The telescopic frame of the interior door is suitable for different types of door leaves: hinged, compartment, sliding, roto or accordion;
- High decorative properties. The assembled structure looks monolithic; the absence of additional means of fastening for platbands and extensions does not require filling of hardware heads or decorating traces of polyurethane foam. Easy installation that even a non-professional can handle;
- Collapsible. Since the platbands and additional boards are simply snapped into the grooves without driving in finishing nails or gluing with foam, they can be removed and reinstalled if necessary, for example, when re-gluing wallpaper.
- Minimum set of tools and materials;
- To install such a structure, a good hacksaw or jigsaw is enough to adjust the dimensions of the planks to the parameters of the opening, a bottle of polyurethane foam (for convenience, it is better to take a professional one complete with a gun, but you can also buy a household one with a special tube), wedges for spacers, a level, anchors and a drill (for concrete walls).
As you can see, there are enough positive qualities of the Eurobox. The only drawback is the cost, which is higher compared to a conventionally assembled box, but the advantages completely cover this drawback.
Video: how to install an interior door frame with your own hands
For those who need to not only understand the process, but also clearly see the installation of the box, you should watch the introductory video. In it, the author gives clear instructions in which he explains all the nuances and difficulties associated with installing the telescopic box.
Don't Miss: The Free Way to Create a Website
Watching the video instructions, you can understand that such a box is easily assembled and mounted to any material (including aerated concrete). This procedure does not require expensive tools and materials; it is enough to follow simple instructions and get the job done efficiently.
When a consumer is faced with the choice of buying a Euroblock or a classic box, then it is worth choosing the first option and, by paying a little more, get high-quality work and aesthetic pleasure.
Post Views: 1,630
Material of manufacture
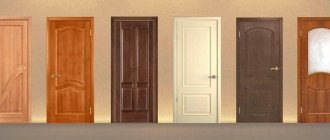
The telescopic frame of the interior door is made of solid wood, glued sawdust (MDF) or metal. The bulk of components are sold by linear meters. Therefore, it is recommended to purchase both the box and the canvas in the same place or from the same manufacturer.
There are two options for choosing a color:
- Classical. The block and the canvas are made in the same tone and texture;
- Contrasting. The euroframe and the door are painted in contrasting shades, for example, a light door in a dark frame.
The latter option is increasingly found in the latest issues of interior magazines; it looks quite stylish and fresh.
Correct installation
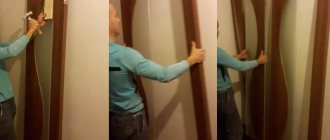
To properly close the door, the walls on both sides of the doorway must be one plane, without deviations or curvatures. In reality this rarely happens. Telescopic platbands allow you to make adjustments - push the door frame inside the opening or install it flush with the wall, and outwardly the difference will be invisible. In fact, the platband of a telescopic door frame is nothing more than a corner that moves along the groove of the frame.
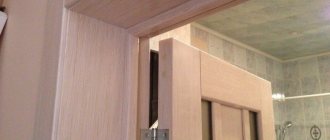
By varying the depth of insertion of the platband into the groove, it is possible to achieve a more or less tight fit to the wall. The extension is also connected to the box using the tongue-and-groove method and is approximately 8-15 cm wide.
Typically, telescopic door frames are made from wood materials: wood itself or MDF. But there are also models of such boxes made of aluminum and even steel. Aluminum telescopic boxes are very practical. They are characterized by great durability, do not dry out or warp, and the aluminum surface can be painted in any color or imitate the texture of wood.
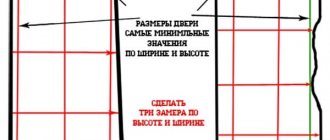
Choosing a size
If you understand the concepts: “telescopic frame for an interior door” and “what is it”, then you should pay attention to the adjustment range. Most often, it varies between 1.5-2 cm. Therefore, before purchasing, do not forget to measure the thickness of the opening walls. It is best to do this in several places, as this will reduce the risk of purchasing a block with inappropriate parameters. The larger indicator is always taken as the main value. If the wall thickness is 9 cm plus/minus 1.5 cm, then calmly buy a Euro-box that can be adjusted within 8-10 cm. For a wall of 9.7-10.0 cm, such a box will no longer be suitable; it is better to purchase a design with parameters 10-12 cm.
Assembly
The assembly and installation process is very simple. Even a non-professional can handle it, but installing telescopic door frames has its key points that are worth paying attention to.
First of all, you need to prepare your equipment. It includes: a frame with grooves for installation and adjustment, an additional strip with corresponding grooves, platbands and, of course, the door leaf itself with fittings.
Assembling a telescopic door frame includes several steps:
- It is necessary to dismantle the previous door with frame.
- Then place the beams to assemble the frame on a horizontal, flat surface. Apply the resulting workpiece to the ends and make cuts. A hacksaw is best suited for this.
- Perform sequential fastening of the posts and the ledge.
- The assembled structure must be placed in the doorway and secured.
Installation
The main component of the box and the additional strip are assembled separately; they are connected at the moment when the canvas is installed. The frame is placed first in the opening and fixed in the same way as a conventional block for interior doors is installed. After the canvas with hinges and fittings has been hung on the frame, its operation and the presence of the necessary gaps have been checked, you can begin the final installation of doors with a telescopic frame and blowing in the foam. As soon as the foam has dried and its excess has been cut off, it’s time to install the additional strip and adjust its width.
But it is worth noting that in blocks with an extension and a platband, made of a single design, it will not be possible to blow out the foam after installation. Therefore, first the eurobox is installed, the canvas is hung, the foam is blown in, and only then the adjustable trim is installed.
Design Feature
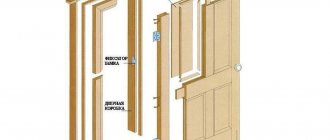
The box for installing telescopic doors of interior type is provided with special grooves required for installing the extension and trim without the use of additional fasteners .
Door panel diagram: trim - strip - frame
Thanks to these grooves, there is no need for nails when fixing the platbands. For telescopic extensions, it is required that the wall width be greater than 14.0 cm. Installation of extensions with a thickness of 5-40 mm is allowed. Thanks to such additions, an opening of any thickness is suitable for installing doors.
For installation, most often, ready-made box kits are used, so during installation the time and effort required will be minimal.
Finishing nails
Wooden and MDF trims are easier and better to fasten with nails with flat heads. Then, if necessary, they can be easily dismantled. And so that the platbands do not dismantle by themselves and hold tightly, the nail should be driven into the door frame at least 20 - 25 mm. It is better to make the distance between the nails the same. To simplify the task, you can pre-drill through holes in the lantern. At the end, so that the nails do not disturb the appearance, they can be painted over with a wax pencil.
You can also drive nails into the door frame first. Then use pliers to remove their caps. The length of the visible part of the nail without the head should not be greater than the thickness of the strip. Next, having placed the platband against the nails, a wooden beam wrapped in fabric is applied to the plank at the location of these nails, and with a few light blows of a hammer the plank is pressed onto the nail.
