- Peculiarities
- How to install a compartment door with your own hands: sequence
- Selection of materials
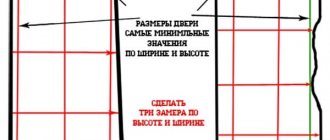
- Measurements
- How to calculate the door leaf parameters?
- What else should you consider?
- Connecting bracket PU09
- Height adjustment
- Adjusting the Bottom Guide
- What other points does the installation instruction for interior compartment doors include?
- How is the opening made?
- Instead of a conclusion
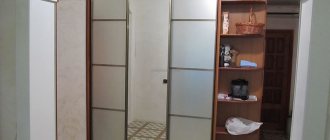
Having decided to renovate your house, you have probably encountered such a problem as choosing interior compartment doors. They will not only help solve the problem of lack of free space in the room, but will also allow you to quickly combine two rooms into one.
Having understood the principle of the design and the features of its assembly, you can quickly install interior compartment doors with your own hands.
This will not only save money, but also be 100% confident in the quality of the existing mechanism.
After reading this article, you will easily understand the nuances relating to the topic under consideration and will be able to quickly install an interior compartment door, the step-by-step installation of which is described here.
Peculiarities
Installation of products will help solve the problem of lack of free space in the house. The mechanism opens easily and does not slam shut due to drafts. If everything is configured correctly, unnecessary noise is eliminated, the system operates in its calm rhythm, without unnecessary haste, the room has reliable sealing when the air conditioner is running. Materials such as MDF and wood, laminated chipboard and tempered glass, as well as a combination of your favorite ones are used in production options. Depending on this choice, the weight will change, which will certainly affect the design of the sliding mechanism and the required number of carriages with rollers. For example, a blade weighing 45 kg is provided with 2 carriages.
Advantages of interior systems
Such designs are very convenient in everyday life and, in addition, have a number of advantages when installing them:
- Simplicity of installation work;
- Elimination of dead space when opening the door;
- Relative cheapness;
- Large selection of products;
- Lightness of design;
- Modern decor.
In addition to the pros, there are also cons. Such mechanisms do not provide sound insulation.
How to install a compartment door with your own hands: sequence
You will need wooden wedges, a drill and a screwdriver, screws and a tape measure, foam for installation, a building level, and a plumb line.
The system operates simply. It is based on a guide rail and rollers. They are attached to the edge of the future product, and on the sides they fix elements that limit movement. This ensures easy movement of the structure above the floor.
Before installing an interior compartment door with your own hands, you should prepare materials such as guides, false panels and trims, as well as purchase stoppers, wooden beams and fittings.
Keep in mind that some space is left between the trim and the door partition; they should not touch each other.
Preparatory activities
Like sliding doors, coupe-type structures do not require the preliminary installation of a full frame, which greatly simplifies the installation process. But this also means that it is necessary to complete the final finishing of the opening as much as possible, since it will be completely open and minor imperfections cannot be hidden behind the platbands.
You can putty the surface and paint on top, or choose plastic facing panels. A good solution would be wood, a light imitation of brick or stone. Perhaps the passage will complement one room or help make a transition to another room, for example, by continuing to glue wallpaper with a twist into another space.
However, the material must be very durable for finishing, because the side surfaces will regularly come into contact with the door and the thin coating will quickly begin to deteriorate.
In preparation for installation, you need to immediately determine the size of the future sash, the height of its location and apply markings according to a laser or bubble level. It is the even horizontal line that will help to avoid problems with operation and prevent possible problems associated with a curved base.
Selection of materials
The reliability of the product will depend on the type of materials used. Aluminum, steel and plastic guides are the most famous in the furniture market.
In the first case, parts made of such metal will be useful if a weightless door leaf is being installed.
Steel and aluminum do not deform under load. This is a suitable option for arranging heavy structures.
Plastic is suitable for simple products.
The choice of door leaf material is also very important. The appointment will play a big role here.
Usually the cost of glass filling is quite high. The weight is significant, therefore, the installation of additional carriages will be required. To avoid distortions, you need a competent drawing. Such products are not the easiest to install. The same applies to solid wood.
If we consider panel materials such as chipboard, MDF and OSV, it turns out that these options are easier to install and their price is lower. Two carriages will be enough for each sash; weight is not a hindrance. If you need to restore a door leaf, you don’t have to contact a professional technician. It is quite possible to cope with this task on your own.
Care and operation of sliding doors
To ensure that doors do not create problems during operation, you need to properly care for them. To do this you need:
- avoid getting water on the door to prevent it from leaking (if the door is made of wood);
- keep the guides clean. Debris that gets inside the guides will cause the door to be difficult to close;
- close the door smoothly. Do not close the door with force, this will accelerate the wear of the rollers. In the worst case, the stopper may fall out and the door will “fly” out of the guides;
- Check the condition of the fittings from time to time. It is easier to replace the rollers in time than to deform the guide profiles over time;
- use special products to care for doors and glass.
Correct installation of sliding doors between rooms and timely replacement of components is the key to the long-term functioning of any door.
Sources:
- https://mainavi.ru/dizain/dveri-i-okna/dveri-kupe-svoimi-rukami/
- https://www.sdmeb.ru/shkafy-kupe/dveri-shkafa-kupe-v-nishu.html
- https://womanadvice.ru/dveri-kupe-v-nishu
- https://www.ustanovimdveri.com/23-ustanovka-razdvizhnyx-dverej-dverej-kupe-i-ix-osobennosti.html
- https://moydomik.net/dveri/mezhkomnatnye-dveri/262-ustanovka-razdvizhnyh-mezhkomnatnyh-dverey-sistemy.html#title8
- https://www.know-house.ru/avtor/assembly_door_coupe.html
Measurements
When installing, it is important that measurements are taken accurately. If installation is carried out in a new building, it is worth considering how the finished floor will be located. This is taken into account in the calculations.
If you are making repairs in a residential building, not only the frame, but also the platbands are first removed. After the existing section of the wall has been cleaned, you have decided that you do not plan to strengthen or expand the walls, the next stage begins - choosing an installation method.
This will help not only to take correct measurements, but also to understand how to position the structure.
The threshold-free system has gained great popularity. Its advantages are undeniable compared to systems with a lower support.
What else should you consider?
In order to be able to grasp the partition with your hand at the moment of closing, you should ensure that the handle protrudes from the mounted opening by an amount equal to 41 mm.
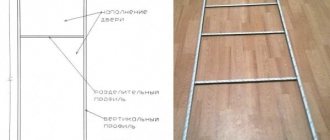
For glass filling with a thickness of 4 or 8 mm, a silicone seal is used. We put it on the edge of the glass. On one side of the filling we install the upper and lower horizontal profiles KR07 and KR08, for this we use a rubber mallet. Then the handle profile KR 300N is attached on both sides. As filling you can also use laminated chipboard, MDF, mirror and other types of materials whose thickness is 4, 8 and 10 mm.
Connecting bracket PU09
We fasten the PU09 bracket into the groove of the KR300N handle with a standard self-tapping screw in the upper part until final fixation. This must be done in such a way that the groove for the wheel screw head on the top shelf of the PU09 bracket faces the inner surface of the door. We perform a similar action on the opposite side.
We secure the installed parts to the other two corner joints with M6X30 self-tapping screws, using shock absorbers.
Height adjustment
To attach a single-leaf system partition to the ceiling, two upper PU10 wheels must be installed in the upper running profile PU01. We fasten the profile to the ceiling with M 3.5x 51 self-tapping screws. After this, the assembled system is hung on the tetrahedral head of the PU-10 wheel screw.
In this position, the system is secured with a fixation nut to the bracket. Manipulation is carried out by tightening it to the surface of the bracket.
Debugging is performed by rotating the height adjustment bushing of the partition. Afterwards, the wheel is secured with a nut to the bracket, while the partition bushing is held in height.
Calculations before installation
To properly install the mechanism, you need to correctly calculate the dimensions and lifting height. First, you need to measure the opening itself and add 5-6 centimeters to this value so that the canvas completely covers the entire opening.
Note!
Do-it-yourself vegetable garden: new interesting garden crafts for the street at your summer cottage (photo/video review)
DIY ceiling installation: step-by-step description of how to make a ceiling. Review of modern structures and ideas for their design (105 photos)
Do-it-yourself garage doors - a detailed description of the construction of various types of garage doors (120 photos)
To calculate the length of the guide, you need to multiply the width of the door by two.
Adjusting the Bottom Guide
The installation procedure for interior compartment doors involves the equally important stage of installing and adjusting the lower guide wheel PU04.
The lower guide roller PU04 is attached to the floor using 3.5x15 self-tapping screws. It should be placed clearly under the top profile. To determine the correct position of the lower wheel, move the partition from the open position to the closed position. Now it automatically takes the right place.
Using a double-leaf design, in the closed position both door leaves will close. The installation of wheels is similar separately for each of the existing products.
Having decided on the location of the lower roller, we secure it with M3.5×15 self-tapping screws. We reinstall the partition in its plane.
Mounting options
Regardless of the sliding door system, installation methods can be:
- Sliding doors. Guides are fixed on the wall along which the canvas rolls.
Sliding doors. The guide is mounted on the wall above the correct opening - Cassette. A special niche is made in the wall into which the door leaf is hidden. They are also sometimes called “retractable.”
Cassette sliding interior door: the door is hidden in a wall niche - Cascade. They consist of one fixed blade and several movable ones. The movable ones, if necessary, move and hide behind the fixed part.
Cascading sliding doors: one leaf pulls the other
The simplest installation option is sliding doors. They can be installed independently, not only at the repair stage, but also after it. It is only important that the opening is smooth and the wall has normal load-bearing capacity. The disadvantage of such a system is that you cannot place anything close to the wall in the place where the door rolls back. There is one more thing: very low sound insulation. This is easy to explain: if you look from the end, there is a gap of several millimeters on the sides. It is necessary so that the canvas does not “shuffle” along the wall. And all sounds penetrate perfectly through it, becoming only a little quieter.
Cassette doors are good because when open, the door leaf is located in a niche in the wall and does not interfere. The second advantage is that seals can be installed around the perimeter of the opening, which provide much higher sound insulation performance. The disadvantage of installing a sliding door in a niche is that it can only be done at the renovation stage. The second drawback: to make a pencil case for sliding doors, they usually install a false wall, and this means stolen centimeters of space.
Cascade doors are one of the types of sliding doors. It simply has a larger number of guides: according to the number of movable door leaves. Installation is perhaps the most difficult: there are many parts and high installation accuracy is required. The systems belong to the elite category, and they rarely save on installation: repairs will cost more.
What other points does the installation instruction for interior compartment doors include?
Now you need to make adjustments by eliminating the gap between the lower roller and the partition. There is play between these elements. To make adjustments, you need to place the tip of a flat-head screwdriver into the end of the wheel plate, directly opposite the elliptical groove.
Now, using a hammer, rotate the roller body relative to the central hole. Lightly tapping with the tool removes the gap. Remove the partition again.
We tighten the screws until they stop to firmly fix the lower wheel.
We put the structure in place. A double-leaf partition is installed in the same way.
Filling elements
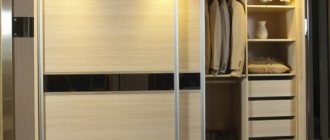
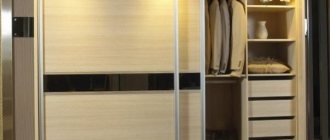
The main task of a wardrobe is to provide maximum storage capacity for clothes. That is why much attention is paid to the internal space. Today, cabinet assembly kits may include the following contents:
- chipboard shelves;
- pipes for hanging clothes;
- pull-out baskets or drawers;
- tie racks;
- retractable pantographs.
Baskets and drawers are mounted on special ball guides with a length equal to the depth of the products. The rods are secured with self-tapping screws using flanges.
When choosing sets of internal filling, you need to think in advance where the clothes will be located. Ready-to-install products are available in fixed sizes, which is also important to take into account when planning and selecting components for the wardrobe.
Pull-out baskets
Pull-out shelves
Tie holder
Pantograph
Pipe for clothes
How is the opening made?
We decide what the edge trim will look like. It is worth installing platbands or extensions. The choice depends only on your preferences. It is better if the guides are closed. At this stage, you should not have any problems, since there is a wide selection of decorative strips on the construction market. When purchasing accessories, there is always the best option for any room interior. Now you know what the instructions for installing interior sliding doors are.
What tools will you need?
Among the tools of each family, as a rule, there is always a basic set, which includes screwdrivers, a chisel, a tape measure, a building level and a plumb line for vertical alignment.
You also need to prepare in advance a simple pencil for marking, an electric drill and a hammer if it becomes necessary to drill the bases and then drive in the dowels.
To adjust the size of wood guides, a hacksaw is used; metal products are trimmed with a grinder or a special metal saw. To polish the cuts you will need a file.
