Now we will make a chair from a profile pipe with our own hands, but it will not be quite ordinary in our understanding. This is not the usual stool with a back, but profile furniture in the Loft style. I invite everyone to the master class.
Source youtu.be
Features of making chairs from pipes
If you choose a suitable material for manufacturing, it is better to make chairs from a 20 by 20 mm profile pipe. The wall thickness of this profile is 1-1.5 mm, resulting in a durable and not too heavy structure.
On the other hand, using a thin-walled metal pipe brings additional difficulties:
- Due to the thinness of the walls, carbon dioxide or plasma welding will be required, and some practice with welding seams will be required before attempting to make chairs from pipe;
- You will need to assemble the individual parts into a finished frame using clamps or any other similar tool;
- In addition to the profiled metal pipe, you will need at least steel angles, bolts, nuts, fasteners, everything necessary for attaching the seat, armrests and backrest.
Advice! It is clear that in this case the seating furniture is not made for the garage, but for the interior of an apartment or house. You always want to make your design more attractive and elegant, so if possible, when choosing a suitable model, it is advisable to abandon straight angular shapes and transitions.
Only a seamless metal tube can be bent without any problems
The most difficult chairs to make are those made from round pipes. It is known from practice that a misaligned connection of round profiles is not always strong enough, so you should also use mechanical fasteners - bolts and nuts. Therefore, if possible, it is better to use a profile of a round, rectangular or square shape, in this case at least the design will not be spoiled by protruding nuts.
Partition
The principle of this polypropylene craft is exactly the same as in the previous case. Except for the unnecessary need to select pipes of a specific, identical diameter. Absolutely any will do, but preferably a medium diameter in order to accommodate as many parts as possible.
Initially, you need to take the pipes and make appropriate markings on them. The marking is done in such a way that in the future it will be possible to cut even round pieces of equal thickness. The resulting large number of parts, each about 1 cm thick, can begin to be connected to each other.
Regardless of the required shape of the partition, all parts are connected to each other using glue, leaning against each other edgewise. This creates a beautiful, translucent partition.
This solution can be used as zoning to isolate a certain area from the rest of the room, to designate shelves with books, etc.
Making a chair from metal pipes in 7 steps
Rednasty
From materials left over after construction or renovation work, you can create unique and unusual interior items. For example, square steel tubes can be used to make an interesting chair.
To create it you will need:
- square steel pipes;
- wooden plank;
- primer and putty for metal;
- drill, grinder, hammer;
- dye;
- wood glue and wax;
- plastic plugs for chair legs;
- welding;
- screwdriver and spatula;
- clamps;
- sandpaper with different grain sizes;
- puzzle (if you want to make a round chair).
Step 1. Creating blanks
First you need to decide on the height of the future chair. It all depends on your height and personal preferences. Next, you need to adjust the pipes to the required size.
Therefore, you should have 4 long lower spars and 4 short upper ones for the deck.
At the same time, clean the pipes, removing rust and other contaminants from them.
Step 2. Welding the base
The next step is to weld the parts. Arrange two original letters “A” from them and connect the elements with each other. Do this slowly so that the chair does not look crooked. There is no need to worry too much about the quality of the welds; they will still be processed.
When all the elements are connected, clean the welds with a grinder. They should be smooth and flush with the pipes.
Drill mounting holes in the four top tubes. In this master class the holes were 4 mm.
Step 3. Putty
Use putty to mask small imperfections and other effects on pipes. Let the solution dry, then sand the surfaces with sandpaper.
Step 4. Adjusting the legs to size
No matter how easily you try to cut and weld the legs, it may happen that on a flat surface the chair will squint. Next you will need to mark, cut and finish the edges of the legs.
Step 5: Paint the base
Before painting, thoroughly clean the metal legs again.
After the paint has dried, the legs can be opened with paint. Be sure to cover them with covers to prevent the chair from scratching the floor.
Step 6: Creating the Seat
Depending on your wishes, the seat can be square or round. In this master class, the second option was used. The author bought a wooden board and cut it into 30x30 cm squares.
To make the seat even more durable, you can glue two sheets together. While the glue dries, the panels must be secured with clamps.
- If you also want to make a round seat, draw a circle on the board and cut it out with a jigsaw.
After this, the wooden surface must be sanded. To do this, use coarse sandpaper first, then finer and finer ones.
Saturate the wood with oil and wax. Then wipe with a soft cloth to make it shine.
Step 7. Final assembly
- Next, you need to secure the seat to the steel frame using self-tapping screws or self-tapping screws.
this is all. Your chair is ready!
January 18, 2022 If you want to express gratitude, add clarifications or objections, ask the author something - add a comment or thank you!
Canopy
A canopy is made in the same way, for example, for a car. However, in this case it is better not to bend the pipes, but to install them vertically. This way it will be possible to achieve greater stability. Place 4 columns on one side and the same number on the other. Connect them together with crosshairs made of shorter pipes.
Connect horizontally along the top perimeter using pipes and adapters. As a roof, you can use the same awning fabric that is used to create a gazebo.
It is worth noting that such a canopy is only relevant in the warm season. In winter, if there is strong wind, the awning can be blown away if it is not firmly attached to the ground.
What is needed to make a chair from a profile pipe
The process of making furniture with a steel frame based on a square or rectangular profile is not complicated or unusual; most of the operations are familiar to anyone who likes to do metalwork or homemade work in the garage.
Without a bending machine you won't be able to make a chair with an elegant design.
To work you will need:
- Semi-automatic welding. The equipment is quite heavy, so there is no point in taking it even for welding homemade folding chairs from a profile pipe. You can always come to a car service center or a locksmith shop, where they will do the work for a small fee;
- Angle machine - grinder with cutting wheels for metal;
- A set of clamps or stable supports, with their help individual pieces of metal are fixed before welding the seams;
- Sharpener with a “rough” stone for deburring;
- Electric drill with a series of drills;
- A bending machine or press where you bend curved parts before cutting the pipe and welding it. Typically this device weighs 10-15 kg, so you can rent a car or borrow it from friends for a couple of days.
For your information! In the case of a round pipe, the most difficult thing is to give the necessary bending and profiling.
Typically, first attempts to bend a round pipe into a curved section result in poor spirals and inclined arcs. Therefore, it is better to make small sections from a round profile that can be easily leveled and adjusted to size.
Working with a semi-automatic welding machine is quite simple, you just need to practice connecting different types of pipes; choosing the gas mode and flow rate will take no more than a few hours. An alternative to a semi-automatic machine can be an inverter welding machine. It also allows you to weld seams quite well, but working with such equipment requires very good electrodes and some experience as a welder.
Other options
A DIY rocking chair can be made of aluminum. For him, the base under the seat with the backrest is one piece and bends in the right place. In this case, tube arcs of a swinging mechanism with a 20 mm cut are used. Docking points are provided with screw fastening.
However, the best option is a combination of steel and wood, when the first is used for the base, and the second for part of the seat. The frame manufacturing technology is identical to the previous description. But the chair is equipped with a bed made of wooden boards. The joining of the upper and lower parts is carried out with screws. Drill holes in 50mm increments. Place the boards of the future chair according to the holes.
Before you start work, you need to think through everything carefully. And, first of all, you should know what exactly can be useful in the process of creating such a piece of furniture. Here is the exact list of tools and equipment:
- Steel rods with 20x20 mm cuts.
- Metal sheet, 2 mm thick.
- The ischial part is made of plastic.
- For fastening you will need steel corners with parameters 40x40x3 mm.
- Planks, 5 cm wide and 0.2 cm high.
- Welding device.
- Drill.
- Grinder and hacksaw for cutting raw materials.
- You will need a tape measure.
- Sheet and instruments for drawing.
- Set of screws.
You can purchase everything you need in specialized supermarkets for construction.
Remember that a rocking chair made by yourself needs care after construction is completed.
For these purposes, buy anti-corrosion products. So, spending time in the garden will become even more pleasant and comfortable.
Required Tools
To work, you need to prepare a basic set of carpentry tools. It is simply impossible to make any wooden furniture without carpentry tools. Professional furniture manufacturers have fully equipped workshops with expensive, specialized equipment. But in order to prove yourself as a carpenter, of course, you shouldn’t immediately buy professional equipment, but you still need to prepare some tools.
Making a bed
To tell the truth, sitting on metal is not very pleasant, because it is hard and cold. For this reason, a rocking chair made with your own hands from metal must have additional finishing. There are several options for making a stock:
- made of wooden blocks, each of which is attached to the frame with bolts;
- made of thick cotton fabric stretched over the top and bottom posts;
- of pillows attached to the back and seat and covered with a removable cover;
- made of willow wicker, which is woven around a metal frame.
Regarding the last option, it would be a good idea to first watch a video teaching the basics of weaving. This design looks very elegant and graceful.
Drawings of chairs from profile pipes
A small drawing of a bar stool can be cited as an example of the effective use of the capabilities of a steel frame.
This design has its own characteristics:
- The hind legs are positioned at an angle of 15° to the vertical, which provides good stability in an unusually high seat;
- The front legs are narrow, but at the same time they have a divergence with an angle of up to 20 ° in the lower part of the structure;
- The presence of a horizontal bar at a height of 30 cm makes the chair more comfortable, since the remaining 50 cm allows you to easily rest your feet on the stand.
The design is achieved with a high center of gravity, so bar stools and chairs must be handled with extreme caution; the metal frame can injure your feet if dropped.
Chair option with round profile
If you need an absolutely safe version of a stool made from a profile pipe, you can use the diagram shown in the photo below.
The appearance and design of the furniture are clearly outdated, but they are very durable and reliable
Chair option for home workshop
The design is slightly higher than the standard 50 cm, but this fit is more convenient in a situation where you have to work at a table or workbench. The simple square tube frame design provides tremendous strength. Craftsmen love these chairs because, if necessary, they can always be used as a stand or portable table.
Another example, this time a universal chair made from a profile pipe. The scheme was observed on a sports simulator for training with a barbell. A similar project attracted summer residents and lovers of country holidays.
The presence of an additional element on the back side makes the chair very convenient when working with plants, and the durable and rigid frame made of a square metal pipe 40 × 40 mm guarantees durability for at least 20 years, even in summer cottages.
For your information! When planning a specific structural design of the chair, it is necessary to take into account the restrictions imposed on the minimum bending radius so that the pipe does not deform or bend when rolling with a roller; it would be correct to carry out an approximate preliminary calculation based on the conditions of critical deformation.
The general requirements are shown in the diagram below.
Coffee table
Don’t think that this item in the interior will look ridiculous or massive. If you assemble it correctly, add decorative elements, and paint it in one or more colors, then this attribute will fit into any design.
Use your imagination and look for non-trivial approaches.
At the first stages of drawing up drawings, you need to decide on the material for the countertop. It can be plastic, tempered glass, wood, steel. You can use the old surface of a disused table.
A glass tabletop is usually attached to the top of the plastic frame.
After this, the pipes are cut and connected using fittings. If you include jumpers in the design, this will make the coffee table more durable. The tabletop can be secured with self-tapping screws. A great idea is to attach wheels to the legs of furniture fittings. This will make this product mobile.
Carefully consider the size and design of the future piece of furniture.
How to make a chair from a profile pipe
The most difficult element of preparation is the correct bending of individual sections of the pipe. The fact is that a hollow metal profile, when processed by a roller press, is easily deformed, causing waves and splashes to appear on the surface. Therefore, when choosing a chair model, it is better to give preference to those projects that do not involve bending along a too small radius.
Chair made of chrome pipe
The presence of a decorative chrome or nickel coating significantly improves the appearance of homemade furniture made from metal pipes. On the other hand, when trying to bend the tube, the chrome easily separates from the copper backing applied to the ferrous metal.
Chairs from a ready-made set of chrome-plated parts are assembled with a screwdriver and saw
The easiest option is to make chairs from round or profiled pipes without bends. In this case, all connections between parts are made using plugs and studs with internal threads. A round furniture tube is best; from it it is not difficult to assemble the simplest version of a chair or stool, something like the one in the photo.
The second option involves using a metal tube without chrome plating; this material can be easily bent to the desired radius using a manual pipe bender. Before assembly, the chair parts will need to be galvanized.
Thin-walled metal tube can be bent using hand tools
To make it you need to bend it with a pipe bender:
- Back with hind legs;
- U-shaped frame of the front legs;
- A ring that enhances the rigidity of the entire structure.
It is clear that all the parts will have to be connected using a semi-automatic welding machine. The seat consists of a circle of plywood covered with foam rubber and upholstery fabric, after which it is attached to a metal tube using ordinary self-tapping screws.
Flat oval tube chair
Material: oval metal profile. As a rule, in such a pipe the seam is located on one of the flat surfaces. The material can be painted or plated with nickel and chrome. The wall thickness of a flat-oval pipe usually does not exceed 0.5-1.0 mm, so it is extremely difficult to bend such a profile even with the appropriate equipment. The bending radius of a standard pipe for making chairs should not exceed 12-15 cm.
The chrome-plated metal profile is very intricate in processing
If you want to make a homemade chair from a flat oval pipe, then it is better to use a standard version of office furniture as a prototype, as in the photo.
To make the simplest pattern, you will need to fold U-shaped leg frames. The backrest will have to be folded twice: the first time to form a support profile, the second time to provide an angle of 120 ° between the horizon of the seat base and the support surface for the backrest.
Square tube chair
It’s worth noting right away that any piece of furniture assembled from a square metal profile does not have the most outstanding design. Office furniture, stands, workbench frames and work tables are often made from square tube.
The most popular model of square metal profile
An example of the successful use of all the advantages of a square profile is the design of a school chair with adjustable seat height.
Despite the simplified design, the chair made from a metal tube turned out to be incredibly durable, unpretentious and easy to make with your own hands. To assemble, you will need to bend two arches from a square pipe under the seat and backrest.
The racks are made of two sizes of square profile, the lower part is welded in the form of two T-shaped supports with a horizontal crossbar. Between the seat and the legs you will need to install a two-piece metal tubular adapter with a side of 15 mm.
Bent pipe chair
Designs made with a curved profile are distinguished by a very impressive design, pronounced style and laconic forms. The process of making such a chair with your own hands involves making a frame from an uncut piece of metal pipe.
For example, to make a simpler model of two chairs presented below, on average, at least 3.5 m of thin-walled metal pipe with a diameter of 25 mm was required.
Most of the central arch frame and legs are folded by machine; the transition areas in the seat and back area often have to be done using a hand bending machine. If you are planning to make a full-fledged chair from a bent metal pipe, then it is better to choose models of a simpler design or use projects with rectangular inserts.
Stool made of profile pipe
Of all the designs and designs of metal furniture for chairs, making a stool can be considered the best option for the first attempt. The designs are very simple and most often they can be assembled even from the remains of a profile pipe after making a workbench or rack.
Almost always, the base of the stool is a rectangular frame consisting of a square or round pipe, welded in a pyramid or in the usual straight-line manner. A sheet of plywood covered with polyurethane foam and leatherette is often used as a seat.
Bar stool made of profile pipe
Most metal chairs and stools are made in the form factor of bar furniture. The demand for such products made from profile pipes is quite high, so many models and patterns have been invented, usually made from a square profile with a wooden seat.
The main material for the chair is a square metal profile
The methods for designing and manufacturing such a chair are no different from the previously mentioned chair made from a metal tube. The only significant difference is the sitting position high at a height of approximately 80-85 cm from the ground and the presence of a special footrest. All parts are welded using conventional welding; you don’t even need to use semi-automatic machines. Sometimes customers specifically choose stools and chairs welded from stainless steel pipes for bar furniture.
Chair made of profile pipe in loft style
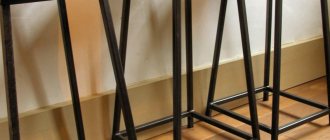
Furniture in the loft style has always been popular and in demand, so you can try to make the simplest version of a chair from a metal pipe. For example, it would be correct to use the models shown in the photo below.
This design differs from conventional metal frame furniture in that the seams and connecting pieces are not protected or hidden under a layer of upholstery or decorative upholstery, but are left on the surface to enhance the appearance of a home chair or stool.
Do-it-yourself kneeling chair made from a profile pipe
Of all the seating furniture options, this project is considered the youngest; the idea to make an office chair with additional knee supports came from industrial production. On transport lines, where it was necessary to perform many assembly operations, bending the body far forward, the kneeling chair was a real salvation, since it allowed part of the load to be transferred to the knees.
But the practice of using metal chairs on wheels has shown that not everything is as good and smooth as it seems in theory:
- Metal furniture, as a rule, provokes the appearance of chronic diseases of the meniscus of the knee joint;
- Incorrect and unnatural distribution of weight in the human musculoskeletal system has affected the overload of the back muscles.
To understand how comfortable the chair is for your knees, you can see the diagram below.
Sometimes, in order to be convinced from personal experience of the individual advantages and disadvantages of chairs and stools made from a profile pipe, you can try to assemble at least one copy from a metal profile, using the industrial design shown in the photo as a prototype.
The chair frame is assembled from three parts. The T-shaped crossbar takes on most of the load; it serves as the rear supports; a similar scheme is used to replace the front legs of the chair. The frame has a height-adjustable rod to support the seat and backrest. The entire structure has a fairly high center of gravity, making the metal chair unstable. It’s even worse if you use wooden bars and slats instead of a metal profile, which reduces the rigidity of the entire structure.
Travel chair
The easiest way to create a fishing stool is from flexible pipes. When folded, such a chair is easy to transport; you can take it with you on hikes. A stool will also come in handy when visiting a guest’s house.
The assembly diagram for a simple folding chair, consisting of two rectangular parts with rounded edges, is made by analogy with existing commercially available models. First, pipes of the required size are cut. Four of them form the height of the chair, and four more form its width. You should get two frames, one of them will be narrower. The frames are connected with bolts, providing mobility to the structure. Stool height – 300-400 mm. Width – 300-350mm.
About materials
Rocking chairs are made primarily of wood. Metal, for all its manufacturability, low waste and greater durability in the open air, is too heavy. The influence of the chair on the overall CG turns out to be significant, the moment of inertia of the system is large and, as a result, the rocking is too sharp. Or you have to set an extremely small initial elevation of the CO above the CO, risking that the rocking chair will tip over under someone. However, we will return to metal rockers when considering individual samples.
Using plywood to make a rocking chair
Plywood is a completely different matter, especially for novice woodworkers. Firstly, when making the parts of the rocking chair with 3-layer glued ones, you can only use a jigsaw to make accurate and durable tenon-groove joints, on the left in the figure, if you follow the following. rules:
- Plywood for the middle layer is taken twice as thick as for the outer layers. For example, if you need a total thickness of 20 mm, then glue 5-10-5 mm.
- The parts are assembled from blanks using 2-component waterproof glue. If it is on PVA, be sure to reinforce it with small nails.
- The connections are assembled with gluing (wedging in this case is unacceptable) and reinforced with diagonal pairs of self-tapping screws on both sides.
- The supporting surfaces are protected with linings made of thin (6-10 mm) strips of hard, durable wood or dense sheet rubber 4-5 mm thick. Plywood under a concentrated load cracks very well at the end.
Secondly, plywood makes it possible to use non-standard technical solutions, for example. as on the right in Fig. Such a rocking bowl can be made from plywood, again using only a jigsaw. Comfort is high, stability is absolute, and can serve as a hanging hammock chair or swing chair. The thickness of the lamella boards is from 12 mm; connecting half-washers on poles – from 24 mm.
How to install overlays
Wear-resistant wooden pads are installed on the rocking chair runners. way:
- Turn the chair over with the runners up;
- We warm the blank plank thoroughly with a construction hairdryer;
- We place the workpiece on the runner and wrap it tightly along the entire length with cotton braid. Don't get burned, the wood is very hot!
- We also grab the second workpiece onto another runner;
- Once the strips have completely cooled, remove the braid bands and glue the pads with PVA on wood or with 2-component glue;
- We attach the ends of the planks with small nails until the overlays fit snugly along the entire length. Place washers or pieces of plywood under the nail heads;
- Once the glue has completely dried (2-3 days), remove the temporary fasteners. We drill blind holes for screws and secure the ends completely;
- We fill the holes with the fastener heads with putty made from sawdust of the same tree, thickly mixed with PVA.
