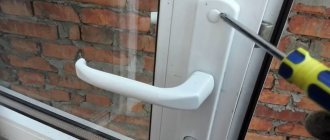
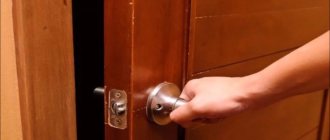
Isn’t it a familiar situation: you grab the door handle, but it remains in your hands? What to do in such cases? How to change the handle? The situation may be complicated by the fact that replacing a door handle may be necessary on a metal entrance door, which, of course, is a more complex process than replacing a handle on an interior door. There are several ways to replace a door handle on your front door, and they will vary slightly depending on the type of handle. Read the following article and you will learn how to replace the door handle on your front door.
Classification of door handle designs
If rust and dirt, the appearance of squeaks, and jamming when opening/closing guarantee an extension of the service life of the handle after wiping and lubrication, then its breaking into pieces immediately entails its replacement.
In order to reduce the cost of the product, many manufacturers manufacture door handle bodies using the powder metallurgy method, when steel chips are sintered in a special mold.
This technology is much cheaper than casting or turning handles on lathes, but the service life of such products is much shorter, on average by a third.
If you have a small child in your home who likes to ride on the door while holding the handle, or you have a habit of tying a large dog to the door by a leash, you should be prepared that the door handle may crack at any moment.
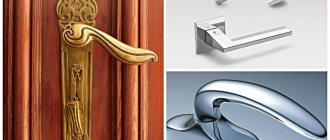
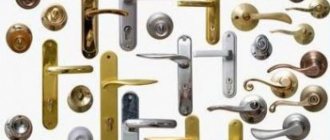
Depending on the type of door, type of handle and set of functions, door handles have the following varieties:
Almost all entrance doors are equipped with two types of handles. These include push and stationaryStationary. This is the simplest model, which is needed only for opening/closing doors without locking. Stationary handles come through and overhead.
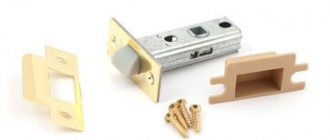
- Latch handles. This is the most common option for interior doors. Based on the type of handle, they are divided into push and turn (knobs). The design is equipped with a halyard latch, which is driven by a handle. A special spring ensures that the handle returns to its original position. There are varieties with a latch or a built-in lock.
- Handles with mortise lock. They are a single mechanism, including a halyard latch and a lock with a latch. They are usually used for entrance doors.
- Handles for plastic doors are single-sided and double-sided. The former are used in cases where the door needs to be closed on only one side. The model has the same principle of operation as the push one, but the handle does not return to its original position.
- Handles for sliding doors are completely different from other models - they are recessed into the door leaf.
- Handles for metal doors have one difference from handles with a lock - the presence of plastic gaskets to protect the mechanism.
Step-by-step instructions for repairing the handle latch
When the door slams, the latch does not retract into the lock and prevents normal closing. If you press the handle, it jams and is difficult to remove; uncharacteristic squeaks are heard. This malfunction requires mandatory repair. The handle latch will not work on its own, and over time the problem constantly gets worse and can cause complete breakdown of the lock.
Sticking handle latch can lead to more serious damage
Removing the handle and lock
Step 1 . Remove the metal door handle strips. They are fastened with long bolts through the entire thickness of the door. To increase the security of the lock, the handle strips are installed so that the bolts are located indoors. The opposite strip has a thread into which the fastener is screwed. There can be two, three or four such hardware; the quantity does not play any role and does not affect the strength and reliability of the lock. These are purely decorative solutions, chosen by manufacturers taking into account the model of the mechanism.
The door handle is held in place by several bolts
Prices for cordless screwdrivers
Cordless screwdriver
Step 2 . Take out the lock core, it is screwed to the locking plate with one long bolt.
The core of the lock is removed
Important. Some cores cannot be removed without a key inserted. The key must not only be inserted, but also turned a little, in this way the cam is removed into place, it becomes in the same plane with the core and is removed from a narrow slot in the mechanism body. Inexperienced craftsmen do not know about this feature and try to pull out the core with great effort. The result is a complete breakdown of the core or body and the need to purchase a new lock.
Step 3 . Unscrew the bolts holding the lock strike plate in the door leaf. Their number may also vary depending on the manufacturer and model. Remove the lock from the door.
The last one to remove is the lock plate.
Next, all work must be done on the table, so cover its surface and protect it from scratches and dirt.
Disassembling the lock
The work requires attentiveness, carefully remember the order, do not lose small bolts and parts. For fastening, it is advisable to prepare a box and put it in it. Inspect the lock, find the side where the bolts are tightened.
This is what a door lock looks like
Step 1 . Place the lock on the table and unscrew the fasteners one by one.
You need to unscrew the lock very carefully so that the lid does not come off abruptly.
Important. Do not rush, do not allow the case cover to open spontaneously. If it is abruptly removed, then there is a high probability that the mechanisms for moving the crossbar will fall apart, and then installing them in their original place in the right order is very difficult. There are locks that are so complex that only the most experienced professionals can do this work, even with a factory key.
Step 2 . Very carefully remove the side cover of the case, carefully inspect and remember the position of all moving elements. Before assembly, they must be installed in exactly the same position.
To properly assemble the lock after lubrication, you must immediately remember the location of the parts in the body
Step 3 . Move the latch with your hand, find the place where it sticks a little. If the problem is long-standing, then critical wear may already appear in this place. Most locks allow some parts to be rotated 180°, due to this the rubbing surfaces change and the functionality of the device is completely restored.
Determining the cause of the jam
Remove the latch from the housing and thoroughly lubricate all rubbing surfaces. You can use traditional grease, but it is better to have a special lubricant for kitchen gas stove taps. It contains graphite powder, it never dries out and guarantees an almost unlimited service life. To make the lock move easier, you can also slightly lubricate the other moving parts of the lock.
All rubbing surfaces are treated with graphite lubricant
Step 4 . Insert the latch into its original position. Carefully check the position of all parts and make sure they move smoothly.
Reassembling the lock is done in the reverse order
Practical advice. Pay attention to the metal used to make Chinese locks, the thickness of the plates, the degree of secrecy, etc. After analyzing what you see, you will lose the desire to buy such products.
Step 5 . Place the side cover and secure its position with screws. All steps must be performed in reverse order.
The cover is secured after checking the smooth movement of the parts.
Step 6 . Reinstall the mechanism. This is a so-called crab lock; it has its own structural differences and a special installation algorithm. The device has additional bolts connected to the lock with special rods. They are located around the perimeter and give the body a crab-like appearance. During installation, it is necessary to achieve such a position of the rods so that their holes coincide with the strips, and the connection becomes working. Inexperienced craftsmen will have to waste a little time: the rods slip off, it is difficult to get to them, and access is limited.
When installing the lock in the door leaf, you need to get the hooks into the holes of the rods
Step 7 . Screw the lock fixing bolts into place and insert the core. Keep in mind that it is asymmetrical; pay attention to the location of the threads on the body and the holes for the fixation bolt.
Installing the lock core
Step 8 . Screw the cap metal handle strips. Do not rush, long bolts do not immediately fall into the threaded sockets. Do not use too much force when tightening the hardware. We have already mentioned that the Chinese use low-quality metal; with great effort, the thread in the bar will break. The bolts should be tightened with your fingers; only a few finishing turns are made with a screwdriver.
Fixing door handles with decorative strips
Assembly is complete. Now we need to check the functionality of the components and the effectiveness of the repairs made. If everything works correctly and without jams, great, you have completed your task. If the problems persist, repeat the repair or buy a new, better quality lock. We advise you to choose the second option, because now you have personal experience of which products you should not purchase.
What breaks most often
To begin with, we suggest you remember one truth - almost all entrance doors are equipped with two types of handles. These include push and stationary. The former additionally act as a lock latch, while the latter perform only one single function - opening the door.
With stationary handles everything is very simple, and if they break, then we are talking about mechanical damage in 100% of cases. And there is no need to repair them, because it is much easier to buy new ones. Since there is absolutely nothing to repair in them - in most cases they are a single piece.
As for the push handles, things are a little more complicated. And it is they who almost always bring the main problems. There are 4 main types of failure:
It is the lever handles that almost always cause the main problems.The handle falls off, but the part of it that is responsible for attaching it to the door leaf is not going anywhere. Solving such a problem is quite easy. This will take no more than fifteen minutes. In 90% of cases, such a breakdown will mean that the person bought a low-quality product.
- The inner square inside the handle fails, causing the latch to stop opening. This only happens when the manufacturing company uses silumin material, which is known for its fragility. And it is this that leads to this problem.
- The latch does not open because it is worn out or the outer square, which connects the handles on both sides and directly turns the latch mechanism, has become stuck in it. It must be said that the wear process in this case is an extremely rare occurrence. Typically, the latch has problems with opening only when the given square is obviously insufficiently long. That is, we are talking about marriage. A situation arises when the handle only works on one side.
- The handle does not return to its original position when needed. That is, after clicking on it. This happens for only one reason - problems have arisen with the spiral spring (it can break or fly out of place). Repair in this case takes place, although it cannot be called too simple.
Of course, these are not the only types of breakdowns, but they are the main ones. Other options are not even worth considering, because they will one way or another be related to those that we have described.
How to fix a lock if it sticks?
The method for replacing or repairing a lock will depend on its design and the type of door. The most commonly used locking mechanisms are lever or cylinder locking mechanisms. They can be returned to working condition.
Repair and replacement of cylinder lock
Work with the mechanism is carried out in the following order:
- The first stage is to remove the locking screw located on the bar in the end part.
- Place the key in the hole and, turning it slightly, remove the core of the lock mechanism.
- The elements necessary for replacement are being prepared.
- A new core is installed in the same place and secured with a locking screw.
- After repair, check the operation of the lock.
Important The dimensions of the element inserted inside the lock must correspond to the part being replaced, otherwise replacement will be impossible.
Repair of lever locking device
Activities to repair such a lock are carried out according to a similar principle.
- It is necessary to move the bolts, open the lock and remove the key from it.
- The fastener located at the end of the door leaf is unscrewed. Usually it consists of several self-tapping screws.
- The mechanism is taken out and a new one is installed in its place.
- Now the lock body can be returned to its place and secured with self-tapping screws.
- After repair, you need to check how well the lock opens/closes.
In some lock models, you can not change the internal components, but simply change the position of the levers. But you will have to order a new key after such recoding.
Other common problems with locking devices
- The tongue is not fixed. The reason for this is the insufficient size of the hole made in the door frame. Then, to restore normal operation of the lock, you need to move this hole closer to the lock tongue. If the door is skewed, it will need to be adjusted more accurately.
- The door opens with force. This happens if the lock is misaligned. Carefully inspect the door, evaluate the geometry of the door. In case of misalignment, the position of the lock will need to be adjusted.
- The key is stuck in the lock. Relevant for metal doors. There may be two common reasons:
- Dust or debris trapped in the mechanism. To eliminate the lock, you need to disassemble, clean, and lubricate the internal parts.
- Displacement of the internal parts of the mechanism also requires disassembling the lock, adjusting it, or replacing damaged elements.
Do-it-yourself repair of entrance doors should begin with a competent diagnosis of the problem that has arisen. Some types of breakdowns can be fixed quickly. Others will require more advanced knowledge of design features to repair.
How to properly disassemble a door handle
If you have all the necessary tools, disassembling the front door handle is not so difficult - if, of course, you know what to do, then it will take no more than five minutes. This process looks like this:
- At the bottom of the handle, closer to the door leaf, there is a small screw with a groove for a hex key. The first thing to do is unscrew it - but not completely, since the screw is small and if it falls out, it can easily get lost.
- Next we screw together the decorative trim covering the main fastener of the handle. It is screwed counterclockwise - this is done by hand, without using keys.
- By removing the decorative trim (it is removed through the handle), you gain access to the fasteners - as a rule, these are either small self-tapping screws or screw ties. They unscrew almost the same way - take a screwdriver and unscrew the fasteners.
- Now we simply remove the handles from the square and, as they say, that’s the end of it - the handle is dismantled.
If we talk about handles for entrance doors, made in the form of one large overlay (such handles are used on Chinese doors), then they are removed a little differently. On the inside of the door (at the top and bottom of the trim) you will see a couple of screws - unscrew them and simply remove the handle along with the wide trim.
It should be noted that by unscrewing two screws on one side of the door leaf, you can remove the handle from both sides at the same time.
As you can see, everything is quite simple, and if you perform such an operation once, in the future the question of how to remove the handle from the front door will no longer arise. By the way, having mastered this simple operation, the question of how to replace the front door handle will also automatically be resolved. After removing the old one, a new handle is installed in its place in the reverse order of disassembly. The only nuance that arises here is the selection of a handle of a similar design.
The handle is loose
Due to intensive use or unreliable fastening, the handles may become loose over time. There are several ways to correct the situation:
- When the handle is fixed with a latch, the connection may become loose and to strengthen it, you need to wind a strong thread or sealing tape between the door and the latch. True, this technique gives a short-term effect;
- if the handle is fastened with a pair of bolts or a goujon, then it is enough to tighten the fasteners;
- To tighten the fittings on the thread, you need to hold the handle on one side and twist it clockwise on the other.
Level of theoretical knowledge required to replace a door handle
But if a breakdown does occur, it is useful to familiarize yourself with the algorithm, at least in general terms, on how to change a door handle. When starting to install a new handle, you need to know axiom number 1: it is desirable that the installation dimensions of the broken handle and the newly purchased one coincide. This is the most important criterion for choosing such a mechanism.
When starting to install a new handle, you need to know axiom number 1: it is desirable that the installation dimensions of the broken handle and the newly purchased one coincide
This way you will save:
- Time
- Efforts
- Money
Because if you want to purchase a more massive product, be prepared to work with a chisel and drill a hole if we are talking about a wooden door. And for such operations additional tools and skill are required.
The cost of the product is also affected by the design of the handle. Products with complex contours in the form of bends cost on average 10-15% more. All of these factors need to be considered before replacing the door handle on your front door.
In addition to a complex design, expensive door handles may have additional operational options, for example, automatic closing in the top position, illumination of the key hole.
If it is not clear, then before purchasing it is better not to be shy and consult the seller.
Also, before changing the door handle on the front door, you should know the principle of marking such products.
The letter “L” means that a door equipped with such a handle will open to the left, and “R” means it will open to the right. Knowing all this, you can begin to dismantle the broken handle, armed with a Phillips screwdriver.
Also watch the video below for useful information about replacing a broken door handle.
How to choose the right model?
Before changing the handle, study the mechanism. The bar can be fixed with screws - unscrew them. If it is smooth, then pick it up with something, for example, a screwdriver and remove it. There will be screws underneath - unscrew them.
Dismantling is completed. Take an old product and buy exactly the same one in the store or, if you can’t find one, one that is as similar in design as possible.
If the new handle is significantly larger than the failed one, you will have to drill new holes for the bolts on the door leaf. Also be prepared to trim the turning mechanism - the new one rarely matches the old one.
How to fix a front door handle
So, we have decided on the types of accidents that occur. We also dealt with the question of how to disassemble the front door handle, now it’s time to tackle the issue of how to fix the damage. Let's start in order.
- The handle fell off, but its base remained in place. As mentioned above, this is a clear sign that the retaining ring has fallen out or burst. Putting it back is quite simple, but you will have to tinker. The question of how to repair the front door handle in this situation is solved in the following way - first, remove the remaining part of the handle from the door leaf. There should also be a retaining ring there. If it is normal (and this is unlikely), then we simply connect the two parts of the handle and install the locking ring in place, after which we mount the handle itself on the door. Almost always you have to purchase a new retaining ring - if it is bent or even broken, you will have to purchase a new one.
- The inner square in the handle broke.
Often, manufacturers save money and make the most important part of the door handle from fragile silumin - if it bursts, then there is nothing else left to do but completely change the door handles. We go to the market and, now wise with experience, purchase a high-quality steel handle for entrance doors. - The handle works, but the latch does not open. We already said above that this happens due to the shift of the square - it is simply short. It is for this reason that you will need to remove one of the handles (on either side of the door), remove the short square and put a normal one in its place, and then return everything to its place. The markets sell long squares that are suitable for door leaves of any width - however, you will have to adjust them to the required size yourself. This is not difficult, especially if you have a grinder or at least a hand hacksaw on hand.
- The handle does not return to its original position. The reason is that the coil spring has burst or jumped off. It is restored in almost the same way as installing a locking ring - the handle is removed, the spring on it is replaced, which is pressed with a washer, and it, in turn, is fixed with the same locking ring. Everything would be fine if it were possible to purchase this spring on the market. Unfortunately, this is not possible, and repairing such a simple problem in most cases comes down to completely replacing the door handle of the front door.
The latch does not work, the tongue sticks out
When the latch does not want to engage when opening the sash, the problem may be in the square. In this case, its length is not enough for it to move quickly enough to push the latch.
You will have to change this element:
- At a hardware store you need to purchase a square for the locking system of sufficient size.
- If it turns out to be too long, then a grinder will help to shorten it.
- Next, you need to unscrew one of the handles installed on the door and remove the structure.
- The square is available for replacement, after which you need to put the handle in its original place and screw it on.
Replacing a metal door handle
First of all, you need to choose a suitable new pen. After that, let's get to work:
- Unscrew the old handles and remove them.
- We put a new square. If the old one is the right length and is not damaged, you can leave it.
- We replace the internal linings that protect the lock cylinder. They are attached with two bolts, just like the handles.
- We insert plastic spacers into the base of the handle. They should fit into the grooves. The smooth side of the gasket is adjacent to the door leaf.
- We put the handles in place, hold them with your hand and lightly tighten the bolts. After all the fasteners are in their threads, tighten them tighter.
- Tighten all the bolts.
When the handle comes only with a lock, you will need to change the lock on the metal door completely.
If, when installing doors, you choose high-quality fittings from well-known manufacturers, replacing the door handle may not be necessary very soon.
Initial installation
The manufacturing company always marks the door leaf - holes are drilled in the places where the lock, latch and door handle should be installed. It is important to choose the right components, because their correct operation and service life depend on this.
Changing the handle is easy, so you can do without the help of a specialist.
We will also consider the option when the handle is located separately from the lock, and it is push-type. Procedure if the fittings need to be replaced:
The work can be done alone, without involving anyone. There is nothing complicated in this activity. Please note that some parts are extremely small. To avoid losing them, all components of the pen should be placed in a small box or jar.
After this you can install a new handle. It is assembled in the opposite way. Lubricate all operating components. They must be included. Otherwise, use existing ones. Check the quality of the new fittings by closing and opening the door. If necessary, correct it. If it turns out that it is not possible to achieve success on your own, then contact a professional specialist.
Replacing locks on a metal door
Forced replacement of locks on a metal door is a less extensive job than dismantling it. In this case, there may be cases when the locking device is not completely replaced, but only the metal door lock cylinder is replaced.
Forced replacement of locks on a metal door is a less extensive job than dismantling it
Losing the keys to the house will lead to the need to open the apartment. Special agencies do this, and often they manage to keep the door in its original form. If you have spare keys at home, it will be enough to make a copy of them.
Otherwise, you will need to replace the metal door locks urgently, and you can use a flexible iron anti-theft lock for bicycles as a locking device.
It fits over the inside handle and an iron corner or bolt nailed or screwed to the wall/jamb. The presence of a powerful latch on the inner surface of the door, which is present on almost all models, also helps.
There may be cases when replacing the lock of a metal entrance door is due to the pranks of children, for example, placing foreign objects in the cylinder. Wooden doors also often suffer from damage to the coating, but this problem can be easily corrected by painting them.
The most unpleasant thing will be the lock breaking if it is impossible to open the door from the inside (that is, if there are no residents at home). In this situation, it will be necessary not only to replace the locks on the metal door, but also to promptly open it.
For example, replacing cisa locks on a metal door is unlikely to be necessary. Products from this company and similar ones are manufactured with a key recoding function, which allows you to leave the lock itself, but change the keys to it. This is convenient if they are lost or possibly stolen.
Subtleties of self-installation of different models
If you don’t go into the design features of any specific models, then the installation of most of these devices is similar, but before we cut in this or that handle, let’s figure out where to install it.
A few words about the installation location
If we are talking about a private house or apartment, then where the handle should be installed, you have the right to decide for yourself, the main thing is that it is convenient for you and your household. But when choosing a place, experts recommend focusing on 2 things:
- First of all, you need to measure at what height all the other handles in your house are. After all, when one handle falls out of the overall ensemble, it is very noticeable and spoils the interior;
- If you choose a place to install all the handles in your home, then you need to focus on your arm bent at 90º at the elbow. Naturally, it is worth taking into account the height of all family members and choosing something in between.
The installation height of the door handle according to GOST is a completely different matter. The documents state that such structures are installed at a height of 1 m, plus or minus 100 mm. This information should be well remembered by office owners and business workers in administrative buildings. Otherwise, the fire inspector will have another reason to find fault.
Entrance door handle
High-quality handles on entrance doors from good manufacturers break extremely rarely; this misunderstanding mainly happens with goods from the friendly Chinese people. Fortunately, it’s easy to find a replacement in the store; the average price of such a kit fluctuates around 500 rubles.
When purchasing a new set of handles, it is advisable to remove the old trim completely and take it with you to the market.
Removing an old handle from a metal door is not difficult. In this case, it is not necessary to completely disassemble the entire mechanism; it is enough to unscrew the 2 mounting bolts that are located on the inside.
So, the handles have been purchased, now all that remains is to insert them. The inner lining has been removed, so there is practically nothing holding the outer lining in place. If you pull the handle a little harder it will come out along with the square pivot pin and connecting pins.
When buying a handle, it is better to choose models with an internal armored lining; they cost more, but the protection against burglary is much higher.
Next, screw 2 connecting pins onto the outer part of the new set of handles. Separate armor plates may be provided on the keyhole; if they fit the holes in the new set, then decide for yourself whether to change them or not.
Now we insert the square rotary pin into the core of the handle and mount the outer trim in its place. Keep in mind – the square pivot pin should almost reach the bottom of the hole on both handles. Otherwise, there is a high probability that the handles will break again.
When everything is inserted and screwed, the gasket is installed last inside the structure. Gaskets can be rubber or plastic, so try to take rubber ones, such as in the photo below.
The outer cover with the pivot pin and studs is inserted first. Then the inner lining is combined with it and all this is fixed with a pair of bolts from the inside.
Handle with latch for interior door
Often, several types of handles can be installed on a lock embedded in an interior door. This is especially true for lightweight latches; any rotary handles generally fit there. The main thing is that the turning mechanism works using a square pin.
The technique of inserting a light latch and a solid lock into an interior door is shown in detail with photos and videos “HERE”, and we will only analyze the installation of the handle.
The handle mechanism is screwed to the doors with self-tapping screws, but so that the fastening washer does not spoil the appearance, it is covered with a decorative overlay, after which the handle is installed.
In round knob handles, both the handle itself and the decorative overlay are secured using a discreet inner tongue. This tongue needs to be pushed down using the special key included in the kit. The tongue itself is equipped with a spring and after removing or installing the handle, it returns to its original position.
In rotary handles, the system is slightly different; after installing the handle, you need to fix it with a small screw on the side, and then screw it on or simply put a decorative cover on the latches (depending on the model).
The screw that secures the rotary handle can be either a Phillips screwdriver or a hexagon. In the latter case, the hexagon must come with the handle.
Replacing a metal door handle
A similar operation is usually performed when changing the general appearance of the door structure. You will also need to replace the handle on the metal door if it breaks. If the sheathing has been reupholstered, then it is worth changing both the entrance handle and the peephole.
Today, there are a variety of models that make it easier to monitor the outside space. Thus, panoramic ones help to see the entire flight of stairs, and video surveillance today is an advanced method of control.
Do not forget that the main task of a metal door is to restrain, not detain. As long as the door prevents entry, the security detail will have the necessary time limit to perform its direct functions.
What to do with a Chinese door?
Metal doors and all their accessories produced in China are often not of high quality. A lot of silumin handles are brought from this country, which quickly wear out.
If this happens, then you need to:
- Unscrew the fasteners that are on the handle.
- Take out the square, inspect it, check that it is long enough. If it is enough, then this element does not need to be changed.
- It is good to fix the gaskets in the structure, as well as the linings, and install the handle on the square.
- Place the bar in the required place, making sure that the crossbar does not move.
- Screw in the fixing screws.
Most types of breakdowns do not require the intervention of professionals, but are eliminated on their own.
Fixing a broken handle that is attached to a through pin
A pin connects two identical parts of the handle on both sides of the door. This is true for spherical or cone-shaped products
A pin connects two identical parts of the handle on both sides of the door. This is true for spherical or cone-shaped products.
For types represented by a bracket, the elements are mounted separately. That is, when one half is broken, only that half is repaired, while the other remains in place.
Next, the handle is removed, to do this the door opens, one half must be held with your hand, and the other must be unscrewed in the direction of the clock. All decorating parts must also be carefully fixed by hand.
Then the halves of the handle are separated, and a pin is taken out, which is adjusted to the desired length. In the same way, the entire structure is screwed back; here it is quite possible to do without special tools.
Recommended Procedure
When planning to repair or replace door handles, you should first read the instructions to avoid common mistakes. For convenience, it is recommended to follow the standard procedure, which includes several simple steps.
Removing the locking device
You can remove a mortise lock on a metal door using a screwdriver. You will need a flathead or Phillips screwdriver depending on the type of mounting screws. The dismantling process includes the following steps:
- Unscrew all the fastening screws that are located on the strip of the end part of the door. If a locking mechanism without a fixed cylinder is used, it is enough to pry the bar and pull out the lock.
- Remove the screw holding the cylinder, which is the secret part of the lock. The fastening element is more elongated and passes through the entire locking mechanism.
- Press the cylinder on either side of the door. If the part is equipped with additional protection, you need to insert the key into the lock and slowly turn it until the cylinder can be pulled out freely.
Troubleshooting and repair
A careful inspection of all parts of the door structure allows you to determine the exact faults and carry out the appropriate repairs. Most breakdowns can be fixed on your own.
The handle itself has become loose
The method for fixing the problem depends on the reason why the fittings became loose. To carry out repairs, you need:
- Remove the handle together with the linings by unscrewing the fastening screws from the inside of the blade. If the design provides a lock, and it has become unscrewed, it is enough to return it to its original position.
- Check the junction with the lining, where the fluoroplastic insert, retaining ring and metal washer are located. When the fluoroplastic is erased, the fastening weakens. If the stopper is deformed, the fittings also begin to wobble. In these situations, you need to replace the broken parts.
- Inspect the part for cracks. The problem is especially common on silumin varieties. It is not possible to eliminate the cracks, so replacement is required.
- Make sure the cylinder is functioning. If it breaks internally, you need to replace the part or the entire fittings.
Pin damage
Deformation of the pin causes the tongue of the door handle to become static and prevents the door from closing. In cheap locks, the pins are made of soft alloys and wear out quickly.
The handle falls out periodically without damaging the metal
The reasons for the handle falling out without destroying the metal blade are the weakening or breakage of the locking ring. If it is damaged, the internal components will fall out immediately after the lock is removed and the mechanism will need to be replaced. If the stopper is loose, it should be strengthened.
If the tongue does not move
When the tongue does not work when opening the door, the reason is that the inner square is not long enough. The element gradually moves closer to the latch and presses it, causing malfunction. To restore the functionality of the door handle, you need to purchase a suitable part, unscrew the fittings and replace it.
If the handle does not return to its original place
Failure to return the handle to the horizontal position occurs due to improper operation of the return spring. You can return the spring to its place by analogy with the retaining ring. If the spring has burst, it will need to be replaced. Since it can be difficult to find the right part, it is easier to change the entire mechanism.
Chinese door handle repair
Chinese fittings made of silumin wear out quickly and are not resistant to external influences. Repair of fittings is carried out according to the following algorithm:
- remove the mounting screws;
- remove the core and square of the lock;
- attach new pads;
- replace worn parts;
- return the bar to its place;
- screw the fasteners.
Technology for repairing a handle attached in the form of a bracket
In this situation, you will have to purchase a screwdriver or screwdriver. It is worth knowing that Phillips screws are screwed better and stronger than straight screws. Therefore, it is recommended to replace them immediately.
The door handle is moved in such a way as to cover the previous recesses. Then, on the opposite side, two pairs of screws are screwed into the places of the new holes. There is no need to press hard to avoid twisting.
The overhead parts are also mounted using screws - self-tapping screws, by drilling new recesses. The overlay can be attached either as a square or as a diamond. Upon completion of the work, the overhead element is secured.
Stage one: choosing accessories
First of all, you will need to purchase a product that is suitable for fastenings, the cross-sectional size of the inner square, and the length of the mounting screws. The easiest way is to remove the pressure structure from the doors and take it with you to the store. You can buy exactly the same model, or you can buy a more modern version that matches the previous handle in all respects.
It is necessary to ensure that the replacement product matches the door in design and color. Also, do not forget that door handles are available on the right and on the left. The bend of the handle can tell you what kind of product is in front of you. Its end should always point down. The products are also marked with the letters L (left) and R (right).
You can correct the mistake of purchasing the wrong model only by visiting the store again to return or exchange the product. Please note that if the locking device has an additional latch, then the decorative trim of the handle must have a special slot for the open-close mode switch.
Features of replacing small parts
In case of replacing the spring part, the new part is strongly compressed on top, a veneer washer is placed, then a veneer ring is attached and the whole thing is connected with a screwdriver. Then the rotating mechanism is delicately screwed in, followed by inserting a spring element into it. The handle is tightened with a wrench or nut.
Sources:
- https://furni-info.ru/zamena-ruchki-dveri.html
- https://dveridoma.net/remont-dvernyx-ruchek-vxodnyx-dverej/
- https://evrostroi.by/blog/remont-dvernyh-ruchek-vhodnyh-dverej-kakie-byvayut-polomki-i-kak-ih-pochinit
- https://www.bloomhuff.com/dveri-i-vse-o-nih/8900-kak-remontiruetsya-ruchka-na-vhodnoy-dveri.html
- https://u-news.org.ua/8832-kak-pomenyat-dvernuyu-ruchku-na-vxodnoj-dveri/
- https://dver.club/materialy/zamena-metallicheskojj-dveri.html
How to adjust hidden hinges?
Internal hinges are in demand because they are not visible from the outside of the room. This means that it is impossible to cut off such canopies, which significantly complicates the penetration of intruders into the house. There are several reasons for adjusting hidden awnings. This may be the formation of a gap between the canvas and the frame, rubbing of the sash, it begins to cling to the threshold.
To repair the operation of an iron entrance door, you need a hex key (4 mm). The door must be opened; this is the only way to gain access to the awnings. If the canvas has sagged down, you need to tighten the screws. If a gap begins to appear, you will have to loosen them a little. You can do this kind of work yourself, but only if you have experience in this field. But it is best to call a specialist to repair iron entrance doors.
general information
Before moving on to any actions to eliminate the consequences of a broken door handle, let's learn more about this element of the door structure.
There are several types of handles for entrance doors. The most common type is Chinese products
for two types of locks - with automatic locking and standard closing procedure. An armored cup protects such a product from damage, but the overall quality of such handles leaves much to be desired.
Handles on cylinder strips are distinguished by the correct mechanism of fastening to the door structure and the higher quality material used in their manufacture. The main manufacturer of such pens is Italy.
The next type is a lever-key version. An extremely specific type; if it breaks, you will need to determine the brand of the lock and replace it accordingly.
Designs with a separate base are distinguished by their versatility and richness of color schemes, however, this is the second category of handles, after Chinese ones, that is most susceptible to breakage. Such products often simply tear off from the door structure due to the fact that they were initially attached incorrectly, or a malfunction of the lock forces additional efforts to be made to open the doors. Also, these structures quickly lose their pleasant appearance and in this case also require replacement.
Replacing worn casing
Sometimes, if there is significant damage to the door leaf, repairing entrance doors requires partial or complete replacement of the finishing material. Before starting work, you should calculate whether partial restoration makes sense or whether it is worthwhile to completely replace the door trim.
The most popular restoration methods are:
- Painting. Currently used quite rarely;
- Upholstery with artificial leather materials. A fairly inexpensive and popular method that provides additional thermal insulation of the structure;
- Laminate covering. A very expensive method, but it has a lot of advantages;
- Powder coating.
This method significantly increases the strength of the canvas and the resistance of the structure to damage. However, it is virtually impossible to carry out such processing at home.
Best season for glazing: when to install windows
You no longer have the strength to clear your balcony or loggia of tens of liters of snow and “drown” after every rain? Maybe you decided to increase the area of the room by adding a loggia to it? Or do you need your own small winter garden, where coolness reigns in summer and lush vegetation pleases the eye in winter?
We will tell you when it is better to start glazing a balcony or loggia, help you choose the best option and give you some tips that will help save your nerves, time and money.
Introduction
There is an opinion that balconies should be glazed only with aluminum frames, and loggias with plastic ones, but this is not at all true. Usually, when they talk about plastic structures, they mean warm glazing, and when they talk about sliding aluminum ones, they mean cold glazing. Each of them requires certain preparation. We will not consider wooden frames, because their service life in Russian realities tends to be a year, and windows simply fall out, shattering into thousands of small pieces of glass under the house.
Before you start the process, you need to ask yourself the question: “Why do I need this?”, and only then begin to prepare the balcony or loggia for the procedure, while simultaneously going through the options.
- Do you need to increase your living space or create a winter garden? Then you will have to install warm, plastic frames with two chambers, insulate the entire balcony or loggia around the perimeter and think about the location of the shelves.
- Protect yourself from natural phenomena and urban debris? Then it is enough to install a budget aluminum frame.
You should also decide in advance about the presence of cabinets and boxes for all sorts of things on the loggia or balcony. This is important, because then an incident may occur and there will be nowhere to put them or they will interfere with the functioning of the installed structures.
Preparation for glazing
Why should you take it seriously? The service life and efficiency of glazing increases significantly. As an example: an aluminum frame lasts three years on average, and if a loggia or balcony is properly prepared, then all 15. And the price of preparation is an order of magnitude lower than the cost of the most budget glazing. However, sometimes the question of whether it is needed or not is simply not worth it. In 80% of cases, it is impossible to install the structure on the average balcony or loggia without preparation.
To install an aluminum “slider”, a frame is assembled from timber (50×70mm), which forms the correct installation plane and has minimal weight, without taking up useful space.
- This is aluminum - it conducts heat perfectly, which will be distributed evenly throughout the frame. The heat will also be at the bottom, unlike plastic, which will only be warm at the top.
- Twice cheaper.
- More compact.
- Poor sound insulation.
- Compared to plastic, it retains heat inside a balcony or loggia worse.
Preparing for the installation of warm (plastic) glazing is more difficult, because it is important to think through the heat exchange inside the balcony or loggia. Typically, the structure is installed on a supporting masonry made of foam blocks, which perfectly supports large weights, retains heat and withstands extreme wind loads. But foam blocks have a disadvantage - they do not tolerate rain or snow, so they need to be protected from environmental influences.
A warm loggia increases the cost of housing. Even if you don’t plan to sell the apartment or add a loggia to it, warm square meters have never hurt anyone.
When is the best time to start glazing?
The best time to glaze a balcony is winter. All errors and shortcomings in installing frames along cold air flows will be instantly noticeable, which can be corrected immediately. Another important factor is that in winter, as a rule, they offer discounts.
Many people mistakenly believe that glazing, no matter what kind, is best done in the summer. Like, it’s warm, there’s no hurry, the workers will do better. Quite the opposite is true: weak points in installed glazing are difficult to track. You will be happy until the first frost, and then you will fully appreciate the quality of the work done. So it will turn out that you will redo everything in the winter.
Therefore, if you still decide to postpone glazing your balcony or loggia until the summer, carefully choose the company you trust to do it. Ask your friends, study the reviews on the site, because you remember that translucent structures are by and large all the same, but the results of their installation are different. And it is the quality of installation that will determine how warm and cozy your home will be.
Specifics
Provedal
One of the most common cold types of glazing is the budget sliding aluminum Provedal system. Depending on the scale of work, the cost ranges from 2,500 to 5,000 rubles. per m²:
The advantages of this system:
- Space saving. The doors do not open inward, like other structures, but simply ride on rails.
- Easy to use. Cleaning Provedal is not difficult at all. I took the sash off, washed it, and put it back.
- Possibility of installing a mosquito net.
- During frosts, the doors may freeze, and they will not open until they thaw.
Slidoors
This is a more expensive plastic design. The cost of Slidoors ranges from 3,500 to 6,000 rubles. per m².
This design has all the advantages of the previous one, but also does not freeze in winter, because it is made of a three-chamber plastic profile that does not allow moisture to penetrate inside the mechanism.
Substitution
If repairing the mechanism is not feasible, then you need to replace the front door handle with another one. To begin with, a latch is inserted into the end hole, which is screwed on with screws on both sides. After installing the latch, you need to clear the hole from construction debris. This can be done using a stream of air, for example a hairdryer.
Then the pin (square) is inserted into the corresponding square hole of the latch. A handle is attached to the pin on both sides. It is important not to confuse which side the left side of the handle should be on and which side the right side should be on. The correctness of the door opening will depend on this. Then the handle is screwed to the door with screws. Now all that remains is to disguise the fastenings. This can be achieved using decorative overlays.
When is the best time to replace plastic windows?
What time of year is it better to install plastic windows - a question that many people ask themselves, who have already decided for themselves another question - which plastic windows are better. Now all that remains is to choose the right season to update your plastic windows. We will be happy to tell you why it is better to install windows in the spring.
Many companies advise
installing plastic windows in winter, and there is a logic to this - in winter, the production of plastic windows is not busy with work, sellers reduce prices, the shortcomings of new windows are revealed immediately after installation, since in the cold season, blowing and freezing through a plastic window is felt instantly and clearly . However, from my own experience, a reduction in window production time due to minimal production workload can have a negative impact on quality - workers are relaxed due to an irregular work schedule, as they either sit at home or wipe their pants in the workshop while waiting for your order. Due to the seasonal drop in demand for windows in winter, window companies often do not have sufficient working capital and are forced to buy cheap components for windows and consumables for installation, which also has a negative impact on quality. Installation of plastic windows in winter is, of course, possible, at temperatures not lower than – 10 degrees. You just need to overcome the psychological barrier of the fact that for some time the street will be very close. And do not demand from window installers or the company that accepted your order that the installation of windows be carried out in accordance with GOST - the external mounting tape PSUL does not expand at negative temperatures! And don’t forget the human factor - the installer is also freezing and strives to complete the work as quickly as possible, by any means necessary, sometimes missing important installation moments. In summer and autumn, there are no obstacles to high-quality installation due to weather conditions, however, if you think that it is better to install plastic windows in an apartment or country house not in the spring, but in the summer or autumn, then remember that window companies have high season during this period of time. They are forced to either increase order fulfillment times or raise window prices in order to cope with the work. During the season, it is more difficult to get good discounts on windows, and the number of accidental mistakes increases - from incorrect window measurements to double-glazed windows broken in a hurry. And this is all your time and nerves.
In conclusion, we will once again list the positive aspects if you place an order for the installation of plastic windows in the spring:
- the order will be completed quickly, since the window workers don’t have a lot of work yet;
- at the same time, window production is already entering a working rhythm, but fatigue has not yet accumulated among its workers;
- Many companies still offer good winter discounts on windows and installation;
- the weather during the day is consistently positive, which provides conditions for high-quality installation;
- at the same time, the weather at night is quite cold, and it is easy to notice shortcomings in the production or installation of windows and doors (especially when the heating has already been turned off and the nights are still cold);
- the window company will correct these shortcomings faster than in summer or autumn, due to the light workload;
Cylinder door lock repair
Such restoration is carried out when replacing a well. In any stores or markets you can consult with sellers. He will easily cope with the task if the buyer brings with him old broken parts.
When making the right choice, the following must be taken into account: the dimensions and the ratio of the hole into which the screws are screwed. The insides may or may not be of good quality. If their cost is small, such a metal door can be easily broken into by selecting a key.
There are many different larvae. They can be with an internal opening or an external one. If there is only an external well, then the one in the middle will not have a hole; instead, manufacturers attach a plastic lamb. In this type of lock, the door closes from the inside without using a key.
The color scheme of the opening should match both the lock and the entrance door.
How to remove it without breaking it?
- Remove the bolts.
- Remove the socket or strip (in some models, first pry off the strip with a screwdriver - the screws are located under it).
- Loosen the rod.
- Unscrew the fittings from one side and remove from the axle.
- Take out the second part along with the rod.
- Now remove the locking mechanism.
Why do pressure mechanisms break?
There are four types of breakdowns that can be repaired, and disassembly will help here:
- The handle fell off. The product is of poor quality, the retaining ring is probably worn out - buy a new one and install it in place.
- The built-in latch has stopped working and will not open. Most likely, a “cheap” piece of silumin is installed on the door. It's a fragile material and it's only a matter of time before it falls apart.
- The latch on one side does not open. The reason is the sinking of the outer square due to its inappropriate size. Purchase a new part, disassemble the device, install the part, then reassemble it by installing it back.
- The handle does not return to its place after pressing. Occurs due to wear or “flying off” of the spring. You can repair it yourself, you just need to completely disassemble the device, find the spring and return it to its place. If the spring wears out, the mechanism will have to be replaced with a new one.
will manufacture metal doors for various purposes for a specific opening. We complete the products with high-quality fittings. The client can independently choose locks and handles. A change in the standard configuration may result in an upward change in the final cost of the product.
How to stop your front door from slamming
How to determine whether a door opens left or right?
What color should the front door be?
Fire and technical doors for medical institutions
Why does a pen become unusable?
Statistically, door handles fail much more often than locks. Since the device for opening and closing the door is often directly related to the lock, repairs must be carried out immediately. Changing the handle alone will be much cheaper than buying a completely new lock.
There are two types of handles on the front door:
- Stationary (not associated with a lock);
- Push (as part of the locking mechanism).
In the first option, in the event of a breakdown, the front door handle is completely replaced. Buy a new handle, preferably similar to the old one. This is necessary so that the holes on the canvas coincide with the purchased product, otherwise you will have to drill new ones. In addition, if the purchased handle does not cover the old holes, they will ruin the entire aesthetics.
Push ones are more of a hassle, but replacing a door handle does not involve purchasing a new lock for a metal door. When the locking mechanism is working properly, it is possible to buy separate parts in stores that are only connected to the handle. After all, one of the reasons for replacing the handle on the front door is the loss of its attractiveness. The appearance deteriorates due to abrasions, scratches and deformations.
The material from which the handle is made may crack or even break. This is due to its quality. Under constant loads, one day the cheap product will simply end up in your hands, while all the fastenings will remain in place.
The cheapness of materials also affects the internal parts of the device. If the square responsible for opening the latch is made of silumin, then it will burst from daily heavy efforts when opening the door. A reliable manufacturer does not skimp on materials and makes this part from steel, so it practically does not wear out.
One of the reasons when a door handle needs to be replaced is dishonesty during installation. This is manifested in the operation of the mechanism only on one side of the iron door. The culprit is that the square is too short. When installed, it was positioned exactly in the middle, but over time it shifted to one side. One handle functions well, but the other cannot grip the part and open it.
It is not uncommon to see the handle sagging. This is due to the weakening of the return spring. But sometimes the reason lies in the lack of clear edges of the square or the lack of its length. The weakening of the entire unit occurs because the manufacturer decided to save money and used low-quality materials.
The door handle will need to be replaced if poor fastenings were used. The handle may fall off if it is screwed to the front door with self-tapping screws rather than screws. Under constant heavy load, the screws will become loose and come out of their grooves.
