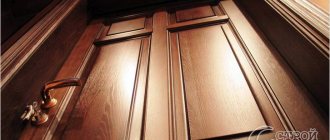
Most people think that installing a door handle is a very simple task and does not deserve serious attention. But when it comes to installation, these “literate” craftsmen are often lost. So that such a misunderstanding does not happen to you, let's figure out together how to install a modern door handle on a metal entrance door and a light interior door.
When installing door handles, the main thing is to understand the principle.
Types of door handles
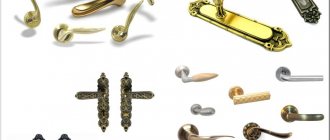
All handles are not very similar to each other and differ in material, shape, color, mechanism and installation method. Based on the last feature, pens can be divided into two types:
- Mortise;
- Invoices.
Mortise handles for interior doors are not difficult to install and will not cause any trouble at all. If we compare them with other products, they are quite simple to install and all you need to do to install them is drill a hole in the sheet of the required diameter.
Mortise handles are also divided into two types:
Rotary. In order to open the door, you do not need to press on them, and opening occurs by turning the holder. Often this type of mechanism is additionally equipped with a latch, with the help of which the lock tongue is locked. This option allows you to lock yourself in a room. In addition, the rounded shape of the handle is very convenient to use.
Push. Here, too, everything is very simple and the mechanism starts after pressing the lever.
When purchasing a product, it is important to pay attention to what material the handle is made of, because it can be not only metal, but also glass, plastic or natural stone.
The selection of the product is made based on the color and model of the installed canvas, as well as the style of the interior.
Preparing the box
And finally, the last step in installing the door handle is installing the latch mate in the frame. To do this, you should smear the tongue with oil, close the door and try to make a mark on the jamb with the tongue, while making several “open-close” movements with the newly assembled door handle. Next, we apply the trim that will be screwed to the jamb, and trace it along the contour, including the inner hole.
Using a drill, we drill a hole for the “tongue” of the latch, and deepen the rest of the part using a chisel and chisel to a depth of 1-2 mm, depending on the depth of the plank. Now all that remains is to fasten the bar with two screws. We mark the center of the holes for the screws with an awl and use a drill to make holes of the required diameter. Next, use a screwdriver to attach the strip to the jamb.
Marking an interior door for inserting a handle
Before you cut the door handle into the interior door yourself, you need to correctly mark the door leaf. First of all, it is necessary to decide in which direction the leaf will open, after which the height of the fittings is determined. The standard height is around 90-100 cm from the floor.
In the box with the door handle you can also find insert instructions, which indicate the expected height of the fittings. If the handle is the simplest, without any additional devices, then its installation is quick and without problems. If you don’t have the tools to carry out the work, you can purchase them at any hardware store.
To insert the handle, you need to purchase a feather drill with a diameter of 23 mm and wood crowns with a diameter of 50-54 mm. After everything is prepared, you can begin active actions.
From the end of the canvas, a height of 95 cm is marked and using a square, a line is drawn perpendicular to the end, the middle is marked with a pencil and marked with some sharp object - a nail, a screw, etc. In the marked place in further work it will be necessary to drill a hole for the latch.
Next, markings are made directly for the mortise handle. To do this, it is worth continuing the line onto the canvas itself, drawn earlier at the end. To ensure that the line is strictly straight and perpendicular, a square must be used.
It is important to pay attention to the fact that the mortise handle for an interior door can be located from the edge of the door either 60 or 70 mm. Only the one who carries out the work should decide which distance to choose, because the length of the latch allows this to be done. But it is also worth paying attention to the fact that choosing the cutting distance from the edge is only allowed on a blank canvas, that is, on one that does not have decorative strips, and where they are, then you will have to cut in the way that decorative elements allow you to do.
Required Tools
To install the handle, arm yourself with tools, without which it will not be easy to do this:
- a simple pencil;
- square;
- roulette;
- chisel;
- screwdriver;
- drill;
- drill;
- crown.
The crown and screwdriver can be replaced with other available tools, but the quality of the work will suffer and it will take a lot of time.
Before starting installation, read the instructions for the product. It indicates all the dimensions, which will help you choose the right drill bit and crown according to the radius.
Hole for handle
The first step is to insert the handle, and then the latches into the interior door. This is done because when drilling a hole for the latch, the master will know where he needs to stop, and the second advantage is that all the chips from drilling will simply fall down and will not need to be blown out with a vacuum cleaner.
In order to make a hole for the handle, you need to take a wood crown with a diameter of 50-54 mm and start drilling in the place where it was originally marked with a pencil. Drilling should occur in small jerks; you should not try to do everything in one go, because in this case the crown will become heavily clogged with sawdust and heat up from friction with the wood. Having passed 4 mm, you should stop, clean the crown and then continue further. When cleaning the instrument, you must be careful because it can be very hot.
Since the depth of the crown does not allow it to pass through the canvas, then it is necessary to drill from both sides. When you reach the middle of the door leaf, you shouldn’t put too much pressure on the crown so as not to hit the door leaf sharply with the drill.
Materials for work
Materials for work:
- – roulette;
- – electric drills;
- – screwdriver;
- – self-tapping screws;
- – chisels;
- – square;
- – hammer;
- – a set of wood drills;
- – pencil;
- – conductor.
The conductor allows you to simplify the process of marking on the door leaf and spend a minimum of time on it. It needs to be attached to the end of the door so that at the end of the work its holes coincide with the lining of the tongue of the screwed handle.
Latch hole
The second stage involves drilling a hole for the latch. To do this, insert a pen drill with a diameter of 23 mm into the drill chuck and carefully make a recess perpendicular to the blade. There is nothing complicated here, you just need to make sure that the recess is even and then everything will be fine.
When to seek professional help
If after reading this article, which tells you how to install a handle, you have doubts that this procedure may be within your power, then it is better not to risk it and seek help from professional craftsmen. This will guarantee a truly high-quality installation, as well as the safety of the door.
In addition, you should contact professionals if it is necessary to install handles on metal doors. Such work requires certain experience, knowledge and tools. If at least one of these components is missing, installation is fraught with injury and damage to the door or the installed mechanism.
Source: www.lock-door.ru
Installation of the locking mechanism
As already mentioned, inserting a handle and latch into an interior door with your own hands should be done as carefully as possible and in compliance with all recommendations. The next step is to install the locking mechanism flush with the canvas.
To begin with, install the mechanism in a ready-made hole and use a pencil to trace the bar, after which the hole is hollowed out to the required depth using a chisel.
When everything is ready, the mechanism is inserted and the bar is screwed on. Next, the handle is installed and screwed in accordance with the instructions supplied with it.
Useful tips
- It is first necessary to carry out careful calculations and then carry out any actions.
- When creating a through hole, you should be extremely careful and do not drill the door on only one side. This can cause chips on the back side of the door leaf. As soon as the drill begins to appear, passing through, you need to continue working on the other side. After completing the installation, it is necessary to double-check the tightening force of the bolts or screws used so that poorly fixed parts do not soon damage the handle.
Tips for caring for a door handle
In order for a door handle to serve for a long time, it must be properly cared for. After several years, the fittings wear out and this negatively affects its operation. To try to slow down this process, you need to properly care for it:
- Periodically wipe the mechanism from dust with water and special means for cleaning accessories. In this case, it is important to avoid products that contain alkali, abrasive particles and various acids, because they can damage the product, which will subsequently lead to rust. After the handle is washed, it must be wiped dry;
- If the mechanism becomes loose over time, it must be tightened, otherwise its breakdown is inevitable;
- Avoid using brute force;
- In addition to caring for the handle, it is also necessary to properly care for the lock, that is, regularly lubricate it using special products. If they are not at hand, then you can always resort to using sunflower or vegetable oil;
- It is not always possible to reach all parts of the mechanism, so in this case a special nozzle in the form of a thin tube is used. If this does not work, then it is advisable to remove the cover and dismantle the handle.
As you can see, embedding a handle into a door is not so difficult if you follow all the recommendations and subtleties of installation. But if you can’t cope with the task yourself, then it is advisable to resort to the services of a master who will do all the work efficiently and quickly.
Form
The handle for a frying pan is usually made in a standard form. It is elongated, massive and can expand slightly from the base. It is convenient and recognized as a classic. But there are metal forms that are made of tubular metal, hollow inside. Most often, such handles are used on pots, but sometimes they are also found on frying pans. They are not entirely comfortable to grip, but their advantages are different - they always remain warm (not hot), although they are made of metal; a product with such handles can be placed in the oven. This is achieved through a special hollow design and spot welding.
