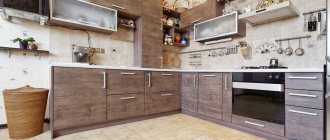
How is Provencal style created?
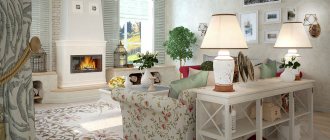
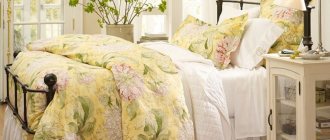
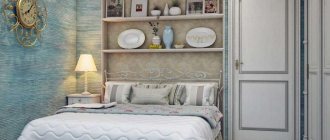
The style originated in the south of France, in the province of Provence. It combines the colors of pastoral landscapes, marine motifs of the Cote d'Azur, and the colors of the foothills of the Alps. It is full of romance, European laconicism and sophistication, full of the special charm of the 18th century. Provençal style conveys the breath of time: artificial aging techniques are used when decorating:
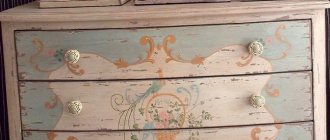
- products are coated with craquelure - a varnish that cracks after drying;
- in some places, artificial abrasions are made with fine sandpaper, through which the bottom layer of paint is visible, it is made contrasting;
- shadows are drawn;
- silver patina and gold leaf are imitated.
For design, select drawings depicting:
- sun-drenched seascapes;
- small meadow flowers;
- rosehip buds;
- spikelets, blades of grass;
- olive branches;
- sunflowers;
- animals;
- houses entwined with greenery;
- pastoral everyday pictures;
- rooster - this symbol of France is a frequent attribute of the Provençal style.
The colors must be light, pastel. Colors that look as if they have been bleached by the sun, bright and rich are unacceptable. Main shades:
- lavender;
- sky blue;
- indigo;
- olive;
- sand;
- beige;
- terracotta;
- light gray tones of varying saturation;
- citric;
- mint;
- light pink;
- light lilac;
- all shades of green.
Nuances of decoupage
The technique does not require the ability to draw or any special skills. Elementary school students are engaged in decorating with napkins during creativity lessons. For interiors in Provencal style, decoupage is done on:
- doors;
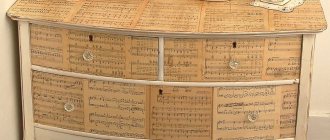
- furniture;
- trays;
- dishes;
- wood (patterns cover boxes, boxes for storing coffee or tea, napkin holders, cutting boards);
- cardboard (hat boxes look elegant on a forged shelf, shoe boxes can easily be turned into a place to store small items and jewelry).
Results
In the same way, you can decorate any other wooden or plastic products, for example, decoupage a box in the Provence style. Decorating with decoupage will help create a special, sincere atmosphere in your home that promotes relaxation and tranquility.
In addition, by making a design with your own hands, you can decorate several objects at once in the same style, with the same color scheme or pattern, resulting in an unusual combination. The house will be unlike the others, individual and created exclusively for you.
- New Year's decoupage - interesting design projects and options for festive decorations (140 photos)
Decoupage of watches - 100 photos of the best design ideas and a master class for beginners
- Decoupage of cans: recommendations for beginners and instructions for decorating various types of cans (110 photos)
Decor
The following elements are used as glued elements:
- napkins (for multilayer ones, only the top layer with a pattern is taken);
- photographs (they are soaked, the bottom layer is removed with twisting movements);
- magazine drawings (they are covered with several layers of varnish, after it has dried, the colors of the bottom page are carefully removed);
- printer printouts (before gluing, they are sprayed with water so that they lie more evenly on the surface);
- wallpaper (use only the base with the pattern, the rest of the paper is removed in its raw form);
- postcards (they need to be varnished and then processed like photographs);
- old newspapers (to create an aging effect, they are glued with the bottom layer);
- colored toilet paper (it’s ideal for creating a background; it’s easy to choose the right shade);
- scraps of fabric (cotton, silk);
- lace;
- tulle scraps;
- leg-split.
Stages of creating a decoupage cutting board
Thanks to a detailed master class on decoupage, the process of creating a unique beautiful board for the kitchen will not become something complicated. All work will take about 2-3 days. Working with wood is pleasant and convenient.
As a picture for the board, you can use thematic drawings in the form of vegetables, fruits, dishes, or choose original unusual images: a world map, a chessboard, a newspaper page, etc.
Step-by-step decoupage for beginners includes several main steps:
- Sanding the workpiece.
- Grinding the ground surface.
- Pasting the image onto the board.
- Varnishing of the product.
Decoupage methods
Volumetric: special air-hardening plastic is used or the relief is created with multilayer pictures. Each new design is applied to the previous one only after two layers of varnish. Each layer must be allowed to dry. Ingoda, individual parts of objects are additionally primed for volume.
Direct is the simplest and most traditional method: the prepared surface is primed, a pattern and varnish are applied.
Smoky involves additional drawing of the picture before varnishing. Shadows are created and the effect of blurred edges is created. Using this technology, the drawing looks more natural against the main background, more like a drawing.
Decopatch - tearing the design into small fragments before sticking, creating the illusion of deep cracks. If the picture is cut, a mosaic is imitated. This method is used to decorate dishes.
Reverse, used to create glass panels, decorate vases, windows above doorways. The design is glued to the glass from the outside and varnished from the back.
Making a blank
There is always a favorite board in the kitchen that you hate to part with, so let’s decoupage the old board. Select the side on which the drawing will be located. Sand the surface with sandpaper and remove dust with a napkin. Using a brush, apply the primer evenly over the entire surface of the board and let it dry thoroughly.
Each stage of decoupage boards with napkins ends with thorough drying - this is the main guarantee of an excellent result of the finished work. Sand the board again, remove dirt with a napkin and apply a second layer of primer, dry. Make sure your brush is always clean and dry.
To finish the workpiece, use a sponge to paint it with white acrylic paint. Apply the paint with jerky movements, pressing and lifting the sponge from the surface.
Try not to smear the paint on the board. After the workpiece has dried, lightly sand it and wipe with a napkin. The workpiece is ready.
Execution technique
Any interior is unthinkable without furniture. A small master class in decorating it with napkins will help make familiar objects unique.
Step-by-step instruction:
Step 1. Surface preparation includes degreasing it and removing the paint layer to the base. To do this, use different numbers of sandpaper. The final grouting is done with zero grout. When restoring bedside tables and chests of drawers, special attention is paid to the drawers; they are the hallmark of complex furniture.
Step 2. The primer is applied in one or two layers, depending on the condition of the surface: cracks are sealed, dents are leveled.
Step 3. New acrylic-based paint is applied. She is allowed to dry completely.
Step 4. While the painted furniture is standing, the drawings are prepared: they are cut with scissors, then plucked. Loose edges under a layer of varnish are almost invisible.
When the cut-out designs are glued, after the glue has dried, the edges are smoothed by sanding them with fine sandpaper. It is better to soak the drawing with a sponge soaked in glue. A brush can damage it.
Step 5. If necessary, the picture is additionally drawn with paints and shadows are applied.
Step 6. The furniture is varnished or covered with craquelure. You need to do three to five layers. Everyone is allowed to dry thoroughly. If bubbles or folds form, they are smoothed out with a blade before applying the next layer.
Information for Beginners
Mastering the technology of creating decoupage is not at all difficult, especially in our age of the Internet. You can use the advice and recommendations of professionals, or get many ideas posted on websites. At the same time, it’s worth trying once, and you will be able to decorate various household items with decorative works or give gifts to loved ones and friends.
Before you start doing creative work, study our master class and photos of decoupage boards.Breathe the atmosphere of France into your home
Everyone can work using the decoupage technique. When decorating a room, napkins are chosen to match the walls and textiles. For furniture, small floral prints are an ideal choice.
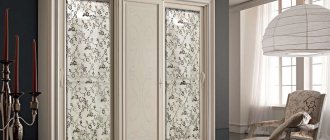
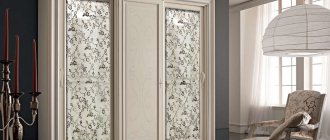
Marine motifs and animals are appropriate for panels, boxes, and dishes. Don’t forget about the doors, they are also covered in fragments with a pattern to make the interior seem complete.
Necessary materials
When working you will need:
- PVA glue or special for decoupage;
- acrylic: varnish, white paint and paints for artistic works;
- napkins with a pattern for decoupage;
- sandpaper of different fractions.
This set of materials is considered basic for decoupage.
