Design and installation of plasterboard kitchens
In a plasterboard kitchen, you can achieve maximum ergonomics if, at the design stage, you take into account all the family’s needs for using equipment and storing utensils.
A DIY kitchen made of plasterboard is an opportunity to realize the most daring design ideas: this material is capable of complex curved shapes. GKLV is used to make furniture for built-in appliances, kitchen cabinets and shelves, bar counters, tables - everything that is needed. An interesting and practical solution would be a combination of open niches and cabinets with seating corners, on the lower level of which it is convenient to store dishes. If you plan to decorate the kitchen in a high-tech style, multi-level lighting would be appropriate, which can be organized by decorating the ceiling using the same plasterboard.
Kitchen cabinets use shelves and fronts made of chipboard, which are purchased separately and mounted on timber. Ready-made kitchen facades have standard sizes, which must be taken into account in the project. There is a 5 mm gap between paired doors. If drawers are planned, their installation requires an additional frame profile made of a block onto which the guides are attached.
The frame of all planned structures is made of metal.
To make the tabletop durable, thick baked plywood (from 12 mm) is usually used for its manufacture. You can purchase a ready-made countertop or cover the plasterboard base with tiles.
Installation of all plasterboard structures includes several stages:
- preparation of the material - to prevent the development of fungus and mold, gypsum board sheets are primed with special compounds;
- marking drywall according to the drawing;
- creation of a metal frame - at this stage, a wooden beam is inserted into the frame for all suspended structures, rack profiles serve as jumpers;
- covering the frame with parts cut out from gypsum board sheets - self-tapping screws are used for fastening;
- filling the seams and subsequent sanding.
To install hanging shelves and cabinets at the junction of walls and screws, wooden beams must be used. If you make furniture yourself and find it difficult to calculate the load, it is better to prefer lighter open shelves to bulky wall cabinets. When the installation is completed, the last stage remains - finishing work.
Required materials and tools
First of all, you need to decide what to assemble the furniture from. Most often it is made from the following materials.
- Natural wood (boards, beams, cladding, planks). Eco-friendly, attractive, durable raw materials. However, not all types of wood are suitable for a niche. The air is more humid than indoors. Wood that is not waterproof swells, warps and rots. To prevent this from happening, for a wardrobe you need to choose straight-layered timber without knots, cracks or chips. It should be dried well and soaked in linseed oil or a moisture-resistant antiseptic primer.
- Drywall. It is easy to process (cut, perforated, leveled), fixed, and there are options for sheets with moisture protection. But plasterboard sheets are heavy and not strong enough. Under its own weight and under heavy loads, the material bends and deforms when installed vertically. Therefore, the cabinet body and doors are not made from it. Drywall is used for arranging shelves, walls, and lining niches in furniture. Installation is carried out on a metal profile frame.
- Woodworking products (chipboard, fiberboard, thick furniture plywood, MDF). This is the best solution for creating a wardrobe with your own hands. The materials are durable, easy to process, protected from moisture by polymer additives and a laminated coating. The film can be painted in different colors to imitate the texture of wood and stone. For the manufacture of frames, storage systems and furniture doors, high-density boards are used that are not damaged or deformed under loads.
To work you will need the following tools:
- tape measure, level, plumb line, pencil;
- jigsaw, wood saw, construction knife;
- screwdriver, Phillips screwdrivers, hex wrench, electric drill;
- carpenter's hammer;
- angle grinder with wheels for metal and wood.
It is also necessary to prepare fasteners: bolts, screws, screws, metal angles, supports.
Filling elements and fittings are selected based on the design of the cabinet. These can include guides, rollers, latches, latches, door handles, as well as racks, rod holders, various hooks and hooks, and drawer slides.
How to hang a picture on a plasterboard wall?
Currently, plasterboard is considered one of the most indispensable materials for repairs. It is used for leveling walls, creating partitions and arches, and installing multi-level ceilings. But sooner or later the renovation ends and you can start decorating the walls.
To prevent the walls from appearing bare, many decorate them with paintings, mirrors, tapestries and other decorative elements. And here a not very pleasant surprise awaits us. Drywall is a rather fragile material, so simply driving nails into it will not work. Such material requires special treatment.
And now the question looms before us: how to hang a picture on a plasterboard wall?
Preparatory stage
Before hanging a picture on a plasterboard wall, you need to prepare:
- At a minimum, you need to choose a suitable place for the artistic canvas so that the wall does not seem bare and dull.
- Once you have decided on the location of your decorative element, you need to clear the area closest to it. Remove from this place everything that might disturb you: calendars, other decorative elements.
- Make notes using a pencil, pen, or chalk.
Important! It would be good to think about this before the end of the renovation. Then, at the time of assembling the metal frame, a wooden beam can be inserted into the structure
This will help you subsequently, without much difficulty, hang not only decorative panels, but also shelves, a mirror or other rather heavy thing.
Fastening methods
Walls made of such material can crumble from the blow of a hammer, so the method of hanging a picture on drywall must be chosen based on the weight of the object that you are hanging. There are two main methods that you can use:
- Using a self-adhesive hook. This, of course, is gentle, but not the most reliable method, because at any moment the hook can come off, even if the chosen decorative fabric is not very heavy.
- Using dowels, screws, anchors. Here you will need tools, for example, a screwdriver. You will also need a bracket that will screw into the dowel.
Hanging light pictures
Using a self-adhesive hook, you can hang pictures whose weight does not exceed 2 kg. Then the chances that the reproduction or photograph will hang for a long time are quite high.
Important! You should not hang decorative canvases in a room with high humidity using this method. How to hang a picture on drywall using hooks?
How to hang a picture on drywall using hooks?
- First, clean the surface of the wall from dirt. You can use dishwashing liquid or other detergent. Then the walls must be washed with clean water and dried. The surface must be dry and clean.
- Now the surface needs to be degreased. There should be no greasy stains in the place where you will glue the hook. In addition, the surface must be flat.
- Glue the hook in the chosen location. Press it firmly so that it sticks to the wall as much as possible.
- All that remains is to hang the canvas.
There is a huge selection of a wide variety of hooks on sale. Make sure that your hook fits the fasteners of your product.
Important! Very light decorative items can be hung with double-sided tape
Hanging a heavy picture
If you don't trust hooks or your painting is quite heavy, then you need to use a different method. What should we do to hang a picture on a plasterboard wall?
- You need to determine where the metal frame is located. This can be done using a magnet. If we have a blank in the form of a wooden beam, then we use it. Mark the place where the product will hang.
- Drill a hole of the required diameter. The diameter must match the fastener. It is best to attach it to special butterfly dowels. They are produced specifically for working with drywall and are distinguished by the fact that when twisted they form a pattern that can withstand heavy weight. You can use an anchor bolt, but here you need to take into account one nuance - it is unlikely that you will be able to dismantle the painting if it is attached to an anchor.
- Insert a dowel into the resulting hole. The edge of the dowel should be flush with the wall.
- Insert a screw into the dowel and tighten it with a screwdriver. Now you can hang even heavy items on a screw.
material
Using any of the methods, you will decorate the room and keep the wall safe and sound. We wish you successful experiments in the interior design of your home!
How to choose material?
The appearance and durability of the decoration depend on the correctly selected raw materials. Experts recommend using alabaster grades from G5 to G25. For large works, grades from G4 to G7 are suitable. The powder is sold dry in paper bags ranging from 5 to 30 kg. To make your own gypsum products white and durable, it is recommended to purchase raw materials from large construction stores or specialized markets.
Alabaster packaging
Advice! When purchasing gypsum by weight, make sure that there are no sand impurities or caked lumps. The color should be uniform and the grind should be fine.
Some manufacturers produce raw materials marked “for artistic stucco.” Products made from it are distinguished by increased whiteness. It is fine-grained, durable, and has a high solidification rate.
In craft departments or construction stores, special plaster casts are sold - containers for pouring the mixture into the model. Previously, they used rubber balls cut in half. By squeezing one edge of the plaster, it is convenient to fill the template details with the contents.
DIY kitchen made from plasterboard
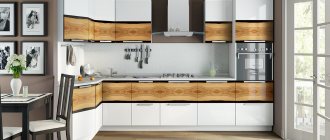
Depending on the style of the interior, a plasterboard kitchen can be with or without doors. Doors, as a rule, use factory ones. An alternative is neat curtains or open niches, ala country style. Plasterboard kitchens lined with tiles are typical for various areas of country style.
The tiles for their cladding are chosen in natural shades: white, beige, terracotta, brown, earthy. Blue or green are also common. The tiles used are slightly rough, which gives the kitchen a certain touch of antiquity and a homely atmosphere. Such kitchens are the real center of the home, where it is pleasant not only to cook and eat, but also to gather with the whole family.
The variability of drywall allows you to forget about such nuances as uneven walls of the room, modules in the manufacture of furniture, and focus on functionality and form based on ease of use. You can not only make cabinets of any size and configuration, but also make an accent, for example in the form of a hearth or a non-trivial imitation of columns. The plasticity of plasterboard structures allows you to create a kitchen of any shape and configuration, a combined composition of cabinets and a table - an island or a bar counter. The use of tiles both for cladding furniture and on the floor and walls creates an amazing effect of unity of space.
So, a plasterboard kitchen is a series of niches that limit the space of individual drawers. More often, plasterboard construction is made only for the bottom row of kitchen units, and the top row is made of wall cabinets or open shelves. This is due, in my opinion, to the fact that plasterboard cabinets look somewhat heavy.
But there are options here. Here is an example of an elegant kitchen, where the upper part is a plasterboard structure.
Preparation and calculation of drywall
It is difficult to build a kitchen set without a project. To accurately determine the format of furniture blanks, interior items are planned to scale. It is convenient to use graph paper for the drawing. Main design stages:
- the kitchen is measured using a tape measure;
- The layout of the future headset is drawn by element.
Standard width of cabinets: 400, 600, 800 mm, depth of upper cabinets 40 cm, lower cabinets – 60.
Modern design today is open to experimentation and even very much welcomes it.
To calculate the amount of materials, all lengths are summed up, the amount is multiplied by 1.2, a small margin is needed. When cutting guides for the frame, take into account the thickness of the sheet. For built-in appliances, suspended facades or boxes are planned. Immediately think through the lighting of the work area, sink, and inside cabinets.
Cabinet frames can be made from plasterboard sheets. We also manufacture cabinets for built-in appliances and tall cabinets.
Preparation of the solution
To make your own gypsum stucco molding beautiful and durable, you should choose high-quality dry raw materials. They differ in composition. Some manufacturers add additional components that make working with the mixture more convenient and the final product highly durable.
Cooking rules:
- The solution is prepared in small portions in order to have time to distribute the entire amount among the containers.
- First, water is poured in, then powder is poured in, but not vice versa. Otherwise, lumps will form and the mixture will not work.
- The ratio of parts of water and alabaster is 10 to 7.
- The liquid is used cold.
- The consistency of the solution resembles liquid sour cream.
- First, the gypsum is poured into water and allowed to settle. Then mix thoroughly. A small volume is stirred with a spatula; for a significant amount, a drill with a mixer attachment is used.
- To improve the plasticity of the composition and to prevent the finished product from cracking, PVA glue is mixed into the mixture.
- Cement is added to increase strength.
Preparation of the solution
Beginners in handling gypsum should know the features of the material:
- liquid solution is plastic;
- hardens quickly;
- when drying, alabaster expands;
- the final product is fragile, especially small parts.
The solution hardens within 5 minutes. During this time, it is necessary to fill out all the blanks. For those who are faced with such work for the first time, the task will be impossible. The hardening mixture will not penetrate into all recesses, especially small and narrow ones.
Advice! To slow down the hardening of the gypsum mixture, add gelatin or hide adhesive solution, borax, slaked or quicklime. They allow you to delay hardening by 30-35 minutes.
In some cases, hardening needs to be accelerated, for example, if a figure is formed on a wall. The easiest way is to pour in hot water. And also for this purpose, add alum, sodium sulfate or regular table salt.
Kitchen installation
So, our products are assembled, now it’s time to start installing the kitchen.
Wall row
It is now customary to hang a wall-mounted row of cabinets not on ordinary blind hinges, but on special furniture hinges with a hook, which cling to a metal profile strip screwed to the wall. The advantage of such hinges is that a cabinet already hung on the profile can be adjusted both in height and depth, which is very convenient for placing the facades of adjacent cabinets in the same plane.
We hang the cabinets of the top row and, using a screwdriver, adjust the hinges up and down, back and forth so that the facades of the adjacent cabinets are in the same plane, and the cabinets themselves hang level.
Bottom row
We tightly arrange the floor row cabinets, adjust them in height (by screwing/unscrewing the legs) and tighten them with intersection bolts.
We cover the cabinets with a tabletop and fix the tabletop with self-tapping screws from below through the drawers (transverse strips). You can also resort to using corners.
On the countertop we mark places for installing a sink and hob, drill a through hole so that a jigsaw blade can be inserted and cut out pieces of the countertop.
We cover the holes in the table top with a layer of silicone sealant, and also apply the sealant to the front side of the table top along the edge of the hole. We insert the sink and remove the squeezed out excess sealant with a rubber spatula. The same needs to be done for the hob, but you just need a heat-resistant sealant.
Bottom row assembled. The tabletop on the right row fits tightly to the window.
Well, here's what it looks like all together.
Installation of kitchen ceiling and bar counter
The next stage of work was the installation of the kitchen ceiling and bar counter. The kitchen is small, there is not a lot of space in it, so the choice was made in favor of a bar counter rather than a traditional table, the place for which was only at the entrance of the room, which, you see, is generally inconvenient.
Four pieces were cut out of chipboard (the same kind from which the cabinets were assembled) especially for the ceiling. Two parts were made with a curve, which should complete the ceiling. The parts were attached to the wall using thickened corners and self-tapping screws, but the bulk of the ceiling lay on the cabinets of the top row. Nothing complicated.
For the bar counter, a piece of the same Egger tabletop measuring 2000x400 mm was cut out, the edge of which was also made with a radius. It turned out that the rack and the ceiling element above it have identical dimensions.
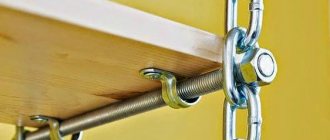
We drill holes (14x170) in the tabletop and place them on hidden shelf holders, pre-fixed along the free wall.
Usually the recommended height for installing a bar counter is approximately 1100 mm from the floor, but mine turned out to be a little higher. The height of my counter was adjusted so that a microwave could fit into the free space between it and the floor row. It turned out something like this.
A little later, railing pipes with various hooks, jars for spices and trays will appear above and below the counter
Well, the whole stand/ceiling composition was completed by the 50th chrome-plated pipe with a holder for glasses and a shelf for fruit. Under the counter on the pipe I installed a holder with hooks for towels.
While the ordered bar stools were on their way, I slightly upgraded the wall above the counter by making the most expensive painting I could for it.
Well, this is what actually came out of it. Railing pipes with hooks are already in place, plus lamps were cut into the ceiling and another holder for glasses was added.
How to restore
Over time or due to mechanical damage, the gypsum decor is destroyed. In this case, restoration of worn parts or their complete replacement will be required.
Renovation Tips
When carrying out restoration activities, the following recommendations are taken into account:
- Before starting reconstruction, you should study the scale and type of damage, and then choose the appropriate method of exposure or camouflage.
- If a small fragment is destroyed, replacement is not required. Existing damage is repaired directly on the element.
- If the stucco molding has changed color due to getting wet or dirty, the entire product is painted in a color that matches the interior. Water-based paint is suitable.
- Artistic painting will help hide minor scratches. Oil paints are used for this.
- In case of loss of a significant part, restoration work is carried out by checking the photograph, if available.
- If there is no photograph of the lost part, then a new one is made taking into account the general style of the room.
- During restoration, cracks and seams are opened and re-sealed with fresh mortar.
- Weakly fixed parts are removed, the surfaces are leveled and fixed again. In this case, double fastening is recommended - with glue and dowels.
- If paint comes off on an area of a figure, the entire element is painted over. Otherwise, the color of the freshly coated area will be different. To do this, the old layer is cleaned off the part, the surface is sanded, primed and a coating of the desired color is applied.
We make a kitchen countertop with our own hands from plasterboard and ceramic tiles
This product can be made in several variations, the most common: linear, L-shaped and U-shaped. Since everyone will develop the principle of creating a kitchen from plasterboard with their own hands, let’s consider the simplest example - a linear countertop.
To create this item we will need the following:
- Guide profiles.
- Plasterboard sheets (thickness not less than 18 mm).
- Drill and screws.
- Ceramic tile.
- Adhesive for installing tiles.
- Grout and spatulas (regular and rubber).
- Level, ruler, marker.
The height and width of the working surface can be selected either in accordance with the standards or individually, taking into account the height of the residents and their needs. Next, the process of creating a plasterboard countertop for the kitchen with your own hands looks like this:
1. On opposite walls we make four marks: in the corners and at the extreme points of the future product. We check the evenness with a level.
2. We go down ten centimeters lower and make four more similar marks. They indicate the attachment points of the four main profile guides.
3. Using strong self-tapping screws in increments of 15-20 cm, we attach two profiles (one higher, the other lower) to the wall to which the tabletop will adjoin.
4. We attach the other two elements to the walls at their ends; they will be the edge of the tabletop.
5. Between the upper and lower elements, 10 cm of profile support posts are mounted every 40 cm.
6. Transverse connections are installed between the upper elements adjacent to the wall and those located at the edge. The step between them is 40 cm.
7. Cover the surface of the structure and its front side with plasterboard.
8. Mark the places where the sink and stove will be installed, cut out the holes.
9. Tile the entire remaining surface. We seal the seams with a special grout that can withstand frequent washing.
The process of creating all these elements is quite simple and resembles the installation of walls from this material
It is worth paying attention to the number of elements that will give rigidity and strength to the entire structure. Read in our next article a comparison of kitchen sets made of wood and kitchens made of wood
After this, all joints are primed and puttied, and reinforcing tape is laid on top. After complete drying, a second layer follows, and after it has dried, the joints must be cleaned. And then the last layer of putty is applied.
- GKL;
- Profiles;
- Self-tapping screws;
- Dowels;
- Hammer;
- Level ;
- Screwdriver;
- Sealant;
- Dye;
- Putty;
- Putty knife;
- Drywall knife;
- Brushes and roller.
It’s not a bad idea to have a drawing of the future piece of furniture - this way, the speed will go faster, the dimensions do not need to be checked every time, the blanks are made in advance. Installation: Do you have nowhere to place kitchen utensils or indoor plants? Not enough room for cookbooks or spice jars? There is a solution - the kitchen arch-rack will not only play a huge role in the interior, but is also functional enough for any needs.
The idea is simple - a vault and a plasterboard wall with shelves.
Guide profile
An important element of the metal frame is the PN guide profile, which has a cross-section in the form of a channel and is used as a guide base for rack profiles. In addition, the PN profile can be used to create jumpers between individual rack profiles. As a rule, this operation is used when installing door structures in plasterboard partitions.
The back of the guide profile is equipped with two longitudinal stiffeners. PN profiles are produced in sizes: PN 50/40, PN 65/40, PN 75/40 and PN 100/40. The first value is the width of the profile back, each value of which fully corresponds to the similar values of the PS profile backs.
The backs of the PN profiles have holes for dowels, the diameter of which is 8 mm. Using dowels, PN profiles are fixed to the supporting base. If additional holes are needed, the latter are drilled in place. The width of the guide profile shelf is 40 mm, which allows you to fix a plasterboard panel on it.
Bathroom furniture
Plasterboard furniture for the bathroom is an excellent alternative to plastic options or expensive finishes made from natural materials. Even the bathroom, which is a special room due to high humidity, can be finished with plasterboard. The main thing is to use a galvanized frame and moisture-resistant drywall (GKLV). You can design and install cabinets with shelves for sinks and cabinets for bathroom accessories. In the manufacture of bathroom furniture, the standard principle of frame assembly with the stages of cladding and finishing is used. To ensure that all bathroom components resist moisture, treat them with protective coatings, and additionally decorate moisture-resistant gypsum board sheets with tiles or decorative plaster.
Drywall, as a universal and easy-to-process material, provides great opportunities for designers to create, and also saves the family budget
When purchasing gypsum boards, pay attention to where and from whom you purchase the finishing material. For example, if plasterboard sheets have been lying in a warehouse for a long time, there is no need to talk about any moisture resistance here
If the price is too low or there is a promotion, remember that free cheese is only in the mousetrap. A finishing material such as drywall will help you create a unique interior with your own hands, which will become a continuation of your individuality. How you decorate your home depends solely on your imagination and preferences, and with drywall the financial component should not be a problem.
To learn how to make a plasterboard countertop for a sink, see the following video.
Varieties
You can make different models of cabinets from plasterboard. They are equally suitable for a large living room or a small bedroom. The main thing is to correctly calculate the dimensions of the furniture at the project development stage.
| Type of furniture | Internal filling options |
| Wardrobe partition | Toys, light books, stationery |
| Wardrobe wall | Any content |
| Coupe with sliding doors | Bed linen, tablecloths, towels |
| Mini dressing room | Clothes, shoes, accessories |
| Open shelving | Landline telephone and household items such as keys, magazines and newspapers, pencils and pens. This furniture will fit well in the hallway |
Making a cabinet for a balcony with your own hands, master classes.
At the bottom of the cabinet you can place several drawers. They can be locked with a key or opened freely. The shelves, if desired, can be glazed to prevent dust from accumulating on them.
Do not place heavy household appliances on plasterboard shelves. Large metal objects (dishes, figurines, souvenirs) also fall under this ban.
Wardrobe partition
Wardrobe wall
Coupe with sliding doors
Mini dressing room
Open shelving
Advantages of finishing a kitchen with plasterboard
Finishing a kitchen with plasterboard has the following advantages:
- The material has an affordable price.
- The ability to do the installation yourself, as the technology is quite simple.
- During installation work, a minimum of dust and dirt is generated.
- High speed of installation work and quick delivery of the finished result.
- Obtaining perfectly smooth surfaces.
- Environmentally friendly material.
- Possibility of implementing numerous design solutions.
- The structures are lightweight.
- Good maintainability.
- Compatible with many finishing materials.
Stages of installation of plasterboard structures
Installation of plasterboard structures consists of several stages, the basis of which is planning and drawing.
Everything else is a matter of technique. According to the drawn up drawing, the furniture frame or wall sheathing is mounted and everything is covered with plasterboard. Having basic skills and following the advice of professionals, you can make any design masterpiece.
Finishing the walls in the kitchen with plasterboard
Installation of plasterboard sheets can be done in two ways - framed and frameless. Both methods are good, but the frame method is used more often due to the fact that the resulting gap allows you to mask any unevenness of wall surfaces and hide all kinds of communications.
However, in small kitchens it is better to use frameless fastening of sheets, which will level the walls and take up a minimum of free space.
Professional subtleties of installing drywall on walls
Stages of finishing walls using a frame method:
- The guide profile is being installed.
- The hangers are attached and checked for evenness.
- The material is prepared and, if necessary, cut.
- The plasterboard sheet is attached to the frame.
- The surface is being finished.
Stages of frameless wall cladding:
- The surface of the walls is cleaned and degreased.
- Primed.
- The canvas is being prepared.
- The sheets are glued with special glue.
- The seams are sealed and final finishing is carried out.
Methods for cutting drywall
In order for the cutting of drywall to be smooth and without defects, when performing work in any way, you must follow a sequence of actions and a number of rules. There are 5 options for cutting sheets.
In a straight line
The most used method. Allows you to cut pieces of sheets to cover the remaining empty sections of the wall after the main drywall finishing. A mounting knife is usually used for cutting. An electric jigsaw is optimal for cutting thick arched sheets or cutting several plates at the same time.
How to cut drywall:
Take measurements on the wall. Measure the distance on the drywall sheet. Using a ruler, draw a cutting line with a pencil. Holding the ruler firmly, carefully cut the sheet along the line mark, deepening the blade by a maximum of 5 mm. Move the plate lying on a horizontal substrate so that the cutting line is approximately 15 mm beyond the edge of the table. Tap the bottom exposed surface of the sheet with your fist until the gypsum core breaks. If the plate is installed vertically, pull its edges, trying to fold it in half
Tap the front side where there is no cut. Turn the drywall over and cut along the fault line. Level the edge of the sheet with a plane.
Cutting out rectangles and squares
If you need to make a hole for a plumbing inspection hatch, socket or other communication object, proceed as follows:
- Mark the rough side of the drywall with a pencil.
- In the corner of the drawn figure, drill a hole with a diameter of 10 mm so that you can insert a hacksaw blade.
- Carry out a similar manipulation in the remaining corners of the rectangle.
- When cutting along the line, hold the hacksaw perpendicular to the drywall.
- Tap the rectangle to press it out.
- Use a plane to smooth out the edges. Or a file if the rectangle is small.
If the hole is in the middle of the plasterboard plate, then it is more convenient to cut the material when it is already fixed to the wall. If the lines of the rectangle run parallel to the metal profile, then a grinder is used for cutting, and the cracks that inevitably form during sawing are filled with putty.
Cutting a round hole
Small circles are usually cut out after the drywall has been secured to the wall. It is more convenient to use a drill. Spade and core drills are suitable for the job. In this case, there is no need to mark the circle; you just need to make a central dot mark for drilling along the guide.
You can also cut the circle with a narrow hacksaw. In this case, the markings are made with a compass. Then drill a hole for the hacksaw blade and carefully cut along the line. With this method of work, the hole is usually produced with defects. It has to be processed with a file or sandpaper.
Figure cutting
The flexibility of drywall allows you to make any shapes. To cut a curved line with a large radius, use a hacksaw or jigsaw.
To cut drywall figuratively, lay it on two horizontal surfaces so that the cutting line is between them
It is important that the supports are stable and wide enough, otherwise the plate may break during operation
How to cut drywall correctly to obtain complex shapes:
- Make markings on the sheet. Use a template if necessary.
- If using a jigsaw, move the saw blade towards the sheet before turning it on.
- Slowly, carefully cut along the line, without pressing the tool too much into the material.
- If the pattern includes sharp corners, cut them off with a smooth line first. Then finish it to the correct shape with a file or hacksaw.
Cutting without tools
If you don't have a hacksaw or jigsaw at hand, you can use a knife and hammer. But with such work, the edges of the drywall will turn out with defects, so you will have to putty the surface.
How to cut drywall at home without the necessary tools:
- Cut the cardboard layer from the rough side, going a little deeper into the plaster.
- Tap the edges of the resulting shape with a hammer to press it out.
- Cut out the cardboard from the front side along the resulting outline.
Choosing the design of a chest of drawers
Before starting installation, you need to decide on some important points. The first of these is the choice of location. This is an individual decision for each home owner. Once the location has been determined, you can make a drawing of the walls and come up with the location of the chest of drawers itself.
We mark the frame lines on the floor, ceiling and walls.
The drawing can be done on a regular piece of paper or use a ready-made one. However, the last option is more complex, because the finished work plan should ideally fit the parameters of your apartment.
Without resorting to the help of a professional, anyone, with some effort, can make a cabinet out of plasterboard with their own hands.
In order to create a plan, you also need to become familiar with the main types of such a design.
Drywall is a modern material that everyone can work with.
A gypsum plasterboard cabinet can be of different types:
- corner;
- linear;
- built-in;
- coupe.
One of the components of plasterboard (plasterboard sheet) is gypsum.
The corner design is ideal for a small room. It will save space. Linear cabinet with shelves - universal. It can be installed in any room of the house.
The strength of the material is ensured by the cardboard shell, which optimizes the technical characteristics of the board.
If the room has niches, then it makes more sense to make a large built-in closet with lighting. For example, it can be used as a dressing room. A chest of drawers with shelves will be an excellent solution if there is not enough space to store things. It can accommodate not only clothes, but also books, equipment or shoes. A coupe is the best solution for a small apartment.
This is an environmentally friendly material that does not contain harmful elements and has an acidity close to human skin.
You should also decide in advance on the features of the chest of drawers. It can have open and closed shelves. A cabinet made of plasterboard with closed shelves is the most practical, since you can store any accessories in it, but building such a frame will be more difficult.
The metal profile is easier to process.
We fasten cut-to-size gypsum boards using gypsum-metal or gypsum-wood screws, depending on the selected frame material.
The final result of a finished plasterboard cabinet may look different.
Construction of the frame
The first is a guide profile; the distance between the slats should be approximately 40-50 centimeters, but if the furniture has a shape that does not allow this, you can change the distance at your discretion. The main thing is not to make this distance too large, otherwise the necessary structural strength will be lost.
Some tips:
- To avoid rattling and unnecessary sounds inside the case, use a damper tape attached to the case. It has a sticky side so this won't be a problem.
- If the wardrobe is large and accordingly you plan to store a lot of things in it, then install two profile guides in the frame, then it will be doubly reliable and you can hang swing doors.
- If you want to make a corner wardrobe out of plasterboard, then in this case you can make a whole dressing room in which you can put a lot of clothes and even several people. By the way, for a corner cabinet you can also use the doors as a sliding wardrobe; to do this you just need to install them with a slight side slope.
If the product reaches the very ceiling, which happens in the vast majority of cases, it is also necessary to place profiles on it so that the cabinet is securely attached to all surfaces. Once the rail is installed, you can proceed to install the rack (CD) rail using the marks created in the previous step. The rack profile is located perpendicular to the guide. In those places where the shelves will be placed, they need to be additionally reinforced with a profile so that they accurately support the weight of the things that will be placed on them.
When you're done, check the frame - press down on it and rock it a couple of times, if it doesn't wobble, move on to the next step, and if it wobbles a little, you need to strengthen the frame even more. This can be done using profile pieces left over from previous work.
Plasterboard niche for TV in the living room
It is almost impossible to imagine a modern living room without a large TV. Even strict opponents of television do not deny themselves the pleasure of showing their favorite films or clips on the screen.
But finding a comfortable place even in a spacious living room is not always easy, because you still need to fit a sofa, table, cabinets, work area, shelves and books, musical instruments and a lot of other little things. Therefore, modern ergonomic designs come to the fore.
Plasterboard niches can easily replace old, clumsy walls. They will also help you organize space correctly, because it is a powerful tool for visually zoning a room.
Pros and cons of shelving
The advantages of using this piece of furniture include:
- convenience of arrangement of objects;
- ease of maintaining order;
- affordable cost due to the use of a minimum of materials;
- the ability to create a beautiful interior using dishes and other original little things;
- absence of doors (saves space in small rooms);
- You can choose designs of any configuration.
Essentially, these are storage systems for jars for seasonings, bottles, cereals, dishes, towels and cleaning items.
Disadvantages of use include:
- the capacity of the shelves is less than that of closed cabinets;
- the shelves of the structures will be decorated only with presentable sets; old dishes will have to be hidden;
- no protection against dust;
- children and animals can easily reach all the things that are located on the open shelving.
Initially, shelving was conceived as furniture for unloading work surfaces.
Installation of a plasterboard furniture frame for the kitchen
Inspect the kitchen space and determine the location of the new drywall furniture. If there are niches in the kitchen, you can use them successfully. At your request, you can build individual elements of kitchen furniture in the kitchen - cabinets, pencil cases, cabinets - buffets, or make a full-fledged kitchen corner.
- Start work by marking the floor and walls, using chalk, use a long, even strip to mark the places where the profile strips for drywall are attached. Select a profile for guides and posts with a galvanized metal thickness of 3-4 mm. You will also need a wooden beam of the appropriate size to fill the “U”-shaped profile. The timber must be well dried, as it may subsequently twist. Choose waterproof plasterboard - with a thickness of 6.5 to 12.5 mm, it will best suit the kitchen atmosphere.
- The profiles are attached to the walls and floor with self-tapping screws and plastic dowels. In places where the profiles come into contact with the floor and walls, a shock-absorbing gasket is attached, which dampens possible vibrations of the building. The guide and rack profiles are fastened together with small “bug” screws. For arched and smooth bends, the side edges of galvanized profiles are trimmed with metal scissors. The cutting step for a non-standard configuration, depending on the degree of bending, ranges from 0.5 cm to 5 cm. Sometimes it is necessary to trim protruding corners in the form of a trapezoid.
- Horizontal guides for shelves on which you plan to place heavy objects or household appliances - for example: stacks of ceramic dishes, a TV or a microwave oven - it is advisable to reinforce them with a profile made of thicker metal, and be sure to insert a wooden beam in the middle.
Rack profile
There are several types of profiles with different functionality. For example, there are PS rack profiles that have a cross-section in the form of a channel. Such profiles are used as vertical frame racks for fixing plasterboard panels on them.
The central element of the PS profile is the back, to which 2 shelves are bent at an angle of 90*.
The shelves, which are equipped with profiles of all available sizes, have a width of 50 mm. The backrest widths are 50, 65, 75 and 100 mm (these are nominal values). The following designations for rack profiles are accepted: PS 50/50, PS 65/50, PS 75/50, PS 100/50. The first value is the back width (in millimeters). Typically, the actual width of the backrest is slightly less than the nominal width. For example, if we consider the PS 50/50 rack profile, then the actual width of the backrest is 48.5 mm, which guarantees strong adhesion of the rack profile to the guide. Thanks to the sufficient width of the profile shelf, the screw will always fall into the right place. This point is very important when using two-layer cladding.
The profile shelves have 3 longitudinal grooves along the entire length. The middle groove positions the junction of two plasterboard panels, and the rest are intended for centering the screws screwed into the plasterboard.
The backs of the profiles are equipped with holes that are intended for installation of utilities in the cavity of the partition or wall. These holes are mostly paired and are located at the very ends of the panel. The hole diameter is 33 mm.
According to the drywall installation manual, rack profiles are usually mounted into guide profiles. To fix them, screws are used or the technology of cutting with a bend is used. Installation of a plasterboard panel on a rack profile is carried out in the direction of the open part of this profile. At the very beginning, screws are screwed into the shelf near the back, and then at the opposite edge. With the reverse algorithm, it may happen that the profile shelf bends inward. To correctly select profile parameters, you should always take into account the expected height of the partition, as well as the features of its design, i.e. what kind of cladding will be done - in one or two layers. An important role in the selection is played by the heat and sound insulation requirements for the future partition.
