What is decoupage
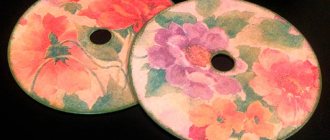
Decoupage is an ancient technique for decorating various surfaces. It is used not only for kitchen cabinets. Decoupage patterns can also be found on chairs, beds, boxes, notepads and much more. Also, in addition to wooden surfaces, any other surface (glass or leather), except metal, can be used.
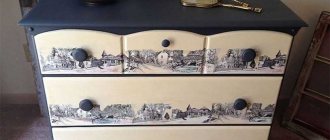
Decoupage is used for any furniture and other items.
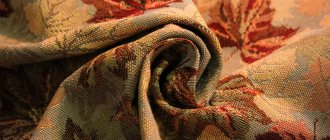
Decoupage is a technique for giving old furniture a new breath, prolonging its life and prolonging its use. This is done using the simplest method. Various designs are applied to the surface, which are cut out from available materials. This could be paper, fabric, napkins and even wallpaper that was left over from the renovation.
You can decorate furniture with any available materials.
The definition of “decoupage” is originally French. Translated, this means “cut out of paper.” Actually, this is the whole peculiarity of this technique. It is possible even for people who have never restored anything, since it does not require the use of special materials or the presence of certain knowledge.
The concept of decoupage is of French origin.
Important! The decoupage technique is applicable to absolutely all products.
Base requirements
The preparatory stage for creating cabinets using the decoupage method is choosing a base, most often wood or chipboard. Wooden products look harmonious with inserts of papier mache, tin or glass. You need to be especially careful when using a plastic base, as the technique may simply not be suitable.
When choosing a basis for decoupage, you should adhere to the following rules:
- The wooden surface is treated with sandpaper to level it well. If there are grooves, they are filled with a special wood putty, after which they are sanded until the surface is smooth;
- glass products must be thoroughly washed and dried so that no lint remains. It is important to degrease the surface before starting work;
- Tin items can be cleaned well with water and vinegar mixed in a 1:1 ratio. If the tin has rusty stains, they can be easily cleaned with a brush or a wire brush.
Types of decoupage technique
There are several main types of equipment in which decoupage is performed:
Straight
This is the simplest and most commonly used technique. It consists of the usual attachment of paper patterns to the outside of the surface of the product. In this case, the item can be pre-painted, aged, primed or craquelure.
With the direct technique, patterns are attached to the outer surface of the furniture.
Reverse
Can only be used to decorate transparent glass objects. The decoration process is similar to the direct one. But the main feature is that a drawing cut out of paper is glued to the back of the selected item. Only after this is the background design and the overlay of other details done.
The reverse technique is used for glass products.
Artistic
The second name of the technique is smoky. Visually, it is very similar to a beautiful painting. This happens due to the fact that in addition to the decoupage design, various elements are also completed independently.
Using artistic techniques, you can complete some elements.
Decopatch
This technique is used when it is necessary to cover the entire surface of the product with a continuous layer. That is, there is no free space left, everything is filled with paper patterns. Both individual fragments of the image and whole pieces are used. You can often find this technique not on furniture, but on decorative toys.
When decopatching, the entire surface of the furniture is covered.
Volumetric
This technique involves creating a three-dimensional image. That is, any pattern rises a little above the rest of the surface and sticks out a little. Visually it looks very impressive and beautiful. This is done using multi-layering. The required amount of special mass or paste is applied, after which the design is attached.
With the volumetric technique, the drawing is made convex.
Note! Each technique is beautiful and unique in its own way. A combination of several at once is allowed.
Several techniques can be combined on one product.
Results
Today you learned about what decoupage is, its main types and techniques. Thanks to the proposed master classes, you can effortlessly master this incredible way of decorating objects and update the interior of your apartment.
Did you like the article? Subscribe to our Yandex.Zen channel
May 22, 2022
Accessories, Design
If you want to express gratitude, add a clarification or objection, or ask the author something, add a comment or say thank you!
Features of working with different surfaces
DIY cabinet decoupage can be done on any surface. The easiest way to work is with wood, as a paper design can easily be attached to it. A special feature of working with any surface will be its preparation. It's different for everyone. The use of technology to decorate the front of the cabinet and shelves, if they are open, looks beautiful.
How to prepare the surface
Before you start decorating, you need to prepare the surface so that the design holds securely. To avoid further detachment, a number of works are carried out. The simplest ones consist of thorough washing and sanding. For those who want to do everything efficiently and conscientiously, you will have to put in a little more effort. To do this, you will have to spend most of it not on decoration, but on preparation.
First of all, you need to wash and clean the furniture.
In total, four most important steps are followed to achieve the desired result. The first is to sand the surface using fine-grit sandpaper.
The surface must be sanded using sandpaper.
Note! It is necessary to remove all old paint and various irregularities. You can remove half the layer of wood if necessary.
If necessary, you can remove the top layer of wood.
The second stage is a one-layer primer. Select light paint if you plan to make the cabinet in light shades and dark paint if you plan to make it in dark shades. If necessary, you can level the primer layer by sanding it - this will be the third step.
The surface must be coated with a primer in one layer.
Fourth – the surface is degreased. If the decoration is carried out to hide any defect, then it must first be repaired with putty.
The last step will be to apply a base color of paint that will not be similar to the primer.
Finally, the main paint color is applied.
Required materials and tools
To complete the job you will need a few tools and materials. A good solution would be to prepare everything you need in advance so as not to be distracted during the process. A sample list consists of:
- Thick napkins with a pattern, wallpaper, clippings from magazines or newspapers, old postcards, posters (you can choose any material, it’s better not to combine them so that the pattern is uniform)
- Small pieces of suitable fabric or linen for finishing (if such elements are provided).
- Scissors.
- Stationery knife.
- Sandpaper only with a fine-grained surface.
- Measuring tools (ruler and meter).
- Acrylic based paints.
- Finishing varnish.
- Polyvinyl acetate glue (PVA). Special decoupage or wallpaper. Using anything else is not recommended.
- Brushes of different sizes and shapes.
- Additional decor (beads, rhinestones, stickers).
- Pencils or felt-tip pens, if you will outline drawings in an artistic style.
Before starting work, you should stock up on the necessary tools.
Table top decoration
painting
An excellent solution for a glass tabletop is bright and airy painting with stained glass paints.
Painting using tulle or any other lace looks very beautiful. To apply an openwork pattern to the surface of the table, you need to attach the tulle to the tabletop (it is advisable to secure it with tape on the back side).
We paint the table in the same way as with a regular stencil, using a sponge, roller or spray paint. We select the color of the enamel that contrasts with the color of the surface.
Glass table with stained glass painting.
Mosaic
We first lay out the frame elements of the mosaic using tile adhesive. We try to make the seams as uniform as possible. Then we begin laying out tiles (or pieces of tiles) from the center of the table. An interesting solution would be to lay tiles of different colors. The top of the tile is covered with a special grout. To prevent the ends of the tiles from being visible, you can attach plastic corners to the edges of the table in the color of the tile grout.
Covering the countertop with mosaic tiles. Mosaic pattern made from pieces of tiles.
In the mosaic technique, you can use not only tiles, but also other materials and a wide variety of objects - shells, pebbles, pieces of glass, eggshells, etc.
Volumetric decor using eggshells.
Potal
First, we draw a stencil on which the gold leaf will be glued. Then apply glue to it with a thin brush.
We carefully place the sheets of sweat on the glue
The thicker the brush with which we apply the glue, the thicker the gold leaf pattern will be.
Painting in different colors
Using a roller or brush, all other colors are applied one after another. After this, the masking tape is removed.
You can draw or glue various pictures on a colored background.
Finally, the table must be covered with two layers of clear varnish. This will add strength to the decor and protect it from external influences. The varnish can be glossy or matte.
How to restore an old table using veneering, watch the video:
Decoupage a closet using wallpaper and fabrics at home
Do-it-yourself decoupage of kitchen cabinets using wallpaper or fabric is done according to the standard scheme.
The decoupage scheme with wallpaper or fabric is quite simple.
Note! Since fabric is a dense material, it is better not to use it for decorating large surfaces. For this it is better to use wallpaper.
It is better to cover small surfaces with fabric.
If the preparatory work has been successfully completed, then you can begin the process of decorating the cabinet. It is necessary to select in advance the places where the patterns will be located. A pre-cut pattern or piece of the required size is applied to the selected location.
The selected design or pattern is simply glued to the prepared area.
All irregularities are smoothed out. There is no need to rush; it is important to carefully remove all creases and place them so that they do not have a chance to reappear in the future.
When wallpapering a closet, it is important to smooth out any uneven surfaces.
Everything is fixed with an adhesive solution (for fabric and wallpaper it is better to choose wallpaper PVA). Gradually the brush covers the entire drawing. The materials are dense, so you don’t have to worry about any part peeling off. Apply 2-3 layers. If the surface is large, you can use a roller for convenience. Each layer must dry. The last step is to apply varnish. It can also be applied in several layers.
Table repair
Tables are classified according to functionality into desks, dining tables, kitchen tables and coffee tables. Depending on their purpose, their structure and, consequently, the restoration process also differ. Typically, dining tables consist of 4 legs, a bow and a tabletop. They can be solid or folding
If necessary, they can be replaced.
The tabletop, in turn, is the main part of the table. Its surface should be smooth, without grooves, cracks and corrosion. If necessary, wood putty can be used to achieve the desired effect. With its help, you can easily and quickly eliminate all surface imperfections. If necessary, it can also be used to repair legs. The same scheme is used when repairing coffee tables.
1 3
Kitchen tables have their own characteristics. Before starting repairs, it is necessary to conduct a full inspection of this piece of furniture. The strength of the countertop plays an important role. It must withstand heavy loads and physical impact. In this regard, the base on which it is installed must also be strong.
An example of using wood putty, which will help correct all the unevenness of an old countertop
Pay attention to the condition of the canopies that secure the door. It is best to replace them with new ones, since with frequent use this part is subject to the greatest wear.
Natural wood is given freshness by special polishing agents, which can be found in any hardware or furniture store.
If the table is equipped with drawers, check how firmly their walls and bottom are connected. To make them easier to use, you can replace the fittings with which the drawers are pulled out. You can buy it at a furniture store. You can also buy various types of comfortable handles there.
How to transform a kitchen cabinet using napkins, newspapers and printouts
Important! The process of working with napkins, newspapers or printouts is no different from that described in fabric and wallpaper. But still there are some peculiarities.
Pre-glue is applied not only to the surface, but also to the design. Everything must be applied with extreme caution, as the materials may tear and everything will have to be redone.
Using decoupage you can also transform your kitchen cabinet.
Note! For this method, it is better to prepare spare drawings in advance, because it may not work the first time.
You can smooth out unevenness only with a soft brush, applying gentle pressure. The glue can be applied in one layer. After it has dried thoroughly, varnish is applied. It is already used in two layers. Irregularities can be sanded with sandpaper.
A painted cabinet can give your kitchen a unique look.
Paper or vinyl wallpaper
Often, after renovation, unused materials remain. Don't throw away pieces of wallpaper - use your imagination to use them in non-standard ways. Excess glued onto the façade of old Soviet furniture will hide imperfections. A built-in wardrobe decorated with wallpaper will visually merge with the wall.
Simple paper wallpaper is easier to lubricate with glue and attach to the surface.
Their advantages:
- low price;
- a light weight;
- low strength compared to vinyl;
- can be placed both on the outer parts of the wardrobe and inside on the shelves.
An example of how a dull Sovdepov wardrobe turns into a Provence style wardrobe
Vinyl wallpaper is heavier and more durable than paper wallpaper. Their base is paper and non-woven fabric. Choose the glue correctly: for paper glue it should contain starch.
Pasting technology:
- Before application, degrease the surface with acetone or alcohol.
- Press the wallpaper onto the facades with a dry sponge to avoid wrinkles.
Due to its flexibility, it is also convenient to wallpaper shelves and external parts. The method is suitable for restoring a bookcase, a hallway set or a children's wall.
You can glue wallpaper not only on the facade, but also inside, especially if the doors are transparent
Decoupage of an old cabinet with the effect of aging with craquelure and bitumen
The craquelure effect is one of the simplest, but at the same time it is particularly beautiful. This is the creation of artificial paint cracks. Bitumen - recreating an imitation of a wooden surface.
For craquelure you will need a special craquelure varnish; it is better to use a two-component one. The cabinet must be coated with a patina varnish and wait until it dries completely. To obtain small ones, you need to over-dry it, but for large ones, do not dry it out. Afterwards, the selected areas are covered with craquelure varnish. After this layer dries, cracks will appear on their own.
The craquelure technique uses a special varnish that creates cracks on the surface.
For bitumen, you will need to sand the surface of the cabinet. Cover with acrylic paint to imitate wood. You can dry it naturally or with the cold air of a hairdryer. Then a water-based varnish is applied and also dried. Bitumen varnish is applied only with gloves and a sponge.
The surface will be sliding, so it will be easy to draw an imitation of solid wood.
Mirror is a special element of the interior
It's no secret that mirrors can make a room visually more spacious and bright. It is precisely this that allows the designer’s rich imagination to run wild – there are many ideas for its design and decoration! Let's look at the simplest ones.
Mirror corridor
You will need 5 mirrors, of different shapes and sizes. Hang them in increasing order of diameter on the wall. This composition will look great above the stairs.
A mirror in shells will be an excellent decoration for the bathroom
You will need:
- Glue.
- Brush.
- Mirror without frame.
- Seashells.
- Varnish or spray paint.
On the wall, place a frame of shells around the mirror. Glue the shells to the mirror, first applying glue with a brush.
Do this carefully - the glue should not get on the mirror surface. Before covering the shells with varnish or spray paint, cover the surface of the mirror with newspaper so as not to stain it.
True, it is not recommended to decorate all mirrors this way - they can make the room somewhat cold and uninviting.
Mirror in rhinestones
You will need a small round or oval mirror without a frame. Cut out a ball of thick cardboard, a circle in the shape of a mirror, but a few centimeters wider, as well as many thin strips that need to be glued into circles of the same size - make 3-4 rows of them, which will create your frame.
Glue these circles to the edges of the cardboard ball and secure with glue. Then glue the mirror to the cardboard and start decorating the circles with rhinestones. This way you will have a stunningly beautiful frame.
Mirror frame made of beads
You will need multi-colored or plain beads. You can purchase models of different diameters and shades. Apply glue to the edges of the mirror and glue beads (or rhinestones).
Do not apply glue along the entire perimeter of the mirror at once, so that it does not dry out and ruin the neatness of the composition.
DIY home decor using a mirror is one of the win-win options. Feel free to experiment with different options for decorating mirrors.
Cabinet Decor Ideas
Decoupage creates unique and original things that will be in a single copy for its owner. Most often, such designs are used for certain styles: shabby chic, Victorian, simple city Provence and loft. It is better not to mix styles, since each has its own motives.
It is advisable to make decoration in one style.
Useful tips and tricks
It is better for beginning craftsmen to train on denser materials and small things. Only after this should you start decorating the cabinet. It is important to get a feel for the technique and understand all its nuances. This way you will definitely achieve the desired result. Each layer of paint and varnish is applied 2-3 times for reliability. This is especially true for cabinets that are often used.
For beginners, it is better to train on small items.
Do-it-yourself cabinet decoupage is a very interesting activity. Using this technique, you can create your own unique interior items without much expense.

