It is no secret that from the moment a child is born, his safety is the main concern for loving parents. Especially when they are not near him. One of these moments is bedtime.
After all, gradually developing, the baby begins to move more and more and, fidgeting in the crib, can unknowingly harm himself or fall out of it. In order to avoid such situations, you can equip the sleeping place with a protective side.
It can be purchased at the store. But it’s much more interesting to show your imagination and make a limiter for a children’s bed with your own hands.
Store-bought barrier
It’s another matter if a child’s bed restrainer is attached to the edge. The worry is over. Parents sleep peacefully, and the baby is reliably protected from falling. The barrier is mobile, easy to remove and easy to clean.
Growing up, the child begins to actively explore the world around him, and no obstacles can stop him. Many people protect sofas with pillows, rolled blankets and blankets. Nothing helps, the baby crawls over such fences just fine. To prevent him from breaking his head when he falls, you need to place a thick blanket on the floor. Because of such protection, the apartment is in complete chaos. But if you put a border-limiter for a children's bed, then this problem would never arise. This useful item can be used at the dacha, at a party, in a train carriage, or in a hotel.
Do-it-yourself soft baby bed restraint
For newborn children, they mainly use soft bumpers, which are filled with foam rubber or padding polyester, lined with fabric on both sides. It is advisable to choose natural and hypoallergenic material. Such a barrier is secured with Velcro or ties sewn around the perimeter of the rectangle. The number of sides can be chosen as desired. Many people install strips on all four sides of the bed to prevent the child from hitting the wooden bars.
It is very easy to sew a soft children's bed restrainer with your own hands. To do this, you need to carefully measure the length of the side and think about what height to choose for the future barrier. It depends on the child's activity. Buy the necessary materials: cotton fabric, padding polyester, Velcro tape, piping. Cut the padding polyester according to your measurements and attach rectangles of fabric cut to size on both sides. Do not forget to retreat 5 cm from the filler on all sides. Sew all layers with a stitch, folding the fabric inward 1 cm. At the time of sewing on the machine, sew the piping around the perimeter of the material. The barrier will have a dense and finished appearance. At the end of the work, all that remains is to add ribbons or Velcro at the corners to attach the barrier to the wooden rods.
Do-it-yourself wooden limiter for a children's bed
When the child grows up, he is transferred to another bed, without bars. The baby is used to spinning freely in his sleep and continues to do so in a new place. Parents understand that there is a danger of falling out of bed. To protect your baby from bumps and night terrors, you need to install a limiter-barrier for the children's bed.
Making a wooden structure is not difficult. Even an amateur can easily cope with this. Take 4 slats of the same size and 2 long ones, equal in thickness to the side slats of the bed. They are connected to each other at right angles so that the barrier parts are in the middle of the U-shaped product. The result is a device that is easy to put on and take off.
Another children's bed restrainer not only has a protective function, but also brings beauty to the bed's decoration. Using your imagination, a piece of plywood or MDF, a pencil, a jigsaw and a few bolts, you can bring any idea to life and become a designer yourself. For boys, make a car or carriage. For a girl - flowers, a caterpillar or a house with a fence.
Review of the best manufacturers
Expert opinion Ksenia Petrovna Romanova Expert in the field of interior design, as well as the head of a fabric sales salon
Tomy bed restraints are available in pink and blue. The barrier is lined with soft fabric so that the child does not get hurt when touching it.
The limiter is installed under the mattress, the width of which should be from 70 to 90 centimeters. The barrier is held in place by the weight of the mattress and the sleeper, and has a 7-centimeter bend at the other end to prevent slipping from under the mattress.
The child can put his favorite toy in the pocket located on the barrier. If desired, it can be folded down to provide access to the child.
The price of such a device is approximately 3,000 rubles.
The compact folded size has a Babies side stop and is suitable for those who like to travel with a child. The size of the device is 140 x 50 centimeters and is suitable for children aged three to five years.
This barrier is attached above the mattress using a unique fastening system, thanks to which it can be removed very quickly. The bright design of such a side will appeal to most little ones.
The soft Baby nice side is made of cotton material. The Periotec filler used in this product is an environmentally friendly material. The product serves to protect the baby’s arms and legs from being pushed between the slats of the crib and from drafts.
Making a barrier from plastic pipes
A barrier-limiter for a children's bed can also be made from plastic plumbing pipes. You will need a special tool to cut such products, pipes of small diameter and connecting corners of the same cross-section.
Using this scheme, take from 5 to 7 straight tubes of the same size, cut small connecting ones up to 20 cm, and assemble the structure using corners of different configurations. Straight sections of the barrier are secured with T-shaped corners, the edges with L-shaped corners. To attach the holder of the future barrier, choose them with 4 holes.
Step-by-step instruction
The design manufacturing process includes the following steps:
- 5–7 parts of the same size are cut out of the pipe (it is determined depending on the desired height of the side), as well as smaller connecting elements that will be located perpendicular to the main rods. Their size depends on the frequency of arrangement of long parts.
- Using the corners, the structure is assembled into a single whole. L-shaped objects are used in the corners, T-shaped objects are used in the upper part, and products with 4 holes are used at the bottom.
- At the bottom of the product (where another hole remains), the remaining pieces of pipes are inserted, which during operation will be located under the mattress and hold the entire structure.
- The product is painted in the color you like.
This design is easy to install, use and maintain. If necessary, it can be easily disassembled, washed, and then, when it dries, put back in place.
Foam tube construction
The lightest and simplest limiter is a design made of dense insulating foam pipes. You can fit one piece on both sides of the bed, connecting them under the mattress with ribbons.
If a larger barrier is required, then you need to take 3 pipes and also tie them together or fasten them with thick gray tape. The design is easy to assemble; even a baby’s mother can do it. The products are quite soft, so a child will not feel pain when hit with a foot or hand. At the same time, the foam rubber is elastic and does not deform when pressed. The parts can be easily disassembled and washed.
Having made a barrier for the bed themselves, parents can be absolutely calm about the safety of the baby. A self-made limiter will serve for a long time, reliably, and its cost is lower than a purchased one.
What YouTube Offers
A search on the sites did not give the expected results; somehow this topic turned out to be completely undeveloped by either craftsmen or bloggers. Although maybe this question worries few people at all? I looked at YouTube, hoping to find there the very straw that a drowning man clutches at.
The service did not let me down, and although there was no ready-made interesting solution there, I was still able to glean a couple of ideas there. Well, my topic turned out to be just a blank spot, perhaps due to the fact that such restraints are in little demand for adults?
How to make a baby bed limiter with your own hands
When a small child sleeps, it is very important to create a safe place to sleep. And if the baby sleeps not in a cradle, but in a crib for children over 3 years old, the limiter will ensure the safety of the baby.
Crib bumpers can be purchased at any children's store. But it’s much more pleasant to make them yourself, showing care and imagination.
In addition, a self-made limiter for a children's bed will be an original gift.
The appearance can be any, in the form of animals, fairy-tale characters, or matched to the interior of a children's room. Vary in height and method of attachment.
To make sides use:
- Plastic . For assembly you will need plastic water pipes (frame), a special tool for cutting plastic pipes, tees and turns to connect the structure. Cut 7 straight tubes of the same size, and smaller ones (protective grille). Straight sections are connected with tees, corners are secured with rotary joints. Plastic tube fasteners will secure the product. This limiter is easy to maintain and easy to assemble.
- Tree. No special plumbing skills are required. A low side is made from a rectangular laminated particleboard. For an easier option, you can take a rectangle of laminated chipboard and cut the transverse slats. For work you will need: a hacksaw, self-tapping screws, a screwdriver, a tape measure. Having made the drawing, you need to cut out the slats. Drill holes in the side of the bed and the slats where the limiter is attached. You can decorate it with bright fabric or paint it in any color. Screw the finished structure with self-tapping screws.
- Textile. The easiest way. Sew a protective fence from dense fabric (chintz, calico, satin). Cut the fabric into a rectangle (according to the size of the limiter) with an allowance of 5 cm. Baste with a stitch seam, bending inwards by 1 cm. Then stitch on a sewing machine.
Advice. To prevent the filling from bunching up, quilt the product.
Foam rubber or padding polyester is suitable as a filler. It is attached using ties, ribbons or Velcro, stitched along the edges of the limiter. For the aesthetic appearance and hygiene of the child, it is better to sew a side that can be washed in a washing machine. It is better to choose natural and hypoallergenic fabrics.
- Net. It is stretched over a frame made of metal or wooden slats. The material must be strong enough to support the weight of the child.
Note. The frame must be completely covered with foam rubber or synthetic padding and covered with fabric.
When making a limiter with your own hands, you need to take into account the age of the child. For children in the first months of life, a low barrier is sufficient.
If the baby stands up on his own, then the height of the protection should be higher than his height.
For children over 2 years old, 20-30 cm is enough (the side will prevent it from falling during sleep). The smaller the little person, the longer the protection should be (along the length of the bed).
For older children, half the length of the bed is sufficient.
For convenient operation, the protective side should be easy to remove and attach.
Even the simplest and most uncomplicated crib stopper cannot compare with the finished product. It will bring individuality and comfort to the interior.
Criterias of choice
When choosing a bed restrainer, you should pay attention to the purpose of the side and take into account the real possibilities. The main criteria when choosing a protective system are:
Age of the child - to care for a small child you will need a functional bed with guards, and the smaller the child, the more reliable the protection system should be. If the child is highly mobile and can carry out playful activities in bed, fall guards also serve the function of preventing bruises and injuries. It is advisable to create them soft. If you need to create a protection for an adult's bed, you should first think about the purpose of the fence. Railings for the disabled serve to create convenience when climbing, so they must first of all be strong and detachable. There is no need to create foam cushions for them. The main purpose of softening elements is to protect the child’s head and body from bruises; Bed size - when making or ordering a child bed restrainer, you must measure the length and width of the mattress, since not all models are made to standard sizes. Removable barriers can be used to cover the entire length of the side of the mattress in a child's bed and to limit the horizontal space in which the child is forced to sleep and which needs to be protected; Room design - if this criterion is important when choosing a protective system, it is recommended to select protection taking into account the design of the children's room
But when installing a protective system, first of all you should pay attention to the reliability of the installation.
An important factor when choosing restraints is also the financial capabilities of parents. Homemade options do not require significant financial costs, but their production requires a lot of time and effort. Pre-fabricated barriers are sometimes expensive and require little construction skills to install, but they offer a high level of protection and reliability.
When considering, selecting, making or purchasing and installing bed guards, much attention is paid to the intended purpose of the bed rail and the weight of the sleeping person. These parameters are the main ones when choosing protective systems
Based on financial capabilities, personal preferences, room design and the features of each specific design, the most optimal option for each specific bed is selected. When traveling frequently with small children, it is recommended to choose removable barriers that are installed on different horizontal surfaces. They will serve as reliable protection for the child wherever he sleeps.
If the baby constantly sleeps in his crib, it is recommended to install a stationary side that is attached to the base of the bed. It will serve as protection for the child not only during sleep, but also during play. The child can stand up, holding the side with his hands and leaning on it. To protect the sleep of teenagers or adults, protective systems are chosen that cover only part of the side of the mattress, since they look more aesthetically pleasing, but fully fulfill their functional purposes.
DIY bed railing to prevent falls
It is no secret that from the moment a child is born, his safety is the main concern for loving parents. Especially when they are not near him. One of these moments is bedtime.
After all, gradually developing, the baby begins to move more and more and, fidgeting in the crib, can unknowingly harm himself or fall out of it. In order to avoid such situations, you can equip the sleeping place with a protective side.
It can be purchased at the store. But it’s much more interesting to show your imagination and make a limiter for a children’s bed with your own hands.
What should the height of the limiter be?
Not the last criterion is the height of the side. It directly depends on the age of the child:
- For babies who have not yet begun to stand on their feet, it is 70 cm;
- If the child begins to rise, then in order to protect him from an unexpected fall, the height of the protection should be 90 cm;
- For older children, a limiter with a height of 20-30 cm is sufficient.
It is also worth adjusting the length of the protection. The smaller the child, the more space the protection should cover. Therefore, for babies it is better to make a little thing that completely covers the long side of the crib. And when he grows up, limit the space partially.
Dimensions
If we talk about the size of the side, then this question directly depends on the age of the child. Young children, as noted above, need high restraints. So, for a crib measuring 70x120 cm, a side with a height of 70 cm will be optimal.
Older children need curbs to prevent them from falling while sleeping.
The size of the bed for children of this age is 70-95x150 cm. The optimal size of the limiter in this case is up to 30 centimeters.
A big child, in principle, does not need a limiter. As a rule, these are teenagers, and the border on their bed, rather, carries a certain design idea. For such children, beds up to 200 centimeters in length are purchased and the side usually takes up no more than a third of the bed.
We make restraints for a children's bed with our own hands
Babies often sleep restlessly and fidget in their sleep. Many parents of children who are moving from an infant cradle to a preschooler's bed are worried that the child will not fall in his sleep. Protective elements come to the rescue - limiters, which you can make yourself.
The limiter is able to protect the child’s sleep from accidental falls. After the need for this element disappears, it can be easily removed.
Model for older children
After the baby starts sleeping in another bed, the possibility of a fall still exists, especially if it is a bunk bed. In this case, a protective bed safety board has its advantages:
- their height is much smaller;
- the product only needs to be attached to one side of the bed;
- in some cases they can be folded back;
- do not interfere with the child if he wants to get out or climb onto the bed on his own.
Limiter options
The side can be made soft from padding polyester or foam rubber rolled into a roll. If you sew a cover on such a roller, it will fit perfectly into the interior of the room. However, it is worth making such a limiter of sufficient length, since it is not attached to the bed, but at the same time it should not roll off it.
A mesh barrier is an effective and safe means of preventing falls, but the tension of the mesh must be calculated so that the child does not fall over it. Typically, such a structure is attached to a metal or wooden frame.
A limiter made of plastic plumbing pipes is a simple and inexpensive design. The elements are attached using corners and, if necessary, can be disassembled quite easily.
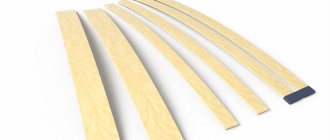
A wooden limiter is a more classic option. It is strong and durable, and also fits seamlessly into any interior. Most often, the barrier is designed in the same style as the bed. Using woodworking tools, you can give this element an interesting shape. Wooden slats are used for manufacturing.
Materials
Restrictors that have a protective and decorative function can be made of various materials.
Soft restraints are made of durable cotton fabric. The filler used is foam rubber, padding polyester or other soft and voluminous material. Sintepon is a soft hypoallergenic material with high thermal insulation properties, suitable for children from 0 to 6 months.
Soft, but at the same time elastic foam rubber is most often used as a filler. For convenience, it is placed in removable covers.
As a rule, such fillers are decorated with various inserts or applications.
Sometimes in such sides some hard material is chosen as the base. A solid base is upholstered with fabric and filler and the result is a more durable, but at the same time comfortable and safe option.
Solid sides can be made of wood, plastic or metal. As a rule, they look like either a solid canvas, or a slatted type, or a canvas with figured cutouts.
- Wooden options have a fairly durable structure, are environmentally friendly and can be installed in three different positions. Manufacturers use species such as oak, pine, maple or ash. All products undergo careful processing. They must be sanded and coated with varnish or paint that does not contain lead or other harmful components.
- The metal sides are quite reliable and durable. Metal is a cold material and therefore is most often used in combination with other materials.
- The design of combined sides can consist of various materials: solid wood, chipboard, plastic, metal in combination with soft foam rubber and fabric.
Attaching a wooden stopper
The barrier can be attached to the side of the bed using self-tapping screws, or to the bottom. In the latter case, the fastening elements will be hidden under the mattress. The basic tools you will need are a hacksaw, a screwdriver, and fasteners (screws, bolts).
Before you start making the limiter, you should first draw a drawing and carefully consider the dimensions.
You can make a limiter for a children's bed yourself and with minimal effort and money. It is enough to think over the design and dimensions, and translate the idea into material.
We make a limiter for a children's bed with our own hands
Loft bed with protective side panel
Young children tend to have restless sleep; they often roll around and throw off the blanket, and falls are common. To avoid this, bumpers must be installed on cribs. But if the bed is purchased for growth, its design is usually repeated by an adult and there are no such barriers. The best solution is to install a temporary restraint that will allow the child to sleep without the risk of falling, and can be easily removed when he grows up.
The removable store barrier is mobile, easy to remove and easy to clean
Restrictors can be purchased at furniture stores, where a wide range of different materials and colors are available. Making a removable bed rail to order will provide the best combination with existing furniture, both in size and design - but it will not be cheap.
Wooden bed restrainer, ideal for children's beds
Therefore, the best solution would be to make a fall arrester for a child with your own hands.
Removable limiter that allows you to lower and raise the side if necessary
Main varieties
The stationary borders-limiters have shaped cutouts that are used by babies as a stop, allowing them to climb into the crib without the help of adults
For very young children, a barrier that completely covers the side of the bed is recommended. In addition, it should be high enough so that the child cannot fall over or climb over it. For older children, a small limiter is sufficient, the purpose of which is to prevent accidental falls in their sleep. Such barriers usually cover only part of the length of the bed, and are often made retractable for convenience.
A removable children's bed restraint is considered an ideal solution for arranging a sleeping place
A common option is a removable restraint for a child, which can be conveniently removed when it is no longer needed. Such a removable barrier will also be indispensable if you are traveling with small children - you can easily take it with you and install it on any child or adult bed.
A built-in border-limiter for a children's bed is purchased along with the rest of the children's furniture
Depending on the material of manufacture, there are several types of protective edges.
- Soft - the simplest design would be a barrier made of foam rubber or padding polyester rolled into tubes. The resulting rollers are attached to each other, gaining the required height of the side. For more convenient care and an aesthetic appearance, such a limiter is covered with removable covers that can be washed in a machine. Such structures are usually attached with Velcro or ties to the bed mattress.
Beautiful soft side for a girl's bed
Protective mesh on a metal frame
Limiter-barrier for a children's bed made of plastic pipes
Wooden side for baby's bed
Metal side limiter for loft bed
It is quite easy to make a barrier of any type yourself, it will not require large economic costs, and will serve no less reliably than a purchased one.
Unusual DIY budget limiter
Which bed side rails are best to buy for the disabled and elderly?
When rating each of the five track systems, we considered factors such as weight-bearing capacity, comfort, and overall user safety.
All of the bed rail systems reviewed here are high quality and durable. However, there are many unique elements that set one apart from the other!
The MediQ bed rail system is adjustable and is a solid choice for a system that will support any weight. The unit is fairly easy to install (though not as easy as some of the others). Additionally, large openings between railing bars do present grip issues unless a rail guard is also used. This model has 2 added conveniences: it folds down when not in use and includes a storage pouch for small care items. In addition, the space between the slats significantly reduces the likelihood of limbs being caught. After all, it can be installed on either side of the bed and allows customers to choose their main side and also switch sides depending on the mattress.
The Versatile Safety Ring is an ideal choice for bariatric patients who need strong balance support when getting in or out of bed. This handle also eliminates trapping risks as it is smaller than most rail systems.
The MediQ soft bed rail is portable and supports significant weight loads along with its multiple desirable features. The non-slip foam handle keeps consumers' hands from rubbing when their hands are wet or sweaty and has a storage pocket. The entire guard can be easily moved to any position thanks to its miniature size and low weight.
Our top pick in this group of bed rails is the Stander EZ Soft Rail as it combines many of the features of our other products and adds even more!
Making a wooden limiter with your own hands
Do-it-yourself limiter for a children's bed
Even if you don’t have much experience in carpentry, making a barrier of the simplest design will not be difficult. Before starting work, you should choose the type of fastening - the simplest involves screwing the holder to the side of the bed. This will save materials and time, but it will not look very aesthetically pleasing and the side of the bed will be damaged.
The child bed restraint is easy to install and securely fastens
The second way is to make holders that will be attached to the bottom of the bed and covered with a mattress on top. This option is more convenient, but the possibility of its implementation depends on the design of the bed.
For work you will need the following materials and tools:
- durable wooden slats;
- hacksaw;
- bolts or screws;
- screwdriver;
- tape measure or ruler;
- paper and pencil for drawing.
Tools for making a side with your own hands
To make a simple U-shaped side (attached with bolts), you will need fairly short slats - the length of the barrier is 55cm. The height of the limiter is optional; for a removable model, a height of 15-30 cm is sufficient.
Example of a short limiting barrier
The stages of work are performed in a certain order.
- A drawing is made on paper, taking into account all the calculations.
Restrictor diagram for a children's bed
Assembling racks - sidewalls with designated places for securing the sides
Fastening the sides of a future bed with posts
Do-it-yourself bed limiter protection
Wave shape stopper for baby crib
What to do with adult patients?
As it turned out, unfortunately, nothing like this is produced on an industrial scale for adults, with the exception of fixing belts for beds. About the same as you see in the picture.
At first glance, it looks more like a torture instrument rather than a device for the safety of a sick person. And, although there are many options for such belts, I didn’t like any of them. Somehow they all don’t look very aesthetically pleasing or reliable.
I had to turn to domestic “homemade” ones in the hope that I would be able to find an idea, a drawing and a method of fastening that would not damage the furniture. Alas, the “homemade” ones mostly had only children’s options, soft, inflatable and completely unsuitable for adult bedridden patients.
Decoration
Homemade limiter, with removable fabric cover
The limiter, made of wood, looks aesthetically pleasing; it is enough to polish or paint it with varnish so that there is no risk of getting a splinter. If plywood or chipboard was used, the side must be decorated. A soft cover or case is best. If you lay padding polyester on the inside, the child will be protected from accidental blows during sleep.
Protective edge against falls, decorated with fabric
The limiter can also be coated with a special paint for wooden surfaces.
Do-it-yourself wooden barrier-limiter for a bunk bed
