Every year, handmade products gain popularity not only among ordinary people, but also among famous designers. Knowing the right platforms to offer your creativity, you can make good money from your favorite activity or hobby.
A hand-made mirror can also add magical energy and creativity to the interior. After all, things made by oneself are valued much higher than those made by a soulless machine.
In order to make an individual piece of furniture in the form of a mirror, you need to know the technique and a set of small rules. More detailed information and ideas can be found right now.
Types of decor
- Sea style;
- Mirror mosaic;
- Painting;
- Rhinestone decoration;
- Decoration with natural materials (stone, wood, sand);
- Jewelry decoration;
- Decor can be made from disks, leftover finishing materials and much more.
It is basically impossible to give a complete list since it is limited only by the imagination of the person doing the decor.
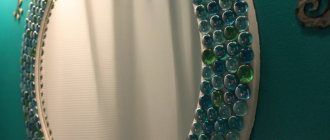
The photo of mirror decor shows various examples of how you can decorate your home yourself. You don’t need to spend fabulous sums on buying a beautiful mirror, just imagination and a little money, most often we make do with what we already have.
Let's look at some methods and instructions for decorating mirrors.
How to make New Year's patterns on a mirror using paper
All we need is thin designer paper of at least A-3 format, a stencil, scissors and paste.
Having found a suitable pattern online or in a store, we transfer it using carbon paper onto designer or simply corrugated paper and cut it out. Next, we make a thick paste from starch and brush one side of the paper pattern.
It is worth remembering that you cannot immediately cover a large surface, since the thin material will simply spread out. It is better to stick the ornament with separate elements. This product washes off perfectly after the holidays with plain water.
Sea style
A marine-style mirror will not only be a beautiful accessory for your home, but also a reminder of your vacation, the blue sea and the hot southern sun. It creates an atmosphere different from all others, lighter with the aroma of the sea breeze.
Tools:
- Mirror;
- Seashells, river pebbles, pearls, starfish;
- Sand (cleaned, sifted);
- Super glue;
- Bandage or adhesive paper;
- Scissors, tweezers, cotton pads, alcohol-containing solution.
Step-by-step strategy:
- Degrease the mirror. This is a mandatory procedure and in order not to be repeated it will be indicated once.
- Using a bandage or paper, we make an interesting frame on the mirror. This is so that you can clearly see the boundaries of the frame, but you can do without it.
- Glue the large shells as symmetrically as possible. Before gluing, we lay it out the way we need it and go look from the side, this is done so that you can immediately correct any violations in their harmonious arrangement. We apply glue only to the shells.
- Between the big ones we glue small ones and river pebbles. Everything must be washed first.
- We glue starfish. They are very fragile and space must be left for them in advance.
- We fill the remaining spaces with the smallest shells, pebbles and pearls (they can be replaced with beads). When working with small objects, we use tweezers to avoid damaging the structure.
- We fill the remaining voids with glue and pour clean sand.
- After drying, clean the mirror and shells from any adhesive residue.
We hang a mirror with original decor made by ourselves in the place that you have prepared for it.
Materials
Before you start making plans about where the mirror will be located and in what style it will be decorated, you need to familiarize yourself with the most popular and available materials. After all, the cost of a mirror often exceeds the initial allocated amount. In order not to get into trouble, you need to know in advance the characteristics of each material used .
What can be used to make?
The best material used to create a professional and high-quality mirror is silver. The material does not deform and is not prone to corrosion. However, not everyone can afford the cost of such a mirror. Therefore, it is worth considering the most available options and their characteristics.
Bronze and steel
Sputtering of bronze, steel or silver is necessary in order to give the future mirror its main feature - reflection. After all, without it, the mirror could be considered an ordinary ownerless piece of glass. The service life will also depend on the material .
Today we can highlight a number of main nuances of each material:
- Bronze - there is a large selection of shades and colors. For high-quality reflection, a coating technique of at least 3 layers is used. Well suited for decorating an apartment or room. Designers often use a combination of titanium and bronze to create a sophisticated tone.
- Steel - spraying, although cheap, has a number of positive aspects: high-quality steel is easier to find, and the ability to create shades is also used.
The only disadvantages of the coating are that the cheaper it is, the more layers you will have to use when spraying. Therefore, sometimes it will be cheaper to purchase high-quality material than to use a large amount of what is available.
Aluminum and others
If the quality of the mirror is not important, and it is created solely for decorative purposes, you can use cheap analogues of bronze and steel . More affordable:
- aluminum;
- acrylic;
- copper sheet using oxides;
- plastic;
- foil;
- cardboard.
The most current and affordable option is aluminum . It is easier to find, you can even use whole sheets. The only negative is the quality of reflection, short service life and a minimal palette for creating an individual shade. However, the metal is quite easy to use, it is easier to polish, and the future mirror will even be able to hold its shape on its own. The most convenient option for a beginner.
Mosaic decor
This is a wonderful decor that can fill your room with light from the sun's rays, with dozens of bunnies scattering around it. Various highlights add variety to even a sparse design.
Here is a list of the necessary tools to create it:
- Three types of mirror mosaics:
- Facet;
- Polished;
- Polished.
- Adhesive paper;
- Super glue;
- Grout.
How it's done:
- We cover the mirror with paper to create a frame.
- We draw a drawing with a pencil so that we can understand where to glue which type of mosaic.
- Using super glue, glue the mosaics as close to each other as possible.
- When the glue has dried, we rub the cracks with putty and remove the residue with a damp cloth.
- We hang the finished mirror on the wall.
Preparation
In order to beautifully decorate a mirror in this way, first carry out the preparatory work. Remove stains, dust and other contaminants from the mirror surface. To do this, rinse it thoroughly with a household product designed to remove grease. Then wipe the mirror with a fiber cloth and dry.
Provocative outfits: how Russian chanson stars dress
We sow once and harvest for 5 years: how to grow hot peppers at home and in the soil
Why didn't Sergei Yursky's father give him his real last name?
Painting with paints
Everyone has seen beautiful stained glass windows made of multi-colored glass; this method of decoration is for those who dream of such a mirror. Here the choice of pattern is also limited by taste and imagination.
Tools.
- Circuit;
- Stained glass paints;
- Brushes and acrylic varnish;
All this can be purchased at a stationery store.
Pattern application method:
- First, draw a drawing with a marker. You must have a ready-made, thoughtful sketch;
- We draw the outline next to the lines of the drawing; if it covers the marker, the pattern will be untidy. It is impossible to wash off the marker from under the outline;
- We erase the marker after applying and drying the outline. After drying, if necessary, remove unnecessary parts with a blade;
- Fill the stained glass paints, diluting them with a solvent for transparency, according to the sketch;
- After drying, we open it with purchased varnish. The decor is ready.
How to make New Year's patterns on a mirror using stained glass paints
Nowadays a great variety of different stained glass paints and contours are sold, both transparent and matte or with glitter.
In order to make a pattern on the mirror with them, we will need a package of paints, film (a regular file will do) and a finished pattern. The latter can be found on the Internet, in a children's publication, or bought in a specialized craft store.
Ideally, this should be a black and white graphic image; it will be easiest to work with. We put it in a file and outline it with a black outline, it is always included in the kit. After it dries, fill the areas with color.
However, if you want complete freedom of expression, you can do without drawings at all, and use shiny paints - gold and silver - to draw fantasy snowflakes or other figures you like on film.
After 24 hours, when the stained glass paints are completely dry, we very carefully begin to peel off the drawing. You should not do this over the entire surface at once, especially with snowflakes - they can stick together.
Gradually, bending one side, we immediately transfer it to the glass and so on until the entire pattern is on the mirror. The advantage of this decor is that after the holidays it can be removed again and, transferred to film, left in the bag until next year.
Rhinestone decoration
A mirror decorated with rhinestones will delight your eye with the play of light on the edges of the crystals. The frame can be decorated with both stripes and more complex patterns.
What is needed for this?
- Of course a mirror;
- Whatever rhinestones you like;
- Good quality glue.
Further actions:
- Option one: You can apply a wide layer of glue along the contour of the entire mirror and cover it with various rhinestones.
- Option two: You can apply a thin design on the mirror with a pencil, and then use glue and rhinestones to assemble the composition.
Do not forget that the decor of the mirror must be done taking into account the interior, as well as the room (bedroom, bathroom, living room, etc.) in which it will be located. This is so that it is not pretentious. Incorrectly chosen decor can ruin the overall picture.
Anyone can create original mirror decor with their own hands, and therefore there is no need to rush. You need to think about what type of decoration is suitable for this particular case and only after that begin to create the chosen image.
There are countless different compositions that can be performed on a mirror. From the above master classes on decorating a mirror, you can see how easy it is to create an original home accessory from a mirror.
The created composition will pleasantly surprise guests and update the interior. At the same time, everyone will be able to show their friends who want the same mirror how to decorate it at home.
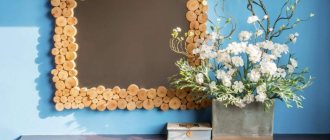
Wooden frames
Wooden frames look great in almost every interior. Due to its structure, wood has a unique pattern, which can be emphasized using varnish and impregnations.
Quadrangular mirrors can be framed with rough-hewn wooden blocks, and round mirrors can be surrounded by radiating “rays” of wood. To do this you will need a wooden base frame, pieces of wood for decoration, and hot glue.
It is best if the bars are divided by size - one half should be longer than the other so that they can be alternated with each other.
You can also use wood of different species, having different colors and wood structure. It is not recommended to process wood too actively in order to preserve its natural pattern.
Photo of mirror decor
Where to hang it?
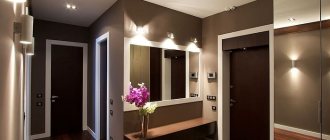
When choosing a place to hang a mirror in the hallway, you need to be guided by the following principles:
- If there is a window in the hallway, the mirror should be placed opposite it. Then the room will be much lighter.
- If the mirror is large, it should be hung so that you can see yourself entirely.
- If you follow the rules of Feng Shui, the mirror should not be hung opposite the door, because it will not let positive energy into the house. On the other hand, it is believed that a mirror located opposite the front door will reflect all negative external energy.
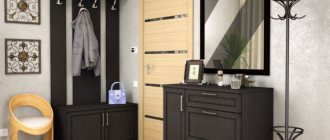
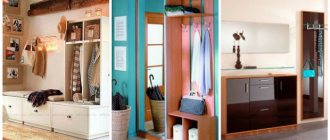
The mirror can be placed on the wall or on the walls of the wardrobe. The standard option is to hang it on the wall. Placing mirrors on the doors and walls of the wardrobe saves space.
Multiple mirrors can be used. If mirrors play a purely decorative role, they are placed accordingly, decorated in the style of the hallway interior.
Basic principles of decorating mirrors
DIY mirror decor is made using a variety of materials, including those that are usually sent to the trash container, and if purchased, cost very little. For example, tubes from old newspapers or magazines. In some cases they are used without dyeing, in others they are painted. Spray paint is more convenient - it is applied in an even thin layer, painting occurs many times faster than using a brush. You can also use broken china, mirror, colored glass, shells, pebbles, rhinestones, glass drops, buttons, ropes, plastic bottles, branches, wooden planks and sticks, plastic spoons and other strange things.
DIY mirror decor can be made to suit any style
All this wealth is usually glued onto transparent silicone. It is sold in construction stores and is available in small tubes or larger cartridges for a construction gun. It’s more convenient to work with a gun - it’s easier to control the force and get the right amount of glue, which is problematic with a regular tube.
Please note that silicone can be acidic or neutral. The acidic one smells very much like vinegar until it dries and you can only work with it in a well-ventilated area. Neutral silicone sealant does not smell like anything, but is more expensive. Still acidic, until it hardens, it can corrode the paint that is applied to the decor. When purchasing, pay attention to the setting time. This is the time during which you can still fix something, move something forward. As soon as the glue begins to polymerize, nothing can be done - it is covered with a hard film. The average time for the formation of a surface film is 10-20 minutes, but there are also more “long-lasting” compositions.
You can use the most unusual materials
There are two decorating techniques:
- The decor is outside the mirror. In this case, a base is cut out of thin fiberboard or thick cardboard, which is larger in size than the mirror. It can be any shape - round, square, arbitrary shape. The decor is glued to the base, after the glue has dried, a mirror is inserted into the finished frame.
- Decorating the mirror around the edge. In this case, the glue and all fragments are applied directly to the mirror surface.
There seem to be small differences, but the design looks different in different techniques. The second allows you to get an openwork decor of the mirror, which seems to be illuminated by reflection.
Tools
As tools, it is worth preparing a soldering iron and a basic set of tools with a stationery knife, pliers and other tools available in every home kit.
Important: when choosing LEDs, keep in mind that the more powerful the diode, the more electricity it will consume. To understand the power of a meter of LED strip, we multiply approximately 5-6 watts by the total length of the strip.
